
Featured image for rv air conditioner installation instructions
Image source: tankbig.com
Proper RV air conditioner installation ensures optimal cooling and prevents costly damage—always follow manufacturer guidelines and safety precautions. This step-by-step guide simplifies the process, from selecting the right unit and preparing the roof opening to wiring and sealing, so you can stay cool on the road with confidence.
Key Takeaways
- Verify roof compatibility before purchasing your RV AC unit.
- Turn off all power before starting installation for safety.
- Seal all edges properly to prevent leaks and drafts.
- Follow torque specs when securing mounting bolts tightly.
- Test AC functionality immediately after installation completes.
- Consult a professional if wiring or refrigerant handling is needed.
📑 Table of Contents
- Why Installing an RV Air Conditioner Is Worth the Effort
- Choosing the Right RV Air Conditioner for Your Setup
- Tools, Materials, and Safety Prep Before You Begin
- Step-by-Step Installation of the RV Air Conditioner
- Electrical and Ventilation Setup for Safe Operation
- Common Mistakes and How to Avoid Them
- Data Table: RV Air Conditioner Installation Checklist
- Final Thoughts: Enjoy the Cool, But Respect the Work
Why Installing an RV Air Conditioner Is Worth the Effort
Imagine this: You’re parked in the middle of a desert canyon, the sun is setting, and the temperature is still pushing 95°F. The kids are cranky, your dog is panting, and you’re sweating through your shirt. Then—click. The RV air conditioner hums to life, and within minutes, the cabin feels like an oasis. That’s the magic of a well-installed RV AC unit. But getting there? That’s where things can get tricky.
Whether you’re upgrading an old unit, replacing a failed one, or installing your first AC on a DIY camper van build, the process can feel overwhelming. There’s wiring, ducting, roof mounting, and more—each step requiring care and attention. But here’s the good news: With the right tools, a clear plan, and a little patience, RV air conditioner installation is absolutely doable, even if you’re not a professional mechanic. I’ve been there—kneeling on a hot roof, wrestling with a 70-pound unit, and wondering if I’d ever get the power right. But after years of trial, error, and a few sweaty lessons, I’ve learned the steps that work. This guide walks you through every phase, from choosing the right unit to testing your system safely.
Choosing the Right RV Air Conditioner for Your Setup
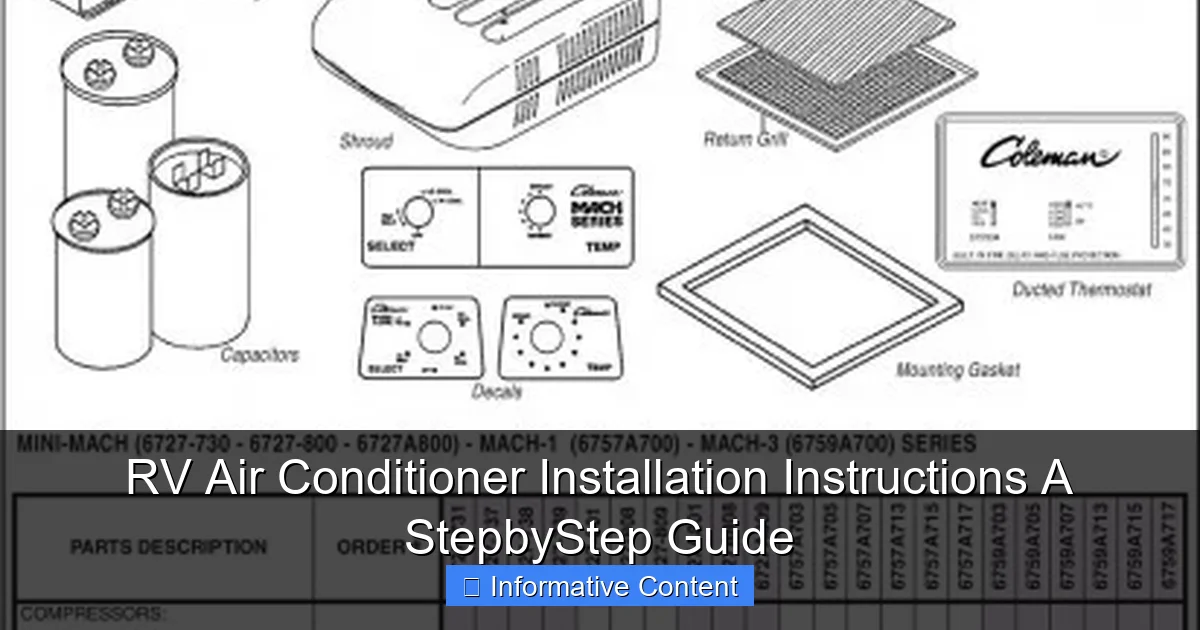
Know Your RV’s Roof Opening and Weight Capacity
The first rule of RV air conditioner installation: Don’t assume all units fit all RVs. Most modern RVs use a standard 14” x 14” roof cutout (sometimes called a 14×14), but older models may have different sizes. Before buying, measure your existing opening or check your RV’s manual. Also, confirm your roof’s weight rating. A typical rooftop AC unit weighs between 65 and 80 pounds. If your RV has a fiberglass or thin aluminum roof, overloading it can cause sagging or leaks.
Visual guide about rv air conditioner installation instructions
Image source: camperfaqs.com
Real-life tip: I once installed a high-efficiency unit on a vintage Class C motorhome, only to find the roof started creaking after a few trips. A quick call to the manufacturer revealed the unit was 15 pounds over the roof’s limit. Lesson learned: Always check the specs.
Select the Right BTU and Power Type
RV AC units come in different cooling capacities, measured in BTUs (British Thermal Units). For most standard RVs under 30 feet, a 13,500 or 15,000 BTU unit is ideal. Smaller trailers or vans may only need 10,000 BTUs. But don’t just go for the highest number—bigger isn’t always better. An oversized unit will cycle on and off too quickly, reducing efficiency and comfort.
Also, consider your power source. Most RV ACs run on 120V AC power, but some high-end models require a dedicated 20-amp circuit. If you’re boondocking, make sure your generator or inverter can handle the startup surge—some units draw up to 15 amps at startup, even if they run at 10.
Choose Between Rooftop, Under-Bench, or Ducted Systems
- Rooftop units are the most common. They’re easy to install, efficient, and don’t take up living space. But they add height and can affect aerodynamics.
- Under-bench units are great for van conversions or small trailers. They’re quieter and lower-profile, but require more ductwork and interior modifications.
- Ducted systems distribute air through ceiling vents, offering even cooling. But they’re more complex to install and often require professional help.
For most DIYers, a rooftop unit is the best balance of simplicity and performance. Just make sure it’s compatible with your RV’s existing ducting or ceiling kit.
Tools, Materials, and Safety Prep Before You Begin
Gather the Right Tools (No Guesswork Needed)
Before you climb onto your roof, make sure you have everything. Here’s what I keep in my RV AC toolkit:
- Socket wrench set (especially 7/16” and 1/2”)
- Torx screwdriver (usually T25 or T27 for mounting brackets)
- Drill with 1/8” and 1/4” bits
- Utility knife
- Caulk gun and RV-grade butyl tape or Dicor sealant
- Voltage tester (non-contact)
- Work gloves and safety glasses
- Extension ladder (rated for your roof height)
- Two-person lift (seriously—don’t try to lift a 70-pound unit alone)
Pro tip: I keep a “roof kit” in my RV with a microfiber towel, a small level, and a flashlight. It’s easy to drop screws or misalign brackets in low light.
Turn Off Power and Secure the Work Area
Safety first. Before touching any electrical connections:
- Disconnect shore power.
- Turn off the main breaker in your RV’s electrical panel.
- Use a non-contact voltage tester to confirm no power is reaching the AC circuit.
- Place warning signs if you’re working at a campground.
Also, park on level ground. If your RV is tilted, the unit may not sit flush, leading to leaks or stress on the mounting hardware.
Inspect the Roof and Remove the Old Unit (If Replacing)
If you’re replacing an old AC, remove it carefully:
- Unplug the power cord from the ceiling junction box.
- Remove the interior shroud (usually held by 4-6 screws).
- Cut through old sealant with a utility knife.
- Unscrew the mounting bolts from the roof.
- Lift the old unit with a partner—never alone.
Inspect the roof for soft spots, cracks, or rot. If you find damage, patch it with marine-grade sealant or replace the roof section before proceeding.
Step-by-Step Installation of the RV Air Conditioner
Step 1: Prepare the Roof Opening
Clean the roof around the opening with isopropyl alcohol to remove dirt, grease, and old sealant residue. This ensures the new gasket seals properly. Apply a bead of butyl tape (not silicone) around the perimeter of the opening. Butyl tape is flexible, waterproof, and won’t crack over time. I use 1/2” wide tape for a snug fit.
Example: On my last install, I skipped the cleaning step and ended up with a small leak after a rainstorm. A quick re-seal with fresh butyl tape fixed it—but it taught me to never skip prep.
Step 2: Install the Ceiling Assembly (Interior Work)
Inside the RV, locate the ceiling duct or plenum box. Most new ACs come with a universal ceiling kit. Attach the ceiling shroud using the provided screws, but don’t tighten fully yet. Run the power wires (usually red, white, black, and green) through the ceiling opening. Connect them to the matching wires in the RV’s AC circuit using wire nuts or a junction box. Double-check the voltage and polarity—reversed wires can damage the unit.
For ducted systems, connect the flexible ducts to the plenum and secure with clamps. Make sure airflow isn’t restricted.
Step 3: Lift and Mount the AC Unit
This is the trickiest part. With a partner:
- Position the AC over the roof opening. Align the mounting holes.
- Lower it slowly, ensuring the power cord drops through the center.
- Insert the mounting bolts from the roof down into the unit. Don’t overtighten—snug is enough. Over-tightening can crack the roof or damage the unit’s frame.
- Use a level to ensure the unit is flat. Even a 2-degree tilt can cause water pooling.
Tip: I use a “lift board” (a 2×4 with padding) to distribute weight and protect the roof during lifting.
Step 4: Seal the Edges
Apply a continuous bead of self-leveling lap sealant (like Dicor) around the base of the unit. Overlap the butyl tape and cover all bolt heads. This creates a waterproof, flexible seal. Let it cure for 24 hours before testing.
Never use silicone—it hardens and cracks. RV-specific sealants remain flexible for years.
Electrical and Ventilation Setup for Safe Operation
Connect the Power Supply Correctly
Back inside, double-check your wiring:
- Red (or black) → Line (hot)
- White → Neutral
- Green or bare → Ground
Secure connections with wire nuts or a terminal block. Wrap with electrical tape for extra safety. If your RV has a thermostat, connect its wires to the designated terminals (usually labeled “T-Stat” on the control board).
Caution: If you’re unsure about wiring, consult an electrician. Incorrect connections can cause fires or damage the AC’s compressor.
Test the Thermostat and Controls
Turn the power back on. Set the thermostat to “Cool” and a low temperature. The unit should start within a minute. Listen for the compressor and fan. Check the control panel for error codes (refer to your manual). Some units have a “pre-charge” delay of 3–5 minutes to protect the compressor.
Inspect Airflow and Ducting
Once running, feel the air from each vent. If airflow is weak:
- Check for kinked or disconnected ducts.
- Ensure the return air path isn’t blocked (e.g., by furniture).
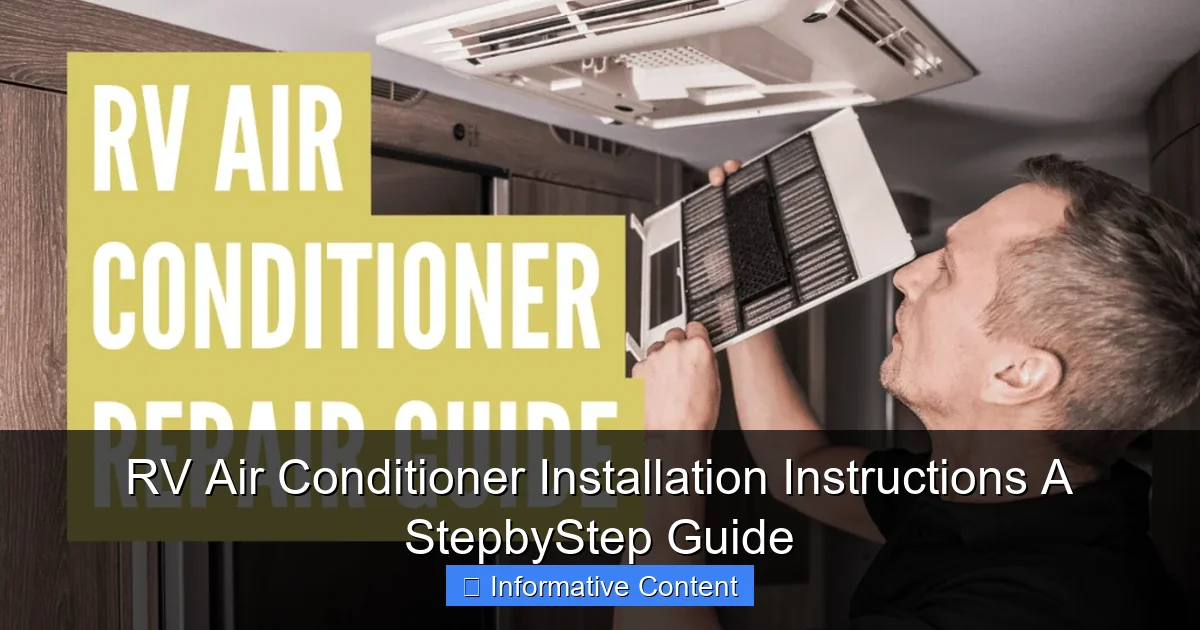
- Clean the AC’s air filter (usually behind a front panel).
For rooftop units, verify the condenser fan is blowing air upward. If it’s not, the unit may be overheating.
Common Mistakes and How to Avoid Them
Overlooking Roof Condition
One of the biggest mistakes? Installing a new AC on a damaged roof. Soft spots, cracks, or old sealant can lead to leaks, mold, and structural damage. Always inspect the roof before installing. If you find rot, replace the affected area or use a roof patch kit.
Skipping the Level Check
An unlevel AC can cause condensation to pool, leading to water damage or short circuits. Use a 2-foot level on the unit’s base. Adjust shims (thin plastic or rubber strips) under the mounting bolts if needed.
Using the Wrong Sealant
Silicone, caulk, or non-RV sealants may seem like quick fixes, but they’ll crack in UV light and temperature swings. Always use butyl tape for the base and self-leveling lap sealant for the edges.
Ignoring the Startup Surge
RV ACs need a lot of power when starting. If your generator or inverter can’t handle the surge, the unit won’t start. Check the manufacturer’s specs. A 3,500-watt generator is usually safe for a 15,000 BTU unit, but a 2,000-watt inverter might not cut it.
Forgetting the Filter
Dirty filters reduce efficiency and strain the motor. Clean or replace the filter every 3–4 months, especially if you’re in dusty areas.
Data Table: RV Air Conditioner Installation Checklist
| Step | Task | Tools/Materials Needed | Time Estimate |
|---|---|---|---|
| 1 | Measure roof opening and weight capacity | Tape measure, RV manual | 15 minutes |
| 2 | Choose AC unit (BTU, power, type) | Manufacturer specs, BTU calculator | 30–60 minutes |
| 3 | Turn off power and secure area | Breaker switch, voltage tester | 10 minutes |
| 4 | Remove old unit (if replacing) | Wrench, utility knife, partner | 45–60 minutes |
| 5 | Clean roof and apply butyl tape | Isopropyl alcohol, butyl tape, caulk gun | 20 minutes |
| 6 | Install ceiling assembly and wiring | Drill, wire nuts, ceiling kit | 60–90 minutes |
| 7 | Lift and mount AC unit | Ladder, partner, level | 30–45 minutes |
| 8 | Seal edges with lap sealant | Self-leveling sealant, caulk gun | 15 minutes |
| 9 | Test power, thermostat, and airflow | Thermostat, voltage tester | 30 minutes |
| 10 | Final inspection and cleanup | Flashlight, microfiber towel | 20 minutes |
Final Thoughts: Enjoy the Cool, But Respect the Work
Installing an RV air conditioner isn’t a weekend project you rush. It’s a mix of mechanical work, electrical know-how, and patience. But the payoff? Absolute freedom. No more sweltering in summer, no more relying on campground power or noisy portable units. You get quiet, efficient cooling—exactly when and where you need it.
Remember, every step matters. From choosing the right BTU to sealing the edges with the right materials, attention to detail prevents leaks, inefficiency, and costly repairs. And if you hit a snag—like a stubborn bolt or a wiring mix-up—don’t panic. Step back, breathe, and consult the manual. Or call a friend who’s done it before. I’ve learned more from mistakes than successes.
So, whether you’re building a van, upgrading your motorhome, or just replacing a worn-out unit, take your time. Use this guide, trust your tools, and don’t skip the safety steps. In a few hours, you’ll be sitting back with a cold drink, the AC humming, and the desert wind outside. That’s the dream. And now, it’s yours to build—one bolt, one wire, and one cool breeze at a time.
Frequently Asked Questions
How do I install an RV air conditioner for the first time?
Start by turning off all power sources and removing the old AC unit (if applicable). Follow the RV air conditioner installation instructions to mount the new unit, secure the gasket, and connect wiring to the thermostat and power supply. Always double-check roof measurements and electrical requirements before proceeding.
What tools are needed for RV air conditioner installation?
You’ll need a screwdriver, wrench, drill, silicone sealant, wire strippers, and a voltage tester. Having a helper is recommended, as AC units are heavy and require careful placement on the roof during installation.
Can I install an RV air conditioner without professional help?
Yes, if you have basic mechanical skills and follow the RV air conditioner installation instructions carefully. However, if your RV uses a ducted system or requires complex electrical work, consulting a technician is advised for safety and compliance.
Why is my RV AC not cooling after installation?
This could be due to incorrect wiring, a loose roof gasket, or low refrigerant levels. Verify all connections match the manual’s guidelines and inspect the thermostat settings. Improper installation often causes airflow or power issues.
Do I need to seal the RV air conditioner unit on the roof?
Absolutely. Apply high-quality silicone sealant around the mounting flange and gasket to prevent leaks. Proper sealing is critical to avoid water damage and maintain insulation efficiency in your RV.
How long does it take to install an RV air conditioner?
Most installations take 2–4 hours, depending on experience and RV model complexity. Rushing can lead to errors, so follow each step of the guide carefully to ensure a secure and functional setup.