
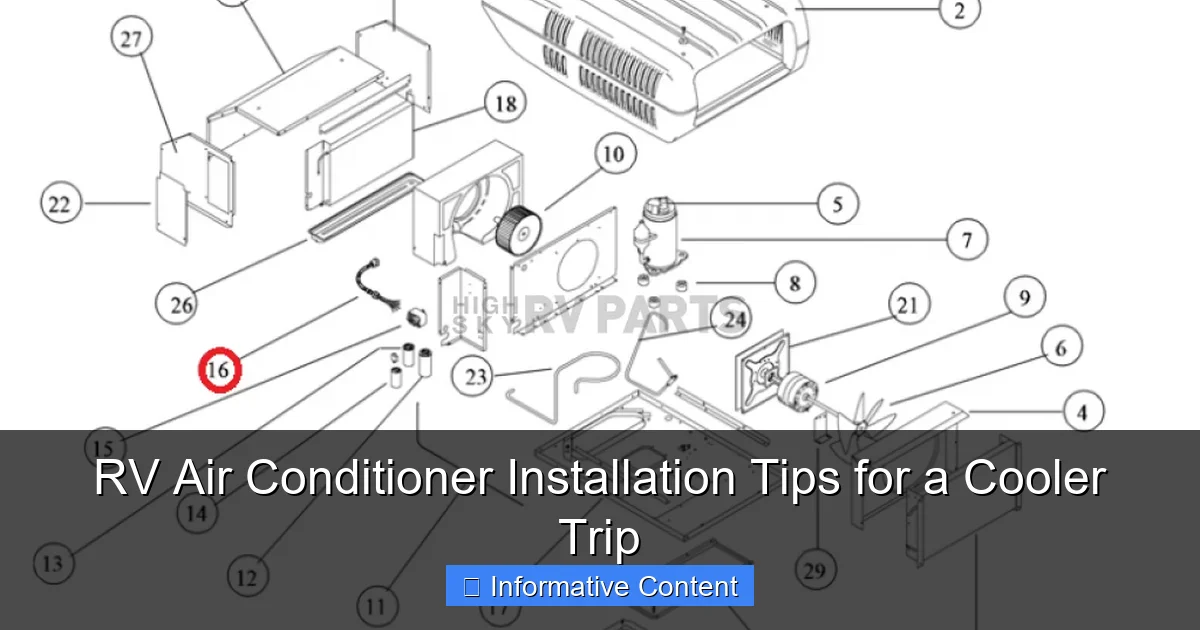
Featured image for rv air conditioner installation
Image source: i1.wp.com
Proper RV air conditioner installation starts with choosing the right unit for your rig’s size and roof type to ensure maximum cooling efficiency. Always follow manufacturer guidelines and use a mounting kit designed for your model to prevent leaks, vibrations, and premature wear. Secure electrical connections and test airflow before hitting the road to guarantee a cooler, stress-free trip.
Key Takeaways
- Measure your RV roof: Ensure proper AC unit fit before purchasing or installing.
- Seal all gaps: Use butyl tape to prevent leaks and improve efficiency.
- Check power requirements: Match AC voltage to your RV’s electrical system.
- Secure mounting bolts tightly: Prevents vibration damage during travel.
- Test airflow and cooling: Run a full cycle before hitting the road.
- Install a cover when not in use: Protects the unit from weather damage.
📑 Table of Contents
- Why Installing an RV Air Conditioner Is a Game-Changer for Your Road Trips
- Choosing the Right RV Air Conditioner for Your Needs
- Preparing for RV Air Conditioner Installation
- Step-by-Step Guide to Installing Your RV Air Conditioner
- Common Mistakes and How to Avoid Them
- Maintaining Your RV Air Conditioner for Long-Term Performance
- RV Air Conditioner Installation: Quick Reference Data
Why Installing an RV Air Conditioner Is a Game-Changer for Your Road Trips
Picture this: You’re halfway through a scenic cross-country journey, the sun is blazing, and your RV feels more like a sauna than a home on wheels. The kids are fussing, your partner is fanning themselves with a magazine, and you’re wondering why you didn’t think to upgrade your cooling system before hitting the road. That’s when it hits you—installing a proper RV air conditioner isn’t just a luxury; it’s a necessity for comfort, safety, and sanity on the road.
Whether you’re a full-time RVer, a weekend warrior, or a seasonal traveler, keeping your rig cool during hot weather can make or break your trip. And while many modern RVs come with factory-installed AC units, older models or custom builds often require a DIY or professional RV air conditioner installation. The good news? With the right tools, knowledge, and a little patience, you can tackle this project yourself—and save a bundle in the process. But it’s not as simple as slapping a unit on the roof and calling it a day. There are safety concerns, compatibility issues, and installation quirks that can trip up even experienced DIYers.
In this guide, we’ll walk you through everything you need to know about RV air conditioner installation, from choosing the right unit to sealing it up properly and troubleshooting common issues. Think of this as your friendly, no-nonsense roadmap to a cooler, more comfortable adventure—no fluff, no sales pitches, just real talk from someone who’s been in your (sweaty) shoes.
Choosing the Right RV Air Conditioner for Your Needs
Before you even think about climbing up on your RV roof, you need to make sure you’re picking the right air conditioner. Not all units are created equal, and choosing poorly can lead to inefficiency, noise, or even damage to your rig. Here’s how to make an informed decision.
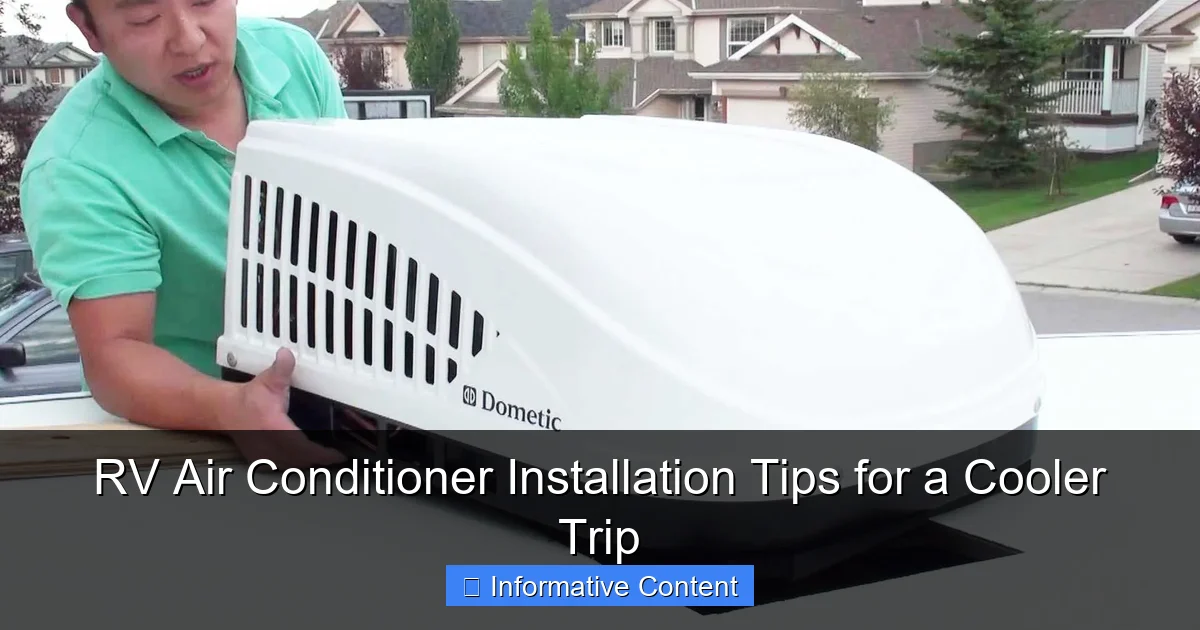
Visual guide about rv air conditioner installation
Image source: i.pinimg.com
1. Know Your BTU Needs
BTUs (British Thermal Units) measure how much cooling power an AC unit provides. For RVs, most units range from 11,000 to 15,000 BTUs. As a general rule:
- 10,000–11,000 BTUs: Best for small travel trailers (under 20 feet) or campers in moderate climates.
- 13,500 BTUs: Ideal for mid-sized RVs (20–30 feet) and most common in standard installations.
- 15,000 BTUs: Recommended for larger RVs, hot climates, or units with high ceilings and poor insulation.
Tip: If you’re in the Southwest U.S. during summer, go for 15,000 BTUs. In the Pacific Northwest, 13,500 may be plenty. Over-sizing wastes energy; under-sizing leaves you sweating.
2. Rooftop vs. Portable Units
Most RVs use rooftop air conditioners, which are permanently installed and ducted into the ceiling. They’re efficient, quiet, and don’t take up floor space. But they require roof access and structural integrity.
Portable AC units sit inside the RV and vent hot air through a window or roof vent. They’re easier to install and cheaper upfront, but they’re noisier, less efficient, and take up valuable living space. Plus, they’re not ideal for long-term use.
Real talk: I once used a portable unit in a 24-foot Class C. It cooled the front but left the bedroom feeling like a sauna. After two days, I swapped it for a rooftop unit—and never looked back.
3. Ducted vs. Non-Ducted Systems
Many RVs have pre-installed ducting that runs through the ceiling. If yours does, go for a ducted AC unit. It integrates seamlessly with your existing vents and provides even cooling.
If your RV lacks ducting, a non-ducted unit is your best bet. It blows air directly downward from the ceiling. It’s simpler to install but may create “hot spots” in larger rigs.
Pro tip: Check your RV’s ceiling cutout dimensions. Most rooftop ACs fit standard 14” x 14” roof openings, but some newer models (like Dometic Penguin II) are slightly smaller. Always double-check specs.
4. Energy Efficiency and Power Requirements
Most RV ACs run on 120-volt AC power and require a 30-amp or 50-amp shore power connection. A 13,500 BTU unit typically draws around 13–15 amps, so you can run it on a 30-amp service (but not much else at the same time).
Look for units with a high SEER (Seasonal Energy Efficiency Ratio). A SEER of 13+ is good; 15+ is excellent. Higher SEER means lower power consumption and quieter operation.
Example: The Dometic Brisk II 15,000 BTU has a SEER of 15.6 and runs quieter than older models—perfect for boondocking with solar.
Preparing for RV Air Conditioner Installation
Now that you’ve chosen your unit, it’s time to prep. This stage is just as important as the actual installation. Skipping steps here can lead to leaks, poor performance, or even roof damage.
1. Safety First: Gear and Precautions
Working on an RV roof is no joke. Always wear non-slip shoes, use a sturdy ladder, and consider a roof harness if you’re on a tall rig. Never work in wet or windy conditions.
Here’s what you’ll need:
- Sturdy ladder (preferably with stabilizers)
- Roof harness or safety line (optional but smart)
- Work gloves and safety glasses
- Knee pads (roofs are hard!)
Personal story: I once tried to install an AC on a windy day. The unit almost blew off the roof before I secured it. Lesson learned: patience pays off.
2. Inspect the Roof and Ceiling
Before removing the old unit (or cutting a new hole), inspect the roof and ceiling for damage:
- Check for soft spots, cracks, or water damage in the roof membrane.
- Inspect the ceiling for mold, warping, or loose ducting.
- Ensure the roof opening is clear of debris, old sealant, or rust.
If you find damage, repair it first. A compromised roof can lead to leaks, insulation damage, or even structural issues over time.
3. Gather Your Tools and Materials
Here’s a checklist of what you’ll need for a typical RV air conditioner installation:
- Power drill with screwdriver bits
- Jigsaw or hole saw (if cutting a new hole)
- Socket wrench set
- Silicone RV sealant (non-hardening, like Dicor)
- Butyl tape or rubber gasket (for sealing)
- Measuring tape and level
- Vacuum and shop vac (to clean old sealant)
- Electrical tester (to verify power is off)
Tip: Use butyl tape instead of traditional caulk for the base seal. It stays flexible and won’t crack over time.
4. Turn Off Power and Disconnect Old Unit (If Replacing)
If you’re replacing an existing AC, shut off the RV’s main power and disconnect the unit at the circuit breaker. Then, remove the ceiling shroud inside and disconnect the wiring harness. Carefully lower the old unit from the roof—don’t let it drop!
Inspect the wiring for fraying or corrosion. Replace any damaged wires before installing the new unit.
Step-by-Step Guide to Installing Your RV Air Conditioner
Now comes the fun part—actually installing the unit. Follow these steps carefully, and you’ll have a cool, leak-free AC in no time.
1. Position the Unit on the Roof
With a helper, lift the new AC onto the roof. Align it with the 14” x 14” opening. Use a level to ensure it’s perfectly flat. Even a slight tilt can cause water pooling and leaks.
Pro tip: Slide a piece of cardboard under the unit to protect the roof while positioning.
2. Secure the Mounting Bracket
Most units come with a mounting bracket that attaches to the roof with screws. Drill pilot holes first to prevent cracking the roof. Use stainless steel or aluminum screws (not steel—they rust).
Tighten screws evenly, but don’t over-torque. You want a snug fit, not a crushed roof.
3. Install the Ceiling Shroud and Ducting
Inside the RV, connect the ceiling shroud to the AC unit. This part holds the air diffuser and controls. If you have ducting, ensure the ducts are properly sealed with foil tape or mastic.
For non-ducted units, simply snap the shroud into place and adjust the airflow vents.
4. Seal the Base with Butyl Tape and Sealant
This step is critical for preventing leaks. Apply a continuous bead of butyl tape around the base of the unit where it meets the roof. Then, run a bead of non-hardening RV sealant (like Dicor) around the outer edge.
Why both? Butyl tape creates a flexible, waterproof barrier. Sealant adds extra protection against wind-driven rain. Together, they’re a leak-fighting dream team.
5. Connect the Wiring
Match the wires from the AC to the RV’s wiring harness (usually color-coded: black to black, white to white, green to ground). Use wire nuts or a connector block. Wrap connections with electrical tape for extra security.
Double-check with a tester before turning power back on.
6. Test the Unit
Restore power and turn on the AC. Listen for unusual noises. Check airflow at all vents. Use a thermometer to ensure the air is cooling properly (should be 15–20°F cooler than ambient air).
Troubleshooting tip: If the unit hums but doesn’t cool, the compressor may not be starting. Check voltage and wiring.
Common Mistakes and How to Avoid Them
Even seasoned RVers make mistakes during RV air conditioner installation. Here are the top pitfalls—and how to dodge them.
1. Skipping the Sealant (Or Using the Wrong Kind)
Using regular silicone caulk? Big mistake. It hardens over time and cracks, leading to leaks. Always use non-hardening RV sealant designed for flexible roofs.
Example: I once used bathroom silicone on my first install. Six months later, water was dripping into my kitchen. Lesson: use the right product.
2. Over-Tightening Mounting Screws
Crushing the roof or cracking the unit’s base is easy if you’re not careful. Tighten screws just until snug—no more. The butyl tape will compress and create a seal.
3. Poor Wiring Connections
Loose or exposed wires can cause shorts, overheating, or even fires. Always use wire nuts, connectors, and tape. Label wires before disconnecting them.
4. Ignoring Roof Vent Clearance
Some ACs require a minimum distance from other roof vents or appliances (like solar panels). Check your unit’s manual. Crowding can block airflow or create hot spots.
5. Not Testing Before Finalizing
Don’t seal everything up before testing. Run the AC for at least 30 minutes. Check for leaks, unusual sounds, or weak airflow. Fix issues before the sealant cures.
Maintaining Your RV Air Conditioner for Long-Term Performance
Installation is just the beginning. Regular maintenance keeps your AC running efficiently and extends its lifespan.
1. Clean the Air Filter Monthly
A clogged filter reduces airflow and forces the unit to work harder. Most ACs have a washable filter in the ceiling shroud. Rinse it with water and let it dry completely before reinstalling.
2. Inspect the Roof Seal Annually
Check the sealant and butyl tape for cracks, gaps, or lifting. Reapply sealant every 2–3 years, or sooner if you notice moisture.
3. Clean the Condenser Coils
The coils on the roof side collect dust, pollen, and bugs. Use a soft brush and coil cleaner (available at RV stores) to remove buildup. Do this twice a year.
4. Check for Refrigerant Leaks
If your AC isn’t cooling well, it might be low on refrigerant. This isn’t a DIY fix—call a professional. Never try to recharge it yourself.
5. Cover the Unit When Not in Use
An AC cover protects against UV damage, debris, and weather. It’s a small investment that can add years to your unit’s life.
RV Air Conditioner Installation: Quick Reference Data
| Factor | Recommendation | Notes |
|---|---|---|
| BTU Size | 13,500–15,000 for most RVs | Go higher for large rigs or hot climates |
| Roof Opening | 14” x 14” standard | Verify with unit specs |
| Sealant Type | Non-hardening RV sealant (e.g., Dicor) | Never use household caulk |
| Mounting Screws | Stainless steel or aluminum | Prevent rust and corrosion |
| Power Draw | 13–15 amps for 13,500 BTU | Use 30-amp service; avoid overloading |
| Maintenance | Clean filter monthly, inspect seal annually | Prevents costly repairs |
Installing an RV air conditioner might seem daunting, but it’s one of the most rewarding upgrades you can make. With the right prep, tools, and attention to detail, you’ll enjoy cool, comfortable travels for years to come. Remember: take your time, prioritize safety, and don’t skip the sealing steps. Your future self (and your travel companions) will thank you.
So the next time you’re planning a summer trip, don’t let the heat hold you back. Tackle that RV air conditioner installation with confidence. The open road—and a cool cabin—awaits.
Frequently Asked Questions
What size air conditioner do I need for my RV?
The size of your RV air conditioner depends on your vehicle’s square footage and climate conditions. For most standard RVs, a 13,500 to 15,000 BTU unit provides sufficient cooling, but larger models or extreme climates may require higher-capacity units.
Can I install an RV air conditioner myself, or should I hire a professional?
DIY RV air conditioner installation is possible if you have basic mechanical skills and follow the manufacturer’s instructions carefully. However, hiring a professional ensures safety, proper sealing, and warranty compliance, especially for complex electrical connections.
What tools are needed for RV air conditioner installation?
Common tools include a drill, screwdrivers, wrenches, a utility knife, and a sealant gun. You’ll also need a voltage tester to ensure the power supply matches your AC unit’s requirements before connecting it.
How long does it take to install an RV air conditioner?
A typical RV air conditioner installation takes 3–6 hours, depending on your experience and whether modifications to the roof or electrical system are required. Rushing can lead to leaks or poor performance, so take your time.
What are common mistakes to avoid during RV air conditioner installation?
Skipping roof sealing or improper shimming can cause leaks and reduced efficiency. Always check the roof’s structural integrity and ensure the unit is level to prevent drainage issues.
Do I need to upgrade my RV’s electrical system for a new air conditioner?
Most modern RVs support standard 120V AC units, but high-capacity models may require a 30-amp or 50-amp service. Verify your system’s capacity with a professional to avoid tripped breakers or wiring damage.