
Featured image for rv air conditioner install
Image source: gorvlifestyle.com
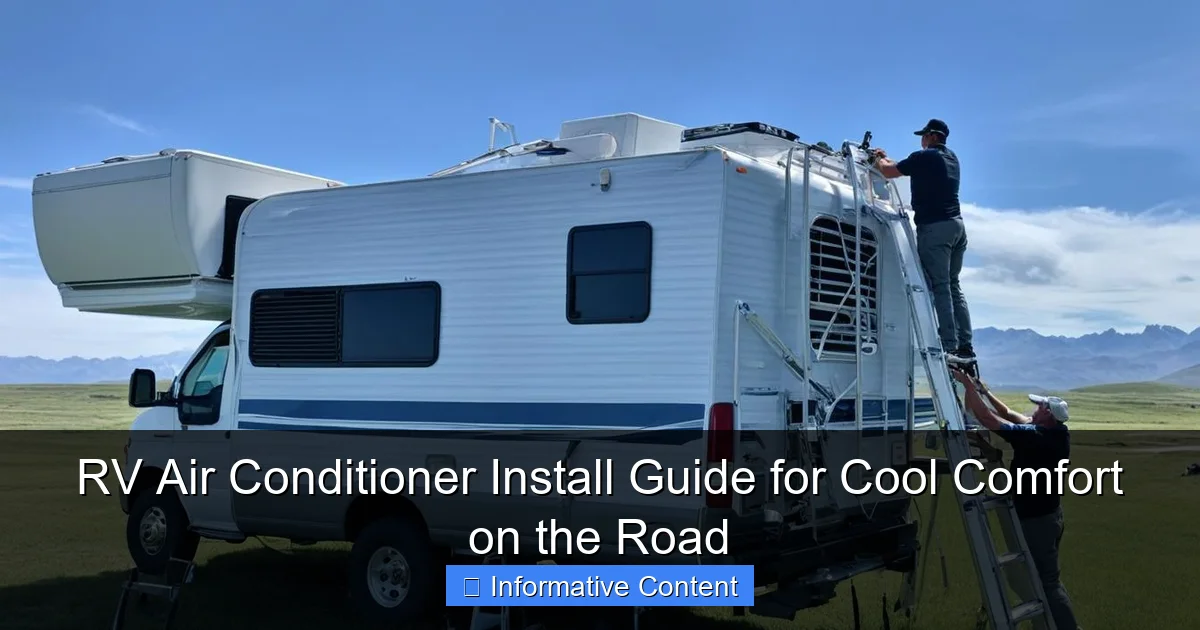
Installing an RV air conditioner yourself saves money and ensures cool comfort on the road—if done correctly. This guide walks you through essential steps like measuring your roof opening, securing the unit, and proper electrical wiring to avoid costly mistakes. With the right tools and safety precautions, a DIY install can deliver reliable, energy-efficient cooling all season long.
Key Takeaways
- Choose the right AC unit: Match size and type to your RV’s needs.
- Turn off power first: Always disconnect power before starting installation.
- Seal gaps properly: Prevent leaks with high-quality gasket and sealant.
- Follow wiring diagrams: Ensure correct electrical connections to avoid damage.
- Test before travel: Run the AC to check performance and cooling.
- Secure all components: Double-check bolts and brackets to prevent vibration issues.
📑 Table of Contents
- Why an RV Air Conditioner Install is a Game Changer for Road Trips
- Choosing the Right RV Air Conditioner for Your Needs
- Tools and Materials You’ll Need for the Install
- Step-by-Step Installation Guide
- Troubleshooting Common Issues After Installation
- Maintaining Your RV Air Conditioner for Long-Term Performance
- Final Thoughts: Enjoy Cool Comfort on Every Adventure
Why an RV Air Conditioner Install is a Game Changer for Road Trips
There’s nothing quite like the freedom of hitting the open road in your RV—until the summer heat hits. You’re cruising through the desert, the sun is blazing, and your RV’s interior feels more like an oven than a home. That’s when you realize: a reliable RV air conditioner install isn’t just a luxury—it’s a necessity.
I remember my first long trip through Arizona. My old RV had a busted AC unit, and by noon, the temperature inside was pushing 100°F. I spent half the day sweating in a parking lot, trying to cool down with fans and cold towels. That’s when I decided to take the plunge and install a new air conditioner. Not only did it transform my comfort, but it also made my RV feel like a true home on wheels.
Choosing the Right RV Air Conditioner for Your Needs
Before you start drilling holes or wiring circuits, it’s essential to pick the right AC unit. Not all air conditioners are created equal, and the wrong choice can lead to poor performance, wasted money, and even damage to your RV’s roof structure.

Visual guide about rv air conditioner install
Image source: m.media-amazon.com
Types of RV Air Conditioners
- Roof-Mounted Units (Most Common): These sit on top of your RV and are connected to ducting inside. They’re easy to install and widely supported. Brands like Dometic and Coleman dominate this space.
- Under-Bench or Ductless Mini-Splits: These are less common but offer quieter operation and better energy efficiency. They’re ideal for smaller RVs or those with limited roof space.
- Portable Units: Great for occasional use, but not a permanent solution. They require window or vent access and take up floor space.
For most RVers, a roof-mounted unit is the best bet. They’re designed specifically for RV use, handle vibration well, and integrate easily with existing ductwork. I went with a Dometic Brisk II—it’s powerful, reliable, and has a sleek low-profile design.
Key Features to Consider
- BTU Rating: 13,500 BTUs is standard for most RVs. If you have a large rig (over 30 feet) or plan to camp in extreme heat, consider 15,000 BTUs.
- Energy Efficiency (EER): Look for units with an EER of 10 or higher. Higher efficiency means less strain on your generator or shore power.
- Noise Level: Measured in decibels (dB). Anything under 60 dB is considered quiet. The Brisk II runs at about 58 dB—perfect for peaceful nights.
- Dual-Fan vs. Single-Fan: Dual-fan models cool faster and are more efficient. Worth the extra cost if you camp in hot climates.
Pro Tip: Check your RV’s roof thickness and material. Some units require a minimum 2.5 inches of insulation or a specific roof type (e.g., fiberglass vs. metal). Always verify compatibility before buying.
Tools and Materials You’ll Need for the Install
Don’t jump into the RV air conditioner install without the right tools. I learned this the hard way when I realized I was missing a crucial socket wrench halfway through my first install. Here’s a checklist to keep you prepared.
Essential Tools
- Drill with 1/4” and 1/8” bits
- Socket wrench set (metric and standard)
- Torx bit set (T20 and T25 are common)
- Jigsaw or hole saw (for cutting the roof opening)
- Wire strippers and crimping tool
- Multimeter (for electrical testing)
- Roofing sealant (Dicor self-leveling lap sealant is a top choice)
- Measuring tape and marker
- Ladder (extendable, stable, and rated for your weight)
Materials and Supplies
- New AC unit (with mounting hardware and gasket)
- Roof vent cover (if replacing an old unit)
- Butyl tape (for sealing around the base)
- Electrical wire (10/2 or 12/2 NM-B, depending on your RV’s wiring)
- Wire nuts or push-in connectors
- Roof patch kit (in case of minor damage)
Example: When I installed my Brisk II, I used a 12/2 NM-B wire because my RV’s circuit was 20 amps. I also picked up a Dicor sealant kit—it comes with a brush and gloves, which makes application way easier.
Safety Gear
- Work gloves (cut-resistant)
- Safety glasses
- Non-slip shoes
- Knee pads (roof work is tough on your joints)
Remember: Always disconnect your RV’s battery and shore power before starting any electrical work. Safety first, comfort second.
Step-by-Step Installation Guide
Now that you’re prepped, let’s walk through the actual RV air conditioner install. I’ll share my real-world steps, including the mistakes I made and how to avoid them.
Step 1: Remove the Old Unit (If Replacing)
- Turn off all power sources (battery, generator, shore power).
- Remove the interior ceiling shroud (usually held by screws or clips).
- Disconnect the wiring harness and ducting.
- From the roof, remove the mounting screws and carefully lift the old unit off. Use a helper if possible—these things are heavy!
Tip: Take photos as you go. It’s easy to forget where each wire or screw goes. I once spent 20 minutes trying to figure out which wire was for the thermostat because I didn’t label them.
Step 2: Prepare the Roof Opening
- Measure and mark the cutout area (refer to your new unit’s manual).
- Use a hole saw to cut a pilot hole, then a jigsaw to cut the full opening.
- Clean up debris and seal any exposed wood with roofing sealant.
Common Mistake: Cutting too big. The opening should be snug. If it’s too large, the unit won’t sit properly and may leak. I once had to patch a slightly oversized hole with a custom metal plate—not fun.
Step 3: Install the Mounting Base and Gasket
- Apply butyl tape around the perimeter of the roof opening.
- Place the mounting base (included with the unit) over the tape and secure with screws.
- Press down firmly to ensure a tight seal.
Pro Tip: Use stainless steel screws. Regular ones will rust and fail over time. I learned this after my first install started leaking during a monsoon.
Step 4: Wire the AC Unit
- Run the new wire from the AC unit’s electrical box to your RV’s main breaker panel.
- Strip the ends and connect to the appropriate circuit (usually a 20-amp breaker).
- Use wire nuts or push-in connectors. Double-check connections with a multimeter.
Caution: If you’re not confident with electrical work, hire a professional. A bad connection can cause a fire. I once saw a fellow RVer’s unit spark because of a loose wire—scary stuff.
Step 5: Mount the AC Unit
- Carefully lift the new unit onto the roof (use a helper!).
- Align it with the mounting base and secure with screws.
- Connect the wiring harness from the RV to the unit.
- Apply Dicor sealant around the base to prevent leaks.
Tip: Don’t overtighten the screws. It can warp the base and compromise the seal. I use a torque screwdriver set to 25 in-lbs—just tight enough to secure without damage.
Step 6: Reinstall the Interior Shroud
- Reconnect the ducting and secure the ceiling shroud with screws.
- Test the unit by turning on the power and setting the thermostat.
First Test: Listen for unusual noises. A slight hum is normal, but grinding or rattling means something’s loose. My Brisk II purred on the first try—a huge relief.
Troubleshooting Common Issues After Installation
Even with careful work, problems can pop up. Here’s how to handle the most common post-install headaches.
AC Won’t Turn On
- Check the circuit breaker—it may have tripped.
- Verify the thermostat is set to “cool” and the temperature is below room temp.
- Test the power at the unit with a multimeter.
Real Example: After my install, the unit wouldn’t start. Turns out, the thermostat wire was loose inside the shroud. Tightened it, and we were back in business.
Weak or No Cooling
- Check for blocked air filters (clean or replace).
- Inspect the condenser coils for dirt or debris (clean with a soft brush).
- Ensure the roof gasket is sealed properly—air leaks reduce efficiency.
Tip: Run the unit for 10 minutes and feel the air coming out. It should be noticeably cold. If not, there may be a refrigerant issue (best handled by a pro).
Water Leaks Inside the RV
- Inspect the roof sealant and butyl tape for gaps.
- Check the drain pan and hose for clogs (clean with a wire).
- Ensure the unit is level—tilting can cause water to pool.
My Leak Story: I once had a slow drip after a rainstorm. Found a tiny crack in the sealant. A quick patch with Dicor fixed it.
Excessive Noise or Vibration
- Tighten loose mounting screws.
- Check the fan blades for damage or imbalance.
- Ensure the roof is structurally sound (no soft spots).
Note: Some noise is normal, especially in high fan mode. But loud bangs or grinding mean stop and investigate.
Maintaining Your RV Air Conditioner for Long-Term Performance
A good RV air conditioner install is just the beginning. Regular maintenance keeps it running smoothly and extends its life. Think of it like changing the oil in your car—small effort, big payoff.
Monthly Checks
- Inspect the roof sealant for cracks or gaps.
- Clean the air filter (washable filters can be rinsed; paper ones should be replaced).
- Check the thermostat batteries (if it’s battery-powered).
Example: I clean my filter every 4 weeks. A dirty filter reduces airflow and makes the unit work harder—wasting energy.
Seasonal Maintenance
- Inspect the condenser and evaporator coils for dirt (use a coil cleaner).
- Check wiring connections for corrosion or looseness.
- Lubricate fan motor bearings (if accessible).
Pro Tip: Cover the unit when not in use (especially in winter). A simple AC cover protects it from debris and UV damage. I use a Classic Accessories cover—it’s durable and fits perfectly.
Annual Professional Check
Even with DIY care, a yearly tune-up by an HVAC technician is wise. They can check refrigerant levels, test the compressor, and spot issues you might miss.
Cost: $100–$200, but worth it for peace of mind. My tech found a refrigerant leak last year—caught early, it was a cheap fix.
Data Table: Maintenance Schedule
| Task | Frequency | Time Required | Tools Needed |
|---|---|---|---|
| Clean Air Filter | Monthly | 10–15 min | Soft brush, water |
| Inspect Roof Sealant | Monthly | 5 min | Flashlight |
| Clean Condenser Coils | Every 3 months | 20–30 min | Coil cleaner, brush |
| Check Wiring | Seasonally | 10 min | Multimeter |
| Professional Tune-Up | Annually | 1–2 hours | Technician visit |
Final Thoughts: Enjoy Cool Comfort on Every Adventure
An RV air conditioner install might seem daunting, but with the right prep and patience, it’s totally doable. I’ve done it twice now—once on my old rig, once on my new one—and each time, the result was the same: instant relief and a more enjoyable trip.
Remember, it’s not just about staying cool. It’s about creating a space where you can relax, sleep well, and truly enjoy the journey. Whether you’re parked in the Mojave Desert or a humid Florida campground, a reliable AC unit makes all the difference.
So grab your tools, follow these steps, and don’t be afraid to ask for help when you need it. The open road is waiting—and now, you’ll be ready for whatever weather comes your way. Happy camping!
Frequently Asked Questions
How do I choose the right RV air conditioner for my install?
Consider your RV’s size, roof type, and BTU needs (typically 13,500–15,000 BTUs for standard RVs). Ensure compatibility with your existing ductwork or non-ducted setup before purchasing. The right RV air conditioner install starts with proper sizing and model selection.
Can I install an RV air conditioner myself, or should I hire a pro?
DIY installation is possible with basic tools and electrical knowledge, but hiring a pro is safer if you’re uncomfortable working with wiring or roof mounts. Always follow manufacturer instructions to avoid voiding warranties or creating hazards.
What tools do I need for an RV air conditioner install?
Common tools include a drill, socket set, screwdrivers, sealant, and a voltage tester. You may also need a mounting gasket and wiring connectors. A second person helps for lifting and aligning the unit.
How long does an RV air conditioner install take?
A basic install typically takes 3–6 hours, depending on experience and whether modifications to the roof or wiring are needed. Rushing can lead to leaks or electrical issues, so plan for extra time.
Why is sealing important during an RV air conditioner install?
Proper sealing with butyl tape or Dicor sealant prevents water leaks and air gaps that reduce efficiency. A poorly sealed RV air conditioner install can lead to costly interior damage over time.
Do I need to upgrade my RV’s electrical system for a new AC unit?
Most modern RV ACs run on 110V/15A, but check your breaker panel and wiring gauge to handle the load. Older RVs may need upgrades to avoid tripping circuits or overheating wires.