
Featured image for rheem air conditioner installation
Image source: bim.rheem.com
Professional Rheem air conditioner installation ensures peak performance, energy efficiency, and long-term reliability. Proper setup by certified technicians maximizes cooling power while minimizing utility costs and potential breakdowns. Trusting experts with your Rheem system also preserves the manufacturer’s warranty and guarantees safe, code-compliant operation.
Key Takeaways
- Hire a pro: Ensure proper Rheem AC installation for peak performance and warranty validity.
- Right size matters: Choose the correct unit size to maximize efficiency and comfort.
- Clear the area: Keep the installation site free of debris and obstacles for safety.
- Check local codes: Verify permits and regulations before starting any installation work.
- Maintain access: Allow space around the unit for future servicing and airflow.
- Test thoroughly: Run system diagnostics post-installation to confirm optimal operation.
📑 Table of Contents
- Why Rheem Air Conditioner Installation Matters for Your Home Comfort
- Understanding Your Rheem AC: Models and Features
- Pre-Installation: What You Need to Know
- The Installation Process: Step-by-Step
- DIY vs. Professional Installation: The Pros and Cons
- Post-Installation: Maintenance and Troubleshooting
- Final Thoughts: Getting the Most from Your Rheem AC
Why Rheem Air Conditioner Installation Matters for Your Home Comfort
Imagine this: It’s the middle of July, the sun is relentless, and your old AC unit is wheezing like a tired marathon runner. You’re sweating through your shirt, your energy bill is climbing, and your family is starting to grumble. That’s when you realize—it’s time for a new air conditioner. And if you’re considering a Rheem air conditioner installation, you’re on the right track.
Rheem is a trusted name in HVAC systems, known for reliability, energy efficiency, and innovative features. But buying a Rheem AC is just the beginning. The real magic happens during installation. A poorly installed unit, even the best model, can lead to higher bills, inconsistent cooling, and a shorter lifespan. On the flip side, a professional Rheem air conditioner installation ensures peak performance, energy savings, and long-term peace of mind.
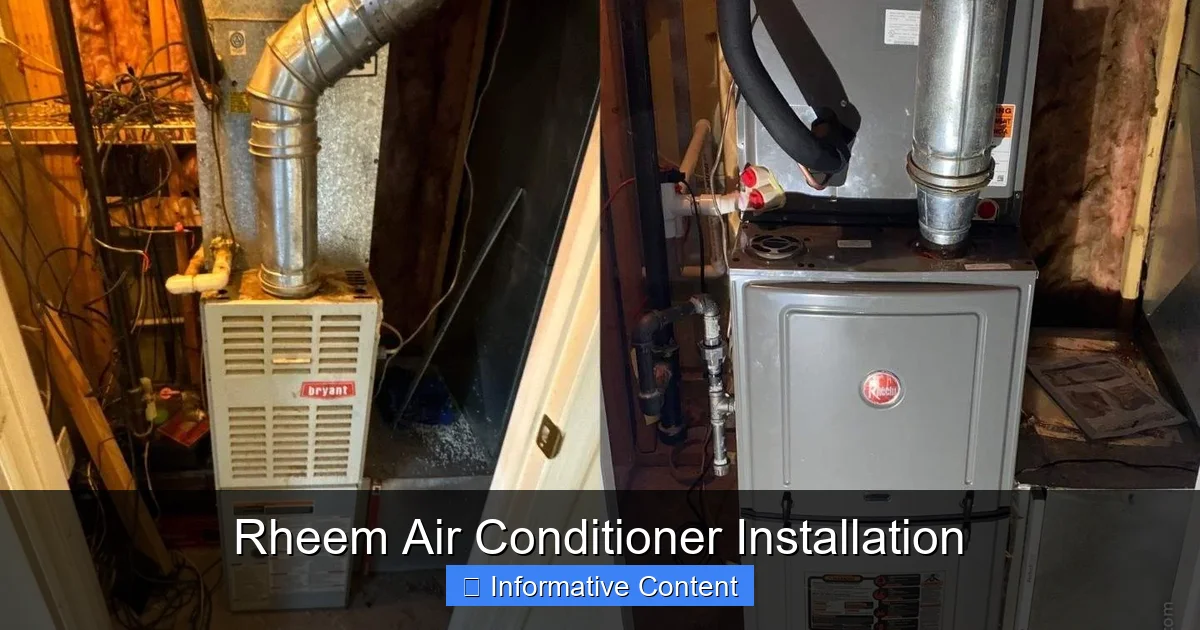
Understanding Your Rheem AC: Models and Features
Before diving into installation, it’s helpful to know what you’re working with. Rheem offers a range of air conditioners, each with unique features to suit different needs. Let’s break down the most popular types so you can choose the right one for your home.
Visual guide about rheem air conditioner installation
Image source: proskyhvac.com
Types of Rheem Air Conditioners
- Single-Stage Units: These are the most common and affordable. They run at full power when on, making them ideal for moderate climates or smaller homes.
- Two-Stage Units: These run at 60–70% capacity most of the time, switching to full power only when needed. They offer better humidity control and quieter operation—great for larger spaces or humid areas.
- Variable-Speed Units: The premium choice. These adjust cooling output continuously, providing ultra-consistent temperatures, lower noise, and maximum energy efficiency. Think of them as the “smart” ACs.
For example, a family in Phoenix might opt for a two-stage Rheem RA17 model for better humidity control, while a homeowner in Maine might choose a single-stage unit due to milder summers. Your installer can help you pick the right model based on your climate, home size, and budget.
Key Features to Consider
- SEER Rating: This measures energy efficiency. Rheem’s top models hit 20+ SEER, meaning they use less electricity. A 16 SEER unit can save you 20–40% on cooling costs compared to a 10 SEER unit.
- Sound Levels: Look for decibel (dB) ratings. Rheem’s Quiet-Drive™ technology keeps units as low as 56 dB (like a quiet conversation).
- Smart Thermostats: Many Rheem ACs work with smart thermostats like Nest or Ecobee, letting you control cooling remotely.
Tip: Always check the AHRI (Air Conditioning, Heating, and Refrigeration Institute) certificate. It confirms your Rheem unit’s performance claims, like SEER and cooling capacity.
Pre-Installation: What You Need to Know
You’ve picked your Rheem AC—congrats! Now, it’s time to prepare for a smooth Rheem air conditioner installation. This stage is critical. Skipping steps here can lead to headaches later.
Assess Your Home’s Needs
Start with a load calculation. This isn’t just about square footage—it considers insulation, windows, ceiling height, and even your home’s orientation. A professional HVAC technician uses the Manual J method to determine the right size (measured in BTUs). For example, a 2,000 sq. ft. home in Texas might need a 3-ton unit, while the same size in Minnesota could use a 2.5-ton.
Why size matters: An oversized AC cools too fast, causing short cycles that waste energy and increase wear. An undersized unit runs nonstop, struggling to keep up. Both scenarios shorten your AC’s lifespan.
Check Your Ductwork and Electrical System
- Ducts: Leaky or poorly sized ducts can lose 20–30% of cool air. Your installer should inspect and seal ducts if needed. In one case, a homeowner saved $200/year just by fixing duct leaks.
- Electrical: Rheem ACs need proper voltage (usually 230V for central units). Your electrician may need to upgrade the disconnect box or circuit breaker. Never DIY this—it’s a fire hazard.
Permits and Local Codes
Most areas require permits for HVAC work. Your installer should handle this, but it’s good to confirm. Local codes dictate things like refrigerant handling, electrical clearances, and condensate drainage. For example, in California, you need a refrigerant recovery license to work with Freon.
Pro Tip: Ask your installer for a pre-installation checklist. It should include:
- Site inspection
- Load calculation report
- Permit confirmation
- Equipment delivery date
The Installation Process: Step-by-Step
Now for the main event: the Rheem air conditioner installation itself. This is where expertise makes all the difference. Here’s what happens during a professional install.
Day 1: Outdoor Unit Setup
- Clear the Site: The condenser (outdoor unit) needs 12–24 inches of clearance on all sides for airflow. Remove debris, trim plants, and level the ground.
- Mount the Pad: A concrete or composite pad keeps the unit stable and off the ground. In one install, a homeowner skipped the pad—the unit shifted in heavy rain, causing a $500 repair.
- Install the Condenser: The technician lifts the unit onto the pad, secures it, and connects the refrigerant lines (copper tubing). They use a nitrogen purge to prevent moisture in the lines.
Day 2: Indoor Components and Ductwork
- Air Handler/Evaporator Coil: For central ACs, this goes in the attic, basement, or closet. It must be level and secured to avoid vibration noise.
- Refrigerant Line Set: Technicians run the lines between indoor and outdoor units. They insulate them to prevent energy loss. A 1/2-inch gap in insulation can reduce efficiency by 5%.
- Condensate Drain: This PVC pipe removes moisture. It must slope 1/4 inch per foot toward a floor drain or outside. Clogs here cause water damage.
Day 3: Electrical and System Startup
- Electrical Connections: The technician wires the unit to your breaker panel, installs a disconnect box, and connects the thermostat.
- Refrigerant Charging: Using gauges, they add the exact refrigerant amount (measured in pounds). Undercharging or overcharging reduces efficiency by up to 20%.
- Startup and Testing: The system runs for 30+ minutes. The technician checks:
- Airflow (measured in CFM)
- Temperature split (should be 14–22°F)
- Electrical amps
- Thermostat communication
Example: A technician once found a reversed thermostat wire during testing. Fixing it saved the homeowner from weeks of uneven cooling.
DIY vs. Professional Installation: The Pros and Cons
You might be tempted to save money by installing your Rheem AC yourself. But here’s the truth: HVAC installation is not a DIY project for most people. Let’s weigh the options.
DIY Installation: When It Might (Barely) Make Sense
Pros:
- Potential cost savings (labor is 50–70% of the total price).
- Control over the timeline.
Cons:
- Voided Warranty: Rheem requires professional installation for warranty coverage. A DIY install could cost you thousands if the unit fails.
- Refrigerant Laws: You need an EPA Section 608 license to handle refrigerant. Illegal handling can lead to fines up to $37,500.
- Hidden Costs: Mistakes like incorrect refrigerant charge or leaky ducts can cost more to fix than hiring a pro upfront.
- Safety Risks: Electrical work and heavy lifting are hazardous.
Real Talk: One homeowner tried DIY installation. They miscalculated the refrigerant charge, causing the compressor to fail within a year. Repair cost: $1,200—more than the labor they “saved.”
Professional Installation: Why It’s Worth It
Pros:
- Warranty Protection: Rheem’s 10-year parts and compressor warranty only applies with a certified installer.
- Code Compliance: Pros know local regulations and pull permits.
- Efficiency Guarantee: A pro install ensures your AC hits its SEER rating. A 16 SEER unit installed poorly might perform like a 13 SEER.
- Peace of Mind: Many companies offer 1–2 year labor warranties.
How to Choose a Pro:
- Look for NATE-certified technicians.
- Check online reviews (Google, BBB, Yelp).
- Ask for references from past customers.
- Get a detailed quote (labor, permits, disposal fees).
Tip: Some states (like Texas) require HVAC contractors to be licensed. Verify this with your local licensing board.
Post-Installation: Maintenance and Troubleshooting
Your Rheem AC is installed—congratulations! But the journey doesn’t end here. Regular maintenance keeps it running smoothly for 12–15 years (or more).
Your First 30 Days
- Check Airflow: Feel vents for strong, consistent airflow. Weak airflow could mean duct issues or a dirty filter.
- Listen for Noises: Squeaks, rattles, or grinding sounds need attention. A loose fan blade, for example, can damage the motor.
- Monitor the Thermostat: If the AC short-cycles (turns on/off every 10 minutes), call your installer. It might need a refrigerant adjustment.
Seasonal Maintenance Checklist
| Task | Frequency | DIY or Pro? |
|---|---|---|
| Replace air filter | Every 1–3 months | DIY |
| Clean condenser coils | Spring and fall | DIY (with garden hose) or pro |
| Inspect refrigerant lines | Annually | Pro |
| Check electrical connections | Annually | Pro |
| Test thermostat accuracy | Annually | DIY or pro |
Common Issues and Fixes
- No Cooling: Check the thermostat setting, circuit breaker, and air filter. If these are fine, call your installer—it could be a refrigerant leak.
- Water Leaks: A clogged condensate drain is the usual culprit. Use a wet/dry vacuum to clear it.
- High Energy Bills: If your bill spikes, check for dirty coils, leaky ducts, or a refrigerant issue.
Pro Tip: Sign up for Rheem’s maintenance plan. Many installers offer discounts for annual tune-ups.
Final Thoughts: Getting the Most from Your Rheem AC
A Rheem air conditioner installation is an investment in your home’s comfort and energy efficiency. But as we’ve seen, the quality of installation matters just as much as the unit itself. A professional install ensures you get the full benefits: lower bills, consistent cooling, and a longer lifespan.
Remember, HVAC isn’t a “set it and forget it” system. Stay proactive with maintenance, and don’t ignore small issues—they often grow into big (and expensive) problems. And if you ever feel unsure, call your installer. Most offer free post-installation check-ins for the first year.
At the end of the day, a well-installed Rheem AC is like a reliable friend: it’s there when you need it, works hard without complaint, and saves you money in the long run. So take the time to do it right. Your future self (and your wallet) will thank you.
Frequently Asked Questions
How much does Rheem air conditioner installation typically cost?
The cost of Rheem air conditioner installation varies depending on unit size, complexity, and labor rates, but it typically ranges from $3,000 to $7,000. For an accurate estimate, get a quote from a licensed HVAC professional in your area.
Can I install a Rheem air conditioner myself to save money?
DIY Rheem air conditioner installation is not recommended due to safety risks, refrigerant handling requirements, and potential voiding of the warranty. Always hire a certified HVAC technician to ensure proper setup and compliance with local codes.
How long does a Rheem air conditioner installation take?
A standard Rheem air conditioner installation usually takes 4–8 hours, depending on system complexity and ductwork modifications. Factors like electrical upgrades or removing old equipment may extend the timeline.
What size Rheem air conditioner do I need for my home?
The correct Rheem air conditioner size depends on your home’s square footage, insulation, climate, and ductwork efficiency. A professional load calculation (like Manual J) ensures optimal performance and energy efficiency.
Does Rheem air conditioner installation include a warranty?
Yes, Rheem air conditioner installation typically includes a manufacturer’s warranty (10 years for parts, if registered) plus a labor warranty from the installer. Always confirm warranty details with your contractor before installation.
What should I look for in a contractor for Rheem air conditioner installation?
Choose a licensed, insured HVAC contractor with experience in Rheem air conditioner installation and positive customer reviews. Verify they provide a detailed quote, warranty coverage, and proper permitting.