
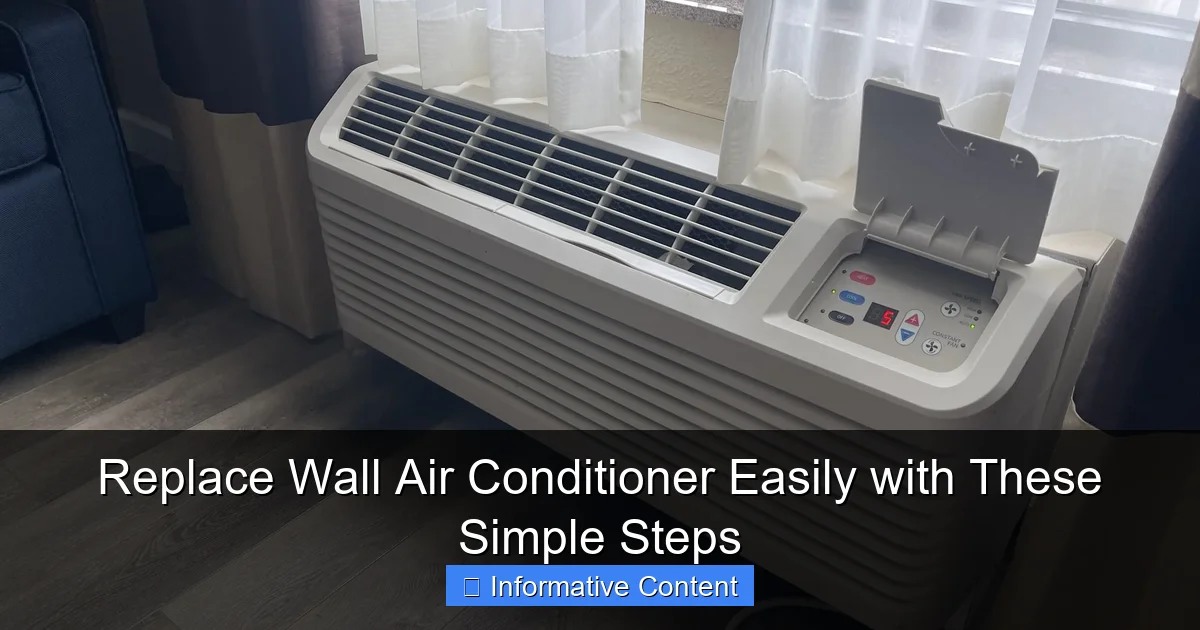
Featured image for replace wall air conditioner
Image source: i.ytimg.com
Replacing a wall air conditioner is a straightforward DIY project that can save you time and money with the right tools and preparation. By carefully removing the old unit, ensuring a proper fit, and sealing the opening correctly, you can enhance efficiency and indoor comfort without professional help. Always prioritize safety by turning off power and following manufacturer guidelines.
Key Takeaways
- Turn off power first: Always disconnect electricity before starting for safety.
- Measure your opening: Ensure the new unit fits perfectly to avoid gaps.
- Remove the old unit carefully: Support it fully to prevent drops or damage.
- Seal gaps properly: Use foam or caulk to boost efficiency and reduce drafts.
- Follow the manual: Adhere to manufacturer instructions for optimal performance.
- Test before finishing: Run the unit to confirm it works and cools well.
📑 Table of Contents
- Why You Might Need to Replace Your Wall Air Conditioner
- Signs It’s Time to Replace Your Wall Air Conditioner
- Tools and Materials You’ll Need for the Replacement
- Step-by-Step Guide to Replace Wall Air Conditioner
- Choosing the Right Replacement Wall Air Conditioner
- Common Mistakes to Avoid When Replacing Your AC
- Conclusion
Why You Might Need to Replace Your Wall Air Conditioner
Let’s face it—wall air conditioners are workhorses. They keep us cool during sweltering summers, often running nonstop for months. But after years of faithful service, even the most reliable unit starts to show its age. Maybe your AC is making strange noises, struggling to cool the room, or just guzzling electricity like a teenager with a new car. These are all telltale signs that it’s time to replace wall air conditioner with a newer, more efficient model.
Replacing a wall AC might seem daunting at first, especially if you’ve never done it before. You might worry about the cost, the complexity, or even whether you can handle it without calling in a professional. But here’s the good news: with the right tools, a bit of patience, and a step-by-step approach, you can tackle this job yourself—and save a bundle on labor costs. I’ve been there, done that, and I’m here to walk you through the process so you can do it confidently and safely.
Signs It’s Time to Replace Your Wall Air Conditioner
1. Age of the Unit
The average lifespan of a wall air conditioner is about 10 to 15 years. If your unit is approaching or has exceeded that range, it’s likely time to consider a replacement. Older models aren’t just less efficient; they can also pose safety risks, like refrigerant leaks or electrical issues. For example, my own unit started tripping the circuit breaker every time it ran—definitely not a good sign.
Visual guide about replace wall air conditioner
Image source: ptac4less.com
Tip: Check the manufacturer’s label on your unit. It should list the model number and manufacturing date. If it’s from 2010 or earlier, you’re probably due for an upgrade.
2. Poor Cooling Performance
Does your AC blow warm air? Does it take forever to cool down the room? These are classic signs of a failing compressor or low refrigerant levels. While some issues can be repaired, if the cost of fixing it is more than 50% of the price of a new unit, replacement is the smarter choice. I once tried to fix my old AC with a recharge kit—it worked for a week, then died again. Lesson learned: sometimes, it’s better to start fresh.
3. High Energy Bills
Older AC units are notoriously inefficient. If you’ve noticed a steady increase in your electricity bills, even with the same usage, your AC could be the culprit. Modern units come with higher SEER (Seasonal Energy Efficiency Ratio) ratings, which means they use less energy to cool the same space. For example, a new unit with a 14 SEER rating can save you up to 30% on cooling costs compared to a 10 SEER model.
4. Frequent Repairs
Are you constantly calling a technician to fix the same issue? If your AC needs repairs more than once or twice a year, it’s a red flag. The cost of repeated fixes adds up quickly. At a certain point, investing in a new unit makes more financial sense. I kept my old AC running for two extra years with patchwork repairs—only to realize I’d spent more on repairs than a new unit would’ve cost.
5. Strange Noises or Odors
Grinding, squealing, or buzzing noises often indicate worn-out bearings, fan motor issues, or loose parts. Musty odors could mean mold inside the unit or a clogged condensate drain. While some of these problems are fixable, if the noise or smell persists after cleaning or minor repairs, it’s likely time to replace wall air conditioner.
Tools and Materials You’ll Need for the Replacement
Basic Tools
- Socket wrench set: For removing mounting bolts and brackets.
- Phillips and flathead screwdrivers: For disconnecting electrical wires and removing trim.
- Drill with bits: If you need to adjust the wall sleeve or add new mounting holes.
- Level: To ensure your new unit sits straight.
- Putty knife or utility knife: For cleaning old sealant or removing caulk.
- Vacuum or shop vac: To clean out dust and debris from the wall sleeve.
Safety Equipment
- Gloves: Protect your hands from sharp edges and dust.
- Safety glasses: Essential when working with power tools or removing old sealant.
- Work apron: Handy for carrying small tools and screws.
Materials
- New wall air conditioner unit: Make sure it fits your existing wall sleeve (more on that below).
- Weatherproof sealant: To seal gaps between the unit and the sleeve.
- Foam insulation tape: For sealing the front panel.
- Mounting brackets or screws (if needed): Some units come with these; others may require separate purchase.
- Electrical wire nuts: For reconnecting the power supply (if your unit has a hardwired connection).
Pro Tip: Before buying your new AC, measure the wall sleeve’s interior dimensions. Most units are designed to fit standard sleeve sizes (e.g., 26” x 15.5”), but older homes might have custom sizes. If your sleeve is non-standard, you may need to replace it too—or choose a unit with an adapter kit.
Step-by-Step Guide to Replace Wall Air Conditioner
Step 1: Turn Off Power and Disconnect
Safety first! Locate the circuit breaker for your AC and flip it off. If your unit is plugged into an outlet, unplug it. For hardwired units, you’ll need to disconnect the wires inside the electrical box. Use a non-contact voltage tester to confirm there’s no power flowing to the unit before touching any wires.
Example: My neighbor once forgot to turn off the breaker and ended up with a minor shock when he touched the wires. Not fun. Always double-check with a voltage tester.
Step 2: Remove the Old Unit
Open the front panel of your AC and remove it (this usually involves unscrewing a few screws or sliding it out). Next, locate the mounting screws or bolts holding the unit in place—these are typically on the sides or bottom of the sleeve. Loosen them, but don’t remove them yet.
With a helper (or a sturdy dolly if the unit is heavy), gently slide the AC out of the sleeve. Tilt it slightly to clear the bottom lip of the sleeve. Be careful—these units can weigh 80-120 lbs. If it’s stuck, use a putty knife to break any old sealant or caulk.
Tip: Lay a blanket or cardboard on the floor to protect your new flooring and cushion the AC as you slide it out.
Step 3: Clean the Wall Sleeve
Once the old unit is out, clean the sleeve thoroughly. Use a vacuum to remove dust, leaves, or debris. Wipe down the interior with a damp cloth to remove mold or grime. Check for rust or damage—if the sleeve is corroded or bent, it may need replacement.
Inspect the weather stripping on the sleeve’s exterior. If it’s cracked or missing, replace it with new foam tape. This ensures a tight seal when you install the new AC.
Step 4: Prepare the New Unit
Most new wall ACs come with a chassis (the main unit) and a decorative front panel. Slide the chassis into the sleeve, aligning it with the mounting holes. Use a level to make sure it’s straight—this prevents water leaks and ensures proper drainage.
Secure the chassis with the provided screws or brackets. Don’t overtighten; you could warp the sleeve or damage the unit. If your unit has a hardwired connection, reconnect the wires using wire nuts (match colors: black to black, white to white, green to ground).
Note: Some units have a “slide-out” chassis design, making installation easier. Others require you to lift the entire unit into place. Check your manual for specifics.
Step 5: Seal and Insulate
Apply weatherproof sealant around the exterior edges of the sleeve where it meets the wall. This keeps out rain, insects, and drafts. Use foam insulation tape on the front panel to seal gaps between the panel and the chassis.
Pro Tip: Don’t skimp on the sealant. A poor seal can lead to energy loss, water leaks, and even mold growth.
Step 6: Test the New Unit
Turn the power back on and run the AC for 10-15 minutes. Check for:
- Proper cooling
- Even airflow from vents
- No unusual noises
- Condensate drainage (water should drip from the back or bottom)
If everything looks good, reattach the front panel. You’re all set!
Choosing the Right Replacement Wall Air Conditioner
1. Size and Cooling Capacity
Wall ACs are measured in BTUs (British Thermal Units). The right size depends on your room’s square footage:
| Room Size (sq ft) | Recommended BTUs | Example Models |
|---|---|---|
| 100-150 | 5,000-6,000 | Frigidaire FFRA0611R1, Midea MAW06R1BWT |
| 150-250 | 7,000-8,000 | LG LW8016ER, GE AHY08LZ |
| 250-350 | 9,000-10,000 | Frigidaire FFRE1033S1, Haier HWR08XCR |
| 350-450 | 12,000 | Friedrich Kuhl KCS12A10A, Amana A1230S |
Note: Oversizing your AC can lead to short cycling (turning on and off frequently), which reduces efficiency and comfort. Undersizing means your AC will run constantly without cooling the room properly.
2. Energy Efficiency (SEER Rating)
Look for units with a SEER rating of 12 or higher. Higher SEER = lower energy bills. ENERGY STAR-certified models are even better. For example, the Midea MAW06R1BWT has a 12.1 SEER rating and is ENERGY STAR certified, making it a great choice for eco-conscious homeowners.
3. Features to Consider
- Remote control: Handy for adjusting settings from across the room.
- Timer and sleep mode: Saves energy by turning off automatically or adjusting temperature at night.
- Dehumidifier function: Useful in humid climates.
- Smart compatibility: Some units work with Alexa or Google Assistant (e.g., GE AHY08LZ).
- Noise level (dB): Quieter units (under 55 dB) are better for bedrooms.
4. Sleeve Compatibility
Most modern wall ACs fit standard sleeves, but always check the manufacturer’s specs. If your sleeve is old or damaged, consider a unit with a universal sleeve kit (e.g., Koldfront WTC12001W).
Common Mistakes to Avoid When Replacing Your AC
1. Skipping the Power Shutoff
It’s tempting to rush, but never skip turning off the power. Even a small shock can be dangerous. Always use a voltage tester to confirm the circuit is dead.
2. Poor Sealing
Leaving gaps between the AC and sleeve invites pests, drafts, and water leaks. Use high-quality sealant and foam tape—it’s worth the extra few dollars.
3. Ignoring the Sleeve Condition
An old, rusty sleeve can damage your new AC. If it’s bent or corroded, replace it or reinforce it with metal brackets.
4. Overlooking Electrical Safety
Hardwired units require basic electrical knowledge. If you’re unsure, consult an electrician. Never guess with wire connections.
5. Rushing the Test Phase
Don’t just turn the AC on and walk away. Monitor it for at least 15 minutes to catch leaks, odd noises, or drainage issues early.
Conclusion
Replacing a wall air conditioner isn’t just about swapping out an old unit for a new one—it’s an opportunity to improve your home’s comfort, efficiency, and even safety. Whether you’re upgrading for better cooling, lower energy bills, or to stop the constant repairs, the process is totally doable with a little know-how.
From recognizing the signs that it’s time to replace wall air conditioner to choosing the right model and installing it correctly, you now have the tools and confidence to tackle this project. Remember to prioritize safety, take your time with sealing and leveling, and don’t hesitate to ask for help with the heavy lifting.
And hey, if you’re ever in doubt, there’s no shame in calling a professional. But if you’re like me and love the satisfaction of a DIY job well done, this guide has got your back. Now go enjoy that crisp, cool air—you’ve earned it!
Frequently Asked Questions
How do I know when to replace my wall air conditioner?
If your unit is over 10–15 years old, requires frequent repairs, or struggles to cool efficiently, it’s likely time to replace your wall air conditioner. Rising energy bills are another sign of declining performance.
Can I replace a wall air conditioner myself, or do I need a professional?
You can replace a wall air conditioner yourself if you’re comfortable with basic electrical and carpentry work, but hiring a pro ensures safety and proper installation. Always turn off power at the breaker before starting.
What size wall air conditioner do I need to replace my current unit?
Match the BTU (British Thermal Unit) rating of your old unit or calculate based on room size (e.g., 20 BTU per square foot). A mismatched size reduces efficiency and cooling performance.
Do I need a permit to replace a wall air conditioner?
Some local codes require permits, especially if electrical or structural modifications are involved. Check with your municipality before starting the project to avoid fines.
How much does it cost to replace a wall air conditioner?
Costs range from $300–$800 for the unit, plus labor (if hired). Replacing a wall air conditioner yourself can save on installation fees, but factor in any needed tools or materials.
What are the best brands to consider when replacing a wall air conditioner?
Top brands include Friedrich, Frigidaire, and LG, known for reliability and energy efficiency. Look for ENERGY STAR® models to maximize savings when you replace your wall air conditioner.