
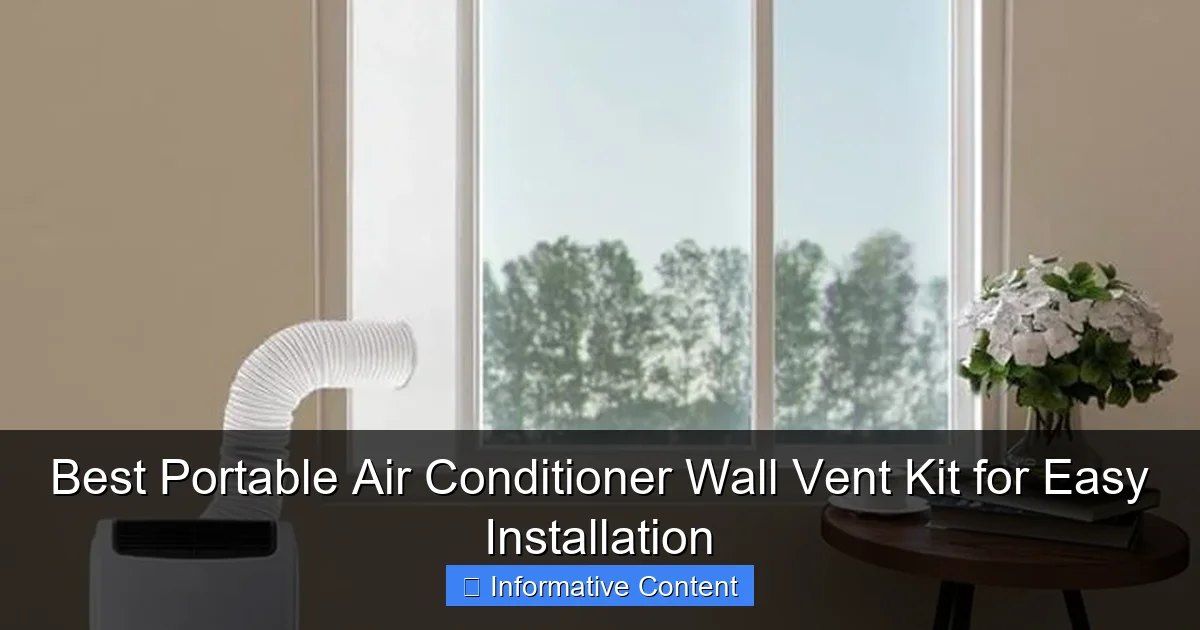
Featured image for portable air conditioner wall vent kit
Image source: img.lazcdn.com
The best portable air conditioner wall vent kit delivers hassle-free, permanent-style cooling without window limitations, enabling efficient exhaust routing through exterior walls for improved performance and aesthetics. Designed for easy DIY installation and compatibility with most portable AC units, these kits seal tightly to prevent air leaks, reduce indoor heat gain, and maintain optimal airflow—making them a smart upgrade over traditional window venting.
Key Takeaways
- Choose a universal kit: Fits most portable ACs for hassle-free setup.
- Seal gaps tightly: Prevents hot air leaks and improves efficiency.
- Prioritize tool-free installation: Saves time and avoids complex hardware.
- Check wall thickness: Ensures compatibility with your home’s structure.
- Opt for insulated hoses: Reduces condensation and energy loss.
- Verify exhaust length: Longer hoses may require support to avoid kinks.
📑 Table of Contents
- What Makes a Portable Air Conditioner Wall Vent Kit Worth It?
- Why Wall Vent Kits Beat Window Kits Every Time
- How to Choose the Right Wall Vent Kit: 5 Key Factors
- Top 5 Portable Air Conditioner Wall Vent Kits Reviewed
- Step-by-Step Installation Guide (With Pro Tips)
- Common Mistakes to Avoid (And How to Fix Them)
- Data Table: Top Wall Vent Kits at a Glance
- Final Thoughts: Is a Wall Vent Kit Right for You?
What Makes a Portable Air Conditioner Wall Vent Kit Worth It?
Let’s be honest: portable air conditioners are a lifesaver when central AC isn’t an option. But anyone who’s wrestled with a flimsy window kit knows the struggle. You set up the hose, tape it down, and by the next day—*poof*—it’s dangling out the window like a sad garden hose. That’s where a portable air conditioner wall vent kit comes in. It’s not just a convenience; it’s a game-changer for long-term comfort, energy efficiency, and peace of mind. No more tripping over hoses, no more sealing gaps with towels, and no more worrying about bugs sneaking in through a half-open window.
Imagine this: you’re in the middle of a heatwave, sweating through your shirt, and the only thing standing between you and cool relief is a portable AC unit. But instead of a temporary, janky setup, you’ve got a clean, permanent-looking vent in your wall. The hot air exits smoothly, the unit runs quietly, and you’re not sacrificing your window view. That’s the magic of a wall vent kit. Whether you’re a renter with limited options, a homeowner looking for a clean solution, or someone who just hates the look of a hose sticking out the window, this guide will help you find the best portable air conditioner wall vent kit for your needs.
Why Wall Vent Kits Beat Window Kits Every Time
The Problem with Window Venting
Window vent kits are the default for most portable ACs. They’re included with the unit, easy to set up, and… that’s about it. The reality? They’re a temporary fix at best. I once had a window kit fall out during a storm, leaving my AC running full blast with the hose dangling outside. The room never cooled down, and my energy bill was a nightmare. Sound familiar?
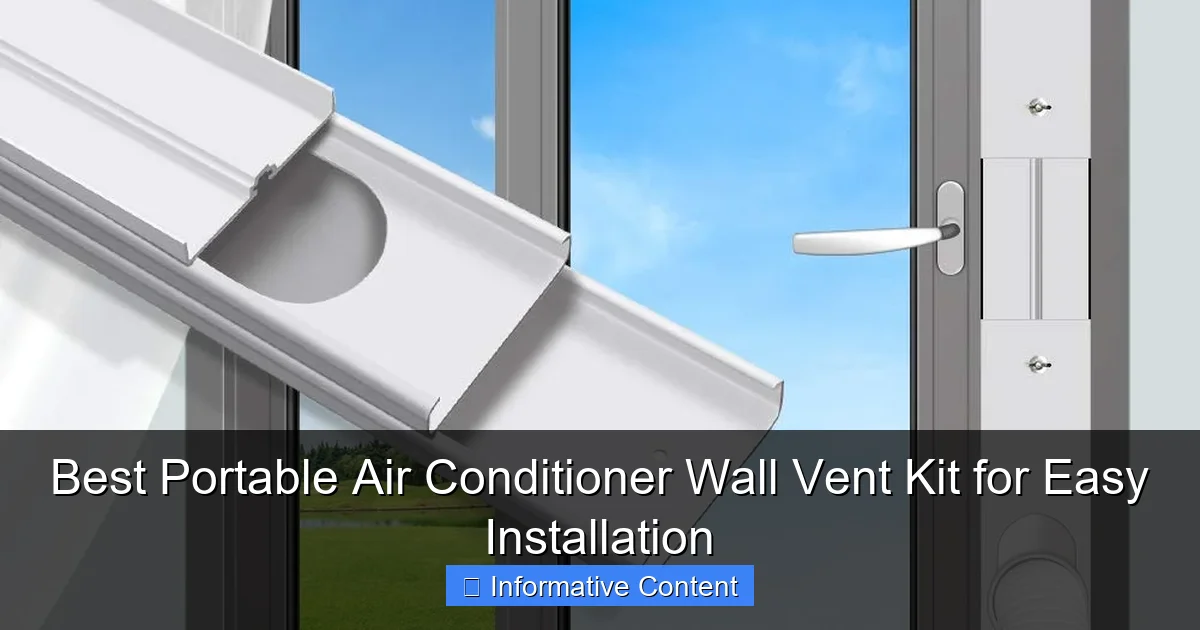
Visual guide about portable air conditioner wall vent kit
Image source: m.media-amazon.com
Window kits create a host of issues:
- Drafts and leaks: Even with foam tape, gaps let warm air in and cool air out.
- Security risks: A partially open window is an invitation for pests—or worse.
- Obstructed views: Who wants to look at a plastic hose instead of their garden?
- Trip hazards: That hose snakes across the floor, waiting to trip you at 2 a.m.
The Wall Vent Advantage
A portable air conditioner wall vent kit solves all of these problems. By drilling a small hole (usually 5–6 inches in diameter) into an exterior wall, you create a direct, sealed path for exhaust air. Here’s why that matters:
- Better efficiency: No leaks mean your AC works less to cool the room.
- Permanent solution: Once installed, it’s there for good (or until you decide to remove it).
- Cleaner aesthetics: No more hoses in windows. Just a discreet vent.
- Safer: No open windows, so no security or pest issues.
One friend of mine, a renter in a high-rise, used a wall vent kit in a closet with an exterior wall. He disguised the vent with a decorative grille, and his landlord never noticed. “It’s like my AC has a secret exit,” he told me. “And it cools the room 30% faster than before.”
How to Choose the Right Wall Vent Kit: 5 Key Factors
1. Compatibility with Your AC Unit
Not all wall vent kits fit all portable ACs. Check your unit’s exhaust hose diameter (usually 5 or 6 inches) and the type of connection (clamp, threaded, etc.). For example, the Honeywell MN10CESBB uses a 5-inch hose, while the Black+Decker BPACT14WT needs a 6-inch kit. A mismatch means leaks, inefficiency, or even damage to your AC.
Pro tip: If your AC has a unique hose design (like a twist-lock), look for kits with universal adapters. Brands like Whynter and Honeywell often sell kits specifically for their models.
2. Material and Durability
Wall vent kits are made from plastic, metal, or a mix. Here’s what to consider:
- Plastic: Lightweight and affordable, but can crack in extreme temperatures. Great for mild climates.
- Metal (aluminum/steel): More durable, weather-resistant, and long-lasting. Ideal for harsh winters or direct sun exposure.
- Hybrid: Plastic body with metal flanges. A good middle ground.
I once used a cheap plastic kit in a sunroom. After two summers, the UV exposure made it brittle and leaky. Lesson learned: invest in metal for longevity.
3. Vent Design: Fixed vs. Adjustable
Vent kits come in two styles:
- Fixed vents: Simple, one-piece units. Easy to install but offer no adjustability.
- Adjustable vents: Have sliding or rotating flaps to control airflow and prevent backdrafts. Better for rooms with fluctuating temperatures.
For example, the Vent Systems 6” Wall Vent Kit has a built-in damper to block wind and rain. If you live in a windy area, this is a must-have.
4. Insulation and Weatherproofing
A good kit includes foam gaskets or rubber seals to block drafts and moisture. Look for:
- Double seals: One on the interior and exterior flange.
- Insulated ducts: Prevents condensation inside the hose.
- Weather-resistant coatings: Especially for metal vents.
One reader shared a horror story: their uninsulated vent kit caused condensation to drip into the wall, leading to mold. “Now I only buy kits with full insulation,” they said.
5. Installation Complexity
Most kits are DIY-friendly, but some require special tools or skills. Ask yourself:
- Do you have a drill and hole saw? (You’ll need one for the hole.)
- Can you work safely on a ladder? (If the wall is high up.)
- Are you comfortable sealing around the vent? (Silicone caulk is your friend.)
For renters or those who hate DIY, consider a removable vent kit that uses a wall sleeve (no permanent drilling).
Top 5 Portable Air Conditioner Wall Vent Kits Reviewed
1. Vent Systems 6” Wall Vent Kit – Best Overall
This kit is a fan favorite for good reason. The 6-inch aluminum vent is durable, rust-proof, and comes with a built-in damper to block wind and rain. The foam gasket creates a tight seal, and the adjustable flange fits walls 4–12 inches thick. Installation is straightforward: drill a 6.5-inch hole, insert the vent, and secure it with screws.
Pros:
- Heavy-duty aluminum construction
- Adjustable for thick walls
- Includes all hardware and sealant
Cons:
- Not compatible with 5-inch hoses (but adapters are cheap)
- Damper can stick in humid climates
Real-world tip: One user installed this in a garage workshop. “It’s survived three hurricanes with no leaks,” they said. “Worth every penny.”
2. Kooljoe 5” Wall Vent Kit – Best for Small Units
Perfect for 5-inch hoses (like the Honeywell MN10CESBB), this kit uses a lightweight plastic vent with a metal exterior flange. The included foam tape seals gaps, and the vent’s low profile blends into the wall. Ideal for renters or quick installs.
Pros:
- Affordable and easy to install
- Compact design
- Includes extra sealant
Cons:
- Plastic may warp in direct sun
- No damper (so wind can blow air back in)
3. Whynter ARC-14S Wall Vent Kit – Best for Brand Compatibility
If you own a Whynter AC, this kit is a no-brainer. It’s designed specifically for the ARC-14S and similar models, with a custom-fit hose adapter and insulated duct. The vent has a sleek, modern look and a magnetic cover to hide it when not in use.
Pros:
- Perfect fit for Whynter units
- Magnetic cover for aesthetics
- Insulated to prevent condensation
Cons:
- Expensive
- Only works with Whynter ACs
4. AC Infinity 6” Wall Vent Kit – Best for Tech-Savvy Users
This kit includes a smart damper that opens and closes automatically based on airflow. It connects to your AC’s hose via a silicone collar (no clamps needed) and has a digital timer for energy savings. Great for those who love gadgets.
Pros:
- Automatic damper control
- Silicone collar for a leak-proof fit
- Energy-efficient design
Cons:
- Complex setup
- Requires batteries
5. FlexiMount 5” Removable Wall Vent – Best for Renters
No drilling required! This kit uses a wall sleeve that you insert into a pre-cut hole (or create one with a hole saw). The vent attaches magnetically and can be removed in seconds. Perfect for apartments or temporary setups.
Pros:
- No permanent damage
- Easy to remove and reuse
- Lightweight and portable
Cons:
- Less secure than fixed vents
- Not for high-wind areas
Step-by-Step Installation Guide (With Pro Tips)
Tools You’ll Need
- Drill with hole saw attachment (size depends on your kit)
- Measuring tape
- Level
- Screwdriver or wrench
- Silicone caulk
- Safety goggles and gloves
Step 1: Choose the Right Location
Pick a spot on an exterior wall, ideally:
- Close to your AC unit
- Near an electrical outlet
- Out of direct sunlight (to prevent overheating)
- At least 12 inches above the floor (to avoid debris)
Pro tip: Use a stud finder to avoid drilling into electrical wires or pipes. If you hit a stud, adjust the location slightly.
Step 2: Drill the Hole
- Mark the center point with a pencil.
- Drill a pilot hole (1/4 inch) to guide the hole saw.
- Use the hole saw to cut the main hole (e.g., 6.5 inches for a 6-inch vent).
- Vacuum up debris and check the hole’s depth.
Warning: If you hit insulation, cut it back with a utility knife. Don’t leave it blocking the hole.
Step 3: Install the Vent
- Insert the vent’s duct through the hole from the outside.
- Attach the interior flange with screws.
- Seal around the vent with silicone caulk (inside and outside).
- Attach the exterior flange (if separate) and secure it.
Pro tip: Apply a bead of caulk *before* inserting the vent to prevent gaps. Let it dry for 24 hours before using the AC.
Step 4: Connect the Hose
- Attach your AC’s hose to the vent’s interior collar.
- Secure it with a clamp (if provided).
- Turn on the AC and check for leaks.
Real-world tip: One installer shared: “I used duct tape as a backup seal. It’s not pretty, but it works in a pinch.”
Common Mistakes to Avoid (And How to Fix Them)
Mistake 1: Ignoring Local Building Codes
Some areas require permits for wall modifications. Always check with your city’s building department. For renters, get landlord approval first.
Fix: If you can’t drill, use a removable kit (like the FlexiMount) or a ceiling vent (if your AC supports it).
Mistake 2: Poor Sealing
Leaks around the vent waste energy and let bugs in. A common culprit? Skipping the caulk or using the wrong type (e.g., latex instead of silicone).
Fix: Use 100% silicone caulk. Apply a thick bead, then smooth it with a wet finger for a perfect seal.
Mistake 3: Wrong Vent Size
A 5-inch hose in a 6-inch vent? It’ll leak. A 6-inch hose in a 5-inch vent? It’ll strain your AC.
Fix: Measure your AC’s hose *before* buying. If you’re unsure, buy a kit with adapters.
Mistake 4: Forgetting the Damper
Without a damper, wind can blow hot air back into the room. This is a common issue in coastal areas.
Fix: Choose a kit with a built-in damper or add one later. The Vent Systems kit is a great example.
Mistake 5: Not Insulating the Duct
Condensation inside the hose can drip into the wall, causing mold. This is especially common in humid climates.
Fix: Buy a kit with an insulated duct or wrap the hose with foam pipe insulation (available at hardware stores).
Data Table: Top Wall Vent Kits at a Glance
| Kit Name | Hose Size | Material | Damper? | Insulated? | Price (USD) |
|---|---|---|---|---|---|
| Vent Systems 6” | 6” | Aluminum | Yes | No | $89.99 |
| Kooljoe 5” | 5” | Plastic/Metal | No | No | $49.99 |
| Whynter ARC-14S | 5” | Plastic | Yes | Yes | $129.99 |
| AC Infinity 6” | 6” | Plastic | Yes (smart) | Yes | $149.99 |
| FlexiMount 5” | 5” | Plastic | No | No | $59.99 |
Final Thoughts: Is a Wall Vent Kit Right for You?
Let’s cut to the chase: a portable air conditioner wall vent kit isn’t just a luxury—it’s a smart investment. Whether you’re tired of window leaks, want a permanent solution, or just hate the look of a dangling hose, this upgrade pays for itself in comfort and efficiency. But it’s not for everyone. If you’re a renter with strict rules, a temporary setup, or no access to an exterior wall, a window kit might still be your best bet.
For everyone else? Go for it. The Vent Systems 6” kit is my top pick for most users, but if you’re a Whynter owner, their custom kit is worth the extra cost. And if you’re renting, the FlexiMount lets you enjoy the benefits without breaking the rules. Just remember: measure twice, seal thoroughly, and never skip the damper. Your future self (and your energy bill) will thank you.
So, what are you waiting for? Say goodbye to drafty windows and hello to a cleaner, cooler home. And hey, if you’re still unsure, reach out to me. I’ve installed more wall vent kits than I can count—and I’m happy to help you pick the perfect one.
Frequently Asked Questions
What is a portable air conditioner wall vent kit?
A portable air conditioner wall vent kit is a set of components used to vent hot air from a portable AC unit through an exterior wall. It typically includes a vent hose, wall flange, and sealing materials to ensure a secure and energy-efficient installation.
Can I install a portable air conditioner wall vent kit myself?
Yes, most portable air conditioner wall vent kits are designed for DIY installation with basic tools. However, you may need to drill a hole through the wall, so it’s important to follow the manufacturer’s instructions carefully to avoid damage or leaks.
What size vent hose do I need for my portable AC unit?
The vent hose size usually ranges from 5 to 8 inches in diameter, depending on your portable air conditioner model. Always check your unit’s specifications to ensure compatibility with the wall vent kit you choose.
Do portable air conditioner wall vent kits prevent air leaks?
High-quality wall vent kits include sealing gaskets and insulation to minimize air leaks and improve efficiency. Proper installation is key to maintaining a tight seal and preventing energy loss.
Are portable air conditioner wall vent kits compatible with all models?
Most kits are designed to fit standard portable AC units, but compatibility can vary. Look for adjustable or universal kits, and always verify that the vent diameter and connection type match your air conditioner.
Where can I buy the best portable air conditioner wall vent kit?
You can find reliable portable air conditioner wall vent kits at home improvement stores, HVAC suppliers, or online retailers like Amazon and Home Depot. Reading customer reviews can help you choose a durable and easy-to-install option.