
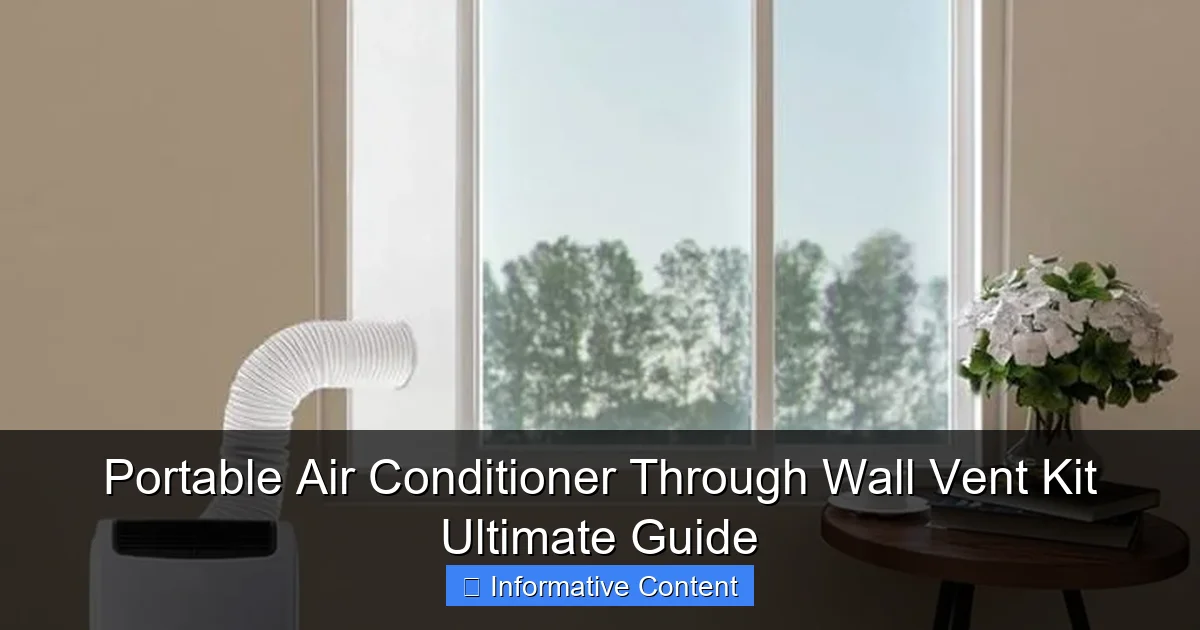
Featured image for portable air conditioner through wall vent kit
Image source: img.lazcdn.com
Maximize cooling efficiency and minimize indoor clutter with a portable air conditioner through wall vent kit—designed for permanent, secure venting without window limitations. These kits enable direct exhaust through exterior walls, improving airflow and reducing heat buildup, making them ideal for apartments, rooms without windows, or strict HOA rules. Easy to install and compatible with most portable AC units, they offer a clean, professional solution for long-term comfort.
Key Takeaways
- Choose a compatible vent kit: Match the kit size and type to your portable AC and wall for optimal performance.
- Seal gaps tightly: Prevent air leaks with foam gaskets or sealant to maximize cooling efficiency.
- Prioritize easy installation: Opt for kits with adjustable panels or universal fittings for hassle-free setup.
- Check local building codes: Ensure compliance before cutting through walls to avoid fines or safety issues.
- Insulate the vent hose: Reduce energy loss and improve efficiency by insulating the exhaust hose.
- Maintain regularly: Clean filters and vents monthly to sustain airflow and prolong AC lifespan.
📑 Table of Contents
- Portable Air Conditioner Through Wall Vent Kit Ultimate Guide
- What Is a Portable Air Conditioner Through Wall Vent Kit?
- Benefits of Using a Through-Wall Vent Kit
- Types of Through-Wall Vent Kits
- Step-by-Step Installation Guide
- Top Brands and Product Recommendations
- Common Mistakes to Avoid
- Is a Through-Wall Vent Kit Right for You?
Portable Air Conditioner Through Wall Vent Kit Ultimate Guide
It was the middle of July, and the heatwave had turned my apartment into a sauna. I’d just bought my first portable air conditioner, excited to finally get some relief. I set it up in the living room, plugged it in, and turned it on—only to realize I had no idea how to vent the hot air out. The window kit that came with it didn’t fit my sliding glass door, and I didn’t want to leave a gaping hole open all summer. That’s when I discovered the portable air conditioner through wall vent kit—a game-changer that let me cool my space efficiently without sacrificing security or insulation.
If you’ve ever felt that same frustration—sweating through a hot afternoon, wondering how to make your portable AC actually work—you’re not alone. Many people assume portable air conditioners are “plug-and-play,” but proper venting is essential for performance and energy efficiency. A through-wall vent kit allows you to permanently or semi-permanently route the exhaust hose through an exterior wall, keeping your indoor air cool and your home secure. In this guide, I’ll walk you through everything you need to know about these kits: what they are, how they work, how to install one, and whether they’re the right choice for your space. Whether you’re a renter, homeowner, or just trying to beat the heat, this guide will help you make an informed decision.
What Is a Portable Air Conditioner Through Wall Vent Kit?
A portable air conditioner through wall vent kit is a specialized installation system designed to allow your portable AC unit to vent hot air directly through an exterior wall. Unlike window kits, which rely on fitting hoses into window frames, a through-wall kit involves cutting a small opening in the wall (usually between 5 to 8 inches in diameter) and installing a vent panel or sleeve that securely holds the exhaust hose in place. This setup provides a more permanent, weatherproof, and energy-efficient solution for venting your portable AC.

Visual guide about portable air conditioner through wall vent kit
Image source: fantesphvac.com
How It Works
Portable air conditioners work by pulling in warm indoor air, cooling it using a refrigeration cycle, and then expelling the hot exhaust air outside. Without proper venting, the hot air simply recirculates back into the room, making the AC ineffective. A through-wall vent kit creates a dedicated pathway for this exhaust air, ensuring it exits your home completely. Most kits include:
- A wall sleeve or vent panel
- Insulated exhaust hose(s)
- Weatherproof seals and gaskets
- Mounting hardware and instructions
- Optional air filters or backdraft dampers
The hose connects from your portable AC unit to the interior side of the wall sleeve, while the exterior side remains sealed against the elements. Some kits also support dual-hose systems, which draw in fresh outdoor air for cooling and expel hot air separately—improving efficiency by up to 30% compared to single-hose models.
Why Choose a Through-Wall Kit Over a Window Kit?
Window kits are the most common venting solution, but they come with limitations. They often don’t seal tightly, letting in hot air and humidity. They can also block natural light, reduce security, and aren’t suitable for all window types (like sliding or casement windows). A through-wall vent kit solves these issues by:
- Providing a tighter, more secure seal
- Allowing full use of windows and doors
- Improving energy efficiency by minimizing air leaks
- Enabling use in rooms without windows or with difficult window configurations
For example, if you’re cooling a basement, garage, or sunroom with no operable windows, a through-wall kit may be your only viable option. It’s also ideal for renters who want a more permanent solution without damaging windows or violating lease agreements (as long as you get permission).
Benefits of Using a Through-Wall Vent Kit
Switching from a window kit to a through-wall vent system isn’t just about convenience—it offers real performance and comfort benefits. After installing one in my own home, I noticed a significant improvement in cooling speed, noise levels, and overall efficiency. Here’s why more people are making the switch.
Improved Cooling Efficiency
One of the biggest advantages is better thermal performance. Window kits often leave gaps around the hose, allowing hot outdoor air to seep back in. This “short-circuiting” forces your AC to work harder, increasing energy use and reducing cooling effectiveness. A properly installed through-wall kit creates a sealed pathway, minimizing heat gain and maximizing cooling output.
In fact, studies show that poorly sealed window vents can reduce AC efficiency by up to 20%. With a through-wall kit, you eliminate this issue. The insulated hose and tight seal keep the hot exhaust air where it belongs—outside. This means your portable AC can cool your space faster and maintain a consistent temperature with less strain on the compressor.
Enhanced Security and Aesthetics
Leaving a window partially open for venting can be a security risk, especially on the ground floor. A through-wall vent kit keeps your windows and doors fully closed and locked, giving you peace of mind. Plus, it looks cleaner and more professional. No more unsightly hoses dangling from windows or tape holding things in place.
I remember one summer when a neighbor’s window AC unit was stolen because the hose was left exposed. With a through-wall kit, the hose is hidden inside the wall, making it nearly impossible for thieves to access. It’s a small detail, but it adds up in terms of safety and curb appeal.
Better Air Quality and Humidity Control
Another benefit is improved indoor air quality. Many through-wall kits include built-in air filters or backdraft dampers that prevent outdoor pollutants, dust, and insects from entering your home. Some models even feature one-way airflow valves that stop cold air from escaping when the AC is off.
Additionally, because the system is more efficient at removing heat and moisture, you’ll notice better humidity control. This is especially helpful in humid climates, where excess moisture can lead to mold, mildew, and discomfort. A well-vented portable AC can reduce indoor humidity by 30–50%, making your space feel cooler and more comfortable.
Long-Term Cost Savings
While the upfront cost of a through-wall kit is higher than a basic window kit, the long-term savings can be significant. By improving efficiency, you reduce electricity usage—especially important if you run your AC for several hours a day. Over a single summer, this could mean savings of $20–$50 or more on your energy bill.
Plus, because the system is more durable and less prone to leaks, you’re less likely to need repairs or replacements. The hose and vent components are typically made from UV-resistant, weatherproof materials designed to last 5–10 years with minimal maintenance.
Types of Through-Wall Vent Kits
Not all through-wall vent kits are created equal. Depending on your portable AC model, wall type, and installation preferences, you’ll need to choose the right kit for your needs. Here’s a breakdown of the most common types.
Single-Hose vs. Dual-Hose Kits
The first decision is whether your portable AC uses a single-hose or dual-hose system. Most standard portable units are single-hose, meaning they draw in indoor air, cool it, and expel the hot air outside through one hose. While simple, this design can create negative pressure inside your home, pulling in warm, humid air from cracks and gaps—reducing efficiency.
Dual-hose systems, on the other hand, use one hose to bring in fresh outdoor air for cooling and another to expel hot air. This balanced airflow prevents pressure imbalances and improves cooling performance. If your AC supports dual hoses, look for a portable air conditioner through wall vent kit that accommodates both hoses through the same wall sleeve or uses two separate openings.
Adjustable vs. Fixed Wall Sleeves
Wall thickness varies depending on your home’s construction. Interior walls are typically 4–6 inches thick, while exterior walls can be 8–12 inches or more. Some vent kits come with adjustable sleeves that can extend to fit thicker walls, while others are fixed-length and may require trimming or additional spacers.
For example, if you live in an older home with thick brick or concrete walls, you’ll need a longer sleeve or a custom-cut solution. Always measure your wall thickness before purchasing a kit. Most standard kits fit walls up to 12 inches thick, but specialty models are available for thicker walls.
Insulated vs. Non-Insulated Hoses
Exhaust hoses come in insulated and non-insulated varieties. Insulated hoses have a layer of foam or reflective material that reduces heat transfer, keeping the hot air from warming up the surrounding area. This is especially important in tight spaces like closets or garages, where heat buildup can affect performance.
Non-insulated hoses are cheaper but less efficient. If you’re installing the kit in a conditioned space (like a bedroom or living room), an insulated hose is worth the extra cost. It helps maintain cooling efficiency and prevents condensation buildup inside the hose.
DIY vs. Professional Installation Kits
Some kits are designed for DIY installation, with pre-cut sleeves, easy-to-follow instructions, and minimal tools required. These are great for homeowners with basic handyman skills. Others are more complex and may require drilling through masonry, sealing with silicone, or modifying wall framing—best left to professionals.
If you’re not comfortable cutting into an exterior wall, consider hiring a contractor. Many HVAC companies offer vent kit installation as a service, often for $150–$300 depending on wall type and location. While it adds to the cost, it ensures a clean, code-compliant installation.
Step-by-Step Installation Guide
Installing a portable air conditioner through wall vent kit might sound intimidating, but with the right tools and preparation, it’s manageable for most homeowners. I walked through the process myself, and while it took a few hours, the results were worth it. Here’s how to do it safely and effectively.
Tools and Materials You’ll Need
Before you start, gather these essentials:
- Measuring tape
- Pencil or marker
- Stud finder
- Jigsaw or reciprocating saw (for wood/metal walls)
- Masonry drill and hammer drill (for brick/concrete)
- Level
- Caulk gun and weatherproof sealant
- Screwdriver or drill
- Safety goggles and gloves
Make sure your portable AC is unplugged and the room is well-ventilated. If you’re working on an exterior wall, check for electrical wires, plumbing, or HVAC ducts behind the wall using a stud finder with deep-scan capability.
Step 1: Choose the Right Location
Pick a spot on an exterior wall that’s:
- Close to where you’ll place the portable AC
- Free of obstructions (like furniture or cabinets)
- Accessible from both inside and outside
- Avoiding load-bearing walls or structural elements
Avoid installing near windows, doors, or vents that could interfere with airflow. The ideal height is about 12–18 inches above the floor to allow clearance for the hose and prevent tripping hazards.
Step 2: Measure and Mark the Opening
Use the template provided with your kit (or trace the sleeve) onto the wall. Double-check the size—most kits require a 5.5- to 7-inch diameter hole. Use a level to ensure the mark is straight, then drill a pilot hole from the inside to the outside to confirm alignment.
For wood or metal walls, use a jigsaw to cut along the marked circle. For brick or concrete, use a hammer drill with a masonry bit to create a series of holes around the perimeter, then chip out the center with a chisel. Wear safety goggles and a dust mask to protect yourself from debris.
Step 3: Install the Wall Sleeve
Insert the sleeve into the hole from the outside, ensuring it sits flush with the exterior wall. Secure it with screws or brackets according to the manufacturer’s instructions. Apply a bead of weatherproof sealant around the edges to prevent water infiltration.
On the interior side, attach the hose connector or flange. Make sure it’s tight and aligned with the sleeve. If your kit includes an interior cover plate, install it now to hide the hardware and improve aesthetics.
Step 4: Connect the Exhaust Hose
Attach one end of the insulated hose to your portable AC unit’s exhaust port. Secure it with a clamp if provided. Run the hose to the wall sleeve and connect the other end to the interior connector. Use duct tape or a hose clamp to ensure a snug fit.
If you’re using a dual-hose system, repeat the process for the intake hose. Some kits include a Y-connector or dual-port sleeve to accommodate both hoses through one opening.
Step 5: Test and Seal
Turn on your portable AC and let it run for 10–15 minutes. Check for air leaks around the hose connections and wall sleeve. If you feel warm air escaping, tighten the connections or apply additional sealant.
Finally, install any optional accessories like backdraft dampers or air filters. These help maintain efficiency and prevent pests from entering through the vent.
Top Brands and Product Recommendations
With so many options on the market, choosing the right portable air conditioner through wall vent kit can be overwhelming. Based on performance, durability, and customer reviews, here are some of the best kits available in 2024.
| Brand & Model | Hose Type | Wall Compatibility | Key Features | Price Range |
|---|---|---|---|---|
| Whynter ARC-14S Vent Kit | Dual-hose | Up to 12″ | Insulated hoses, weatherproof seal, easy install | $120–$150 |
| Black+Decker BPACT14WT Kit | Single-hose | Up to 10″ | Adjustable sleeve, includes sealant, compact design | $80–$100 |
| Frigidaire FHPW102AC1 Kit | Single-hose | Up to 8″ | Pre-cut sleeve, foam insulation, includes clamps | $70–$90 |
| hOmeLabs HME14000 Kit | Dual-hose | Up to 12″ | Heavy-duty sleeve, backdraft damper, UV-resistant | $130–$160 |
| SereneLife SLPAC10 Kit | Single-hose | Up to 10″ | Lightweight, includes installation guide, affordable | $60–$80 |
When choosing a kit, consider compatibility with your AC model, wall thickness, and whether you need single or dual-hose support. Reading customer reviews can also help identify common issues like poor sealing or difficult installation.
Common Mistakes to Avoid
Even with the best kit, a poor installation can ruin performance. Here are some common pitfalls I’ve seen—and how to avoid them.
Cutting the Hole Too Small or Too Large
A hole that’s too small won’t fit the sleeve, while one that’s too large creates gaps that are hard to seal. Always use the manufacturer’s template and double-check measurements. If you’re unsure, start smaller—you can always enlarge the hole slightly.
Ignoring Weatherproofing
Water intrusion is a major risk with through-wall installations. Skimping on sealant or using the wrong type can lead to leaks, mold, and structural damage. Use high-quality silicone or polyurethane sealant rated for exterior use. Apply it generously around the sleeve and hose connections.
Using the Wrong Hose Length
Too short, and the hose will pull on the AC unit; too long, and it can kink or trap condensation. Measure the distance from your AC to the wall and choose a hose that’s 1–2 feet longer for flexibility. Avoid sharp bends, which restrict airflow.
Not Checking for Obstructions
Before drilling, always scan the wall for wires, pipes, or studs. Hitting a live wire or water line can be dangerous and costly. Use a reliable stud finder and, if in doubt, consult a professional.
Forgetting to Insulate
Even with a sealed vent, heat can transfer through the hose if it’s not insulated. This is especially true in unconditioned spaces like garages. Always use an insulated hose and consider adding extra foam insulation around the sleeve if needed.
Is a Through-Wall Vent Kit Right for You?
After using one for two summers, I can confidently say a portable air conditioner through wall vent kit is a worthwhile investment—but it’s not for everyone. Here’s how to decide if it’s the right choice for your situation.
If you’re a homeowner with an older home, a basement apartment, or a room without windows, a through-wall kit offers unmatched efficiency and convenience. It’s also ideal if you’re tired of struggling with window kits or want a cleaner, more permanent solution.
However, if you’re a renter with strict lease terms, live in a historic building, or aren’t comfortable with DIY projects, you may want to explore alternatives like high-quality window kits or ductless mini-splits. Always check with your landlord or building manager before making any modifications.
Ultimately, the decision comes down to your priorities: efficiency, security, aesthetics, and long-term comfort. For me, the peace of mind and improved cooling performance made the effort worthwhile. If you’re ready to take your portable AC to the next level, a through-wall vent kit could be the upgrade you’ve been looking for.
Frequently Asked Questions
What is a portable air conditioner through wall vent kit?
A portable air conditioner through wall vent kit is a set of components designed to vent a portable AC unit through a wall, offering a semi-permanent and efficient cooling solution. Unlike standard window kits, these are ideal for homes without operable windows or where a cleaner, more secure installation is preferred.
Can I install a portable air conditioner through a wall without professional help?
Yes, most portable air conditioner through wall vent kits are designed for DIY installation with basic tools. However, you’ll need to cut a hole in the wall and follow manufacturer instructions carefully to ensure a proper seal and safe setup.
Are wall vent kits compatible with all portable air conditioners?
Most kits are compatible with standard single- or dual-hose portable ACs, but always check the manufacturer’s specifications for hose diameter and exhaust requirements. Some kits may need adapters for non-standard units.
What are the benefits of using a through-wall vent kit instead of a window?
A through-wall vent kit provides a tighter, more weatherproof seal than window venting, improving energy efficiency and reducing noise. It also frees up window space and offers better security compared to leaving a window partially open.
Do through-wall vent kits work for both exhaust and intake hoses?
Most dual-hose portable air conditioner through wall vent kits support both exhaust and intake hoses, which improves cooling efficiency by separating hot air expulsion from cool air intake. Single-hose units typically only vent exhaust through the wall.
How do I maintain a portable AC with a through-wall vent kit?
Regularly clean or replace the AC’s air filter and inspect the wall vent for debris or blockages. Ensure the exterior vent cover is sealed and free of dirt to maintain airflow and prevent energy loss.