
Featured image for panasonic air conditioner instructions
Image source: m.media-amazon.com
Master your Panasonic air conditioner with ease using this straightforward setup guide that walks you through every step—from unboxing to optimal operation. Clear, concise instructions ensure quick installation and reliable performance, so you can enjoy cool comfort without the hassle.
Key Takeaways
- Read the manual first: Always consult Panasonic air conditioner instructions before setup.
- Verify parts: Check all components against the included checklist immediately.
- Mount correctly: Ensure the unit is level and securely installed per guidelines.
- Use correct power source: Match voltage requirements to avoid damage or failure.
- Test after setup: Run a quick operational test before regular use.
- Save documentation: Keep manuals and warranty info accessible for future reference.
📑 Table of Contents
- Why Your Panasonic Air Conditioner Deserves the Right Start
- Understanding Your Panasonic Air Conditioner Model
- Step-by-Step Installation Guide
- Setting Up and Using Your Remote Control
- Daily Operation and Smart Features
- Troubleshooting Common Issues
- Maintenance Schedule and Longevity Tips
- Final Thoughts: Mastering Your Panasonic Air Conditioner
Why Your Panasonic Air Conditioner Deserves the Right Start
Let’s face it—setting up a new air conditioner can feel like solving a puzzle with missing pieces. You’ve got the sleek unit, the remote control, and a stack of manuals, but where do you even begin? If you’ve just brought home a Panasonic air conditioner, you’re in luck. These units are known for their reliability, energy efficiency, and smart features—but only if you set them up correctly. And that’s exactly where Panasonic air conditioner instructions come in.
I remember when I first installed my own Panasonic split system. I was excited, but also slightly overwhelmed by the number of buttons, modes, and settings. I skipped a few steps, thinking “how hard can it be?” Spoiler: It was harder than I expected. After a few trial-and-error cycles (and a slightly overworked compressor), I realized that following the Panasonic air conditioner instructions wasn’t just a suggestion—it was the key to getting the most out of my unit. Whether you’re installing a wall-mounted split system, a portable model, or a multi-split unit, this guide will walk you through every step with real-world tips, practical examples, and a dash of humor to keep things light.
Understanding Your Panasonic Air Conditioner Model
Before diving into setup, it’s essential to know what kind of Panasonic air conditioner you have. Not all models are created equal, and the Panasonic air conditioner instructions can vary slightly depending on the type. Let’s break it down so you don’t end up pressing the wrong button and wondering why your room feels like a sauna.
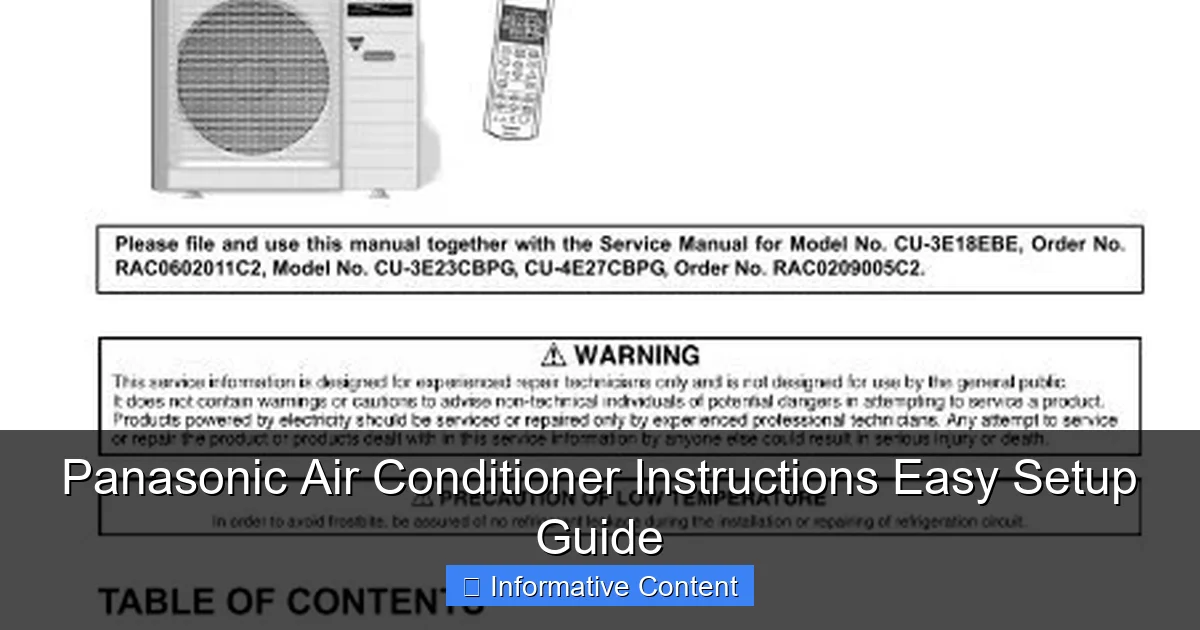
Visual guide about panasonic air conditioner instructions
Image source: img.yumpu.com
Types of Panasonic Air Conditioners
- Split System (Inverter & Non-Inverter): Most common in homes. Includes an indoor unit (evaporator) and an outdoor unit (condenser). Offers quiet operation and high energy efficiency. Popular models include the CS/CU-Z series and the XE series.
- Window Units: Compact and self-contained. Ideal for single rooms or apartments. Less common in newer Panasonic lines, but still available in select markets.
- Portable Air Conditioners: Great for renters or rooms without windows. Easy to move but less efficient than split systems. Models like the CS-PN10XKH are popular.
- Multi-Split Systems: One outdoor unit powers multiple indoor units. Perfect for larger homes. Requires professional installation.
Pro tip: Check the model number on the side or back of your unit (e.g., CS-Z35XKEW). This helps you download the correct user manual from Panasonic’s website. Trust me—trying to use the wrong manual is like trying to fit a square peg in a round hole.
Key Components You’ll Work With
- Indoor Unit: Mounted on the wall. Houses the fan, evaporator coil, and air filter.
- Outdoor Unit: Placed outside (usually on a bracket or concrete pad). Contains the compressor and condenser coil.
- Remote Control: Your command center. Controls temperature, fan speed, mode, and more.
- Drain Hose: Removes condensation. Must be properly routed to avoid leaks.
- Refrigerant Piping & Electrical Cables: Connects indoor and outdoor units. Should be installed by a licensed technician.
One thing I learned the hard way: never assume the remote control batteries are included. Always have a pair of AA batteries ready before setup. Nothing kills the mood like an unresponsive remote on a hot summer day.
Step-by-Step Installation Guide
Now that you know your model, let’s get into the nitty-gritty. Whether you’re a DIY enthusiast or planning to hire a pro, understanding the Panasonic air conditioner instructions for installation will save you time, money, and future headaches.
1. Choose the Right Location
Location is everything. For the indoor unit, pick a spot that’s:
- At least 1 meter away from heat sources (e.g., radiators, ovens).
- Free from direct sunlight (which can affect temperature sensors).
- At least 3 meters from the outdoor unit (check your manual for exact distance).
- On a strong, vertical wall that can support the unit’s weight (usually 10–15 kg).
Example: I once installed my unit above a bookshelf. Bad idea. The airflow was blocked, and the unit struggled to cool the room. After moving it to the center of the wall, performance improved dramatically.
2. Prepare the Wall and Drill the Hole
Use the template included in the box (or print it from the manual) to mark the drilling points. Drill a 65–75mm hole at a slight downward angle (about 1–2 degrees) to allow condensation to drain outside.
Tip: Use a vacuum to clean up dust from drilling. You don’t want debris falling into your new unit.
3. Mount the Indoor Unit
- Attach the mounting plate to the wall using screws and anchors (included).
- Hang the indoor unit on the plate. Make sure it’s level.
- Connect the refrigerant pipes, drain hose, and electrical cables through the wall hole.
Important: Do not kink or bend the refrigerant pipes. A sharp bend can reduce efficiency or cause refrigerant leaks.
4. Install the Outdoor Unit
- Place it on a stable, level surface (concrete pad or wall bracket).
- Ensure there’s at least 30 cm of clearance on all sides for airflow.
- Connect the refrigerant lines and power cables from the indoor unit.
- Secure the drain hose so water flows away from the unit.
Warning: If you’re not comfortable with electrical or refrigerant work, hire a licensed HVAC technician. Safety first!
5. Vacuum and Leak Test
This step is often skipped by DIYers, but it’s critical. Use a vacuum pump to remove air and moisture from the refrigerant lines (usually for 30–60 minutes). Then, perform a leak test using nitrogen or a refrigerant detector.
Without this step, your unit may underperform or fail prematurely. I learned this after my unit ran for months with low cooling—turned out there was a tiny refrigerant leak.
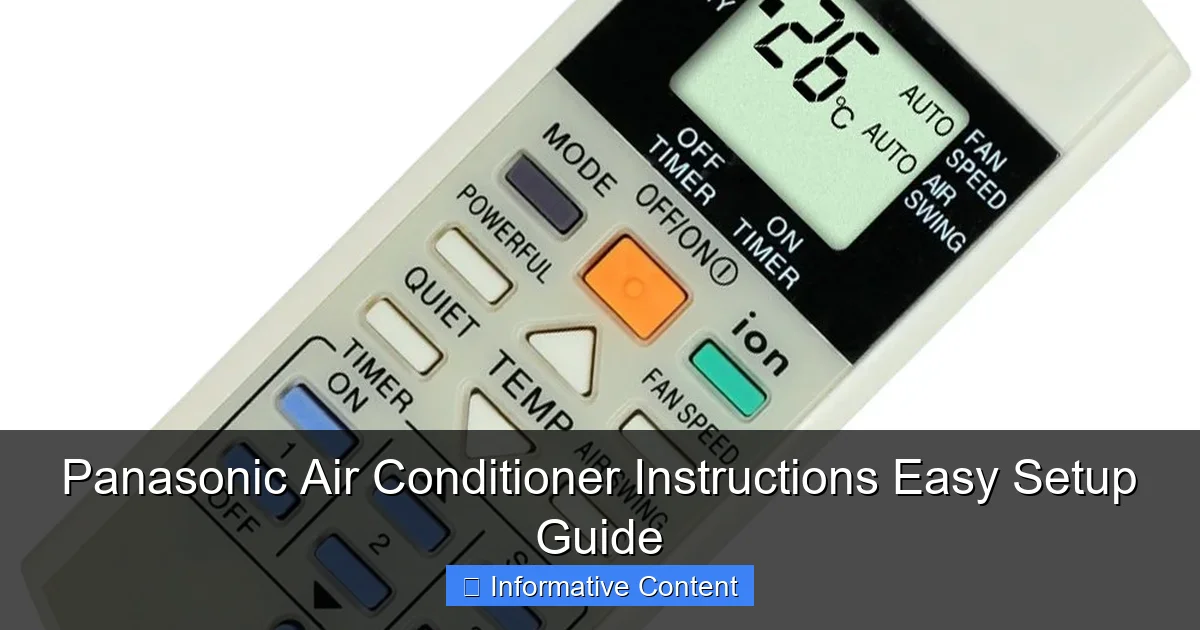
Setting Up and Using Your Remote Control
Once installed, the remote control becomes your best friend. But with so many buttons, it’s easy to get confused. Let’s decode the Panasonic air conditioner instructions for remote operation.
Remote Control Layout and Functions
- Power Button: Turns the unit on/off.
- Mode Button: Cycles through Cool, Heat, Dry, Fan, and Auto modes.
- Temperature Up/Down: Adjusts set temperature (usually 16–30°C).
- Fan Speed: Low, Medium, High, or Auto (follows temperature demand).
- Swing Button: Adjusts vertical or horizontal louvers for better airflow.
- Timer: Set on/off schedules (great for saving energy).
- Quiet Mode: Reduces fan speed for quieter operation at night.
- Eco Mode: Optimizes energy use by adjusting compressor speed.
- Nanoe-G / Air Purification: Activates air ionizer to reduce dust, mold, and allergens (on select models).
Pro tip: Press and hold the “Swing” button for 2 seconds to reset the louver position if it gets stuck.
First-Time Setup Tips
- Pair the Remote: Most Panasonic remotes pair automatically. If not, point it at the indoor unit and press any button.
- Set the Clock: Press and hold the “Clock” button until it flashes, then adjust with up/down arrows.
- Test All Modes: Run each mode (Cool, Heat, Dry) for 5–10 minutes to ensure they work.
- Check Airflow: Feel the air coming from the unit. It should be strong and consistent.
One thing I always do: set a timer to turn the unit off 30 minutes before bedtime. That way, it cools the room just enough without overworking overnight.
Daily Operation and Smart Features
Now that your unit is up and running, let’s talk about how to use it efficiently. The Panasonic air conditioner instructions cover more than just buttons—they’re about smart habits too.
Best Practices for Daily Use
- Use Auto Mode: The unit adjusts fan speed and temperature automatically. Saves energy and maintains comfort.
- Keep Doors and Windows Closed: Prevents hot air from entering. Even a small gap can reduce efficiency by 20–30%.
- Clean the Air Filter Monthly: A dirty filter restricts airflow and increases energy use. Just remove it, rinse with water, and let it dry.
- Set the Right Temperature: 24–26°C is ideal for cooling. Every degree below 24°C increases energy use by 6–8%.
- Use Eco Mode at Night: Reduces power consumption without sacrificing comfort.
Real-life example: I used to set my unit to 18°C at night, thinking it would cool faster. Instead, it ran all night and my electricity bill skyrocketed. Now I use Eco Mode at 25°C—just as comfortable, half the cost.
Smart Features You Might Not Know About
- Wi-Fi Control (on select models): Use the Panasonic Comfort Cloud app to control your AC from your phone. Great for pre-cooling your home before you arrive.
- Sleep Mode: Gradually increases temperature by 1°C per hour to prevent overcooling.
- Self-Cleaning Function: Some models (like the XE series) run a drying cycle after shutdown to prevent mold in the unit.
- Airflow Direction Memory: Remembers your preferred louver position.
Tip: If your model supports Wi-Fi, connect it to your home network during setup. It only takes 2 minutes and unlocks remote control, usage reports, and firmware updates.
Troubleshooting Common Issues
Even the best Panasonic units can have hiccups. Here’s how to diagnose and fix common problems using the Panasonic air conditioner instructions as your guide.
Unit Not Turning On
- Check if the remote has batteries.
- Verify the power supply to the indoor unit (test with a lamp).
- Look at the error code on the display (e.g., “H11” = communication error between units).
- Reset the unit: Turn off power, wait 5 minutes, then turn it back on.
Weak or No Cooling
- Clean the air filter.
- Check if the outdoor unit is blocked by leaves or debris.
- Ensure the refrigerant lines aren’t kinked.
- Verify the set temperature is lower than room temperature.
Water Leaking from Indoor Unit
- Check if the drain hose is clogged or improperly angled.
- Ensure the indoor unit is level (tilt can block drainage).
- Clean the drain pan if mold is present.
Unusual Noises
- Clicking: Normal during startup/shutdown.
- Buzzing: Could be loose parts or electrical issue—call a technician.
- Water Dripping: Normal if from the outdoor unit. If from indoor unit, check drain.
Remember: If you see an error code (e.g., “F97”), look it up in your manual or visit Panasonic’s support site. Most codes point to specific issues—don’t ignore them!
Maintenance Schedule and Longevity Tips
Want your Panasonic air conditioner to last 10+ years? Maintenance is key. Think of it like changing the oil in your car—small efforts prevent big problems.
| Task | Frequency | Details |
|---|---|---|
| Clean Air Filter | Monthly | Remove, rinse with water, dry completely before reinstalling. |
| Inspect Drain Hose | Every 3 months | Ensure no clogs or kinks. Flush with vinegar if moldy. |
| Clean Outdoor Unit | Every 6 months | Remove leaves, debris, and hose down fins (avoid high pressure). |
| Check Refrigerant Lines | Annually | Look for cracks, leaks, or damage. Call a pro if unsure. |
| Professional Service | Every 2–3 years | Technician checks refrigerant levels, electrical connections, and overall performance. |
Bonus Tips for Long Life
- Use a Surge Protector: Power surges can damage the control board.
- Cover the Outdoor Unit in Winter: Use a breathable cover to protect from snow and ice.
- Turn Off During Long Absences: Save energy and reduce wear.
- Update Firmware (Wi-Fi models): Check the app for updates to improve performance.
I’ve had my Panasonic unit for 6 years now, and it still runs like new. The secret? Monthly filter cleaning and a professional check every 2 years. It’s a small price to pay for reliable comfort.
Final Thoughts: Mastering Your Panasonic Air Conditioner
Setting up and using a Panasonic air conditioner doesn’t have to be intimidating. With the right Panasonic air conditioner instructions, a little patience, and these practical tips, you’ll be enjoying cool, clean air in no time. From choosing the perfect spot for your indoor unit to mastering the remote’s hidden features, every step matters.
Remember, your air conditioner is more than just a cooling device—it’s an investment in your comfort and health. Follow the maintenance schedule, use the smart features wisely, and don’t hesitate to call a pro when needed. And if you ever feel stuck? Just grab your manual, check the error codes, or visit Panasonic’s support site. You’ve got this!
Now, go enjoy that crisp, cool air—you’ve earned it.
Frequently Asked Questions
How do I set up my Panasonic air conditioner for the first time?
Follow the Panasonic air conditioner instructions in the user manual to install the unit, connect the drainage hose, and secure the mounting plate. Ensure the power is off during setup, and use the remote to test basic functions after installation.
Why is my Panasonic AC not cooling properly?
Check if the air filter is clogged or if the temperature setting is too high, as both can reduce cooling efficiency. Refer to the troubleshooting section of your Panasonic air conditioner instructions for guidance on cleaning filters and adjusting settings.
Can I use the Panasonic AC without the remote control?
Yes, most models have a manual power button and mode switch on the unit itself. However, the remote provides full access to features like timer settings, fan speed, and eco modes outlined in the instructions.
How often should I clean the air filters in my Panasonic AC?
Panasonic recommends cleaning the filters every two weeks for optimal performance. The Panasonic air conditioner instructions include step-by-step guidance on removing, washing, and reinstalling the filters.
What do the error codes on my Panasonic AC display mean?
Error codes (e.g., “H99” or “F12”) indicate specific issues like sensor problems or refrigerant leaks. Consult the “Troubleshooting” section of your Panasonic air conditioner instructions or contact customer support for code explanations.
How do I enable the timer or sleep mode on my Panasonic AC?
Press the “Timer” or “Sleep” button on the remote and adjust the duration or temperature using the arrow keys. Detailed steps are available in the Panasonic air conditioner instructions under “Advanced Features.”