

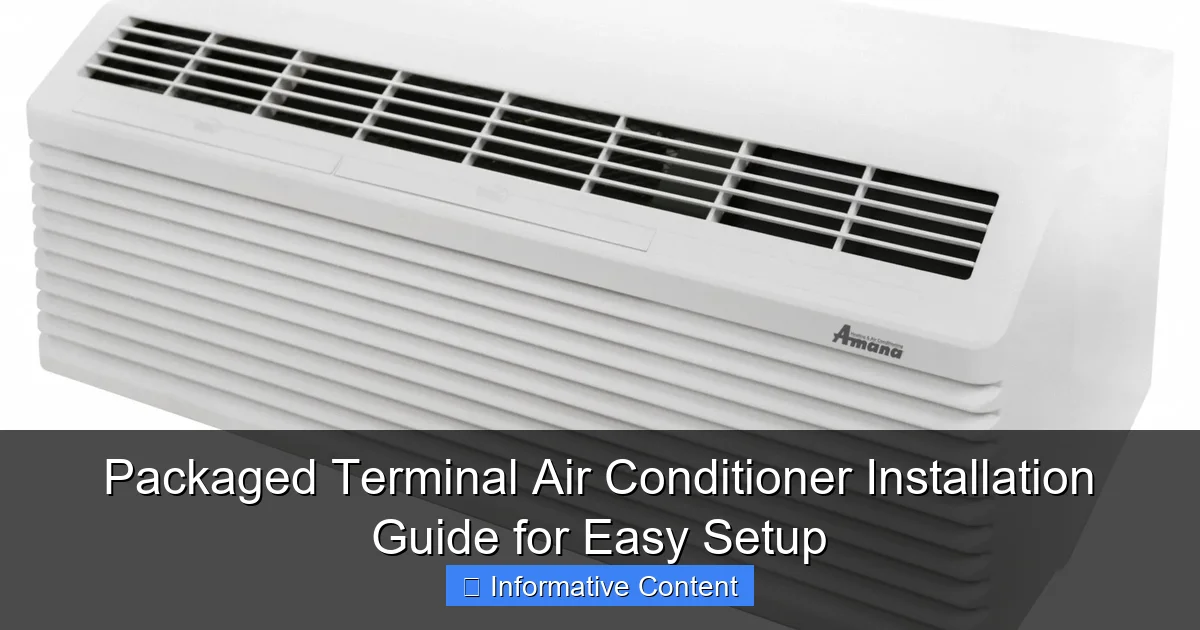
Featured image for packaged terminal air conditioner installation
Image source: sharonshvac.com
Proper installation of a packaged terminal air conditioner (PTAC) ensures optimal performance, energy efficiency, and long-term reliability. This guide walks you through a step-by-step setup, from selecting the right wall sleeve and checking electrical requirements to securing the unit and sealing gaps for weather resistance. Avoid common pitfalls and enjoy a cool, quiet space with a professional-quality installation.
Key Takeaways
- Measure carefully: Ensure correct PTAC dimensions before ordering or installing.
- Seal the unit: Use weatherstripping to prevent air leaks and improve efficiency.
- Follow wiring diagrams: Always match electrical connections to manufacturer specifications.
- Secure the chassis: Anchor the unit firmly to support its weight and reduce vibration.
- Test after setup: Run a full cycle to verify cooling, heating, and airflow performance.
- Maintain clearance: Keep indoor and outdoor vents unobstructed for optimal airflow.
📑 Table of Contents
- What Is a Packaged Terminal Air Conditioner (PTAC) and Why Should You Consider It?
- Is a PTAC Right for Your Space? Key Considerations Before Installation
- Step-by-Step Packaged Terminal Air Conditioner Installation Guide
- Common Installation Mistakes (And How to Avoid Them)
- Maintenance Tips to Keep Your PTAC Running Smoothly
- Cost Breakdown and Energy Efficiency Considerations
- Final Thoughts: Your PTAC Journey Starts Here
What Is a Packaged Terminal Air Conditioner (PTAC) and Why Should You Consider It?
Imagine this: you’re sitting in your hotel room on a sweltering summer afternoon. The sun beats down on the window, and the air feels thick. But then, with a gentle hum, a cool breeze starts to flow from the wall unit. Within minutes, the room is refreshingly cool. That’s the magic of a packaged terminal air conditioner (PTAC) — a compact, self-contained HVAC unit designed to cool (and often heat) individual rooms or zones. PTACs are a go-to solution for hotels, motels, dormitories, apartments, and even some homes, especially where central HVAC isn’t practical or cost-effective.
Unlike window units or split systems, PTACs are installed through an exterior wall or a sleeve in a window opening. They combine all components — compressor, condenser, evaporator, and fan — into a single unit, making them easier to maintain and more efficient in certain settings. What’s more, many modern PTACs come with energy-saving features, smart thermostats, and even heat pump functionality. If you’re considering a packaged terminal air conditioner installation for your space, you’re not just investing in comfort — you’re opting for flexibility, reliability, and long-term savings.
Is a PTAC Right for Your Space? Key Considerations Before Installation
Before you dive into a packaged terminal air conditioner installation, it’s important to assess whether a PTAC is the best fit for your needs. These units are incredibly versatile, but they’re not a one-size-fits-all solution. Let’s walk through the key factors to consider.
Visual guide about packaged terminal air conditioner installation
Image source: static.grainger.com
Room Size and Cooling Needs
PTACs come in various capacities, typically measured in BTUs (British Thermal Units). A standard room of 300–400 square feet usually requires a 9,000–12,000 BTU unit. Larger rooms or spaces with high sun exposure may need 15,000 BTUs or more. Use this simple rule of thumb: 20 BTUs per square foot. For example, a 400 sq ft room needs about 8,000 BTUs — but if it’s a south-facing bedroom in Arizona, bump it up to 10,000–12,000 BTUs for better performance.
Pro tip: Don’t oversize your PTAC. An oversized unit will cool the room quickly but won’t run long enough to dehumidify properly, leaving the space feeling damp and clammy. Undersizing, on the other hand, leads to constant running and higher energy bills.
Wall Type and Sleeve Compatibility
Most PTACs are designed to slide into a wall sleeve — a metal or plastic housing installed through the exterior wall. Older buildings may already have sleeves from previous units, but if not, you’ll need to cut an opening. The standard sleeve size is 42” wide x 16” high, but always check your model’s specifications.
Brick, stucco, and concrete walls require special tools (like a concrete saw or core drill) and sealing techniques. Wood-framed walls are easier to work with but still need proper flashing and vapor barriers to prevent moisture intrusion. If you’re replacing an old unit, measure the existing sleeve carefully — not all PTACs are interchangeable.
Electrical Requirements
This is a big one. Most PTACs require a dedicated 208/230-volt circuit with a specific amperage (usually 15–30 amps). That’s not your standard 110-volt outlet. If your building only has 110-volt circuits, you’ll need an electrician to run a new line from the breaker panel. Running the wrong voltage can damage the compressor and void the warranty.
I once helped a friend install a PTAC in his beachside rental. We assumed the existing wiring was sufficient — only to find out later that the unit kept tripping the breaker. A quick call to an electrician saved us from a costly repair. Moral of the story: check your voltage and amperage before buying a unit.
Climate and Heating Needs
Many PTACs offer both cooling and heating. If you live in a region with cold winters, a heat pump or electric heat strip model is worth the investment. But if you’re in a mild climate, a cooling-only unit might suffice. Also, consider humidity levels — some PTACs have better dehumidification features than others.
For example, a hotel in Florida might prioritize dehumidification over heating, while a ski resort in Colorado would want a robust heating function. Know your climate and usage patterns.
Step-by-Step Packaged Terminal Air Conditioner Installation Guide
Now that you’ve decided a PTAC is right for you, it’s time to roll up your sleeves. A packaged terminal air conditioner installation can be a DIY-friendly project if you’re handy with tools — but don’t underestimate the need for precision. Let’s break it down into clear, manageable steps.
Step 1: Gather Your Tools and Materials
Before you start, make sure you have:
- Measuring tape
- Level
- Drill and bits (including masonry bits for concrete/brick)
- Jigsaw or reciprocating saw (for cutting wood or metal)
- Utility knife
- Silicone caulk and backer rod (for sealing)
- Flashing tape or metal flashing
- Screwdrivers and wrenches
- Safety gear (gloves, goggles, dust mask)
- PTAC unit and sleeve (if not already installed)
If you’re installing a new sleeve, you may also need a circular saw (for wood) or a core drill (for concrete/brick).
Step 2: Prepare the Wall Opening
If you’re replacing an old unit, remove it first and inspect the sleeve. Clean out any debris, rust, or insulation. If the sleeve is damaged, replace it — a warped or corroded sleeve can cause leaks and poor performance.
For new installations, mark the opening on the interior wall using the sleeve’s dimensions. Use a level to ensure it’s perfectly square. Drill pilot holes from the inside to mark the corners on the exterior, then cut the opening from the outside. Always start from the outside to avoid damaging interior finishes.
Once the hole is cut, insert the sleeve and secure it with screws. The sleeve should extend slightly beyond the interior wall for proper fit. Use shims to level it — this is crucial for proper drainage and operation.
Step 3: Weatherproof the Sleeve
This step is often overlooked but absolutely essential. Moisture is the enemy of any wall-mounted HVAC unit.
- Apply a bead of silicone caulk around the exterior flange of the sleeve where it meets the wall.
- Install metal flashing above the sleeve (like a mini roof) to direct water away from the opening.
- Use backer rod and caulk to seal any gaps between the sleeve and the wall.
- On the interior, install a trim kit or decorative cover to hide the gap.
I learned this the hard way when I skipped the flashing on a PTAC install. Two weeks later, a heavy rainstorm left a damp spot on the ceiling. A $20 piece of flashing could’ve saved me hours of cleanup.
Step 4: Install the PTAC Unit
With the sleeve in place and sealed, it’s time to slide in the unit. Most PTACs come with a mounting bracket or rails. Attach these to the sleeve according to the manufacturer’s instructions.
Carefully lift the unit (they’re heavy — get help if needed) and slide it into the sleeve. Make sure it sits flush against the interior wall. Secure it with the provided screws or latches. Some models have a locking mechanism to prevent tampering — great for rental properties.
Important: Don’t force the unit. If it doesn’t slide in easily, check for obstructions or misalignment. Forcing it can damage the sleeve or the unit’s chassis.
Step 5: Connect Power and Test
Now for the electrical work. Turn off the power at the breaker before making any connections. Run the PTAC’s power cord (or hardwired connection) to the dedicated circuit. If your unit has a plug, use a NEMA 6-20 or 6-30 outlet, depending on amperage. For hardwired units, connect the wires (typically black, red, white, and green) to the corresponding terminals.
Once connected, restore power and turn on the unit. Listen for smooth operation — no grinding, buzzing, or rattling. Check that air flows from both the front (cool air) and top/bottom (condenser air). Set the thermostat to a low temperature and let it run for 10–15 minutes. Feel the airflow and check for leaks around the sleeve.
Common Installation Mistakes (And How to Avoid Them)
Even seasoned DIYers make mistakes during a packaged terminal air conditioner installation. Here are the most common pitfalls — and how to steer clear of them.
1. Poor Sleeve Leveling
A crooked sleeve causes two major problems: poor drainage and air leaks. If the unit isn’t level, condensate water can pool inside the chassis, leading to corrosion or electrical issues. It also creates gaps around the unit, letting hot or cold air escape.
Solution: Use a 2-foot level on both the front and sides of the sleeve. Shim as needed until it’s perfectly level. A 1/8-inch tilt toward the outside is ideal for drainage.
2. Inadequate Weatherproofing
As I mentioned earlier, skipping the flashing or caulk is a recipe for water damage. But it’s not just about rain — condensation can also seep into walls if the sleeve isn’t sealed properly.
Solution: Use high-quality silicone caulk and metal flashing. Apply caulk on both the interior and exterior. For extra protection, use vapor barrier tape on the interior edges.
3. Wrong Electrical Connection
This is a serious safety hazard. Connecting a 230-volt unit to a 110-volt circuit (or vice versa) can fry the compressor, melt wires, or even cause a fire. I’ve seen units with “110V” stickers that actually require 230V — always check the nameplate on the unit itself.
Solution: Verify voltage and amperage requirements on the unit’s label. If you’re unsure, hire a licensed electrician. It’s better to pay for a pro than risk a costly repair.
4. Blocking Airflow
PTACs need clear airflow on both sides. The front (evaporator) side should have at least 12 inches of clearance. The rear (condenser) side needs 24–36 inches of unobstructed space outside. Don’t install the unit behind heavy curtains, furniture, or in a recessed niche.
Pro tip: If you must place furniture near the unit, use a low-profile dresser or shelf that doesn’t block the air intake vents.
5. Ignoring the Drain Pan
All PTACs have a condensate drain pan. If it’s clogged or misaligned, water can overflow and damage the unit or wall. Some models have a drain kit or hose connection for routing water outside.
Solution: Check the drain pan during installation. Clean it if necessary, and ensure it’s properly seated. If your unit has a drain hose, connect it and route it to a safe discharge point.
Maintenance Tips to Keep Your PTAC Running Smoothly
A well-installed PTAC can last 10–15 years — but only if you maintain it properly. Think of it like a car: regular tune-ups prevent breakdowns and save money in the long run.
Monthly: Clean or Replace the Air Filter
Dirty filters restrict airflow, reduce efficiency, and strain the motor. Most PTACs have a washable or replaceable filter behind the front panel. Remove it monthly and rinse with water (for washable types) or replace it (for disposable ones).
For high-occupancy spaces like hotels, clean filters weekly during peak season. I once managed a motel where guests complained of poor airflow — turns out, the filters hadn’t been cleaned in six months. A 10-minute job fixed the entire issue.
Quarterly: Inspect and Clean the Coils
The evaporator and condenser coils collect dust and debris over time. This reduces heat transfer and forces the unit to work harder. Use a soft brush or vacuum to clean the coils every 3–4 months. For heavy buildup, use a coil cleaner (available at HVAC supply stores).
Note: Never use a pressure washer — it can bend the delicate fins.
Bi-Annually: Check the Drain Pan and Condensate Line
Even with a clean filter, algae and mold can grow in the drain pan. Every six months, remove the front panel and inspect the pan. Scrub it with a mild bleach solution (1:10 bleach to water) to kill bacteria. If your unit has a condensate drain hose, flush it with water to clear clogs.
Annually: Professional Tune-Up
While DIY maintenance is great, a licensed HVAC technician should inspect the unit once a year. They’ll check refrigerant levels, electrical connections, and overall performance. This is especially important for commercial installations where downtime equals lost revenue.
During a recent tune-up, my technician found a loose wire that could’ve caused a short. A $100 service call saved me a potential $1,000 repair.
Cost Breakdown and Energy Efficiency Considerations
Let’s talk money. A packaged terminal air conditioner installation isn’t just about the unit — it includes labor, materials, and long-term energy costs. Here’s what to expect.
Upfront Costs
| Item | Low End | High End | Notes |
|---|---|---|---|
| PTAC Unit (12,000 BTU) | $500 | $1,200 | Cooling-only models are cheaper; heat pump models cost more |
| Sleeve (if needed) | $50 | $150 | Metal sleeves last longer than plastic |
| Electrical Work | $200 | $800 | Depends on distance from panel and complexity |
| Tools & Materials | $100 | $300 | Caulk, flashing, screws, etc. |
| Professional Installation | $300 | $1,000 | Recommended for new sleeves or electrical work |
| Total | $1,150 | $3,450 | DIY can save $300–$800 |
As you can see, the total cost varies widely. If you’re handy and have the tools, DIY can save hundreds. But if you need a new sleeve or electrical work, hiring a pro is worth the peace of mind.
Energy Efficiency and Savings
Modern PTACs are far more efficient than older models. Look for units with an Energy Efficiency Ratio (EER) of 10 or higher. For example, a 12,000 BTU unit with an EER of 11 uses about 1,090 watts — compared to 1,500 watts for a lower-efficiency model. That’s a 27% energy saving!
Over 10 years, that can add up to hundreds of dollars in savings, especially in high-usage areas. Many utility companies also offer rebates for ENERGY STAR® certified PTACs — check with your provider.
Another tip: use a programmable or smart thermostat. Set it to 78°F when the room is occupied and 85°F when empty. This simple habit can reduce cooling costs by 10–15%.
Final Thoughts: Your PTAC Journey Starts Here
Installing a packaged terminal air conditioner might seem daunting at first, but with the right preparation, it’s a manageable project that pays off in comfort and efficiency. Whether you’re upgrading a hotel room, cooling a basement apartment, or replacing an old wall unit, a PTAC offers a reliable, all-in-one solution.
Remember the key takeaways: choose the right size, seal the sleeve properly, check your electrical setup, and maintain the unit regularly. Don’t rush — take your time with the installation, and don’t hesitate to call in a pro for the tricky parts. After all, a well-installed PTAC doesn’t just cool a room — it creates a comfortable, healthy environment for years to come.
So go ahead, grab your tools, and get started. That cool, refreshing air is just a few steps away. And when you’re lounging in your perfectly cooled space, you’ll thank yourself for doing it right the first time.
Frequently Asked Questions
What is a packaged terminal air conditioner (PTAC) installation?
A packaged terminal air conditioner (PTAC) installation involves mounting a self-contained unit through a wall or window sleeve to provide heating and cooling to individual rooms. These units are commonly used in hotels, apartments, and commercial spaces due to their compact design and efficiency.
Do I need professional help for a PTAC installation?
While DIY installation is possible, hiring a professional ensures proper electrical connections, secure mounting, and adherence to local building codes. Improper installation can lead to performance issues or safety hazards.
Can I install a packaged terminal air conditioner myself?
Yes, if you have basic electrical and carpentry skills, you can handle a packaged terminal air conditioner installation. However, always turn off power at the breaker and follow the manufacturer’s instructions carefully to avoid risks.
What tools are needed for PTAC unit installation?
Common tools include a drill, level, screwdriver, measuring tape, and a saw for cutting the wall sleeve. A voltage tester and sealant are also recommended to ensure safety and weatherproofing.
How long does a typical PTAC installation take?
A standard packaged terminal air conditioner installation takes 2–4 hours, depending on wall type, electrical setup, and whether the sleeve is pre-installed. Complex projects may require additional time.
Are permits required for installing a PTAC unit?
In many areas, permits are needed for PTAC installation due to electrical and structural modifications. Check with your local building department to ensure compliance with regulations and avoid fines.