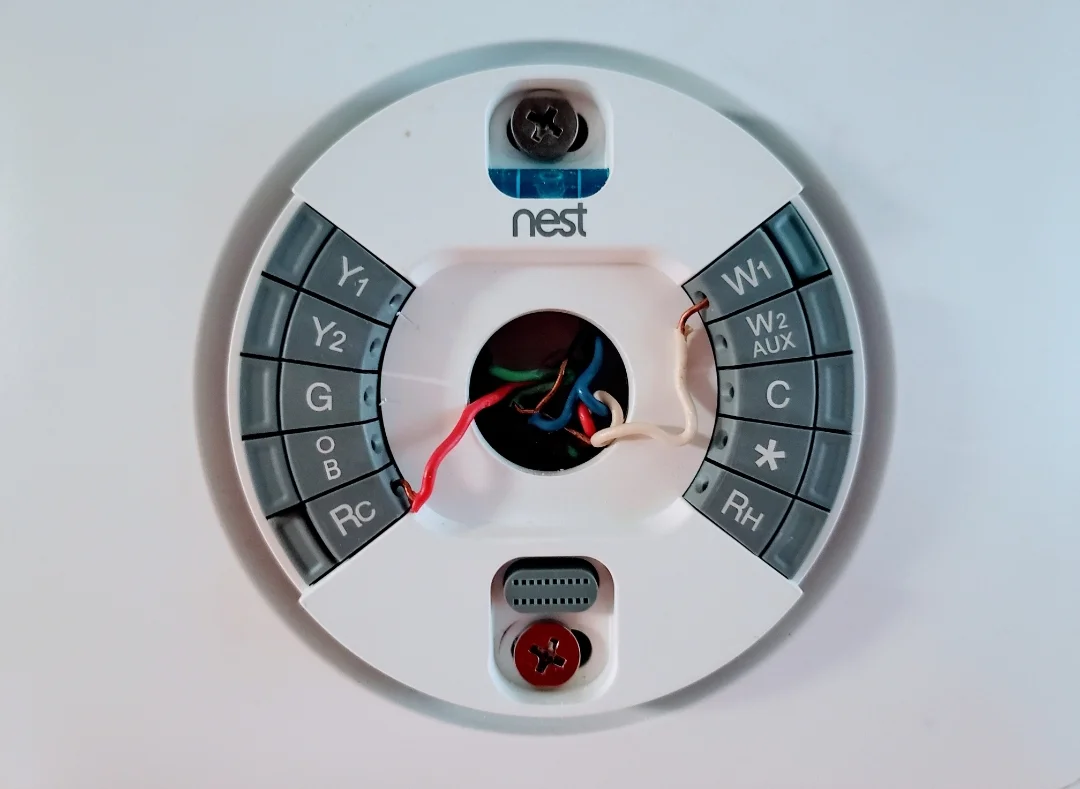
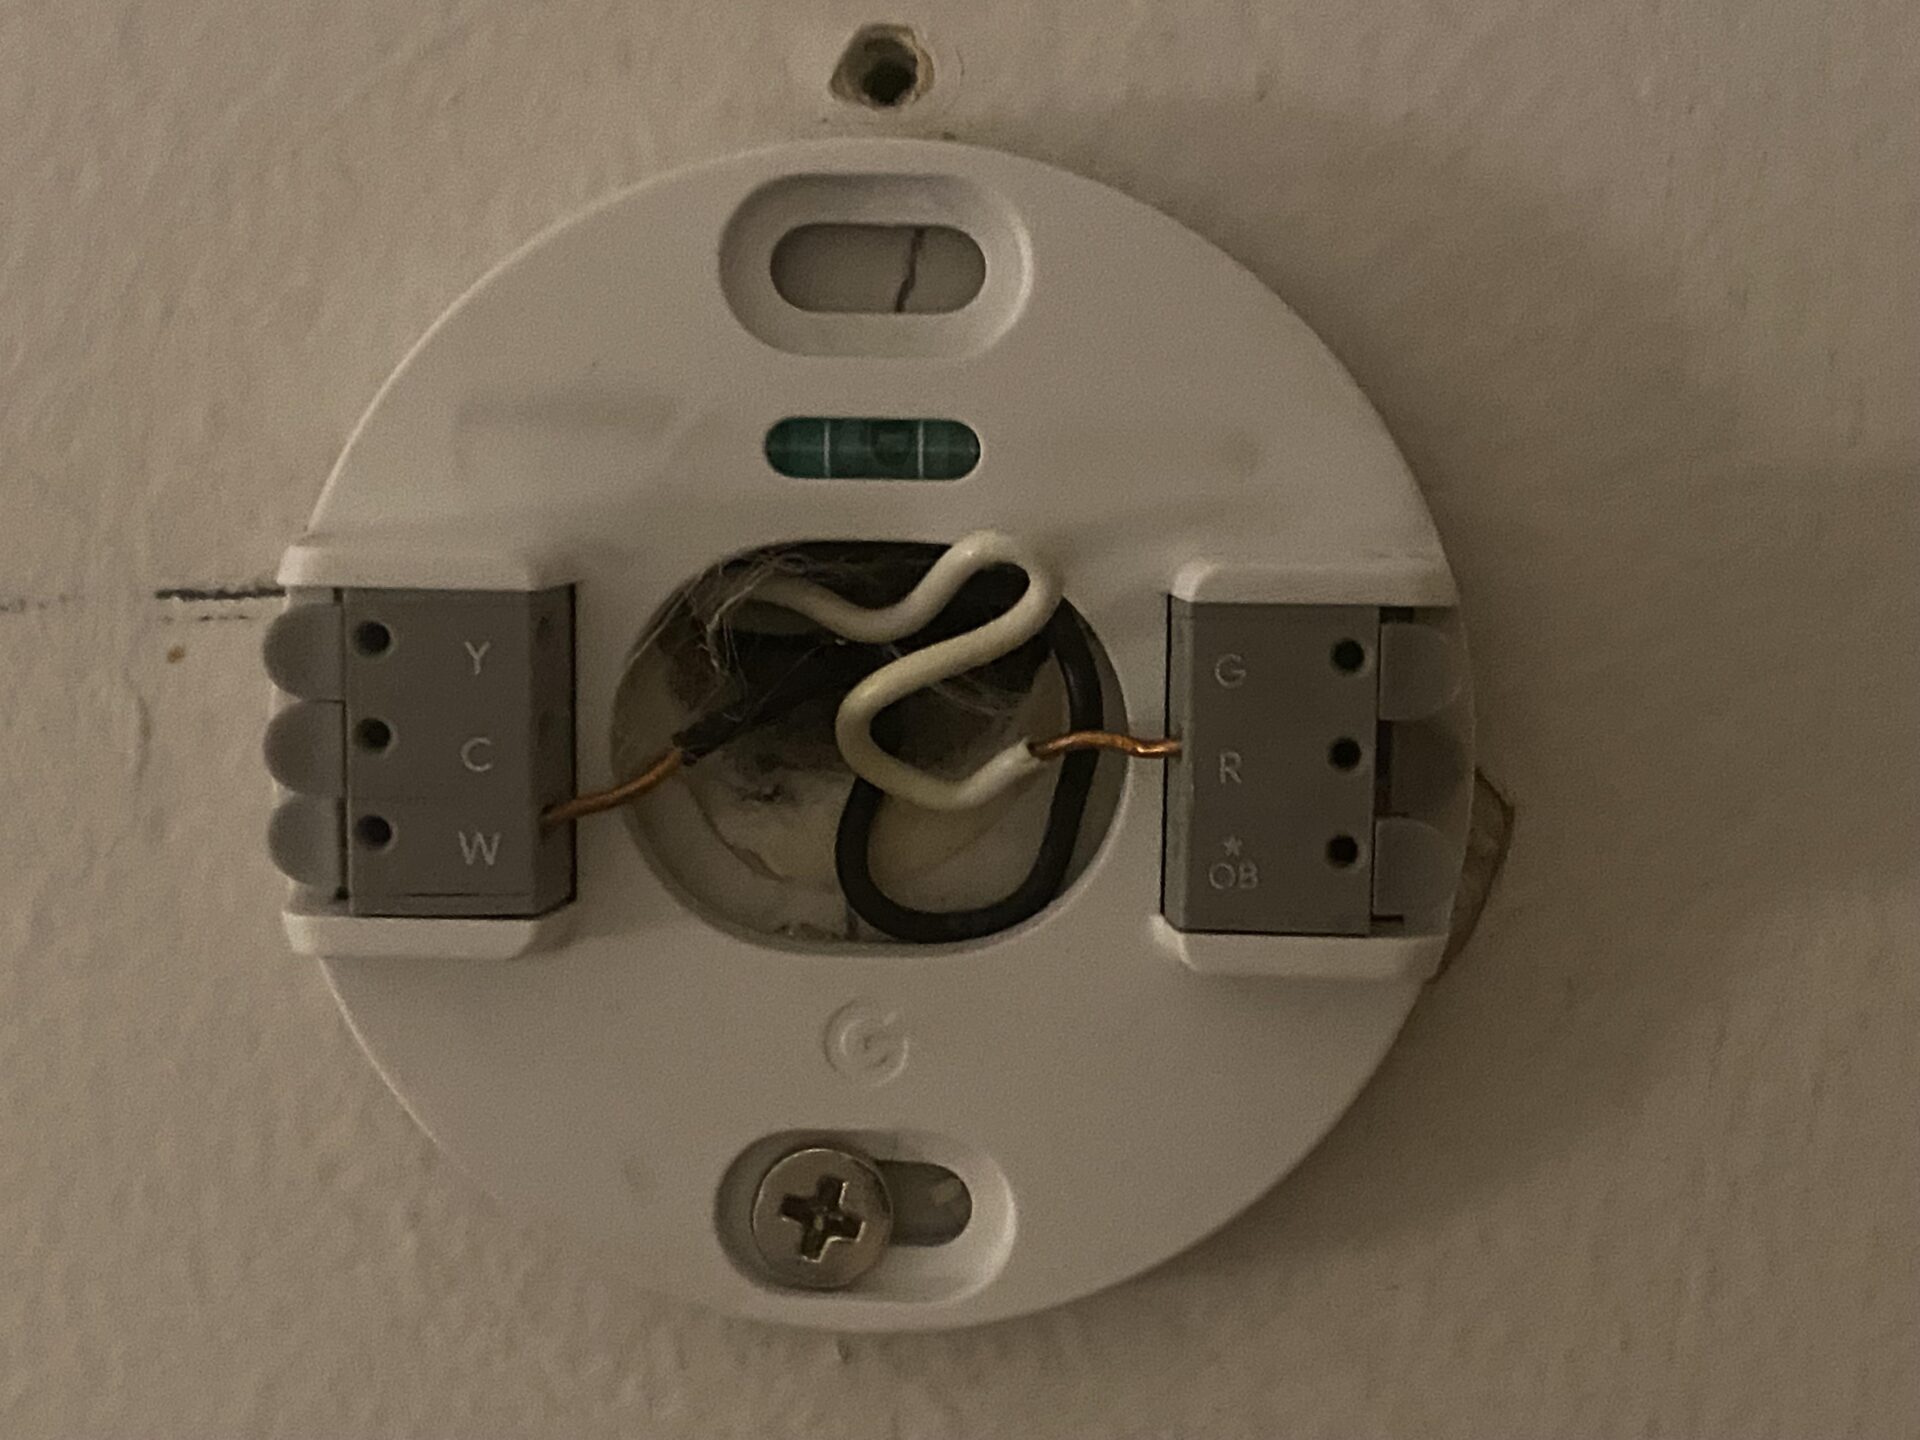
Installing a Nest Thermostat with two wires can be easy. This guide will help you understand how to do it. We will explain everything step by step. You will learn about tools, preparation, and the installation process. Let’s get started!
What is a Nest Thermostat?
A Nest Thermostat is a smart device. It helps you control your home temperature. You can adjust it from your phone or tablet. It can save energy and keep your home comfortable.
Why Use a 2-Wire System?
Many older heating systems use a 2-wire setup. This type of system is simple. It uses two wires to connect the thermostat to the heating system. This is often the best choice for basic heating systems.
Tools You Will Need
Before you start, gather these tools:
- Screwdriver (flat and Phillips)
- Drill (if needed)
- Wire strippers
- Level
- Tape measure
- Pencil
- Smartphone or tablet
Preparing for Installation
Now that you have your tools, let’s prepare for installation:
- Turn off the power to your heating system. This is very important.
- Remove the old thermostat. Take a picture of the wires connected to it. This helps you remember.
- Label the wires. Use tape to mark each wire with its letter. This makes it easier later.

Understanding the Wires
In a 2-wire system, you will usually find two wires:
- R wire (Red) – This is the power wire.
- W wire (White) – This is the heating wire.
Make sure you identify these wires correctly. Knowing which wire is which will help during installation.
Installing the Nest Thermostat
Now it is time to install the Nest Thermostat:
- Take the Nest Thermostat out of the box. Look at the back of the thermostat.
- Push the wires through the back plate of the thermostat.
- Connect the wires to the correct terminals:
- Connect the R wire to the R terminal.
- Connect the W wire to the W terminal.
- Make sure the connections are tight. This helps the thermostat work well.
- Attach the back plate to the wall. Use screws to secure it.
- Push the thermostat onto the back plate. It should click into place.
Powering On
Now, it is time to turn the power back on:
- Go to your circuit breaker.
- Turn the power back on for your heating system.
Once the power is on, the Nest Thermostat should light up. If it does not, check the connections again.
Setting Up the Nest Thermostat
After the thermostat powers on, it will guide you through setup:
- Select your language. Use the dial to scroll through options.
- Connect the thermostat to your Wi-Fi. This allows you to control it from your phone.
- Follow the on-screen instructions. The thermostat will ask questions about your heating system.

Testing the Thermostat
After setup, it is important to test the thermostat:
- Adjust the temperature using the dial.
- Wait a few minutes to see if the heating turns on.
- If it works, you are done!
Common Issues and Fixes
Sometimes, you may face issues. Here are some common problems and their solutions:
- Thermostat does not turn on: Check if the power is on.
- Wires are loose: Make sure all connections are tight.
- Wi-Fi connection fails: Check your Wi-Fi settings.
Tips for Using Your Nest Thermostat
Here are some tips to help you use your Nest Thermostat:
- Set a schedule for your heating. This can save energy.
- Use the app on your phone to control the thermostat.
- Check the energy history. This shows you how much energy you use.
Conclusion
Installing a Nest Thermostat with a 2-wire system is simple. By following these steps, you can do it yourself. Remember to take your time and check your work. A properly installed thermostat can keep your home comfortable. It can also save you money. Enjoy your new Nest Thermostat!

