
Featured image for mounting air conditioner in wall
Image source: digitalassets.reecegroup.com.au
Installing a mounting air conditioner in wall requires precise measurements, proper support, and strict adherence to safety codes to prevent structural damage and ensure optimal performance. Always use a reinforced wall sleeve, secure mounting brackets, and verify electrical compatibility before operation. Following manufacturer guidelines and local building regulations is essential for a safe, efficient, and long-lasting installation.
Key Takeaways
- Measure accurately: Ensure precise wall cutout dimensions for a secure fit.
- Check wall structure: Locate studs and avoid electrical or plumbing lines.
- Use proper tools: Invest in a level, drill, and support brackets.
- Seal gaps tightly: Prevent air leaks with foam or caulk around edges.
- Follow manufacturer instructions: Adhere to guidelines for safe, efficient operation.
- Test before finalizing: Run a trial to confirm cooling and stability.
📑 Table of Contents
- Why Wall-Mounted Air Conditioners Are a Game-Changer
- Choosing the Right Wall-Mounted Air Conditioner
- Preparing Your Wall and Tools for Installation
- Step-by-Step Installation Guide
- Common Mistakes and How to Avoid Them
- Maintenance Tips for Long-Term Efficiency
- Final Thoughts: Enjoying Your Cool, Quiet Space
Why Wall-Mounted Air Conditioners Are a Game-Changer
Imagine this: it’s the peak of summer, and your old window AC unit is rattling like a washing machine on spin cycle. It’s loud, inefficient, and barely cooling the room. You’ve heard about wall-mounted air conditioners—sleek, quiet, and powerful—but the idea of installing one feels overwhelming. You’re not alone. Many homeowners hesitate because they think mounting an air conditioner in the wall is a job for professionals only. But here’s the good news: with the right guidance, it’s absolutely doable. And once it’s in? You’ll wonder why you didn’t do it sooner.
Wall-mounted ACs are more than just a modern upgrade—they’re a practical solution for saving space, reducing noise, and improving energy efficiency. Unlike bulky window units, they’re installed high on the wall, freeing up floor and window space. They also offer better air distribution and quieter operation, making them ideal for bedrooms, living rooms, and even home offices. Whether you’re retrofitting an older home or upgrading your current cooling system, learning how to install a mounting air conditioner in the wall safely and efficiently can save you hundreds of dollars and give you a sense of accomplishment. In this guide, I’ll walk you through every step—from choosing the right unit to sealing the final gap—with real-world tips and lessons learned from my own installation journey.
Choosing the Right Wall-Mounted Air Conditioner
Assess Your Cooling Needs
Before you even think about drilling into your wall, you need to pick the right unit. Size matters—not just in physical dimensions, but in cooling capacity. Air conditioners are rated in BTUs (British Thermal Units), and matching the BTU output to your room size is crucial. Too small, and it’ll run nonstop without cooling. Too big, and it’ll cool too quickly, leading to humidity issues and wasted energy.
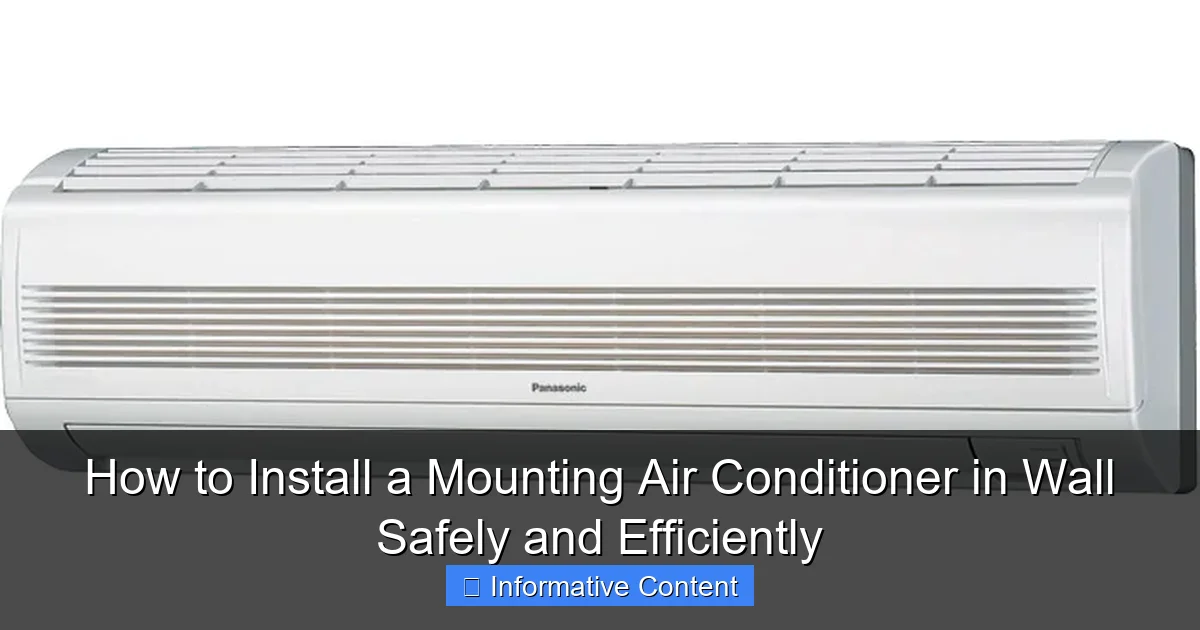
Visual guide about mounting air conditioner in wall
Image source: bostonheatingsupply.com
Here’s a simple rule of thumb: 15-20 BTUs per square foot is a good starting point. For example, a 200 sq ft bedroom needs a 3,000–4,000 BTU unit. A 400 sq ft living room? Aim for 6,000–8,000 BTUs. But don’t stop there. Consider these factors:
- Room height: Rooms with vaulted ceilings need more BTUs.
- Sun exposure: South- or west-facing rooms gain more heat, so add 10% to the BTU estimate.
- Insulation: Poorly insulated rooms lose cool air faster, requiring more capacity.
- Occupancy: More people = more body heat. Add 600 BTUs per additional person.
I learned this the hard way when I bought a 5,000 BTU unit for my sun-drenched living room. It ran 24/7 and still left me sweating. After upgrading to an 8,000 BTU model, the difference was night and day.
Types of Wall-Mounted ACs: Ductless Mini-Split vs. Through-the-Wall Units
Not all wall-mounted ACs are created equal. There are two main types, each with pros and cons:
- Ductless Mini-Split Systems: These consist of an indoor wall unit connected to an outdoor compressor via a small refrigerant line. They’re highly efficient, quiet, and allow zoning (cooling only occupied rooms). However, they require professional refrigerant line evacuation and electrical hookup.
- Through-the-Wall Units: These are all-in-one systems installed directly into a wall sleeve. They’re simpler to install (no refrigerant lines), but often less efficient and noisier than mini-splits. They’re ideal for retrofitting older homes without ductwork.
For most DIYers, a through-the-wall unit is the better starting point. They’re easier to install, don’t require special tools, and are widely available. Mini-splits are worth the investment if you plan to cool multiple rooms or want the best efficiency, but the installation complexity means you’ll likely need a pro for the refrigerant and electrical work.
Key Features to Look For
Once you’ve narrowed down the type, focus on features that matter for performance and convenience:
- Inverter Technology: Adjusts compressor speed to maintain temperature, saving energy and reducing noise.
- Remote Control & Smart Features: Wi-Fi connectivity lets you control the unit from your phone—handy for pre-cooling before you get home.
- Energy Efficiency Ratio (EER): Look for units with an EER of 10+ for better efficiency.
- Washable Filters: Saves money on replacements and improves air quality.
- Drain Pan Overflow Protection: Prevents water damage in case of clogged drains.
Pro tip: Check the sound rating (measured in decibels). A unit under 55 dB is whisper-quiet—perfect for bedrooms.
Preparing Your Wall and Tools for Installation
Inspect the Wall: Where and How?
Not every wall is suitable for a wall-mounted AC. You need a solid exterior wall—ideally concrete, brick, or wood frame with sheathing. Avoid interior walls, which lack the structural support and exterior access needed. Also, check for:
- Obstructions: No pipes, wires, or studs in the planned cutout area. Use a stud finder and wall scanner to verify.
- Drainage: The unit should slope slightly downward toward the outside (about 1/4 inch per foot) to let condensation drain properly.
- Sunlight: Avoid direct afternoon sun to reduce heat gain.
I once tried installing a unit on a wall with a hidden electrical conduit. Let’s just say I learned to scan first, drill later. A $20 stud finder saved me from a costly mistake.
Gather the Right Tools and Materials
Having the right tools makes the job faster and safer. Here’s what you’ll need:
- Measuring tape and level: For precise positioning.
- Stud finder and wall scanner: To avoid pipes and wires.
- Jigsaw or reciprocating saw: For cutting the wall opening (a circular saw works for wood-frame walls).
- Caulking gun and exterior-grade sealant: To seal gaps and prevent leaks.
- Drill and masonry bits: For mounting the sleeve and securing the unit.
- Safety gear: Gloves, goggles, and a dust mask (cutting drywall or brick is messy!).
- Vacuum: To clean up debris after cutting.
Bonus: A laser level helps align the sleeve perfectly—no guesswork. I borrowed one from a neighbor and was amazed at how much easier it made the job.
Turn Off Power and Prepare the Area
Safety first! Even if you’re not doing electrical work, turn off the circuit breaker for the area. This prevents accidental shocks if you hit a wire. Clear furniture, cover floors with drop cloths, and set up a fan to ventilate dust. If you’re working in a tight space, a small work light helps visibility.
Step-by-Step Installation Guide
Mark and Cut the Wall Opening
Start by measuring the unit’s sleeve (usually included with the AC) and transfer those dimensions to the wall. Use a level to draw a precise rectangle—this is your cutout. Pro tip: Cut slightly smaller than the sleeve (about 1/8 inch) so it fits snugly.
- For wood-frame walls: Use a circular saw to cut the opening. Drill starter holes in the corners to fit the blade.
- For concrete or brick: Use a hammer drill with a masonry bit to score the outline, then a chisel or reciprocating saw to remove material.
Wear a dust mask! Drywall and brick dust are nasty. I learned this after inhaling drywall dust for an hour—my throat was sore for days.
Install the Wall Sleeve
The sleeve is the metal or plastic frame that holds the AC unit. Slide it into the opening and check the level. Adjust with shims if needed. Secure it with screws through the flange (the outer edge) into the wall studs or masonry. Apply exterior-grade sealant around the flange to prevent water intrusion.
Important: Ensure the sleeve slopes downward toward the outside (use a level to verify). This lets condensation drain out instead of pooling inside.
Connect Electrical and Drain Lines
Most through-the-wall units plug into a standard 110V outlet, but check the manual. If it requires hardwiring, hire an electrician—this isn’t a DIY job. For the drain line:
- Connect the unit’s drain pan to a 3/4-inch PVC pipe or flexible hose.
- Route it through the sleeve and direct it outside, ensuring it slopes downward.
- Use a drip pan under the unit as a backup (especially in humid climates).
I skipped the drip pan once—big mistake. A clogged drain caused water to leak into my living room. Now I always install one.
Mount the AC Unit
Carefully slide the unit into the sleeve. Align it with the mounting holes and secure it with the provided screws. Connect the electrical cord (if applicable) and test the unit before sealing. Turn it on and check for:
- Proper airflow (no obstructions).
- Drainage (water should drip outside, not inside).
- Noise levels (listen for rattling or vibration).
If everything works, seal the gaps around the unit with foam tape or silicone caulk. This improves efficiency and prevents pests from entering.
Common Mistakes and How to Avoid Them
Ignoring the Slope (And Why It Matters)
A common DIY error is installing the unit level or sloping inward. This traps condensation, leading to water damage, mold, and even electrical hazards. Always slope the sleeve and unit downward toward the outside. A 1/4-inch drop per foot is ideal. Use a level to verify.
Overlooking Insulation and Sealing
Even small gaps around the sleeve can let in hot air, bugs, and moisture. Seal the interior and exterior with:
- Exterior: Exterior-grade caulk or foam sealant.
- Interior: Foam tape or spray foam (avoid overfilling—it can warp the unit).
I once used regular interior caulk on the outside. It cracked within weeks. Lesson learned: always use weather-resistant products.
Skipping the Pre-Installation Test
Don’t fully seal the unit until you’ve tested it. Plug it in, run it for 15 minutes, and check for:
- Cool air output.
- Proper drainage (no leaks inside).
- Unusual noises (vibrations mean it’s not seated properly).
It’s much easier to adjust the unit before sealing than after.
Choosing the Wrong Location
Avoid:
- Direct sunlight: It increases heat load and reduces efficiency.
- Near heat sources: Stoves, ovens, or radiators.
- Low on the wall: This limits airflow and makes it a tripping hazard.
Ideal height: 6–7 feet above the floor, centered in the room.
Maintenance Tips for Long-Term Efficiency
Clean the Filters Monthly
Dirty filters restrict airflow, making the unit work harder and use more energy. Most wall-mounted ACs have washable filters. Remove them, rinse with water, and let dry before reinstalling. Do this every 4–6 weeks in peak season.
Check and Clear the Drain Line
Clogged drains cause leaks and mold. Pour a cup of vinegar or bleach solution down the drain line monthly to kill algae and prevent clogs. Inspect the drip pan for standing water.
Inspect Seals and Insulation Annually
Over time, caulk and foam can crack or degrade. Inspect the seals around the sleeve and unit each spring. Replace any damaged material to maintain efficiency.
Schedule Professional Servicing (For Mini-Splits)
If you have a ductless mini-split, schedule a professional tune-up every 2–3 years. They’ll check refrigerant levels, clean coils, and ensure the system is running optimally. This can extend the unit’s lifespan by years.
Data Table: Recommended Maintenance Schedule
| Task | Frequency | Notes |
|---|---|---|
| Clean filters | Every 4–6 weeks | More often in dusty environments |
| Clear drain line | Monthly | Use vinegar or bleach solution |
| Inspect seals | Annually (spring) | Replace cracked caulk/foam |
| Professional servicing (mini-splits) | Every 2–3 years | Check refrigerant and coils |
| Wipe exterior | As needed | Use a damp cloth; avoid harsh cleaners |
Final Thoughts: Enjoying Your Cool, Quiet Space
Installing a mounting air conditioner in the wall isn’t just about beating the heat—it’s about creating a more comfortable, efficient, and enjoyable home. From choosing the right unit to sealing the final gap, every step matters. And while it’s a project that requires patience and attention to detail, the payoff is huge: a quiet, powerful AC that blends seamlessly into your space.
Remember, safety and precision are key. Don’t rush the prep work. Take time to inspect the wall, test the unit before sealing, and maintain it regularly. A well-installed and maintained wall-mounted AC can last 10–15 years or more, saving you money on energy bills and repairs.
So, whether you’re a DIY newbie or a seasoned home improver, I hope this guide gives you the confidence to tackle the job. And when you’re relaxing in your perfectly cooled room, listening to the soft hum of your new AC? You’ll know it was worth every minute. Happy cooling!
Frequently Asked Questions
Can I install a mounting air conditioner in wall without professional help?
While DIY installation is possible, hiring a professional ensures safe electrical connections, proper wall reinforcement, and compliance with local building codes. Mistakes can lead to water leaks, poor cooling, or structural damage.
What tools do I need to install a mounting air conditioner in wall?
Essential tools include a stud finder, level, drill, hole saw, measuring tape, and a vacuum pump for refrigerant lines. For safety, you’ll also need a voltage tester and protective gear like gloves and goggles.
How do I choose the right location for a wall-mounted air conditioner?
Pick a spot near a power source, away from direct sunlight or heat sources, and with at least 6 inches of clearance on all sides. Ensure the wall can support the unit’s weight and allows proper drainage.
What are the risks of improper installation for a wall-mounted air conditioner?
Incorrect installation can cause refrigerant leaks, electrical hazards, or inefficient cooling. Poor sealing may also lead to water damage or mold growth inside the wall cavity.
Do I need a permit to install a mounting air conditioner in wall?
Many jurisdictions require permits for HVAC modifications, especially if electrical or structural changes are involved. Check local regulations to avoid fines or issues during home inspections.
How do I seal the gap around a wall-mounted air conditioner?
Use foam weatherstripping or expandable spray foam to fill gaps between the unit and wall, preventing air leaks and water ingress. Finish with a waterproof silicone caulk for a weather-resistant seal.