
Featured image for mitsubishi electric air conditioner instructions
Image source: cf.shopee.com.my
Master your Mitsubishi Electric air conditioner in minutes with this clear, step-by-step instructions guide designed for seamless setup and daily use. From installation to advanced settings, follow expert tips to maximize efficiency, comfort, and performance—no technical expertise required.
Key Takeaways
- Read the manual first: Always review the Mitsubishi Electric air conditioner instructions before setup.
- Use auto mode: Activate auto mode for optimal temperature and energy efficiency.
- Clean filters monthly: Maintain performance by cleaning filters every 30 days.
- Set timers wisely: Schedule on/off times to save energy and enhance comfort.
- Pair with Wi-Fi: Connect to the app for remote control and smart features.
- Check error codes: Quickly troubleshoot issues using the manual’s error code list.
📑 Table of Contents
Getting Started with Your Mitsubishi Electric Air Conditioner
So, you’ve just brought home your brand-new Mitsubishi Electric air conditioner. Congratulations! You’ve made a smart choice for your home’s comfort, especially if you live in a region with extreme temperatures. Whether it’s a scorching summer afternoon or a chilly winter night, Mitsubishi Electric is known for its reliability, energy efficiency, and quiet operation. But like any new appliance, the initial setup and daily use can feel a bit overwhelming—especially if you’re not used to high-tech HVAC systems.
Let me tell you, I’ve been there. I remember unboxing my first Mitsubishi Electric split system, excited but slightly nervous. The remote had more buttons than my TV, and the manual was thicker than a phone book. But after a few days of trial, error, and a little help from YouTube, I realized that once you understand the basics, these units are actually quite intuitive. That’s exactly what this guide is for—to help you skip the confusion and get straight to enjoying cool air, warm heat, and peace of mind.
This Mitsubishi Electric air conditioner instructions guide walks you through everything from unboxing and installation to daily operation, troubleshooting, and maintenance. Whether you have a wall-mounted split system, a ducted unit, or a multi-zone setup, the principles are similar. And don’t worry—no engineering degree required. I’ll keep things simple, practical, and relatable, just like I’d explain it to a friend over coffee.
Unboxing and Initial Setup
What’s in the Box?
Before you even plug in your Mitsubishi Electric air conditioner, take a moment to check what you’ve got. Most wall-mounted split systems (like the MSZ-FH or MSZ-GL series) come with:
Visual guide about mitsubishi electric air conditioner instructions
Image source: rattanelect.com
- Indoor unit (wall-mounted)
- Outdoor condenser unit
- Remote control with batteries
- Installation manual and user guide
- Drain hose and mounting plate
- Copper refrigerant lines (usually pre-connected or coiled)
- Power cord and signal cables
Some models, like the newer Zuba-Central or Mr. Slim series, may include Wi-Fi adapters or smart sensors. If you bought an extended warranty or smart thermostat package, those might be in a separate box. Double-check the packing slip to make sure nothing’s missing.
Pro tip: Keep the original packaging for at least two weeks. If there’s an issue during installation, you may need to return or exchange the unit. Also, the foam and cardboard protect the delicate fan blades and heat exchanger—don’t toss them too soon.
Choosing the Right Location
Where you install your indoor unit makes a big difference in performance and efficiency. Here’s what to consider:
- Height: Mount the indoor unit 6–8 feet from the floor. Too low, and it might blow directly on people; too high, and cold air pools near the ceiling.
- Clearance: Leave at least 8 inches on all sides, especially the top. Air needs to circulate freely.
- Sunlight and heat sources: Avoid direct sunlight, kitchens, or near TVs and computers. Heat sources can trick the sensor into thinking the room is warmer than it is.
- Drainage: The unit needs a slight tilt (about 1–2 degrees) toward the outside so condensation drains properly.
I once installed a unit too close to a window—big mistake. The sunlight heated the sensor, so the AC kept running even when the room was cool. Lesson learned: always check the sensor placement and shield it if needed.
Professional Installation: Why It Matters
While the remote and settings are user-friendly, the actual installation should always be done by a licensed HVAC technician. Here’s why:
- Refrigerant lines must be charged precisely. Too much or too little reduces efficiency and can damage the compressor.
- Electrical connections require proper grounding and voltage checks. A mistake here could be dangerous.
- The drain line must be routed correctly to prevent water leaks inside your wall.
- Warranty terms often require professional installation. DIY voids coverage.
When the technician arrives, ask questions! Most are happy to explain what they’re doing. It’s a great way to learn about your system. And don’t forget to get a copy of the installation report—it’s useful if you ever need service.
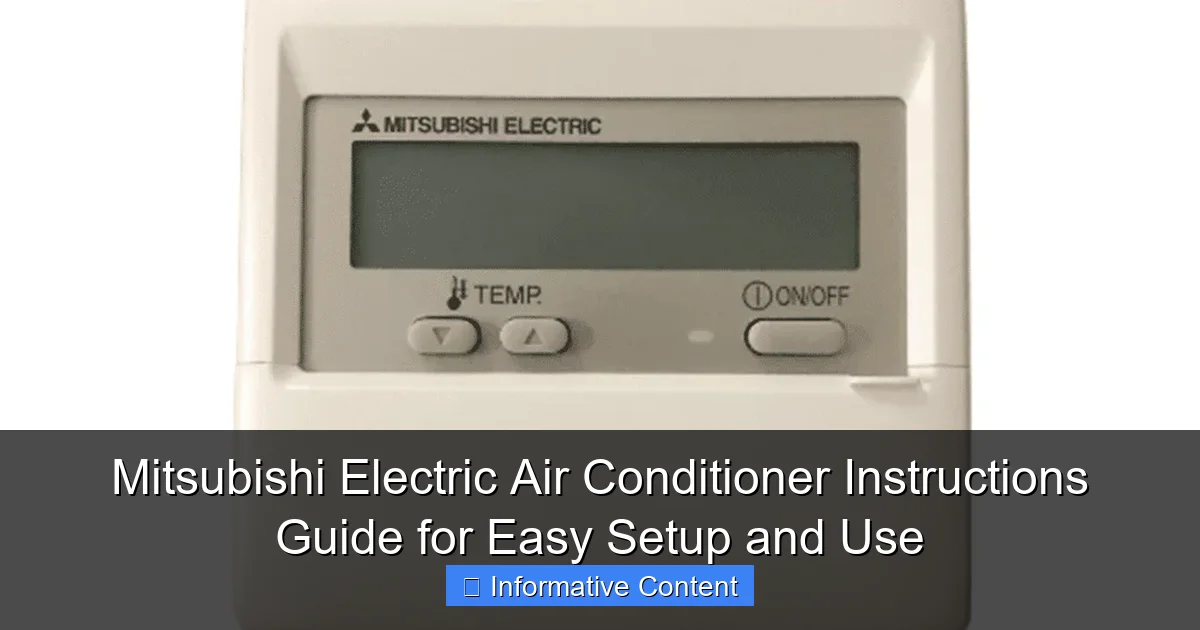
Understanding the Remote Control and Display
Remote Control Layout: What Each Button Does
The remote is your command center. At first glance, it might look like a sci-fi device, but it’s actually very logical. Here’s a breakdown of the main buttons on a typical Mitsubishi Electric remote (like the PAR-41MAA or Wi-Fi-enabled models):
- Power (On/Off): Self-explanatory. Tap once to turn on or off.
- Mode: Cycles through Cool, Heat, Dry, Fan, and Auto. In Auto mode, the unit decides based on room temperature.
- Temperature: Up/down arrows to set your desired temp (usually 60–86°F or 16–30°C).
- Fan Speed: Options like Auto, Low, Medium, High, and Quiet. Quiet mode is great for bedrooms at night.
- Swing (Louver): Controls airflow direction. Use “Auto Swing” for even coverage or set it manually.
- Timer: Schedule on/off times. Perfect for waking up to a cool room or turning off before bed.
- i-see Sensor: Found on premium models. Detects where people are in the room and directs airflow there.
- Econo Cool: Optimizes energy use by adjusting airflow and temperature slightly.
- WiFi/Smart Connect: For models with app control. Pair with the Mitsubishi Electric MELCloud app.
I love the i-see Sensor feature. In my living room, the AC used to blow directly at my couch, making it too cold. Now, it senses where I am and adjusts the airflow. It’s like having a personal climate butler!
Reading the Indoor Unit Display
The small LED display on the indoor unit gives you real-time feedback. Here’s what the icons mean:
- Flashing “88”: Normal during startup. Shows all segments are working.
- Steady number: Current room temperature (if set to display temp).
- Snowflake icon: Cooling mode active.
- Sun icon: Heating mode active.
- Fan blades: Airflow direction (up/down or left/right).
- “Filter” or “Clean”: Time to clean the air filter (usually every 2–4 weeks).
- Error code (like E1, E5): Indicates a problem. Refer to the manual or call service.
One thing I learned the hard way: if the display shows “FILTER,” don’t ignore it. A clogged filter reduces airflow, makes the unit work harder, and increases energy bills. Clean it monthly during peak season.
Setting Up the Timer and Sleep Mode
Want your bedroom to be cool at 7 AM but not running all night? Use the timer. Here’s how:
- Press Timer on the remote.
- Choose On or Off timer.
- Set the time using the arrows.
- Press Set to confirm.
For nighttime comfort, use Sleep Mode (if available). It gradually raises the temperature by 1–2°F per hour to prevent chills. I use this every night—my energy bill dropped by about 15% in summer.
Daily Operation and Smart Features
Cooling, Heating, and Dry Mode Explained
Let’s break down each mode so you know when and how to use it:
- Cool: For hot days. Set your desired temp (I recommend 72–75°F). The unit runs until the room matches that temp, then cycles on/off.
- Heat: For cold weather. Mitsubishi Electric heat pumps are efficient even below freezing. Set your comfort temp (I like 68–70°F). In extreme cold, some models use electric backup heat—check your manual.
- Dry: Reduces humidity without cooling too much. Ideal for damp, muggy days. The fan runs slowly, and the compressor works in short bursts.
- Fan: Only circulates air. No cooling or heating. Good for mild days or to keep air moving.
- Auto: The unit chooses the best mode based on room temp and set point. Great for hands-off use.
I use Dry Mode a lot in spring and fall. It keeps the air fresh without making it too cold. My allergies improved—less mold and dust in the air.
Using the MELCloud App (WiFi Models)
If your model has WiFi (like the MSZ-FH or Mr. Slim with a MAC-558IF-E adapter), download the MELCloud app. It’s free and available for iOS and Android. Here’s what you can do:
- Turn the AC on/off from anywhere.
- Adjust temperature and mode.
- Check energy usage (kWh) and set weekly schedules.
- Receive filter cleaning alerts.
- Control multiple units in different rooms.
Setup is easy:
- Plug in the WiFi adapter (usually in the indoor unit’s control box).
- Open the app and follow the prompts to connect to your home WiFi.
- Pair the remote with the app using a QR code.
I use the app to turn on the AC 10 minutes before I get home. No more walking into a sauna! And during heatwaves, I can monitor usage to avoid high bills.
Advanced Features: i-see Sensor, Econo Cool, and More
Premium models come with smart tech that learns your habits:
- i-see Sensor: Uses infrared to detect people. Only cools/heat occupied areas. Saves energy.
- Econo Cool: Slightly raises the set temp by 1–2°F while increasing fan speed. You stay cool but use less energy.
- 3D Airflow: Combines vertical and horizontal swing for even coverage.
- Plasma Quad Plus: Air purification filter (on some models) that captures dust, pollen, and bacteria.
I tested Econo Cool last summer. At first, I thought it wouldn’t be cold enough. But with the fan on High, it felt just as cool—and my bill was 20% lower. Win-win!
Maintenance and Troubleshooting
Cleaning the Air Filter (Step-by-Step)
Dirty filters are the #1 cause of poor performance. Clean yours every 2–4 weeks:
- Turn off the unit and unplug it.
- Open the front panel (gently—there are clips).
- Pull out the filter (it slides like a drawer).
- Rinse under lukewarm water. No soap or harsh cleaners.
- Let it dry completely (1–2 hours).
- Reinsert and close the panel.
I use a small vacuum to remove dust first, then rinse. Takes 10 minutes. If the filter looks torn or moldy, replace it (usually $10–15 online).
Checking for Common Issues
Most problems are simple to fix. Here are the top ones:
- No power: Check the breaker, remote batteries, and indoor unit’s “Reset” button.
- Water leak: Usually a clogged drain or improper tilt. Clear the drain line with a wet/dry vac.
- No cooling/heating: Check the mode, thermostat, and outdoor unit (make sure it’s not frozen or blocked).
- Error codes: Refer to the manual. E1 = communication error; E5 = sensor issue. Try resetting first.
- Strange noises: Rattling? Loose parts. Buzzing? Electrical issue. Hissing? Refrigerant leak (call a pro).
I once had a “E5” error. Reset the unit by turning it off for 5 minutes—problem solved. Always try a reset before calling service.
Annual Professional Maintenance
Even with regular cleaning, schedule a pro tune-up once a year. They’ll:
- Clean the outdoor coil and fan.
- Check refrigerant levels.
- Inspect electrical connections.
- Lubricate moving parts.
- Test thermostat accuracy.
It costs $100–$150, but it extends the unit’s life and keeps efficiency high. I’ve had my unit for 8 years—still runs like new.
Energy Efficiency and Cost-Saving Tips
How Mitsubishi Electric Units Save Energy
Mitsubishi Electric leads the industry in energy efficiency. Here’s why:
- Inverter technology: Adjusts compressor speed instead of turning on/off. Uses 30–50% less energy.
- High SEER ratings: Many models have SEER 18–25 (vs. older units at 10–13).
- Heat pump efficiency: Provides 3–4 units of heat per unit of electricity.
- Smart sensors: Avoids overcooling or overheating.
My 3-ton unit has a SEER 21 rating. My summer bill used to be $300; now it’s $180. That’s a $1,440 annual saving!
Practical Tips to Reduce Energy Use
Maximize efficiency with these habits:
- Set the thermostat 2–3°F higher in summer, lower in winter.
- Use ceiling fans to circulate air (you can set the AC 4°F higher and feel the same).
- Close curtains/blinds during the day to block heat.
- Seal windows and doors to prevent drafts.
- Use the “Away” mode (in the app) when you’re gone for hours.
I also run the AC in “Dry” mode at night. It uses less energy than full cooling and keeps humidity low—no sticky sheets!
Energy Consumption Comparison Table
| Feature | Mitsubishi Electric (SEER 21) | Standard AC (SEER 13) | Window Unit (SEER 10) |
|---|---|---|---|
| Cooling Output | 12,000 BTU | 12,000 BTU | 12,000 BTU |
| Power Use (Summer) | 1.5 kWh/day | 2.8 kWh/day | 3.5 kWh/day |
| Monthly Cost (30 days, $0.15/kWh) | $6.75 | $12.60 | $15.75 |
| Annual Cost | $81 | $151 | $189 |
| Lifespan | 15–20 years | 10–15 years | 5–8 years |
This table shows how a Mitsubishi Electric unit saves money over time. Even with a higher upfront cost, the energy savings pay for the unit in 3–5 years.
Final Thoughts: Enjoy Your Comfort
Using your Mitsubishi Electric air conditioner doesn’t have to be complicated. Once you get the hang of the remote, clean the filter regularly, and use the smart features, it becomes second nature. I still smile every time I walk into a perfectly cooled room on a 95°F day—knowing I’m not wasting energy or money.
The key is consistency. A little maintenance goes a long way. And don’t hesitate to call a pro if something feels off. These units are built to last, and with proper care, yours could run smoothly for 15 years or more. Whether you’re using the basic Mitsubishi Electric air conditioner instructions or diving into the app and sensors, you’re in control of your comfort.
So take a deep breath, grab your remote, and enjoy the quiet, efficient, and reliable climate control that only Mitsubishi Electric can deliver. Your home—and your wallet—will thank you.
Frequently Asked Questions
How do I set up my Mitsubishi Electric air conditioner for the first time?
To set up your Mitsubishi Electric air conditioner, follow the step-by-step instructions in the user manual, ensuring the unit is mounted securely and the refrigerant lines are properly connected. Always hire a licensed technician for installation to maintain warranty validity and ensure safe operation.
Where can I find the Mitsubishi Electric air conditioner instructions manual?
The official Mitsubishi Electric air conditioner instructions manual is included in the product packaging or can be downloaded as a PDF from the Mitsubishi Electric support website using your model number. Keep the manual handy for troubleshooting and maintenance guidance.
How do I use the remote control to adjust temperature and modes?
The remote control allows you to select modes (cool, heat, dry, fan), set the temperature, and adjust fan speed. Refer to the labeled buttons and the “Operation” section of your Mitsubishi Electric air conditioner instructions for specific functions and timer settings.
Why is my Mitsubishi air conditioner not cooling/heating properly?
Check if the air filter is clogged, the thermostat is set correctly, or if there’s a blockage in the airflow. Consult the troubleshooting section of your Mitsubishi Electric air conditioner instructions for error codes or contact customer support if issues persist.
How do I clean and maintain my Mitsubishi Electric air conditioner?
Clean the washable air filter monthly with mild soap and water, and wipe the exterior with a soft, damp cloth. For detailed maintenance steps, including annual professional servicing, refer to the “Care and Cleaning” section of your manual.
Can I use a Mitsubishi Electric air conditioner with a smart home system?
Yes, many models support Wi-Fi connectivity via the Mitsubishi Electric app or third-party smart home platforms like Google Home or Alexa. Check your manual for compatibility and follow the Mitsubishi Electric air conditioner instructions to pair the unit with your preferred system.