
Featured image for mitsubishi air conditioner instructions
Image source: alliancecc.com.au
Master your Mitsubishi air conditioner with simple, step-by-step setup and maintenance instructions designed to maximize performance and extend unit life. From installation to filter cleaning and troubleshooting common issues, these expert-backed tips ensure energy-efficient cooling all season long.
Key Takeaways
- Read the manual first: Always consult Mitsubishi air conditioner instructions for model-specific setup and safety guidelines.
- Use auto mode: Optimize comfort and efficiency by selecting auto temperature and fan speed settings.
- Clean filters monthly: Maintain airflow and performance with regular filter cleaning per the instructions.
- Schedule annual maintenance: Prevent breakdowns with yearly professional servicing and system checks.
- Install correctly: Follow mounting and drainage guidelines to avoid leaks and poor cooling.
- Use timer settings: Save energy by programming on/off times via the remote or control panel.
📑 Table of Contents
- Why Your Mitsubishi Air Conditioner Deserves a Little TLC
- Getting Started: Unboxing and Initial Setup
- Understanding Your Remote Control and Settings
- Daily and Weekly Maintenance for Peak Performance
- Troubleshooting Common Issues (And When to Call a Pro)
- Seasonal Care and Long-Term Maintenance
- Data Table: Maintenance Schedule at a Glance
- Final Thoughts: Your AC, Your Responsibility
Why Your Mitsubishi Air Conditioner Deserves a Little TLC
Let’s be honest: when your Mitsubishi air conditioner kicks in during a sweltering summer afternoon, it feels like a miracle. But like any hardworking appliance, it needs a little love to keep performing at its best. I learned this the hard way a few years back when my unit started making strange noises—turns out, I’d neglected the filter cleaning schedule for far too long. That experience taught me a valuable lesson: Mitsubishi air conditioner instructions aren’t just a manual gathering dust in a drawer. They’re a roadmap to comfort, efficiency, and peace of mind.
Whether you’re setting up a new unit or maintaining an older model, understanding your Mitsubishi’s care and setup process can save you time, money, and frustration. From decoding remote control buttons to troubleshooting common hiccups, this guide is your friendly, no-nonsense companion. No jargon, no fluff—just practical, real-world tips to help you get the most out of your system. Think of it as your air conditioner’s personal care manual, written by someone who’s been in your shoes (and probably forgot to clean their filter too).
Getting Started: Unboxing and Initial Setup
Unboxing Your Mitsubishi Air Conditioner
When your new Mitsubishi air conditioner arrives, it’s tempting to jump right in and plug it in. But take a breath—there’s a method to the madness. Start by checking the box for all included components: indoor unit, outdoor compressor, remote control, batteries, wall mounting brackets, and the Mitsubishi air conditioner instructions manual. (Yes, that manual. Keep it handy!)
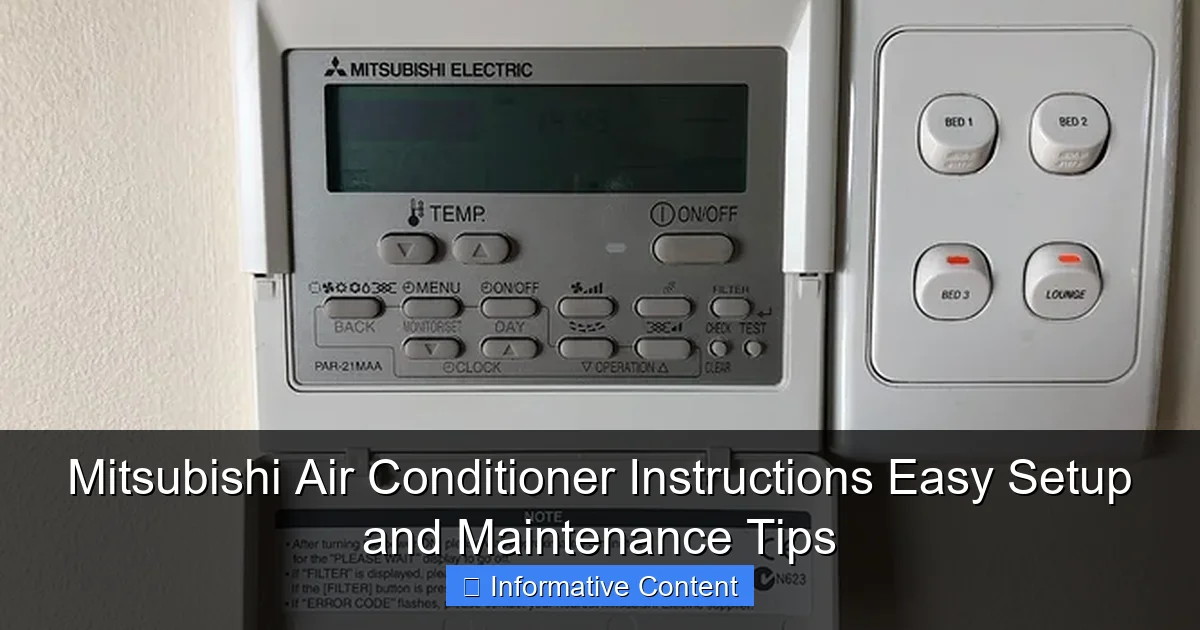
Visual guide about mitsubishi air conditioner instructions
Image source: community-assets.home-assistant.io
Pro tip: Lay out everything on a clean surface. I once accidentally tossed out the mounting screws with the packaging—don’t be me. If anything’s missing, contact customer service immediately. Most models also come with a warranty card, so fill it out and keep it in a safe place.
Choosing the Right Location
Where you place your indoor unit matters more than you think. For wall-mounted models, aim for a spot:
- At least 7 feet above the floor (for optimal air circulation).
- At least 6 inches from the ceiling (to prevent airflow blockage).
- Free of direct sunlight, heat sources, or large furniture (which can disrupt temperature sensors).
- With a clear path to the outdoor unit (minimizing refrigerant line length).
For example, my living room unit sits near a corner, away from the TV and bookshelves. This keeps the airflow even and avoids “cold spots” where the AC blows directly onto one area. If you’re unsure, use a laser level or app to check for even wall surfaces—uneven mounting can cause vibrations and noise.
Professional Installation: Why It Matters
While DIY setups are tempting, I strongly recommend hiring a certified technician for the Mitsubishi air conditioner instructions installation process. Why? Because:
- Refrigerant lines must be properly charged and sealed (a DIY error can lead to leaks and costly repairs).
- Electrical connections need to meet local codes (safety first!).
- Drain lines must slope correctly to prevent water buildup.
When I moved into my new apartment, the landlord insisted on a pro install. It cost a bit more upfront, but it saved me from dealing with a flooded floor six months later. Most Mitsubishi warranties also require professional installation to stay valid—so don’t skip this step!
Understanding Your Remote Control and Settings
Decoding the Remote: A Cheat Sheet
Mitsubishi remotes can feel like a puzzle at first glance. But once you learn the basics, they’re surprisingly intuitive. Here’s a quick breakdown of common buttons:
- Power: Turns the unit on/off.
- Mode: Cycles through Cool, Heat, Dry, Fan, and Auto modes.
- Temperature: Adjusts setpoint (usually 60°F–90°F).
- Fan Speed: Low, Medium, High, or Auto (Auto adjusts based on room temperature).
- Timer: Sets on/off times (perfect for saving energy).
- Econo Mode: Reduces power consumption by cycling the compressor (great for long-term use).
- Swing: Controls airflow direction (horizontal and vertical vanes).
Fun fact: The “I-Save” button on some models (like the Mitsubishi MSZ-FH series) memorizes your preferred temperature and fan settings for quick access. I use it every morning—press one button, and my room cools to my ideal 72°F with medium airflow.
Mastering the Modes
Let’s talk modes. They’re not just labels—they’re tools:
- Cool: Best for hot days. The unit cools air and dehumidifies slightly.
- Heat: Reverses the refrigerant cycle to warm your space (ideal for chilly mornings).
- Dry: Removes humidity without overcooling. I use this during humid summers when it’s 80°F but feels like 90°F.
- Fan: Circulates air without cooling/heating. Great for mild days.
- Auto: The unit decides the best mode based on your set temperature. It’s like having a smart assistant—but sometimes it overthinks (e.g., switching to heat on a 75°F day if you set it to 72°F).
<
Pro tip: In “Dry” mode, avoid setting the temperature too low. The goal is humidity control, not freezing your toes off. I learned this after accidentally turning my bedroom into an ice cave during a muggy July.
Using the Timer and Econo Mode
Want to save energy (and money)? Use these features:
- Timer: Set the AC to turn on 30 minutes before you wake up. My morning routine: wake up to a 72°F room, not a sweaty sauna. You can also schedule it to turn off when you leave for work.
- Econo Mode: This isn’t just a marketing gimmick. By cycling the compressor on/off instead of running continuously, it can reduce power use by up to 20%. I run it all night during summer—my electricity bill dropped noticeably.
Example: My neighbor, Sarah, uses Econo Mode from 8 PM to 6 AM. Her unit cycles every 15–20 minutes, but the room stays comfortable. She calls it her “sleep-friendly” setting.
Daily and Weekly Maintenance for Peak Performance
Cleaning the Air Filters (The #1 Must-Do)
Dirty filters are the silent killer of air conditioner efficiency. They clog up, restrict airflow, and force your unit to work harder—which means higher bills and shorter lifespan. The Mitsubishi air conditioner instructions manual recommends cleaning them every 2–4 weeks during heavy use. Here’s how:
- Turn off the unit and unplug it (safety first!).
- Open the front panel (usually by lifting it gently).
- Remove the filter(s)—most models have 1–2.
- Rinse under lukewarm water. No soap! (Soap residue can damage the filter material.)
- Shake off excess water and let it air-dry completely (2–4 hours).
- Reinsert and close the panel.
My routine: I clean filters every Sunday morning. It takes 10 minutes, and I’ve noticed a huge difference in airflow and cooling speed. Pro tip: Keep a spare set of filters (available at hardware stores) for backup. That way, you’re never caught off guard when one’s still drying.
Wiping Down the Indoor Unit
While you’re cleaning filters, give the indoor unit a wipe-down. Dust buildup on the front panel and air vents can spread allergens and reduce efficiency. Use a soft, dry microfiber cloth—no liquids! If there’s stubborn dirt, lightly dampen the cloth (wring it out well first).
Example: Last winter, my unit collected a layer of dust from a home renovation. After wiping it down, the airflow improved noticeably. It’s like giving your AC a mini-facial.
Checking the Outdoor Unit
The outdoor compressor is your AC’s “engine.” Keep it happy:
- Clear leaves, grass, and debris from around it (maintain at least 2 feet of space).
- Trim nearby plants—they’re great for shade, but overgrowth blocks airflow.
- Check for ice buildup in winter (a sign of low refrigerant or airflow issues).
I once found a squirrel’s nest in my outdoor unit. Not fun. Now I inspect it monthly during spring and summer. A simple $10 mesh cover (from Home Depot) keeps critters out.
Troubleshooting Common Issues (And When to Call a Pro)
AC Not Cooling: Quick Fixes
Is your Mitsubishi blowing warm air? Try these steps before panicking:
- Check the thermostat: Is it set to “Cool”? Is the temperature lower than the room’s current temp? (Duh, but it happens!)
- Inspect the filters: Clogged filters = poor cooling. Clean them.
- Look at the outdoor unit: Is the fan running? Is it covered in debris? Clear any obstructions.
- Check for ice: If the outdoor coil is frozen, turn off the unit for 24 hours to thaw. If ice returns, it’s likely a refrigerant leak—call a pro.
My story: Once, my AC stopped cooling mid-summer. I panicked, but the issue was a tripped circuit breaker. A $0 fix! Moral of the story: check the basics first.
Strange Noises: What They Mean
Air conditioners make noise, but some sounds are red flags:
- Buzzing: Could be loose parts or electrical issues.
- Clicking: Normal when turning on/off, but continuous clicking = relay problem.
- Rattling: Loose panels, screws, or debris in the fan.
- Hissing: Possible refrigerant leak (urgent! Call a pro).
When my unit started rattling, I opened the panel and found a loose screw. A quick tighten fixed it. But when it hissed? That was a refrigerant leak—$250 repair. Learn the difference!
Water Leaks and Drain Issues
A little condensation is normal, but puddles aren’t. Causes:
- Clogged drain line: Algae or debris blocks the drip tube. Use a wet/dry vac to clear it, or flush with vinegar.
- Frozen coil: Ice melts and overflows. See “AC Not Cooling” above.
- Improper installation: Drain line isn’t sloped correctly. A pro can fix this.
I once ignored a slow drip for weeks. The result? A soaked carpet and moldy baseboards. Lesson learned: address leaks immediately.
Seasonal Care and Long-Term Maintenance
Preparing for Summer
Before summer hits:
- Deep-clean filters (see above).
- Inspect outdoor unit for debris.
- Test the system: Run it for 15 minutes. Does it cool? Is the airflow strong?
- Check insulation on refrigerant lines (cracked insulation = energy loss).
My prep ritual: I do this in May. It’s saved me from mid-summer breakdowns twice.
Winterizing Your System
For cold climates:
- Cover the outdoor unit (use a breathable cover—plastic traps moisture).
- Drain the condensate line (if your model has a drain plug).
- Run the unit in “Fan” mode once a month to prevent motor seizing.
Pro tip: If you have a heat pump, run it in “Heat” mode monthly. This keeps the refrigerant circulating and prevents gunk buildup.
Annual Professional Checkups
Even with perfect maintenance, schedule an annual tune-up. A technician will:
- Check refrigerant levels.
- Inspect electrical connections.
- Clean coils and drains.
- Test safety controls.
Cost: $100–$200, but it extends your AC’s lifespan by years. I treat it like a car oil change—non-negotiable.
Data Table: Maintenance Schedule at a Glance
| Task | Frequency | Time Required | Notes |
|---|---|---|---|
| Clean air filters | Every 2–4 weeks (heavy use) | 10–15 minutes | Rinse with water; air-dry completely. |
| Wipe indoor unit | Monthly | 5 minutes | Use dry or slightly damp microfiber cloth. |
| Check outdoor unit | Monthly (seasonal) | 5 minutes | Clear debris; trim plants. |
| Test system | Seasonally (pre-summer/winter) | 15 minutes | Run all modes; check for odd noises. |
| Professional tune-up | Annually | 1–2 hours | Essential for warranty and longevity. |
Final Thoughts: Your AC, Your Responsibility
Look, I get it—maintaining an air conditioner isn’t glamorous. But it’s one of those things where a little effort goes a long way. By following the Mitsubishi air conditioner instructions and these tips, you’re not just avoiding breakdowns. You’re saving money, staying comfortable, and doing your part for the planet (efficient AC = less energy waste).
Remember: your Mitsubishi is built to last 15–20 years with proper care. Treat it like a trusted friend, and it’ll keep you cool (or warm!) for years to come. So grab that manual, set a monthly reminder to clean the filters, and give your AC the TLC it deserves. Trust me—you’ll thank yourself when summer’s hottest day hits and your unit runs like a champ.
Frequently Asked Questions
How do I set up my Mitsubishi air conditioner for the first time?
Follow the Mitsubishi air conditioner instructions included in the manual to mount the unit, connect refrigerant lines, and pair the remote. Ensure the indoor and outdoor units are level and properly spaced for optimal airflow.
Why is my Mitsubishi AC not cooling efficiently?
Check if the air filter is clogged or if the outdoor unit is obstructed by debris. Refer to the Mitsubishi air conditioner instructions for cleaning guidelines and ensure all settings match your desired temperature.
How often should I clean my Mitsubishi AC’s air filter?
Clean the filter every 2–4 weeks during heavy use to maintain airflow and efficiency. Simply remove the front panel, rinse the filter with water, and dry it thoroughly before reinstalling.
Can I use a Mitsubishi AC without the remote control?
Yes, most models have a manual override button behind the front panel for basic operation. However, the remote or a smart adapter is needed for advanced settings like timers and modes.
What do the error codes on my Mitsubishi AC mean?
Error codes (e.g., E6, P8) indicate specific issues like sensor failures or refrigerant leaks. Consult your model’s troubleshooting section in the manual or contact Mitsubishi support for resolution.
How do I enable energy-saving mode on my Mitsubishi AC?
Press the “Econo Cool” or “Energy Saver” button on the remote, as outlined in the Mitsubishi air conditioner instructions. This mode reduces power consumption while maintaining a comfortable temperature.