
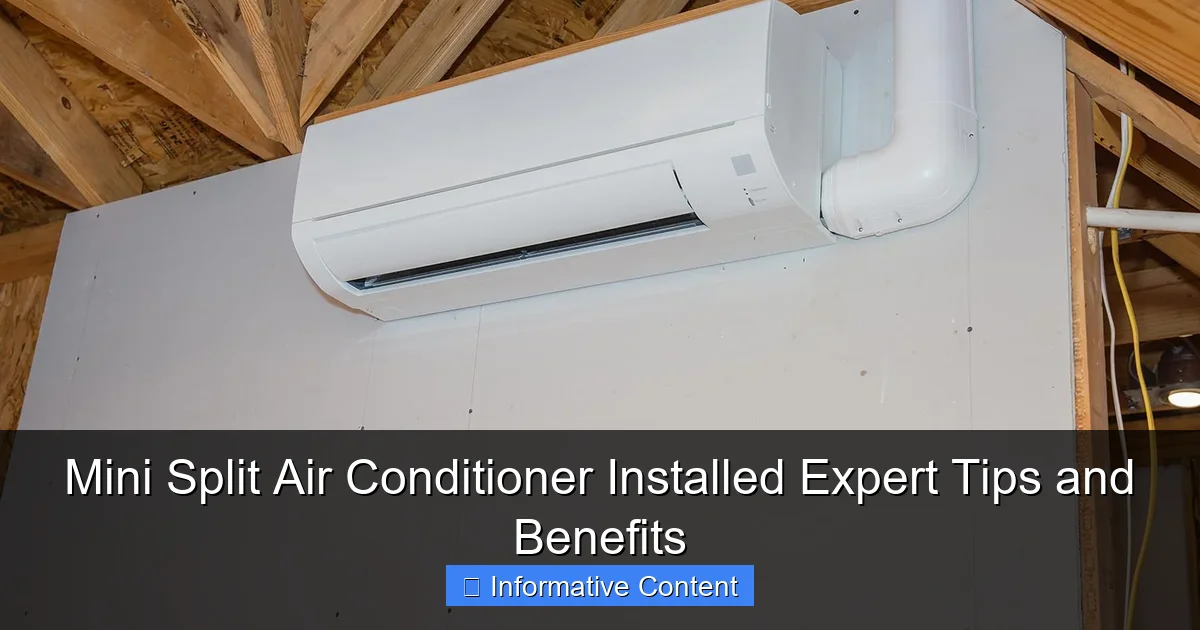
Featured image for mini split air conditioner installed
Image source: hvacseer.com
Professional installation of a mini split air conditioner ensures peak performance, energy efficiency, and long-term reliability. A properly installed system eliminates common issues like refrigerant leaks, poor airflow, and electrical faults—maximizing comfort and lowering utility bills. Trusting experts guarantees correct sizing, optimal placement, and warranty compliance for lasting climate control.
Key Takeaways
- Hire a pro: Ensure correct sizing, placement, and refrigerant line installation for peak efficiency.
- Choose inverter tech: Opt for inverter-driven units to save energy and reduce noise.
- Seal connections tightly: Prevent air leaks to maintain performance and lower utility bills.
- Prioritize maintenance: Clean filters quarterly to extend lifespan and improve air quality.
- Use zones wisely: Install in frequently used rooms for cost-effective, personalized cooling.
- Verify warranties: Confirm coverage for parts and labor to avoid surprise repair costs.
📑 Table of Contents
- Why a Mini Split Air Conditioner Installed System Might Be Your Home’s Best Upgrade
- What Is a Mini Split Air Conditioner and How Does It Work?
- The Installation Process: What to Expect When You Get a Mini Split Air Conditioner Installed
- Benefits of a Mini Split Air Conditioner Installed: Why It’s Worth It
- Expert Tips for a Smooth Installation and Optimal Performance
- Common Challenges and How to Avoid Them
- Cost Comparison: Mini Split vs. Other Cooling Options
- Final Thoughts: Is a Mini Split Right for You?
Why a Mini Split Air Conditioner Installed System Might Be Your Home’s Best Upgrade
Imagine this: It’s the middle of summer, and your house feels like a sauna. You’ve got fans running, windows open, and maybe even a portable AC unit clattering in the corner. But no matter what you do, the air stays thick and sticky. That’s when you start wondering: Is there a better way to cool (and heat) your home without tearing down walls or dealing with bulky ductwork? Enter the mini split air conditioner installed system—a sleek, efficient, and surprisingly simple solution that’s been quietly revolutionizing home comfort for years.
When I first considered a mini split for my own home, I was skeptical. I’d always assumed central AC was the gold standard, and I didn’t want to deal with the hassle of installation. But after researching and eventually installing a mini split, I realized it wasn’t just a “good alternative”—it was often a better choice. Whether you’re retrofitting an older home, cooling a sunroom, or just tired of high energy bills, a mini split offers flexibility, efficiency, and quiet operation that’s hard to beat. And the best part? With the right planning, a mini split air conditioner installed can feel like it was always meant to be part of your home.
What Is a Mini Split Air Conditioner and How Does It Work?
The Basic Components: Inside and Out
A mini split system is like a hybrid between a traditional central AC and a window unit. Instead of ducts, it uses refrigerant lines to connect an outdoor compressor to one or more indoor air-handling units. Here’s the breakdown:
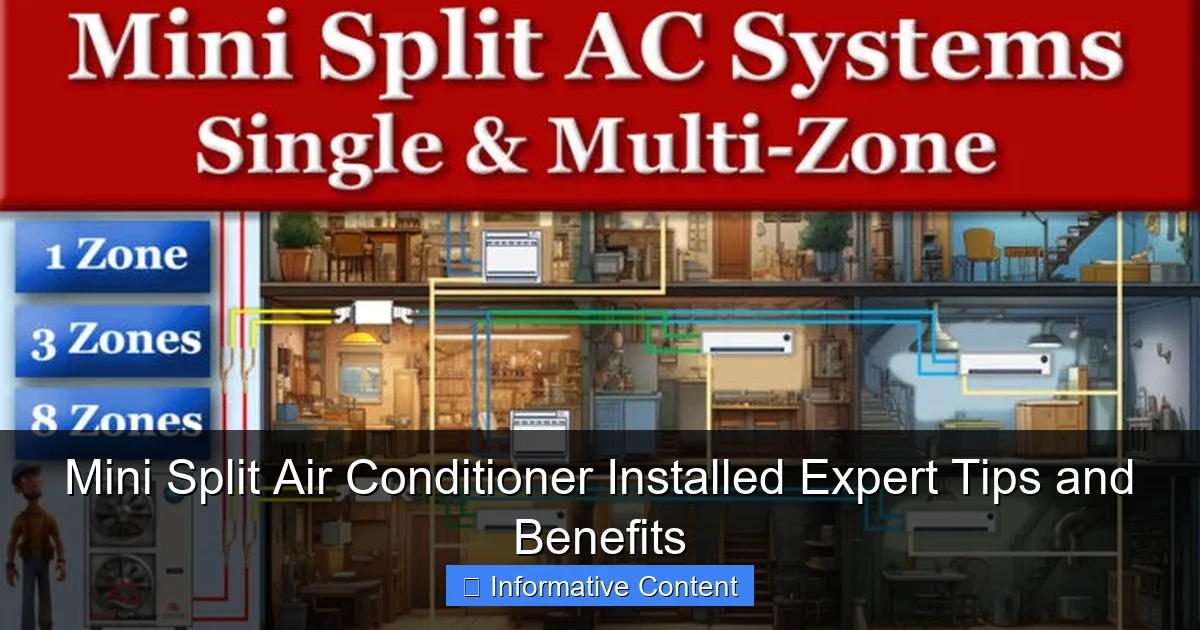
Visual guide about mini split air conditioner installed
Image source: mepacademy.com
- Outdoor unit: Contains the compressor and condenser. It’s usually mounted on a wall bracket or concrete pad outside your home.
- Indoor unit(s): These are mounted on walls or ceilings inside the rooms you want to cool (or heat). They blow conditioned air directly into the space.
- Refrigerant lines: Copper tubes that carry refrigerant between the indoor and outdoor units. These are routed through a small hole in the wall (about 3 inches in diameter).
- Drain line: Removes condensation from the indoor unit to the outside.
- Power and control wires: Connect the units and allow remote operation.
Unlike window units, which are loud and block views, mini splits are whisper-quiet. The noisiest part—the compressor—sits outside, so the indoor unit operates at around 20–30 decibels (about as loud as a whisper).
How the Cooling (and Heating) Happens
Mini splits use heat pump technology, which means they don’t just cool—they also heat your home. In cooling mode, they absorb heat from inside and release it outside. In heating mode, they reverse the process. This makes them incredibly efficient, especially in mild to moderate climates.
For example, I live in a coastal area where winters are cool but rarely freezing. My mini split handles both summer heatwaves and winter chills without breaking a sweat. And because it’s a heat pump, it uses far less electricity than a space heater or electric furnace. In fact, many models have a Seasonal Energy Efficiency Ratio (SEER) of 20+ and Heating Seasonal Performance Factor (HSPF) of 10+, which translates to big energy savings.
Single-Zone vs. Multi-Zone Systems
One of the biggest advantages of a mini split is its flexibility. You can choose:
- Single-zone: One indoor unit connected to one outdoor unit. Ideal for cooling a single room (like a home office or sunroom).
- Multi-zone: One outdoor unit powers multiple indoor units (up to 8, depending on the model). Perfect for whole-home comfort with individual temperature control per room.
I started with a single-zone unit in my home office. When I realized how much I loved the quiet, consistent cooling, I upgraded to a multi-zone system for the whole house. The ability to turn off the AC in unused rooms (like guest bedrooms) has cut my energy bill by nearly 30%.
The Installation Process: What to Expect When You Get a Mini Split Air Conditioner Installed
Step 1: Assessment and Planning (The Most Important Part)
Before any tools come out, a professional installer will assess your home. This includes:
- Measuring room sizes to determine BTU (British Thermal Unit) needs.
- Identifying the best location for the outdoor unit (away from direct sunlight, debris, and noise-sensitive areas).
- Planning the route for refrigerant lines (shorter is better—ideally under 50 feet).
- Checking electrical capacity to ensure your panel can handle the added load.
Pro tip: If you’re DIY-inclined, don’t skip this step. Even if you hire someone, understanding the layout helps you spot potential issues. For example, I once saw an installer plan to run lines across a roof. I suggested a shorter path through a crawl space instead—saved time and avoided roof damage.
Step 2: Mounting the Indoor Unit
The indoor unit is mounted high on the wall (usually near the ceiling) to allow even air distribution. The installer will:
- Mark the mounting template and drill pilot holes.
- Secure the mounting plate with screws.
- Connect the drain line to the unit (it slopes downward to prevent clogs).
Common mistake: Mounting the unit too low. This can cause “cold spots” near the floor and uneven cooling. Aim for 6–8 inches from the ceiling.
Step 3: Running Refrigerant Lines and Wiring
This is where precision matters. The installer will:
- Drill a hole (3 inches) through the wall for the lines and wires.
- Flare and connect copper refrigerant lines (requires a vacuum pump to remove air and moisture).
- Run the drain line outside, ensuring it has a slight slope.
- Connect power and control wires to the indoor unit.
Real talk: This step is messy. Dust, debris, and even a bit of drywall dust are normal. I recommend covering furniture with drop cloths and sealing off the room if possible.
Step 4: Installing the Outdoor Unit
The outdoor unit needs a stable, level surface. Options include:
- Concrete pad: Most durable, but requires curing time.
- Wall bracket: Great for tight spaces or second-story units.
- Ground-mounted: Use a vibration-dampening pad to reduce noise.
Pro tip: Leave at least 12 inches of clearance around the unit for airflow. I’ve seen units installed too close to walls or fences—it reduces efficiency and can trigger error codes.
Step 5: Charging and Testing
After everything’s connected, the installer will:
- Evacuate the refrigerant lines with a vacuum pump (takes 30–60 minutes).
- Charge the system with the correct amount of refrigerant (measured in pounds).
- Turn on the system and check for leaks, proper airflow, and temperature differentials.
Red flag: If the system doesn’t cool/heat within 10 minutes, there’s likely an issue with the refrigerant charge or wiring. Don’t sign off until you’re 100% sure it’s working.
Benefits of a Mini Split Air Conditioner Installed: Why It’s Worth It
Energy Efficiency That Pays Off
Mini splits are among the most efficient HVAC systems available. Here’s why:
- Inverter-driven compressors: Instead of turning on/off like traditional units, they ramp up/down to match demand. This saves energy and reduces wear.
- Zoned cooling/heating: No energy wasted on empty rooms. My utility bill dropped $40/month after switching.
- High SEER ratings: Many models exceed 20 SEER (compared to 13–16 for older central ACs).
Example: A 12,000 BTU mini split with a 22 SEER rating uses about 550 watts per hour. A window unit with 10 SEER uses 1,200 watts for the same cooling power.
Quiet Operation—No More Loud AC
Traditional AC units can hit 60–70 decibels (like a vacuum cleaner). Mini splits? Around 20–30 decibels. I can have a conversation in my living room with the unit running, and guests often don’t even notice it’s on.
No Ductwork, No Problem
Ducts lose 20–30% of energy through leaks and poor insulation. Mini splits eliminate this. They’re perfect for:
- Homes without ducts (like older houses).
- Room additions (no need to extend central AC).
- Basements or attics (where ducts are inefficient).
Heating and Cooling in One
Most mini splits are heat pumps, so you get year-round comfort. In my area, it heats efficiently down to 20°F (-6°C). If you live in a colder climate, some models work down to -15°F (-26°C) with a backup electric heater.
Improved Air Quality
Many indoor units have multi-stage air filters that trap dust, pollen, and even some bacteria. I’ve noticed fewer allergy symptoms since installing mine—especially during spring.
Expert Tips for a Smooth Installation and Optimal Performance
1. Hire a Licensed Pro (But Be Involved)
DIY installation voids most warranties. A licensed HVAC technician ensures:
- Proper refrigerant charging (critical for efficiency).
- Compliance with local codes.
- Warranty validity (most require professional installation).
How to pick a pro: Look for NATE-certified techs or HVAC Excellence certification. Ask for references and check online reviews.
2. Plan for the Long Term
- Future expansions: If you might add more indoor units, install a larger outdoor unit now.
- Line length: Keep refrigerant lines under 50 feet if possible. Longer runs reduce efficiency.
- Drain access: Ensure the drain line is easy to clean (use a T-connection for future maintenance).
3. Optimize Unit Placement
- Indoor unit: Away from direct sunlight, heat sources, and furniture that blocks airflow.
- Outdoor unit: In a shaded area with good airflow. Avoid placing it under a deck or near a patio where noise might bother neighbors.
My mistake: I once placed an outdoor unit under a tree. Leaves clogged the condenser coils within a month. Now I trim branches and clean the unit monthly.
4. Use a Programmable Thermostat
Many mini splits come with Wi-Fi remotes. Use them to:
- Set schedules (e.g., cool at 6 PM, warm at 7 AM).
- Monitor energy use.
- Control multiple zones from your phone.
I set my bedroom unit to 68°F at night and 78°F during the day. It saves energy without sacrificing comfort.
5. Maintain Your System
Simple tasks keep your mini split running smoothly:
- Clean filters monthly: Rinse with water (don’t use harsh cleaners).
- Inspect the outdoor unit quarterly: Clear debris and check for corrosion.
- Schedule annual professional maintenance: A pro can check refrigerant levels, electrical connections, and coil cleanliness.
Common Challenges and How to Avoid Them
Refrigerant Leaks
Leaks reduce efficiency and can damage the compressor. Signs include:
- Reduced cooling/heating.
- Hissing sounds.
- Ice buildup on the indoor unit.
Solution: Only licensed techs should handle refrigerant. If you suspect a leak, turn off the system and call a pro.
Drain Line Clogs
Algae and mold can clog the drain line, causing water leaks. Prevent this by:
- Flushing the line with a mixture of bleach and water (1:10 ratio) every 6 months.
- Installing a condensate pump if the unit is below the drain exit.
Condensation on Indoor Unit
If the indoor unit is dripping, check:
- Drain line slope (must be downward).
- Insulation on refrigerant lines (missing insulation can cause condensation).
- Filter cleanliness (dirty filters reduce airflow and cause ice buildup).
Noisy Outdoor Unit
Some noise is normal, but loud bangs or vibrations suggest:
- Loose mounting bolts.
- Debris in the fan.
- Compressor issues (rare but serious).
Quick fix: Tighten bolts and clear debris. If noise persists, call a pro.
Cost Comparison: Mini Split vs. Other Cooling Options
Below is a breakdown of average costs for a 2,000 sq. ft. home:
| System Type | Equipment Cost | Installation Cost | Annual Energy Cost | Lifespan |
|---|---|---|---|---|
| Mini Split (Multi-Zone) | $4,000–$8,000 | $1,500–$3,000 | $300–$500 | 15–20 years |
| Central AC | $3,500–$7,500 | $2,000–$6,000 | $600–$1,000 | 12–15 years |
| Window Units (4 rooms) | $800–$1,200 | $0 (DIY) | $800–$1,200 | 5–8 years |
| Ductless Heat Pump (Mini Split) | $4,500–$9,000 | $1,800–$3,500 | $250–$450 | 15–20 years |
While the upfront cost of a mini split air conditioner installed is higher than window units, the long-term savings in energy and maintenance make it a smarter investment. Plus, you gain heating capability and quieter operation.
Final Thoughts: Is a Mini Split Right for You?
After years of using a mini split air conditioner installed in my home, I can confidently say it’s one of the best upgrades I’ve made. The combination of energy efficiency, quiet operation, and zoned comfort is hard to beat. It’s not just for retrofits or room additions—many new homes are skipping ducts altogether in favor of mini splits.
But it’s not a one-size-fits-all solution. If you live in an area with extreme winters (below -15°F), you might need a backup heating system. And if you’re on a tight budget, window units or portable ACs can work for short-term needs.
The key is to plan carefully, hire a qualified installer, and maintain your system. With those steps, a mini split can provide reliable, comfortable cooling (and heating) for over 15 years. So if you’re tired of high bills, noisy AC, or uneven temperatures, it’s time to consider this smart, modern solution. Your home—and your wallet—will thank you.
Frequently Asked Questions
What is a mini split air conditioner installed system?
A mini split air conditioner installed system consists of an outdoor compressor and one or more indoor air-handling units, connected by a refrigerant line. It’s a ductless solution ideal for heating and cooling individual rooms or zones efficiently.
How much does a mini split air conditioner installed cost?
The cost to have a mini split air conditioner installed typically ranges from $2,000 to $10,000, depending on the number of zones, unit capacity, and labor. While the upfront cost is higher than window units, long-term energy savings make it a worthwhile investment.
Can I install a mini split air conditioner myself?
While DIY kits are available, professional installation is strongly recommended to ensure proper refrigerant handling, electrical connections, and optimal performance. A licensed HVAC technician ensures your mini split air conditioner installed system operates safely and efficiently.
What are the benefits of a mini split air conditioner installed in my home?
A mini split air conditioner installed offers energy-efficient zoned cooling and heating, quiet operation, and improved indoor air quality without ductwork. It’s ideal for room additions, garages, or homes lacking central HVAC systems.
How long does it take to install a mini split air conditioner?
Most mini split air conditioner installations take 4 to 8 hours, depending on the number of indoor units and complexity. Factors like wall type, line set routing, and electrical access can influence the total time.
Is a mini split air conditioner suitable for cold climates?
Yes, modern mini split air conditioners with heat pumps operate efficiently in temperatures as low as -15°F. Many models include advanced features like inverter compressors for reliable heating and cooling in cold climates.