

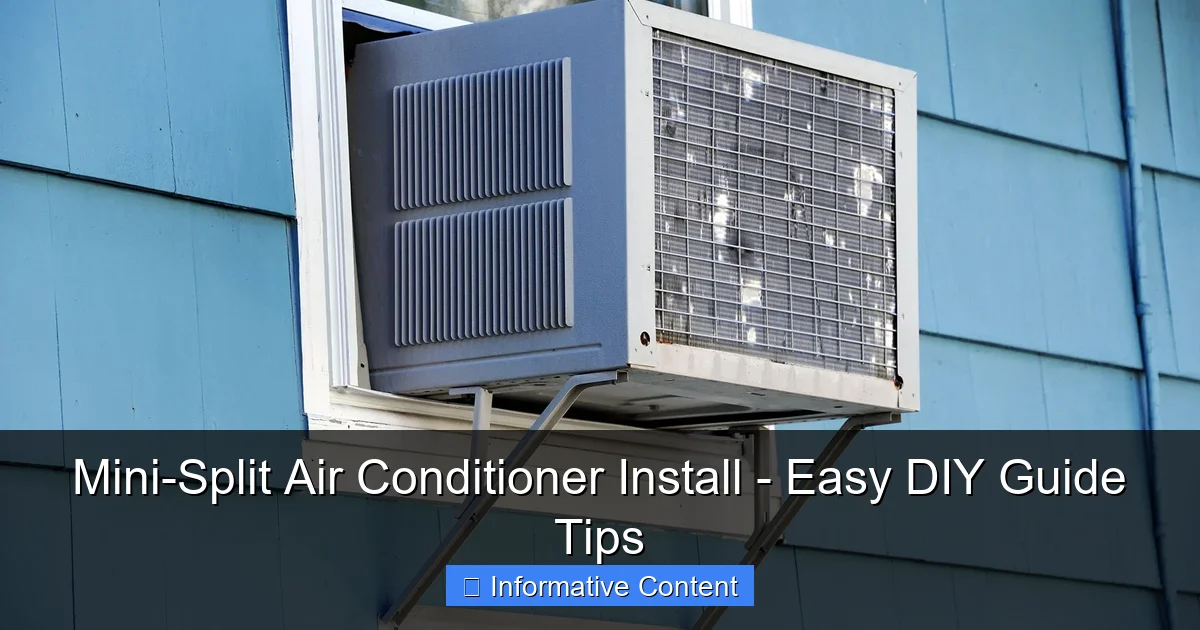
Featured image for mini-split air conditioner install
Image source: m.media-amazon.com
Installing a mini-split air conditioner yourself is a cost-effective way to cool your space efficiently—without needing a professional HVAC technician. With the right tools, clear instructions, and attention to mounting, refrigerant line routing, and electrical connections, a DIY mini-split install can be completed in a weekend while ensuring optimal performance and energy savings.
Key Takeaways
- Plan carefully: Choose the right location for indoor and outdoor units to maximize efficiency.
- Check power supply: Ensure your electrical system meets the unit’s voltage and amperage requirements.
- Use proper tools: A drill, vacuum pump, and refrigerant gauge set are essential for installation.
- Seal gaps: Prevent air leaks by sealing holes with foam or caulk after running lines.
- Test thoroughly: Verify refrigerant levels and system performance before finalizing the install.
- Follow local codes: Always comply with building and electrical regulations for safety and legality.
📑 Table of Contents
- Why a Mini-Split Air Conditioner Might Be Your Best Summer Upgrade
- What Is a Mini-Split Air Conditioner and Why Choose It?
- Planning Your Mini-Split Air Conditioner Install: The Prep Work That Matters
- Step-by-Step Mini-Split Air Conditioner Install (DIY Edition)
- Common Mistakes and How to Avoid Them
- Maintenance Tips to Keep Your Mini-Split Running Smoothly
- Cost Comparison: DIY vs. Professional Install
- Final Thoughts: Is a DIY Mini-Split Air Conditioner Install Right for You?
Why a Mini-Split Air Conditioner Might Be Your Best Summer Upgrade
Let’s face it—summer heat can turn even the most peaceful home into a sweaty, sticky mess. I remember one particularly brutal July when my central AC decided to give up the ghost mid-week. I was stuck with fans and cold showers, and let me tell you, neither did much to cool me down. That’s when I discovered the mini-split air conditioner install—a game-changer for anyone tired of noisy, inefficient cooling systems.
Mini-split systems are like the quiet, efficient neighbors you wish you had: they cool (or heat) individual rooms, use less energy, and don’t require ductwork. Whether you’re retrofitting an older home, cooling a new addition, or just tired of sky-high energy bills, a mini-split can be a smart, long-term solution. And the best part? With the right tools and a little patience, mini-split air conditioner install can be a rewarding DIY project—no HVAC license required.
What Is a Mini-Split Air Conditioner and Why Choose It?
Before you grab your tools, it’s worth understanding what makes mini-splits different—and why they’re gaining popularity fast.
Visual guide about mini-split air conditioner install
Image source: stackheating.com
How Mini-Splits Work (Without the Tech Jargon)
Think of a mini-split like a two-part team. The indoor unit (usually mounted high on a wall) blows cool air into the room. The outdoor unit (a compact condenser) sits outside, quietly removing heat from the air and expelling it. They’re connected by a small refrigerant line, a power cable, and a drain hose—all tucked neatly through a 3-inch hole in the wall.
Unlike central AC, which cools the whole house even when you’re only using one room, mini-splits let you zone your cooling. Only cool the bedroom at night? Only the living room during the day? No problem. That means less energy waste and lower bills.
Top Benefits You’ll Actually Notice
- No ducts, no dust: Ductless systems mean fewer places for allergens and dust to hide. Great for allergy sufferers.
- Super quiet: Indoor units run at a whisper—often quieter than a refrigerator.
- Energy efficient: Most models have high SEER ratings (Seasonal Energy Efficiency Ratio). Some go up to 30 SEER, meaning you get more cooling per watt.
- Heating too: Many models double as heat pumps, so you can use them year-round.
- Easy install: No major renovations. No tearing into walls or ceilings.
One homeowner in Portland, Oregon, told me her electric bill dropped by 40% after replacing window units with a single mini-split. “I didn’t think one unit could cool two rooms,” she said. “But it did—and it was quieter than my coffee maker.”
When a Mini-Split Makes the Most Sense
Mini-splits shine in specific situations:
- Older homes without ductwork
- Room additions (like a sunroom or garage conversion)
- Homes with inconsistent cooling (hot rooms, cold rooms)
- Energy-conscious homeowners wanting to reduce carbon footprint
- Anyone tired of noisy window units
But they’re not perfect for every home. If you’re cooling a large, open-plan space with no room divisions, a central system might still be better. But for most single-family homes or apartments, a mini-split air conditioner install is a smart move.
Planning Your Mini-Split Air Conditioner Install: The Prep Work That Matters
I’ll be honest: the actual installation is only about 20% of the job. The other 80%? Planning. Skip this, and you’ll end up with poor airflow, an ugly outdoor unit, or a system that can’t keep up.
Step 1: Choose the Right Size (And Avoid the “Bigger Is Better” Trap)
Size matters—but not how you think. A unit that’s too big will cool too fast, then shut off, leaving humidity behind (hello, sticky air). Too small, and it runs nonstop, wasting energy.
Use British Thermal Units (BTUs) to match your room size. Here’s a quick guide:
- 150–250 sq ft: 6,000 BTUs
- 250–350 sq ft: 9,000 BTUs
- 350–550 sq ft: 12,000 BTUs
- 550–800 sq ft: 18,000 BTUs
- 800–1,000 sq ft: 24,000 BTUs
But don’t just go by square footage. Consider:
- Sun exposure (south-facing rooms need more BTUs)
- Ceiling height (over 8 feet? Add 10–20% more capacity)
- Insulation quality (poorly insulated = more cooling needed)
- Number of windows and heat sources (kitchen, electronics)
Pro tip: Use an online BTU calculator (like those from ENERGY STAR) and cross-check with the manufacturer’s recommendations. I once installed a 12,000 BTU unit in a 300 sq ft room with big west-facing windows. It struggled. Upgrading to 18,000 BTUs fixed it—and my tenant stopped complaining about “the sauna effect.”
Step 2: Pick the Perfect Indoor Location
The indoor unit needs:
- At least 6 inches of clearance on all sides (for airflow)
- No direct exposure to sunlight or heat sources (like lamps or TVs)
- A solid wall (not drywall over insulation or a hollow partition)
- A path to the outside that avoids major obstructions
I like to mount it high on an interior wall, opposite the main heat source. In a bedroom, that’s usually the window. In a living room, it might be the kitchen wall. Avoid corners—airflow gets restricted.
Step 3: Find the Best Outdoor Spot
The outdoor condenser needs:
- A stable, level surface (concrete pad, wall bracket, or ground mount)
- Good airflow (at least 12 inches of clearance on all sides)
- Protection from snow, rain, and falling debris (but not enclosed)
- A short, straight line to the indoor unit (longer lines reduce efficiency)
I once saw a unit mounted under a deck—great for hiding it, but terrible for airflow. The homeowner had to clean it weekly and it ran 30% longer. Not worth the “neat” factor.
Step 4: Gather Your Tools and Materials
You’ll need:
- Mini-split kit (includes indoor unit, outdoor unit, line set, power cable, remote)
- Drill with 3-inch hole saw (for the wall penetration)
- Level and stud finder
- Wrenches (usually included with the kit)
- Vacuum pump (for removing air from the refrigerant lines)
- Manifold gauge set (to check refrigerant pressure)
- Pipe insulation (to wrap the refrigerant lines)
- Condensate pump (if the drain line can’t slope naturally)
- Electrical tools (voltage tester, wire strippers, conduit, etc.)
Note: Some kits include the vacuum pump and gauges. Others don’t. Check before you buy. And if you’re not comfortable with electrical work, hire a licensed electrician. It’s not worth the risk.
Step-by-Step Mini-Split Air Conditioner Install (DIY Edition)
Now the fun begins. I’ll walk you through each step, with real-life tips from my own installs and common mistakes to avoid.
Step 1: Mount the Indoor Unit
1. Use the mounting template (included with the unit) to mark the wall. Make sure it’s level.
2. Drill pilot holes and secure the mounting plate with screws. I use 3-inch lag screws into wall studs for extra support.
3. Hang the indoor unit on the plate. It should click into place.
4. Connect the refrigerant lines, drain hose, and power cable to the unit (but don’t tighten yet).
Tip: I always run the lines behind the unit first, then pull them through the wall hole. It’s easier to manage the slack.
Step 2: Drill the Wall Hole
1. Mark the center point for the hole (usually 3–4 inches below the indoor unit).
2. Use a 3-inch hole saw to drill through the wall. Start from the inside, then finish from the outside to prevent blowout.
3. Insert a PVC sleeve (included in most kits) to protect the lines and prevent air leaks.
Caution: Watch for pipes, wires, or structural beams. Use a stud finder and drill slowly. I once hit a water pipe—lesson learned: always shut off water before drilling.
Step 3: Run the Lines and Wiring
1. Pull the refrigerant lines, drain hose, and power cable through the wall hole.
2. Connect them to the indoor unit. Use flare wrenches to tighten the refrigerant connections—don’t overtighten.
3. Wrap the lines with pipe insulation. Secure with zip ties every 12 inches.
4. Route the drain hose downward. If it can’t slope naturally, install a condensate pump.
Pro tip: Use a fish tape to guide the lines through the wall. And leave a slight “drip loop” outside—it keeps rain from running back into the house.
Step 4: Mount the Outdoor Unit
1. Place the outdoor unit on a level surface. Use a concrete pad, wall bracket, or ground mount.
2. Secure it with bolts or straps. I use rubber vibration pads to reduce noise.
3. Connect the refrigerant lines to the outdoor unit. Again, use flare wrenches and don’t overtighten.
Tip: Keep the lines as short and straight as possible. Bends and long runs reduce efficiency.
Step 5: Evacuate the Lines (The “Hard Part”)
This step removes air and moisture from the refrigerant lines. Skip it, and your system will underperform or fail.
1. Connect the manifold gauges to the service ports on the outdoor unit.
2. Attach the vacuum pump to the center hose.
3. Open both valves on the gauges and run the pump for at least 30 minutes.
4. Check the vacuum level. It should hold at -30 inHg for 15 minutes with the pump off.
5. Close the valves, disconnect the pump, and open the refrigerant valves on the outdoor unit.
Warning: Never release refrigerant into the air. It’s illegal and harmful to the environment. Always use a recovery machine if you’re removing refrigerant.
Step 6: Electrical Connection (When to Call a Pro)
1. Run a dedicated 20-amp circuit from your main panel to the outdoor unit.
2. Use outdoor-rated conduit and wire (usually 12/2 with ground).
3. Connect the power to the outdoor unit’s terminal block.
4. Connect the low-voltage signal wire between indoor and outdoor units.
Critical: If you’re not 100% confident with electrical work, stop here and call a licensed electrician. A bad connection can damage the unit or create a fire hazard.
Common Mistakes and How to Avoid Them
Even experienced DIYers make these errors. Learn from them—so you don’t have to.
1. Wrong Sizing (Again)
As I mentioned, oversized units cycle on and off too fast. This is called short-cycling. It wastes energy and reduces comfort. Undersized units run nonstop, leading to premature wear.
Fix: Use a BTU calculator and consider all factors—not just square footage. And if you’re between sizes, go up one. Better to have a little extra capacity than not enough.
2. Poor Drainage
Water pooling around the indoor unit? That’s usually a clogged or improperly sloped drain hose.
Fix: Clean the drain hose with a wet/dry vac or pipe cleaner. And always slope it downward—at least 1/4 inch per foot.
3. Refrigerant Leaks
Low refrigerant causes poor cooling, ice buildup, and compressor damage.
Fix: Check for oil stains or hissing sounds near connections. But never try to “top off” refrigerant yourself. Only a licensed HVAC tech should handle refrigerant.
4. Noisy Outdoor Unit
Vibration can make the unit rattle against the wall or pad.
Fix: Use rubber vibration pads. And make sure it’s level. Even a 1/4-inch tilt can cause noise.
5. Blocked Airflow
Furniture, curtains, or plants too close to the indoor unit block airflow.
Fix: Keep at least 6 inches of clearance. And never cover the unit—even with a “decorative box.”
Maintenance Tips to Keep Your Mini-Split Running Smoothly
Good news: mini-splits are low-maintenance. But a little care goes a long way.
Monthly: Clean the Filters
Most units have washable air filters. Pull them out, rinse with water, and let them dry. Do this every 4–6 weeks in summer.
Why it matters: Dirty filters reduce airflow, strain the motor, and make the unit work harder. One homeowner told me she skipped cleaning for three months. Her energy bill jumped 25%.
Seasonally: Check the Drain Line
Flush the drain hose with vinegar or a mild bleach solution to prevent mold and clogs.
Annually: Inspect the Outdoor Unit
1. Turn off the power.
2. Remove debris (leaves, dirt, spider webs).
3. Straighten bent fins with a fin comb.
4. Check for leaks or corrosion.
5. Re-tighten loose bolts.
I do this every spring, before the heat hits. It’s quick and makes a big difference.
Every 3–5 Years: Professional Tune-Up
Even if everything seems fine, have a pro check:
- Refrigerant levels
- Electrical connections
- Compressor health
- Drain pan condition
It’s like a car oil change—cheap insurance against major repairs.
Cost Comparison: DIY vs. Professional Install
Let’s talk numbers. Here’s what you can expect:
| Item | DIY Cost | Professional Cost | Notes |
|---|---|---|---|
| Mini-split system (12,000 BTU) | $800–$1,500 | $800–$1,500 | Same unit, different install fees |
| Tools (if not owned) | $200–$500 | $0 | Vacuum pump, gauges, hole saw |
| Electrical work | $100–$300 (electrician) | $300–$600 (included) | Only if you can’t DIY safely |
| Labor (install) | $0 | $1,000–$2,500 | 2–6 hours, depending on complexity |
| Total (approx.) | $1,100–$2,300 | $2,100–$4,600 | DIY saves 40–50% |
DIY isn’t always cheaper—especially if you need to buy tools or hire an electrician. But it gives you control, satisfaction, and the chance to learn. Plus, you can do it on your own schedule.
One caveat: some manufacturers void the warranty if the system isn’t installed by a licensed pro. Check the fine print before you start.
Final Thoughts: Is a DIY Mini-Split Air Conditioner Install Right for You?
Let’s wrap this up with honesty. A mini-split air conditioner install isn’t the easiest DIY project. It requires precision, patience, and a willingness to learn. But it’s not impossible. I’ve seen homeowners with zero HVAC experience pull it off—and love the results.
The key is preparation. Plan carefully, size correctly, and don’t skip the evacuation step. And if electrical work makes you nervous, don’t risk it. Safety first.
When done right, a mini-split delivers quiet, efficient, zoned comfort for years. It can lower your energy bills, improve indoor air quality, and even boost your home’s value. And there’s something deeply satisfying about cooling your home with a system you installed.
So if you’re ready to ditch the window units, stop sweating through summer, and take control of your comfort, give it a try. Start small—one room, one unit. You’ve got this.
And when you’re done? Sit back, turn on the AC, and enjoy the cool. You’ve earned it.
Frequently Asked Questions
Can I install a mini-split air conditioner myself?
Yes, a mini-split air conditioner install can be a DIY project if you have basic electrical and plumbing skills. However, always follow local codes and manufacturer guidelines to ensure safety and efficiency.
What tools do I need for a mini-split air conditioner install?
You’ll need a drill, level, vacuum pump, wrenches, wire strippers, and refrigerant gauges. A hole saw for the wall penetration and a ladder for outdoor unit placement are also essential.
How long does a mini-split installation take?
A typical DIY mini-split air conditioner install takes 4–8 hours, depending on complexity. Professional installations may be faster but often cost more for labor.
Do I need a permit to install a mini-split system?
Many areas require permits for HVAC work, especially if refrigerant lines or electrical connections are involved. Check with your local building department before starting the mini-split air conditioner install.
Where should I place the indoor and outdoor units?
Indoor units should be mounted high on an exterior wall, away from direct sunlight. The outdoor unit needs clear airflow, stable footing, and a location within the refrigerant line’s maximum length.
What are common mistakes to avoid during installation?
Skipping the vacuum pump step, improper refrigerant line sealing, or incorrect electrical wiring can damage the system. Always double-check measurements and follow the manual’s instructions carefully.