
Featured image for midea portable air conditioner instructions
Image source: d1pjg4o0tbonat.cloudfront.net
Setting up your Midea portable air conditioner is quick and hassle-free when you follow the clear, step-by-step instructions included in the user manual. From unboxing to optimal cooling in under 15 minutes, this guide covers venting, control panel navigation, and maintenance tips to ensure peak performance all season long.
Key Takeaways
- Read the manual first: Always start with Midea’s setup guide for safe, correct installation.
- Ensure proper venting: Use the included hose and window kit to exhaust hot air efficiently.
- Check power requirements: Confirm outlet compatibility to avoid tripped circuits or malfunctions.
- Use the remote wisely: Master preset modes and timers for optimal comfort and energy savings.
- Clean filters monthly: Maintain airflow and efficiency with regular filter upkeep.
- Drain water when needed: Empty the tank or use continuous drainage for long-term use.
📑 Table of Contents
- Why a Portable Air Conditioner Can Be a Game-Changer for Your Home
- Unboxing and Initial Setup: Getting Started the Right Way
- Understanding the Controls and Settings
- Daily Use and Maintenance Tips
- Troubleshooting Common Issues
- Storing Your Unit Off-Season
- Final Thoughts: Making the Most of Your Midea Portable AC
Why a Portable Air Conditioner Can Be a Game-Changer for Your Home
Let’s be honest: summer heat can be brutal. Whether you’re in a small apartment without central AC or just need to cool down a single room, a portable air conditioner is often the most practical solution. I remember the first time I used a Midea portable air conditioner during a sweltering heatwave. I was living in a third-floor walkup with no central cooling, and the sun turned my bedroom into an oven by 2 p.m. After a few sweaty, sleepless nights, I decided to try a portable unit. The relief was immediate. Within 20 minutes, my room went from sauna-level hot to comfortably cool.
But here’s the catch: even the best portable AC can become a frustrating hassle if you don’t know how to set it up or use it properly. I’ve seen friends struggle with confusing controls, improper venting, or even units that barely cool because they were placed in the wrong spot. That’s why understanding Midea portable air conditioner instructions isn’t just helpful—it’s essential. In this guide, I’ll walk you through everything you need to know, from unboxing to daily use, based on real experience and common pain points. Whether you’re a first-time buyer or just upgrading, this guide will help you get the most out of your unit without the guesswork.
Unboxing and Initial Setup: Getting Started the Right Way
What’s in the Box?
When you first open your Midea portable air conditioner box, you’ll find several key components. Here’s what to expect:
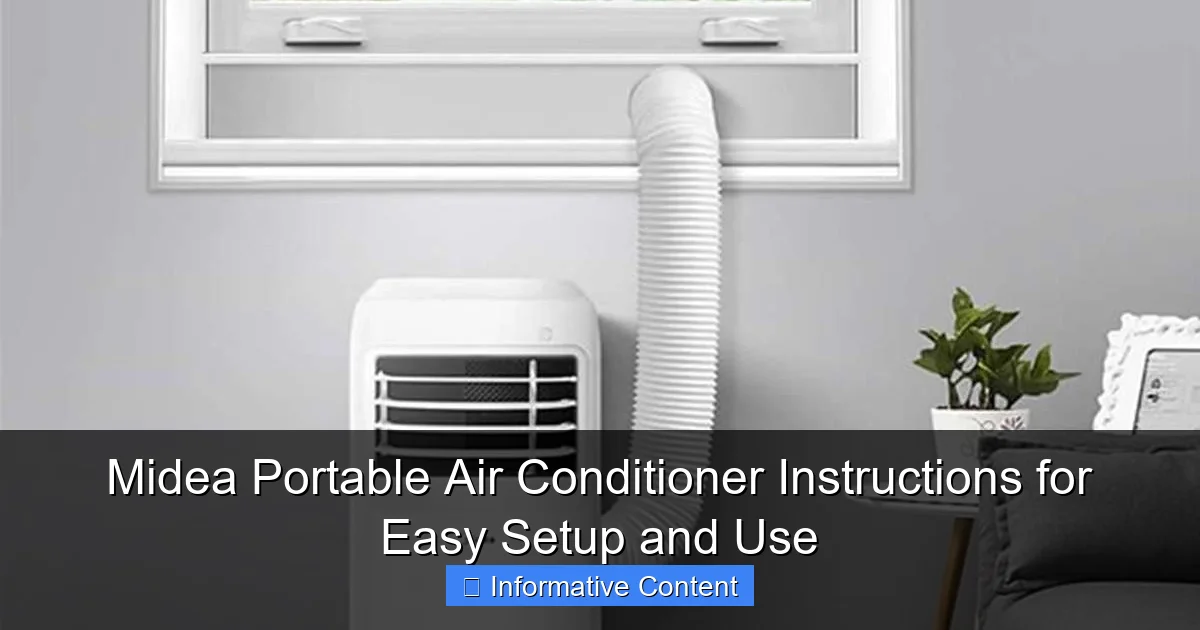
Visual guide about midea portable air conditioner instructions
Image source: d1pjg4o0tbonat.cloudfront.net
- The main AC unit
- Exhaust hose (usually 5–6 feet long)
- Window venting kit (plastic panels, foam strips, and connectors)
- Drain hose (for manual draining models)
- Remote control (with batteries)
- User manual (always keep this handy!)
- Optional: dehumidifying bucket or auto-drain adapter (on select models)
One thing I appreciated right away was how clearly labeled everything was. No guessing which part goes where. Just make sure you don’t toss the packaging too quickly—some people keep the foam inserts to protect the unit during storage or transport.
Choosing the Right Spot for Your Unit
Placement matters more than you think. I once placed my unit near a heat source (a sunny window and a running laptop) and wondered why it wasn’t cooling well. Turns out, placing your portable AC in a hot or poorly ventilated area forces it to work harder and cool less efficiently.
Here’s what to look for:
- Near a window: You need to vent hot air outside, so a window within 6–8 feet is ideal.
- On a flat, stable surface: The unit has wheels, but it should sit level to prevent vibration and noise.
- Away from heat sources: Keep it clear of radiators, ovens, direct sunlight, or electronics that emit heat.
- At least 12–18 inches from walls: Good airflow on all sides helps efficiency.
Pro tip: I always recommend placing the unit in the room you use most—like your bedroom or home office—rather than trying to cool a whole house. Portable ACs are designed for spot cooling, not whole-home coverage.
Venting Through the Window: A Step-by-Step Guide
This is where many people get stuck. Venting seems simple, but if it’s not done right, hot air leaks back in, and your AC struggles.
- Assemble the window kit: Slide the plastic panels together to match your window width. Most kits are adjustable from 24 to 48 inches.
- Attach the exhaust hose: One end connects to the back of the AC unit (usually with a twist-lock or snap-on mechanism). The other end connects to the window kit’s adapter.
- Seal the gaps: Use the included foam strips or weather stripping to block any air leaks around the window. I use extra foam from old AC kits or buy inexpensive foam tape from hardware stores.
- Open the window slightly: The kit should sit securely in the opening. If using a sliding window, close it tightly against the kit.
- Double-check the hose: Make sure it’s not kinked or sagging. A straight, upward angle helps hot air escape more efficiently.
I learned the hard way that a poorly sealed window can reduce cooling efficiency by up to 30%. One summer, I skipped sealing the edges and ended up with a warm, humid room—despite the AC running nonstop. A few minutes with foam tape fixed the problem instantly.
Understanding the Controls and Settings
Remote Control vs. Panel Buttons: What’s the Difference?
Most Midea portable air conditioners come with both a remote control and physical buttons on the unit. I love the remote because it means I don’t have to get up to change the temperature or switch modes. But I’ve also had moments when the remote died or got lost, so knowing the panel buttons is crucial.
Here’s a quick rundown of the main controls:
- Power: Turns the unit on/off.
- Mode: Switches between Cool, Fan, Dry (dehumidify), and Auto (if available).
- Temperature: Adjusts from 61°F to 86°F (16°C to 30°C). I usually set mine to 72°F for a balance of comfort and efficiency.
- Fan Speed: Low, Medium, High. High is great for quick cooling; Low is quieter and better for sleeping.
- Timer: Set the unit to turn on or off after 1–24 hours. Handy for pre-cooling a room before you come home.
- Sleep Mode: Gradually adjusts temperature and fan speed to keep you comfortable overnight (reduces noise and energy use).
- Swing (if available): Oscillates the air vent for wider coverage.
One thing I wish I knew earlier: the remote uses infrared, so it needs a direct line of sight to the unit. If you’re on the other side of a couch or there’s something blocking the signal, it won’t work. I now keep the remote in a designated spot (like a side table) to avoid losing it.
Choosing the Right Mode for Your Needs
Not all modes are created equal. Here’s how to use each one based on your situation:
- Cool Mode: The default. Cools and dehumidifies. Use this on hot, humid days. I run it for a few hours in the afternoon to bring the temp down before bedtime.
- Fan Mode: Circulates air without cooling. Great on mild days or when you just want airflow. It’s also quieter and uses less energy.
- Dry Mode: Removes moisture from the air without cooling much. Perfect for humid climates or damp rooms. I use it during rainy weeks to prevent musty smells and mold.
- Auto Mode: Automatically switches between Cool and Fan based on room temperature. I use this when I’m not home and want the room to stay within a set temp range.
Real-life example: During a particularly humid summer, I used Dry Mode for two hours in the morning. The room felt cooler and fresher, even though the temperature only dropped by 2°F. My clothes dried faster, and the air didn’t feel sticky.
Using the Timer and Sleep Features Effectively
The timer is one of my favorite features. I set it to turn on 30 minutes before I get home from work. By the time I walk in, the room is cool and inviting. You can also set it to turn off after you fall asleep, which saves energy and prevents overcooling.
Sleep Mode is equally useful. It starts by cooling the room to your set temperature, then gradually raises it by 1–2°F every hour. This mimics natural body temperature changes at night and prevents you from waking up too cold. I’ve used Sleep Mode every night for the past two summers, and I’ve never had a single night of poor sleep due to temperature.
Daily Use and Maintenance Tips
How to Operate Your Unit for Maximum Efficiency
Using your Midea portable air conditioner wisely can save you money and extend its lifespan. Here are my top tips:
- Close doors and curtains: Keep the cooled room sealed. Open windows or doors let hot air in, making your AC work harder.
- Pre-cool the room: If you know it’s going to be hot, turn the AC on early. It’s easier to maintain a cool temp than to cool a hot room from scratch.
- Use ceiling fans (if available): They help circulate cool air, so you can set the AC a few degrees higher and still feel comfortable.
- Set a reasonable temperature: Every degree below 72°F increases energy use by about 6–8%. I find 72–74°F is the sweet spot for comfort and efficiency.
- Clean the air filter weekly: A clogged filter restricts airflow and reduces cooling power. I clean mine every Sunday with a vacuum or soft brush.
I once left my unit running with a dirty filter for a month. The cooling performance dropped noticeably, and the unit made a faint rattling noise. After cleaning the filter, it ran like new again. A simple 5-minute task made a huge difference.
Cleaning and Maintaining Your Air Filter
The air filter is your AC’s first line of defense against dust, pollen, and pet hair. If it’s clogged, the unit can’t breathe—and neither can you.
Here’s how to clean it:
- Turn off and unplug the unit.
- Locate the filter (usually behind a front panel or side grille—check your manual).
- Slide it out gently.
- Rinse it under cool water or vacuum it. Avoid soap unless the manual says it’s safe.
- Let it air dry completely (takes about 30–60 minutes).
- Reinsert it and close the panel.
I recommend doing this at least once a week during heavy use. If you have pets or allergies, clean it twice a week. I use a small handheld vacuum to remove dust quickly between washes.
Managing Condensation: Drainage Options
All portable ACs produce condensation as they dehumidify the air. Midea units offer different drainage methods depending on the model:
- Auto-evaporative: Most newer models evaporate condensation into the exhaust air. No manual draining needed. Great for convenience.
- Manual drain: Some models have a drain plug or hose. You’ll need to empty the internal tank every few days, especially in humid conditions.
- Continuous drain: You can attach a hose to the drain port and let water flow out continuously (e.g., into a sink or bucket). I use this in my basement, where humidity is high.
Tip: If your model requires manual draining, check the tank level daily during hot, humid weather. A full tank can shut off the unit to prevent overflow. I once ignored the “full tank” light and came home to a puddle on the floor—not fun.
Troubleshooting Common Issues
Unit Not Cooling: What to Check First
It’s frustrating when your AC runs but doesn’t cool. Before calling customer service, try these fixes:
- Check the mode: Is it set to “Fan” instead of “Cool”? I’ve made this mistake more than once.
- Inspect the exhaust hose: Is it disconnected or kinked? Hot air must escape freely.
- Look at the window seal: Are there gaps? Hot air leaking back in reduces efficiency.
- Clean the filter: A dirty filter can block airflow and reduce cooling.
- Check the temperature setting: Is it set higher than the current room temp? The unit won’t cool if the target temp is already reached.
I once thought my AC was broken because it wasn’t cooling. Turns out, I had set the temp to 80°F on a 78°F day. Oops. A quick adjustment fixed it instantly.
Unusual Noises and Vibrations
Some noise is normal—like the hum of the compressor or the fan. But loud rattling, buzzing, or grinding sounds aren’t.
Common causes:
- Loose parts: Check if the exhaust hose is vibrating against the window or wall. Use tape or foam to secure it.
- Unit not level: Adjust the wheels or use shims to level it.
- Debris in the fan: Turn off the unit and inspect the fan blades. Remove any dust or foreign objects.
- Compressor issues: If the unit makes a loud knocking sound, it could be a failing compressor. Contact Midea support.
I once had a buzzing noise that turned out to be a loose screw in the back panel. Tightening it took two minutes and silenced the unit completely.
Error Codes and What They Mean
Midea units display error codes on the control panel when something’s wrong. Here are the most common ones:
| Error Code | Meaning | Solution |
|---|---|---|
| E1 | Water tank full | Drain the tank or check the auto-drain function. |
| E2 | Temperature sensor issue | Unplug for 10 minutes, then restart. If it persists, contact support. |
| E3 | Compressor overload | Turn off and let the unit rest for 30 minutes. Avoid running it continuously for hours. |
| E5 | Low refrigerant (rare) | Contact a technician. Do not attempt to refill refrigerant yourself. |
I’ve seen E1 pop up a few times during humid weeks. It’s a good reminder to check the tank—even on auto-evaporative models, heavy humidity can overwhelm the system.
Storing Your Unit Off-Season
Cleaning Before Storage
Don’t just pack your AC away dirty. Moisture and dust can cause mold, bad smells, or damage over time.
Here’s my pre-storage checklist:
- Clean the air filter thoroughly.
- Wipe down the exterior with a damp cloth.
- Drain all water from the tank and hose.
- Run Fan Mode for 1–2 hours to dry internal components.
- Store the exhaust hose and window kit in a dry, sealed bag.
I once stored my unit without drying it first. The next summer, it had a musty smell for the first few days. A little extra care prevents that.
Where and How to Store It
Store your portable AC in a cool, dry place—like a closet or basement. Avoid attics or garages where temperatures fluctuate or dust builds up.
- Keep it upright (don’t lay it on its side).
- Use the original box if possible, or cover it with a breathable cloth.
- Keep it away from pets and kids.
- Store the remote control with the unit or in a labeled drawer.
I keep mine in my bedroom closet, wrapped in an old sheet. It’s out of the way but easy to access when summer rolls around.
Final Thoughts: Making the Most of Your Midea Portable AC
Using a Midea portable air conditioner doesn’t have to be complicated. With the right setup, smart settings, and regular maintenance, it can keep you cool and comfortable all summer long. I’ve used mine through heatwaves, power outages (with a backup generator), and even during remote work days when staying cool was essential for focus.
The key is to follow the Midea portable air conditioner instructions carefully—but also to use common sense. Listen to the unit, check for issues early, and don’t ignore small problems. A little attention goes a long way in preventing bigger headaches down the road.
Remember: your portable AC is a tool, not a magic box. It works best when you use it wisely—right placement, proper venting, clean filters, and smart settings. Whether you’re cooling a studio apartment, a home office, or a guest room, this guide gives you everything you need to get started and stay comfortable.
So go ahead—set it up, plug it in, and enjoy that cool, refreshing air. Summer doesn’t stand a chance.
Frequently Asked Questions
How do I set up my Midea portable air conditioner for the first time?
To set up your Midea portable air conditioner, place it near a window or vent for exhaust hose installation, secure the hose with the included window kit, and plug it into a grounded outlet. Refer to the Midea portable air conditioner instructions for detailed diagrams and safety tips.
Why is my Midea portable AC not cooling properly?
Ensure the exhaust hose is properly installed and free of kinks, and check that the air filter isn’t clogged. Also, verify the room size matches the unit’s BTU rating as per the Midea portable air conditioner instructions.
Can I use my Midea portable AC without a window kit?
While not ideal, you can temporarily vent the exhaust hose through a sliding door or drop ceiling using an adjustable panel. However, permanent use without proper venting reduces efficiency and may damage the unit.
How often should I clean the filter in my Midea portable air conditioner?
Clean the filter every 2–4 weeks during regular use to maintain airflow and cooling performance. The Midea portable air conditioner instructions provide step-by-step guidance on removing and washing the filter.
What does the “Full Tank” indicator mean, and how do I empty the water?
This alert means the internal water tank is full, which happens in humid conditions. Turn off the unit, remove the drain plug, and empty the tank—or use continuous drainage with the included hose for uninterrupted operation.
Does the Midea portable AC work with smart home systems?
Select models feature Wi-Fi and app control (check your manual). Pair the unit with the Midea app to adjust settings remotely, but always follow the Midea portable air conditioner instructions for setup and troubleshooting.