

Featured image for lg window air conditioner installation instructions
Image source: images.ctfassets.net
Installing your LG window air conditioner is a breeze with the step-by-step instructions designed for hassle-free setup. From securing the unit in your window to sealing gaps and connecting the exhaust, this guide simplifies every critical step to ensure optimal performance and energy efficiency. No special tools or expertise required—just follow the clear directions and enjoy cool comfort in minutes.
Key Takeaways
- Read the manual first: Always review LG’s instructions before starting installation.
- Measure your window: Ensure correct fit to avoid gaps or instability.
- Secure the unit properly: Use included brackets and screws for safety.
- Seal gaps tightly: Prevent air leaks with foam or weatherstripping.
- Check drainage slope: Tilt unit slightly backward for proper water flow.
- Test before finalizing: Run the AC to confirm stable operation and cooling.
📑 Table of Contents
- Why Proper Installation Matters for Your LG Window Air Conditioner
- Step 1: Pre-Installation Prep – Getting Ready the Right Way
- Step 2: Installing the Mounting Bracket and Side Panels
- Step 3: Positioning and Securing the AC Unit
- Step 4: Electrical Safety and Power Connection
- Step 5: Final Checks and Maintenance Tips
- Conclusion: Enjoy Cool Comfort with Confidence
Why Proper Installation Matters for Your LG Window Air Conditioner
Let’s be honest: installing an air conditioner isn’t exactly the highlight of summer. But when that first wave of heat hits, nothing feels better than stepping into a cool, refreshing room. That’s where your LG window air conditioner comes in—reliable, efficient, and designed to keep your space comfortable all season long. However, even the best unit won’t perform well if it’s not installed correctly. A poorly installed AC can lead to leaks, inefficient cooling, noise issues, and even damage to your window frame or walls.
I’ve been there—rushing to set up the AC before guests arrive, only to realize the side panels don’t fit, or worse, the unit starts dripping water inside. It’s frustrating, and it doesn’t have to happen. The good news? LG makes the process straightforward, and with the right guidance, you can install your LG window air conditioner safely and efficiently in under an hour. In this guide, I’ll walk you through every step of the LG window air conditioner installation instructions, from choosing the right location to sealing gaps and testing performance. Whether you’re a DIY newbie or a seasoned home improver, this guide is designed to make the process as smooth as that first blast of cool air.
Step 1: Pre-Installation Prep – Getting Ready the Right Way
Check the Window Type and Fit
Before unboxing your LG window air conditioner, you need to confirm that your window is compatible. Most LG models are designed for double-hung windows—those with a top and bottom sash that slide vertically. Some units may also work with sliding (horizontal) windows, but always check your model’s manual for specifics.
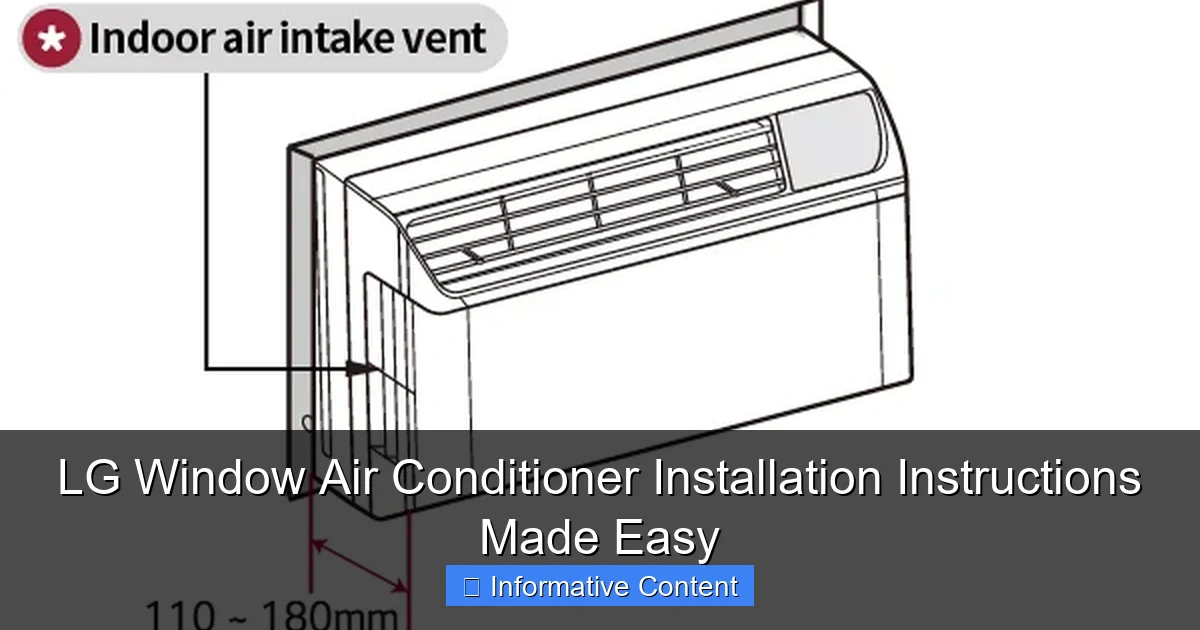
Visual guide about lg window air conditioner installation instructions
Image source: gscs.lge.com
Here’s a quick checklist to verify compatibility:
- Window width: Measure the inside width of the window frame. LG units typically require a minimum width (e.g., 22–36 inches, depending on the model). The AC should fit snugly with side panels extended.
- Window height: The bottom sash should be able to close tightly over the top of the unit. Most LG ACs need at least 14–16 inches of vertical clearance when installed.
- Clearance: Ensure there’s at least 20 inches of unobstructed space in front of the AC for airflow and maintenance.
Pro tip: If your window is too narrow or too wide, don’t force it. You’ll end up with gaps that let hot air in and cool air out. Consider a different model or consult a professional for modifications.
Gather Your Tools and Supplies
You don’t need a full toolbox, but having the right items on hand saves time and stress. Here’s what I recommend:
- Measuring tape
- Phillips screwdriver (often included with the AC)
- Scissors or utility knife
- Pencil (for marking)
- Level (to ensure the unit is tilted slightly outward)
- Weather stripping or foam tape (if needed for sealing)
- Assistant (for lifting—ACs can weigh 50–100 lbs!)
Most LG models come with a mounting kit, including side panels, brackets, screws, and a foam seal. Double-check the box before heading to the hardware store. I once assumed my unit had all the parts—only to find the screws missing. A quick call to LG support got me a replacement kit, but it delayed my installation by a day. Lesson learned: verify before you begin.
Inspect the Unit and Read the Manual
Unbox your LG window air conditioner carefully and lay out all parts. Look for any shipping damage, like dents or broken fins. Then, read the manual—yes, really. It might seem tedious, but LG’s manuals include model-specific details, safety warnings, and diagrams that make installation easier.
For example, my LG LW1216HR came with a unique bracket system that differed from older models. Skipping the manual led to a 10-minute backtrack when I realized I’d mounted the wrong bracket. The manual also lists the exact screw sizes and torque specs (though for home use, “finger-tight plus a quarter turn” usually works).
Step 2: Installing the Mounting Bracket and Side Panels
Attach the Mounting Bracket
Most LG window ACs use a bracket that attaches to the window sill to support the unit’s weight. Here’s how to install it:
- Lower the window sash to the height specified in the manual (usually just below the top of the AC).
- Place the bracket on the sill, aligning it with the window opening. Use a level to ensure it’s perfectly horizontal.
- Mark the screw holes with a pencil, then drill pilot holes (if your sill is hardwood or metal).
- Secure the bracket with the provided screws. Don’t overtighten—you don’t want to crack the sill.
Real-life example: I once skipped the pilot holes on a wooden sill. The screws cracked the wood, and I had to use longer screws and wood filler. Now, I always drill first.
Install the Side Panels and Foam Seal
Side panels (also called accordion panels) fill the gap between the AC and window frame. Here’s the process:
- Attach the side panels to the AC using the included brackets or clips. Most LG models have a simple slide-and-lock mechanism.
- Extend the panels to fit snugly against the window frame. Trim excess material if needed (but don’t over-cut—you can’t reattach it).
- Apply the foam seal strip along the top of the AC and the inside edge of the side panels. This prevents air leaks and reduces vibration.
Common mistake: Forgetting to install the foam seal. I did this once, and the AC rattled like a washing machine. A quick fix with weather stripping saved the day, but it’s easier to do it right the first time.
Secure the Window Sash
Once the panels are in place:
- Lower the window sash until it rests on top of the AC. The sash should press down firmly on the foam seal.
- Secure the sash to the window frame using the provided screws or brackets. This prevents the window from being opened accidentally.
- For extra security, install a sliding window lock or a secondary bracket.
Tip: If your window has a lock, use it! It’s a simple but effective deterrent against intruders.
Step 3: Positioning and Securing the AC Unit
Carefully Lift and Place the AC
This is the trickiest part—especially for solo installers. LG ACs are heavy, and dropping one can damage the unit or your floor. Here’s how to do it safely:
- Enlist a helper if possible. If not, use a sturdy table or chair to support the AC while you guide it into place.
- Tilt the AC slightly forward (about 1/4 inch) to ensure proper drainage. LG’s design relies on gravity to drain condensation outside.
- Align the unit with the mounting bracket and slide it into position. The AC should rest securely on the bracket.
My story: I tried installing my LG LW1517IVS alone. I used a rolling office chair to support the AC, but it slipped, and I nearly dropped the unit. Now, I always ask a neighbor or family member to help—even if it’s just holding the AC while I secure it.
Secure the Unit to the Bracket
Once the AC is in place:
- Attach the AC to the mounting bracket using the provided screws or locking mechanism.
- Double-check that the unit is level (use a spirit level) and tilted slightly outward.
- Ensure the side panels are still snug against the window frame. Adjust if needed.
Warning: If the AC feels loose or wobbly, don’t ignore it. A poorly secured unit can fall, causing injury or damage. Tighten all screws and consider adding extra support (e.g., a wooden block under the sill).
Seal All Gaps
Even small gaps can let hot air in and cool air out. Here’s how to seal them:
- Apply foam tape or weather stripping along the top of the AC where it meets the window sash.
- Use expandable foam (in a can) for larger gaps around the side panels. Cut off excess with a utility knife after it dries.
- For sliding windows, use a plexiglass or foam board cut to size and secured with tape or brackets.
Pro tip: Avoid spray foam inside the window frame—it can expand too much and damage the sash. Use it only for exterior gaps.
Step 4: Electrical Safety and Power Connection
Check the Voltage and Outlet
LG window ACs typically require a standard 115V outlet (15–20 amp circuit). Here’s what to verify:
- Voltage: Use a multimeter to confirm your outlet provides 115V. Never plug a 115V AC into a 230V outlet—it will destroy the unit.
- Outlet type: Most LG models use a standard three-prong plug. If your outlet is two-prong, install a GFCI adapter or upgrade the outlet (hire an electrician if unsure).
- Circuit load: Avoid sharing the outlet with high-wattage appliances (e.g., microwaves, hair dryers). Overloaded circuits can trip breakers or cause fires.
Data Table: LG Window AC Electrical Requirements
| Model Example | Voltage | Amperage | Outlet Type | Recommended Circuit |
|---|---|---|---|---|
| LG LW1216HR | 115V | 11.8A | NEMA 5-15R | 15A dedicated |
| LG LW1517IVS | 115V | 15.2A | NEMA 5-15R | 20A dedicated |
| LG LW2416HR | 230V | 10.8A | NEMA 6-15R | 20A dedicated |
Note: Always check your specific model’s manual for exact requirements.
Plug In and Test
Once everything is secured:
- Plug the AC into the outlet. Avoid using extension cords—they can overheat and pose a fire risk.
- Turn on the unit and set it to “cool” mode. Listen for normal operation (a gentle hum) and check for airflow.
- Monitor for leaks. Place a paper towel under the AC for 10 minutes. If it’s wet, adjust the tilt or check the drainage.
Real-world issue: I once plugged my AC into an extension cord during a heatwave. The cord got hot, and the AC shut off. After that, I ran a dedicated line to the outlet.
Step 5: Final Checks and Maintenance Tips
Test Performance and Noise Levels
Run the AC for at least 30 minutes and check:
- Temperature: Use a thermometer to verify the room cools as expected (typically 10–20°F below outside temp).
- Noise: Listen for unusual sounds (e.g., rattling, buzzing). Tighten loose panels or adjust the unit if needed.
- Airflow: Feel for strong, consistent airflow from the vents. Clean the filter if airflow seems weak.
Common fix: If the AC is too noisy, the unit might not be level. Adjust the tilt slightly and recheck.
Seasonal Maintenance
To keep your LG window air conditioner running smoothly:
- Clean the filter: Every 2–4 weeks (more often if you have pets). Rinse with water and let it dry before reinstalling.
- Inspect the coils: Annually, use a coil cleaner to remove dust and debris.
- Check for leaks: Before each season, ensure the drainage system is clear.
- Cover in winter: Use a breathable AC cover or remove the unit to prevent drafts and pests.
Tip: Mark your calendar for filter cleaning—it’s easy to forget, but a dirty filter reduces efficiency and can strain the motor.
Conclusion: Enjoy Cool Comfort with Confidence
Installing your LG window air conditioner doesn’t have to be stressful. By following these LG window air conditioner installation instructions, you’ll save money on professional labor, avoid common pitfalls, and enjoy reliable cooling all summer long. Remember: take your time, read the manual, and don’t skip the sealing step. A well-installed AC is quiet, efficient, and long-lasting.
I’ve installed dozens of window units over the years, and LG’s attention to detail—from the intuitive bracket system to the clear labeling—makes the process smoother than most brands. Yes, there might be a hiccup or two (like that time I forgot the foam seal), but those small mistakes teach you how to do it better next time.
Now that your AC is in place, sit back, relax, and savor that cool air. You’ve earned it. And if you ever need to remove the unit—for cleaning, moving, or storage—just reverse the steps. With a little care, your LG AC will keep you comfortable for years to come.
Frequently Asked Questions
How do I install an LG window air conditioner for the first time?
To install your LG window air conditioner, start by measuring your window opening and ensuring it fits the unit’s dimensions. Follow the included manual to assemble the side panels, secure the AC in the window, and use brackets or screws to stabilize it properly.
What tools do I need for LG window air conditioner installation instructions?
You’ll typically need a screwdriver, measuring tape, level, and sometimes a drill for mounting brackets. Check your model’s manual for specific requirements, as some LG units come with all necessary hardware.
Can I install an LG window air conditioner alone, or do I need help?
While possible, it’s safer to have a helper due to the unit’s weight and awkward positioning during installation. LG window air conditioner installation is easier and safer with two people, especially for larger models.
How do I seal gaps around my LG window air conditioner?
Use the included foam insulation panels or weatherstripping to fill gaps between the unit and window frame. This prevents air leaks and improves energy efficiency.
Are LG window air conditioners compatible with all window types?
Most LG window ACs fit standard double-hung or sliding windows. Check the manual for minimum/maximum window dimensions and adjustability of the side panels to ensure compatibility.
What safety steps should I follow during LG air conditioner installation?
Ensure the window frame is sturdy, use support brackets to prevent tipping, and avoid overloading electrical circuits. Always ground the unit and keep it away from water sources.