
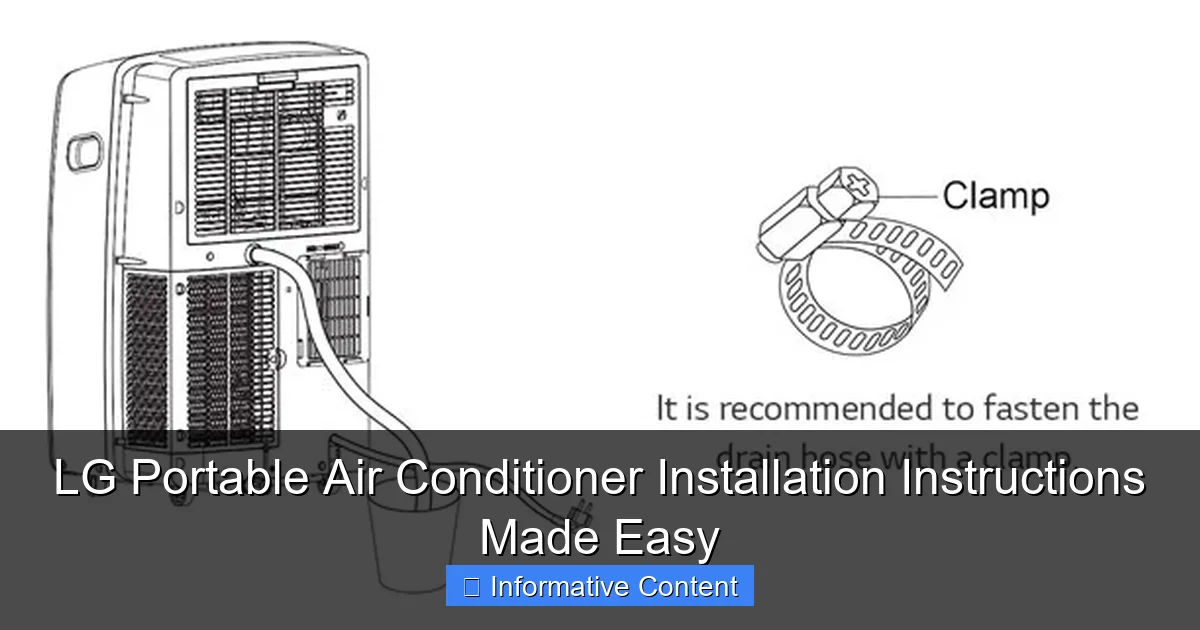
Featured image for lg portable air conditioner installation instructions
Image source: gscs.lge.com
Installing your LG portable air conditioner is quick and hassle-free with the right guidance. This step-by-step guide simplifies setup—from window kit assembly to proper venting—ensuring optimal cooling performance in under 30 minutes, no tools required. Perfect for renters or quick climate control!
Key Takeaways
- Choose the right location: Place near a window for exhaust hose access and stable flooring.
- Install the window kit securely: Use included brackets and panels to seal gaps and prevent air leaks.
- Connect the exhaust hose properly: Attach firmly to unit and window adapter to avoid hot air recirculation.
- Ensure proper ventilation: Keep intake and exhaust areas unobstructed for optimal cooling performance.
- Plug into a dedicated outlet: Avoid extension cords to prevent overheating and ensure safe operation.
- Test the unit immediately: Run a short cycle to confirm cooling and check for unusual noises or leaks.
📑 Table of Contents
- LG Portable Air Conditioner Installation Instructions Made Easy
- What’s in the Box? Unboxing Your LG Portable Air Conditioner
- Pre-Installation Checklist: Setting Up for Success
- Step-by-Step LG Portable Air Conditioner Installation Instructions
- Common Installation Mistakes (And How to Fix Them)
- Maintenance Tips to Keep Your LG Portable AC Running Smoothly
- LG Portable AC Model Comparison Table
- Final Thoughts: You’ve Got This!
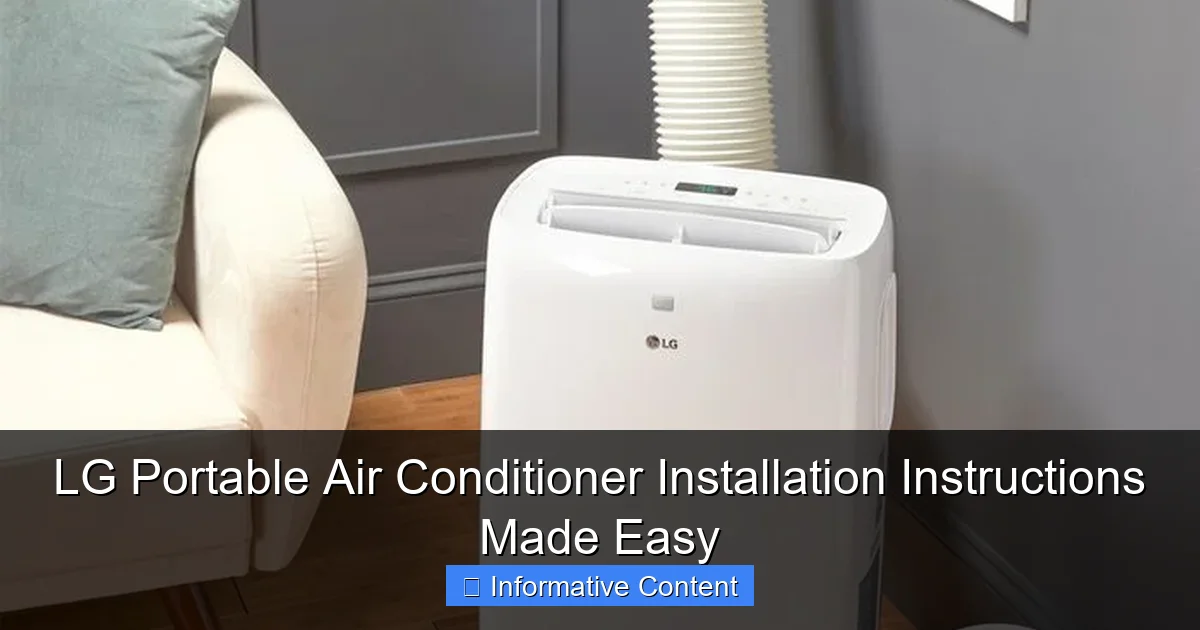
LG Portable Air Conditioner Installation Instructions Made Easy
So, it’s the middle of July, and your apartment feels like a sauna. You’ve tried fans, ice packs, and even sleeping on the bathroom floor (yes, really), but nothing’s working. That’s when you finally bite the bullet and order an LG portable air conditioner. You’re excited—until the box arrives, and you’re staring at a jumble of hoses, brackets, and instruction manuals that look like they were translated by a sleep-deprived robot.
Don’t worry—you’re not alone. Installing a portable AC can feel overwhelming, especially if you’re doing it solo or for the first time. But here’s the good news: LG portable air conditioners are actually designed with user-friendliness in mind. With the right guidance, you can have yours up and cooling your space in under an hour. In this guide, I’ll walk you through every step of the LG portable air conditioner installation instructions—from unboxing to first cool breeze—with real-world tips, common pitfalls to avoid, and even a handy comparison table to help you choose the right model. Whether you’re a DIY newbie or just need a refresher, this guide will make the process smooth, stress-free, and surprisingly satisfying.
What’s in the Box? Unboxing Your LG Portable Air Conditioner
Before you even think about installing your LG portable AC, take a moment to unpack everything carefully. I made the mistake of rushing this step once and ended up missing a crucial bracket—don’t be like me. Most LG portable air conditioners come with a standard set of components, but it’s always smart to double-check against the manual.
Visual guide about lg portable air conditioner installation instructions
Image source: familyhandyman.com
Essential Components You Should Find
- Portable AC unit – The main body with the compressor, evaporator, and control panel.
- Exhaust hose – A flexible, accordion-style tube that vents hot air outside.
- Hose connector(s) – Usually two plastic pieces that attach to each end of the hose.
- Window kit – Includes a sliding window bracket, foam seals, and sometimes a custom window panel.
- Remote control and batteries – For convenient operation from across the room.
- User manual and quick start guide – Keep these handy; they often include model-specific tips.
- Drain hose (on some models) – Used for manual drainage if the unit doesn’t have auto-evaporation.
Pro tip: Lay everything out on a clean, flat surface—like your kitchen table or living room floor. This helps you visualize the setup and ensures nothing gets lost. I once spent 20 minutes searching for a tiny rubber gasket under my couch. Lesson learned.
Model-Specific Variations
Not all LG portable ACs are identical. For example, the LG LP1419IVSM (a popular 14,000 BTU model) includes a dual-hose system, which means it has both an intake and exhaust hose—great for efficiency but slightly more complex to install. Meanwhile, single-hose models like the LG LP0817WSR (8,000 BTU) are simpler but may slightly reduce indoor air pressure.
Always check your model number (usually on a sticker on the back or side of the unit) and refer to the included manual. LG’s website also has downloadable PDFs if you lose the paper copy.
Pre-Installation Checklist: Setting Up for Success
You wouldn’t build a house without checking the foundation, right? Same goes for your portable AC. A little prep work now saves you headaches—and potential damage—later.
Choose the Right Location
Your portable AC needs space to breathe—literally. Here’s what to look for:
- Near a window – Obviously, since you’ll be venting hot air outside. Sliding windows work best, but hinged windows can be adapted.
- Flat, stable surface – Avoid carpets or uneven flooring. The unit should sit level to prevent water leakage or vibration.
- At least 18–24 inches of clearance – On all sides, especially the front (air intake) and back (exhaust). Crowding it reduces efficiency.
- Accessible power outlet – Use a dedicated outlet if possible. Avoid extension cords—they can overheat under high load.
I learned this the hard way when I placed my unit too close to a bookshelf. Not only did it rattle loudly, but the reduced airflow made it work twice as hard. After moving it, my electricity bill dropped noticeably.
Check Your Window Type
LG’s window kits are designed to fit most standard windows, but you’ll need to measure:
- Horizontal sliding windows – Most common. The adjustable bracket slides to fit your window width.
- Vertical sliding windows – Also compatible, but you may need to rotate the bracket or use a different seal.
- Hinged (casement) windows – Trickier. You might need a custom acrylic panel or a flexible seal kit (sold separately).
Measure your window opening before installation. If it’s wider than the maximum bracket length (usually around 48 inches), you may need to reinforce it with wood or buy an extension kit.
Prepare the Room
While your AC cools the air, it also removes humidity. To maximize efficiency:
- Close doors and windows in the room you’re cooling.
- Use curtains or blinds to block direct sunlight.
- Seal any major drafts with weather stripping.
Bonus tip: If you’re cooling a bedroom, consider installing the unit in the room you’ll be using most. Portable ACs are best at spot cooling—trying to cool an entire house is inefficient and costly.
Step-by-Step LG Portable Air Conditioner Installation Instructions
Now for the main event: actually installing your LG portable air conditioner. Don’t stress—this is easier than assembling IKEA furniture (and way more rewarding). Follow these steps in order, and you’ll be chilling in no time.
Step 1: Assemble the Exhaust Hose
Start by connecting the hose connectors to each end of the exhaust hose. Most LG models use a simple twist-and-lock mechanism. Just align the tabs and turn clockwise until it clicks.
💡 Tip: If the hose feels stiff, let it sit in a warm room for 10–15 minutes. Cold hoses are harder to bend and can kink, reducing airflow.
Step 2: Attach the Hose to the Unit
Locate the exhaust port on the back of your LG portable AC—it’s usually labeled and has a round or oval opening. Insert one end of the hose and secure it by twisting the connector until it locks. You should feel it seat firmly.
⚠️ Warning: Don’t force it. If it doesn’t go in easily, double-check the alignment. Forcing it can crack the plastic port.
Step 3: Install the Window Kit
This is where many people get stuck—but it’s simpler than it looks.
- Open your window and place the adjustable window bracket inside the track.
- Slide the bracket outward until it fits snugly against the window frame.
- Use the included screws or clips to secure it (some models use adhesive foam instead).
- Insert the foam seals into the gaps to prevent hot air from sneaking back in.
For vertical windows, you may need to install the bracket horizontally and use a different seal configuration. Refer to your manual for diagrams.
Step 4: Connect the Hose to the Window Kit
Take the free end of the exhaust hose and attach it to the window bracket. Most LG kits have a pre-cut opening or a removable panel. Slide the hose through and secure it with the provided clamp or twist-lock connector.
💡 Pro tip: Use zip ties or Velcro straps to keep the hose from sagging. A drooping hose can trap condensation, leading to water leaks.
Step 5: Plug In and Power On
Plug the unit into a grounded outlet (preferably one that’s not shared with high-wattage appliances like microwaves or space heaters). Press the power button on the unit or remote.
You should hear the fan start and see the display light up. If nothing happens, check the circuit breaker—portable ACs can trip breakers if the outlet is overloaded.
Step 6: Set Your Preferred Mode
Use the remote or control panel to select your desired mode:
- Cool – Standard cooling mode.
- Fan – Circulates air without cooling (great for mild days).
- Dry – Removes humidity without significant cooling (ideal for humid climates).
- Auto – Adjusts fan speed based on room temperature.
Set the temperature using the up/down arrows. Most LG models allow you to set temps between 60°F and 86°F.
Common Installation Mistakes (And How to Fix Them)
Even with perfect instructions, things can go sideways. Here are the most common issues I’ve seen—and how to avoid or fix them.
Hose Not Sealing Properly
Symptom: Warm air leaks back into the room, reducing cooling efficiency.
Solution: Double-check all connections. Use extra foam tape or silicone sealant around the window bracket if needed. Make sure the hose isn’t kinked or bent at sharp angles.
Unit Shaking or Vibrating
Symptom: Loud rattling noises, especially at high fan speeds.
Solution: Ensure the unit is on a flat, level surface. Place rubber pads or a anti-vibration mat underneath. Also, check that the exhaust hose isn’t pulling too tightly on the unit.
Water Leaking from the Unit
Symptom: Puddles forming around the base.
Solution: Most LG portable ACs use auto-evaporation, but in high-humidity environments, water can accumulate. Check if your model has a drain port. If so, attach the drain hose and direct it to a bucket or floor drain. Empty it regularly.
💡 Tip: Run the unit in “Dry” mode for 10–15 minutes before turning it off to evaporate residual moisture.
Remote Not Working
Symptom: Buttons on the remote don’t respond.
Solution: Replace the batteries (usually AAA). Make sure there’s no obstruction between the remote and the unit’s sensor (usually on the front panel). If it still doesn’t work, try resetting the unit by unplugging it for 5 minutes.
Maintenance Tips to Keep Your LG Portable AC Running Smoothly
Installation is just the beginning. To keep your LG portable air conditioner efficient and long-lasting, regular maintenance is key.
Clean the Air Filter Monthly
The air filter traps dust, pet hair, and allergens. A clogged filter reduces airflow and forces the unit to work harder.
How to clean it:
- Turn off and unplug the unit.
- Open the front panel (usually snaps off).
- Remove the filter and rinse it under lukewarm water.
- Let it air dry completely before reinserting.
💡 Pro tip: Mark your calendar for the first of every month. I use a phone reminder—set it and forget it.
Inspect the Exhaust Hose Quarterly
Over time, dust and debris can build up inside the hose, restricting airflow. Every few months, disconnect the hose and vacuum the inside with a brush attachment.
Check for Condensation Buildup
If you notice water pooling inside the unit or dripping from the back, it could mean the internal drain pan is full or clogged. Refer to your manual for access instructions—some models require partial disassembly.
Store Properly During Off-Seasons
If you’re not using your portable AC in winter:
- Clean the filter and wipe down the exterior.
- Drain any remaining water from the tank or hose.
- Coil the hose neatly and store it in a dry place.
- Cover the unit with a breathable cloth to prevent dust buildup.
Never store it in a damp basement or garage—moisture can damage internal components.
LG Portable AC Model Comparison Table
| Model | BTU | Room Size (sq ft) | Hose Type | Special Features | Drain Method |
|---|---|---|---|---|---|
| LP0817WSR | 8,000 | Up to 300 | Single | Remote, 3-speed fan | Auto-evaporation |
| LP1217WSR | 12,000 | Up to 450 | Single | Wi-Fi enabled, voice control | Auto-evaporation |
| LP1419IVSM | 14,000 | Up to 500 | Dual | Inverter tech, quiet operation | Auto-evaporation + drain port |
| LP1021BSS | 10,000 | Up to 400 | Single | Energy Star certified | Auto-evaporation |
This table helps you compare key specs at a glance. For most apartments, an 8,000–12,000 BTU model is sufficient. Larger homes or hot climates may need 14,000 BTU or higher.
Final Thoughts: You’ve Got This!
Installing an LG portable air conditioner might seem daunting at first, but once you break it down into simple steps, it’s totally doable—even if you’re not a handyman (or woman). The key is patience, preparation, and following the LG portable air conditioner installation instructions carefully.
Remember: a well-installed unit not only cools better but also lasts longer and uses less energy. Take your time with the window seal, keep the filter clean, and don’t skip the maintenance. Your future self—and your electricity bill—will thank you.
And the next time a friend complains about the heat, you can confidently say, “Just get a portable AC. I’ll even help you install it.” Because now, you’re the expert.
Frequently Asked Questions
How do I install an LG portable air conditioner for the first time?
Start by choosing a location near a window and power outlet. Follow the included LG portable air conditioner installation instructions to assemble the window kit and exhaust hose, ensuring a secure fit to prevent air leaks.
Do I need special tools to set up my LG portable AC unit?
No special tools are required—most LG portable air conditioners come with everything you need. Basic setup involves attaching the exhaust hose, installing the window bracket, and plugging in the unit.
Can I install an LG portable air conditioner in a sliding window?
Yes, LG provides adjustable window kits compatible with sliding windows. Refer to the LG portable air conditioner installation instructions for proper sealing techniques to maintain efficiency.
How do I vent my LG portable air conditioner properly?
Connect the exhaust hose to the back of the unit and route it to the window kit. Make sure the hose is straight and not kinked to ensure optimal airflow and cooling performance.
Is it safe to run the LG portable AC without the window kit installed?
No, always use the window kit to vent hot air outside. Operating the unit without proper ventilation can cause overheating and reduce cooling efficiency.
Where can I find the official LG portable air conditioner installation instructions?
You can download the latest manual from LG’s official support website or check the printed guide included in the box. The instructions cover setup, maintenance, and troubleshooting tips.