

Featured image for lg dual inverter air conditioner instructions
Image source: media.wired.com
Master your LG Dual Inverter AC in minutes with this clear, step-by-step instructions guide designed for seamless setup and optimal performance. From unboxing to smart cooling, follow easy-to-understand directions to install, program, and maintain your unit efficiently—saving time, energy, and money.
Key Takeaways
- Read the manual first: Always start with LG’s official guide for safe, correct setup.
- Ensure proper voltage: Match your power supply to the AC’s requirements to avoid damage.
- Use the remote correctly: Point it directly at the sensor for best responsiveness.
- Set optimal temperature: 24–26°C balances comfort and energy efficiency effectively.
- Clean filters monthly: Prevent airflow issues and maintain cooling performance long-term.
- Leverage Dual Inverter: Enjoy quieter, faster cooling with lower energy bills over time.
📑 Table of Contents
- Why Your LG Dual Inverter Air Conditioner Is a Game-Changer
- Getting to Know Your LG Dual Inverter Air Conditioner
- Step-by-Step Installation Guide (DIY-Friendly!)
- Daily Use: Remote Control & Smart Features
- Maintenance and Cleaning for Longevity
- Troubleshooting Common Issues (And When to Call a Pro)
- Performance Data: How LG Dual Inverter Stacks Up
- Final Thoughts: Your LG Dual Inverter, Simplified
Why Your LG Dual Inverter Air Conditioner Is a Game-Changer
When summer hits and the heat becomes relentless, few things feel as essential as a reliable air conditioner. That’s where the LG dual inverter air conditioner steps in—not just to cool your space, but to do it smarter, quieter, and more efficiently than most conventional models. I remember the first time I upgraded from a standard window unit to an LG dual inverter. The difference was night and day: no more loud compressor cycles, no sudden temperature swings, and my energy bill actually went down. That’s the magic of dual inverter technology—it adjusts cooling power continuously, like a dimmer switch for cold air, rather than just turning on and off like older units.
If you’ve just brought home your LG dual inverter air conditioner, you’re probably excited to start enjoying its benefits. But let’s be honest: setup and operation can feel a little overwhelming, especially if you’re not a tech whiz. Don’t worry—this guide is here to walk you through every step, from unboxing to troubleshooting, in plain, easy-to-follow language. Whether you’re installing it in your bedroom, living room, or home office, these LG dual inverter air conditioner instructions will help you get the most out of your investment without the stress.
Getting to Know Your LG Dual Inverter Air Conditioner
Before you start setting up your new unit, it helps to understand what makes the LG dual inverter so special. It’s not just a cooler—it’s a precision climate control system. Let’s break down the key features and components so you can feel confident from the get-go.
Visual guide about lg dual inverter air conditioner instructions
Image source: i.ytimg.com
What Is Dual Inverter Technology?
The “dual” in dual inverter air conditioner refers to two compressors working in tandem: one for cooling and one for heating (in models that include heat pump functionality). Unlike traditional ACs that blast at full power and then shut off, dual inverter models adjust their output in small increments. This means:
- Faster cooling/heating: The unit reaches your desired temperature quicker because it doesn’t have to “ramp up” from zero.
- Steady temperature: No more hot flashes or sudden chills—your room stays consistently comfortable.
- Energy savings: Studies show dual inverter units use up to 40% less energy than non-inverter models over time.
- Quieter operation: Since the compressors aren’t constantly turning on and off, the noise level drops significantly (often under 20 dB).
Think of it like driving a car with cruise control versus one that constantly accelerates and brakes. The smoother ride isn’t just more pleasant—it’s more efficient.
Main Components You’ll Interact With
Your LG dual inverter air conditioner comes with a few key parts you’ll use daily:
- Indoor unit: Mounted on the wall, this is where you’ll feel the airflow. It houses the fan, filters, and control panel.
- Outdoor unit: This sits outside (usually on a balcony, wall bracket, or concrete pad) and contains the compressors and condenser.
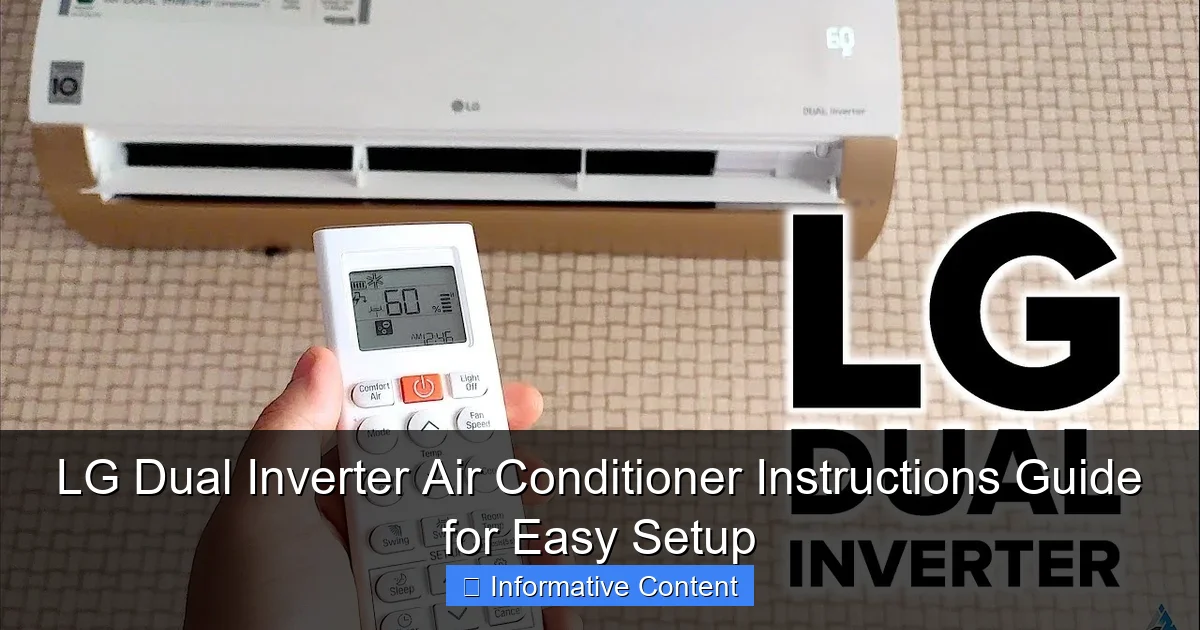
- Remote control: Most models come with a sleek remote featuring buttons for power, mode, fan speed, temperature, and special functions like sleep or jet cool.
- Wi-Fi module (optional): Many LG dual inverter models support LG ThinQ app control, letting you adjust settings from your phone.
One thing I love is the auto-clean function—after you turn off the unit, the fan runs for a few minutes to dry the evaporator coils. This helps prevent mold and keeps your air fresh. Small detail, big impact.
Common Models and Their Differences
LG offers several dual inverter models, including the Art Cool, Dual Cool, and Super Convertible series. Here’s a quick comparison:
- Art Cool: Stylish designs with customizable front panels. Great for living rooms where aesthetics matter.
- Dual Cool: Focuses on energy efficiency and quiet operation. Ideal for bedrooms and study rooms.
- Super Convertible: Can be installed as a split or cassette unit, making it versatile for different room layouts.
All share the core dual inverter tech, but features like Wi-Fi, dehumidification strength, and noise levels vary. Check your model number (usually on the indoor unit) to see exactly what you’ve got.
Step-by-Step Installation Guide (DIY-Friendly!)
Installing an LG dual inverter air conditioner isn’t as scary as it sounds—especially if you’re replacing an old unit. With the right tools and a little patience, most people can handle basic setup. That said, if you’re not comfortable with electrical work or drilling into walls, hiring a pro is always a safe choice. Here’s how to do it right.
Tools and Supplies You’ll Need
Before you start, gather these items:
- Drill and masonry bits (for wall mounting)
- Level (to make sure the indoor unit is straight)
- Wrench or socket set (for connecting refrigerant lines)
- Vacuum pump (for removing air from the refrigerant lines)
- Insulated tubing (for refrigerant lines)
- Electrical tester (to verify power supply)
- Mounting bracket (usually included in the kit)
- Sealant or putty (to fill the wall hole)
Pro tip: If your kit didn’t include a vacuum pump, you can rent one from a local hardware store. It’s essential for proper installation.
Mounting the Indoor Unit
- Choose the location: Pick a spot on an interior wall, ideally 6–8 feet above the floor. Make sure it’s not blocked by furniture and has at least 6 inches of clearance on all sides.
- Mark and drill: Use the mounting template (included in the manual) to mark drill points. Drill holes and insert wall anchors.
- Install the bracket: Secure the mounting bracket with screws. Use a level to ensure it’s perfectly horizontal.
- Drill the access hole: Drill a 3-inch hole through the wall behind the bracket for the refrigerant lines, power cable, and drain hose.
- Mount the unit: Carefully lift the indoor unit and hang it on the bracket. Double-check the level again.
One thing I learned the hard way: always tilt the unit slightly downward toward the outside. This ensures condensation drains properly. A 1-inch drop over 3 feet is ideal.
Connecting the Outdoor Unit
- Place the outdoor unit: Put it on a flat, stable surface (like a concrete pad or wall bracket). Keep it at least 12 inches from walls and 3 feet from windows.
- Connect refrigerant lines: Remove the caps from the indoor and outdoor unit’s service valves. Connect the copper lines using flare nuts. Tighten with a wrench—don’t overdo it!
- Evacuate the lines: Attach a vacuum pump to the service valve and run it for 15–30 minutes to remove air and moisture. This is crucial for efficiency and longevity.
- Open the valves: Once vacuumed, slowly open the service valves to allow refrigerant to flow.
- Connect power: Follow the wiring diagram in the manual. Most units require a dedicated 220V circuit. If you’re unsure, call an electrician.
Important: Never skip the vacuum step. Air in the refrigerant lines causes poor cooling and can damage the compressor.
Testing and Final Checks
After installation:
- Turn on the power and press the remote’s “On” button.
- Set the mode to “Cool” and lower the temperature to 60°F (15.5°C) to test.
- Listen for smooth compressor startup—no loud clicks or rattles.
- Check that the drain hose is dripping water (a good sign the system is working).
- Use a thermometer to measure air temperature at the indoor unit’s outlet—it should be 20–30°F cooler than room air.
If everything works, seal the wall hole with putty and clean up. Congrats—you’ve just installed your LG dual inverter air conditioner!
Daily Use: Remote Control & Smart Features
Now that your unit is set up, it’s time to enjoy it. The remote is your best friend, but there’s more to it than just “on” and “off.” Let’s explore the everyday functions and smart features that make LG dual inverter models stand out.
Remote Control Functions Explained
Here’s what each button on your remote does:
- Power: Turns the unit on/off.
- Mode: Cycles through Cool, Heat (if applicable), Dry, Fan, and Auto.
- Temp Up/Down: Adjusts temperature in 1°F increments.
- Fan Speed: Choose from Auto, Low, Medium, High, or Turbo (for quick cooling).
- Swing: Activates vertical and/or horizontal vanes to direct airflow.
- Sleep: Gradually raises temperature by 2–3°F over 3 hours to save energy while you sleep.
- Jet Cool/Heat: Runs at maximum fan speed for 30 minutes to quickly cool or heat the room.
- Timer: Set on/off times (great for turning it on before you get home).
My favorite feature? The Auto Restart—if the power goes out, your AC will turn back on with the same settings once power returns. No more waking up to a sauna!
Using the LG ThinQ App (Wi-Fi Models)
If your model supports Wi-Fi (look for a Wi-Fi icon on the remote), download the LG ThinQ app (available on iOS and Android). Here’s how to set it up:
- Press and hold the “Wi-Fi” button on the remote for 3 seconds until the indicator blinks.
- Open the ThinQ app and follow the prompts to connect your AC to your home network.
- Once connected, you can control the unit from anywhere—turn it on from work, adjust settings while in bed, or check energy usage.
The app also sends alerts if the filter needs cleaning or if there’s a system error. It’s like having a personal AC assistant.
Energy-Saving Tips for Daily Use
Even with dual inverter efficiency, you can save more energy by:
- Setting the temperature to 78°F (25.5°C) in summer and 68°F (20°C) in winter—ideal for comfort and savings.
- Using the sleep mode at night to reduce energy use.
- Closing curtains during the day to block solar heat.
- Running the fan on “Auto” instead of “On”—this saves power and reduces noise.
- Scheduling the timer to turn off when you’re not home.
One trick: if you’re away for a few hours, set the mode to “Dry” instead of turning it off completely. This keeps humidity down without overworking the unit when you return.
Maintenance and Cleaning for Longevity
Your LG dual inverter air conditioner is built to last 10–15 years, but only if you maintain it properly. Regular cleaning and checks keep it running efficiently and prevent costly repairs. Here’s your maintenance schedule.
Monthly: Clean the Air Filters
The air filters trap dust, pet hair, and allergens. When they get clogged, airflow drops and your AC works harder. Here’s how to clean them:
- Turn off the unit and unplug it.
- Open the front panel (usually by pressing the tabs on the sides).
- Pull out the filters—they slide out easily.
- Rinse them under lukewarm water. No soap needed.
- Let them air dry completely (about 1–2 hours).
- Reinsert and close the panel.
Pro tip: Mark your calendar to clean filters every 30 days. If you have pets or allergies, do it every 2 weeks.
Quarterly: Check the Outdoor Unit
Every 3 months, inspect the outdoor unit:
- Remove leaves, grass, and debris from the fan and fins.
- Check for dents or damage to the condenser coils.
- Ensure the unit is level and the mounting brackets are secure.
- Verify the drain hose isn’t blocked.
If the coils are dirty, use a soft brush or low-pressure water to clean them. Never use a pressure washer—it can bend the fins.
Annual: Professional Servicing
Once a year, have a technician:
- Check refrigerant levels.
- Inspect electrical connections.
- Test the thermostat and sensors.
- Clean the indoor evaporator coils (if needed).
This service usually costs $75–$150 but can prevent breakdowns and extend your unit’s life.
Troubleshooting Common Issues (And When to Call a Pro)
Even the best ACs run into issues. Here’s how to fix common problems—and when to call for help.
No Cooling or Weak Airflow
If your room isn’t cooling:
- Check the remote’s temperature setting—did you accidentally set it to “Fan”?
- Clean the air filters (clogged filters reduce airflow).
- Ensure the outdoor unit isn’t blocked by debris.
- Verify the circuit breaker hasn’t tripped.
If none of these work, the refrigerant might be low. This requires a pro.
Strange Noises
Normal sounds include a low hum and occasional clicks. But if you hear:
- Banging: Could mean loose parts or a failing compressor.
- Squealing: Often a worn fan belt (in older models).
- Gurgling: Air in the refrigerant lines—needs vacuuming.
Turn off the unit and call a technician.
Water Leaking Indoors
If water drips from the indoor unit:
- Check if the unit is tilted properly (should slope toward the outside).
- Clear the drain hose—it might be clogged with algae.
- Inspect the drain pan for cracks.
A wet vacuum can help clear clogs. If the pan is damaged, replace it.
Error Codes on Display
Your unit may show error codes like “CH05” (low refrigerant) or “CH07” (sensor issue). Refer to your manual’s troubleshooting section. If the code persists, call LG support or a certified technician.
Remember: never attempt to repair refrigerant lines or electrical components yourself. Safety first!
Performance Data: How LG Dual Inverter Stacks Up
Here’s a quick look at real-world performance metrics for popular LG dual inverter models:
| Model | Cooling Capacity (BTU/h) | Noise Level (dB) | Energy Efficiency Ratio (EER) | Wi-Fi | Special Feature |
|---|---|---|---|---|---|
| LG Dual Cool 18,000 | 18,000 | 19 (indoor), 45 (outdoor) | 12.5 | Yes | Plasmaster Ionizer |
| LG Art Cool 12,000 | 12,000 | 18 (indoor), 44 (outdoor) | 13.0 | Yes | Customizable Front Panel |
| LG Super Convertible 24,000 | 24,000 | 21 (indoor), 47 (outdoor) | 12.0 | Yes | Multi-Position Installation |
Note: EER (Energy Efficiency Ratio) measures cooling output per watt of power. Higher is better. All models meet ENERGY STAR standards.
Final Thoughts: Your LG Dual Inverter, Simplified
Setting up and using your LG dual inverter air conditioner doesn’t have to be a headache. From the smart installation steps to the intuitive remote and app controls, LG has designed this unit to be user-friendly—once you know the tricks. The dual inverter technology really does live up to the hype: quieter, more efficient, and more comfortable than traditional ACs.
But like any appliance, it thrives on care. A few minutes each month cleaning the filters, checking the outdoor unit, and using energy-smart settings can keep your AC running smoothly for years. And if you ever run into an issue, don’t panic—most problems have simple fixes, and LG’s customer support is generally responsive.
Whether you’re cooling a studio apartment or a large living room, your LG dual inverter is more than just a machine. It’s your personal comfort companion, working quietly in the background so you can focus on what matters. With these LG dual inverter air conditioner instructions, you’re not just setting up a unit—you’re setting up a better, more comfortable life. Now go enjoy that perfectly cool air!
Frequently Asked Questions
How do I set up my LG Dual Inverter Air Conditioner for the first time?
Begin by mounting the indoor and outdoor units securely, then connect the refrigerant pipes, drain hose, and electrical wiring as per the LG Dual Inverter Air Conditioner instructions. Always ensure the unit is on a level surface and follow the safety guidelines in the manual.
Why is my LG Dual Inverter AC not cooling properly?
Check if the air filter is clogged, the thermostat is set correctly, or if there’s a refrigerant leak. Refer to the troubleshooting section of the LG Dual Inverter Air Conditioner instructions for specific error codes and solutions.
How often should I clean the air filter on my LG Dual Inverter AC?
Clean the air filter every two weeks during heavy use to maintain efficiency and airflow. Simply remove the front panel, rinse the filter with water, and reinstall once dry.
Can I use a smart app to control my LG Dual Inverter Air Conditioner?
Yes, many LG Dual Inverter models support the LG ThinQ app for remote control via Wi-Fi. Download the app, pair your AC, and follow the on-screen setup to adjust settings from your smartphone.
What does the “E1” error code mean on my LG Dual Inverter AC?
The “E1” error typically indicates a communication issue between the indoor and outdoor units. Check wiring connections, reset the unit, or consult the LG Dual Inverter Air Conditioner instructions for detailed diagnostics.
How do I activate the energy-saving mode on my LG Dual Inverter AC?
Press the “Eco” or “Energy Saver” button on the remote control to activate the mode. This optimizes compressor speed and reduces power consumption while maintaining comfort.