
Featured image for lg air conditioner installation instructions
Image source: 5.imimg.com
Installing your LG air conditioner is quick and hassle-free with the step-by-step guidance provided in the official LG air conditioner installation instructions. Designed for both DIYers and professionals, these clear, illustrated directions ensure safe setup, optimal performance, and long-term efficiency. From mounting the indoor unit to connecting refrigerant lines and wiring, every critical step is simplified to help you get cooling fast—without costly mistakes.
Key Takeaways
- Choose the right location: Install on a sturdy, level wall away from direct sunlight and heat sources.
- Ensure proper electrical setup: Use a dedicated circuit with correct voltage to prevent overloads.
- Seal gaps tightly: Prevent air leaks with foam insulation around the mounting bracket.
- Follow the manual step-by-step: LG’s instructions ensure safe and efficient installation.
- Test before finalizing: Run the AC briefly to check for unusual noises or leaks.
- Schedule professional help if unsure: Complex wiring or refrigerant handling requires certified technicians.
📑 Table of Contents
- LG Air Conditioner Installation Instructions Made Simple
- Why Proper Installation Matters for Your LG Air Conditioner
- Pre-Installation Checklist: Getting Ready for Success
- Step-by-Step LG Window Air Conditioner Installation
- Installing an LG Split System: A Professional’s Touch
- Portable LG Air Conditioner Installation Tips
- Troubleshooting Common Installation Issues
- Maintenance Tips to Keep Your LG AC Running Smoothly
- Final Thoughts: Installation Done Right
LG Air Conditioner Installation Instructions Made Simple
So, you’ve finally decided to upgrade your home cooling system with an LG air conditioner. Congratulations! You’re not just buying a sleek, energy-efficient appliance—you’re investing in comfort, reliability, and peace of mind. LG has built a solid reputation for manufacturing air conditioners that blend smart technology with user-friendly design. But here’s the thing: even the best AC unit won’t perform at its peak if it’s not installed correctly. That’s why understanding LG air conditioner installation instructions is so important.
Now, I get it—installing an air conditioner might sound intimidating. You might be picturing tangled wires, confusing manuals, and a weekend lost to frustration. But honestly, with the right guidance, it doesn’t have to be that way. Whether you’re tackling a window unit, a split system, or a portable model, LG has designed its products with the average homeowner in mind. The key is to follow the steps carefully, prepare your space, and know when to call in a professional. In this guide, I’ll walk you through everything you need to know to install your LG air conditioner safely and efficiently—without the stress.
Why Proper Installation Matters for Your LG Air Conditioner
Let’s start with the basics: why does installation even matter? After all, once the unit is plugged in, it should just work, right? Not quite. A poorly installed air conditioner can lead to a host of problems—reduced cooling efficiency, higher energy bills, frequent breakdowns, and even safety hazards. Think of it like building a house: if the foundation isn’t level, the whole structure suffers. The same goes for your AC.
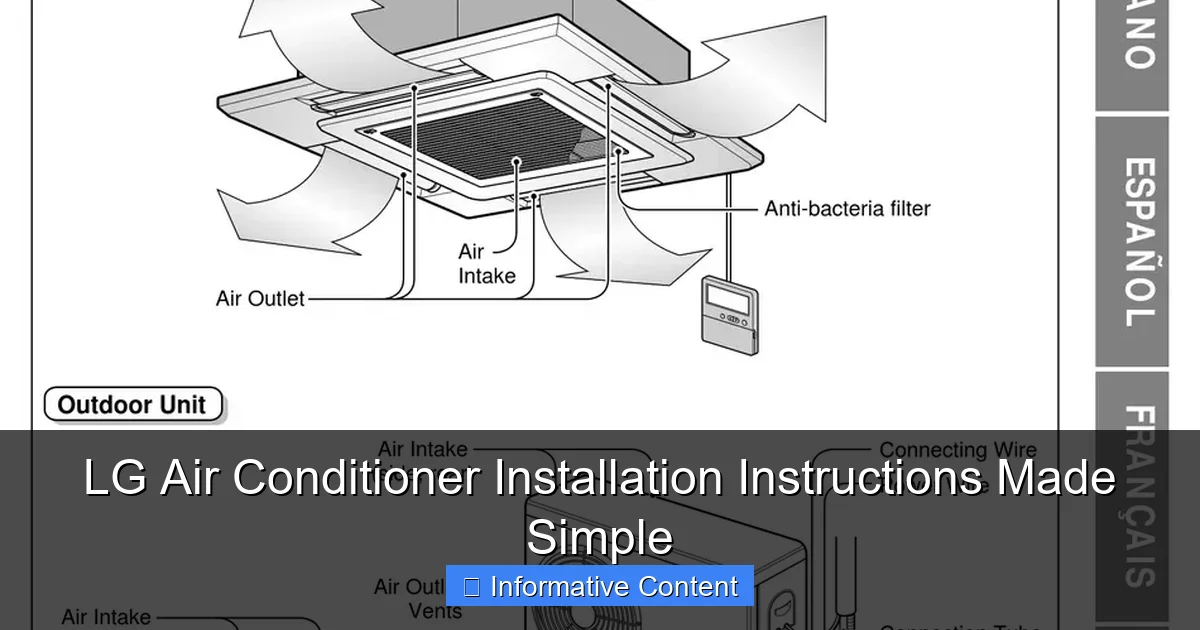
Visual guide about lg air conditioner installation instructions
Image source: i1.wp.com
Energy Efficiency and Performance
One of the biggest benefits of LG air conditioners is their energy efficiency. Many models come with ENERGY STAR certification, which means they use less electricity to cool your space. But that efficiency only kicks in when the unit is installed correctly. For example, if there’s a gap around a window-mounted unit, hot air can sneak in, forcing the AC to work harder. This not only increases your energy bill but also shortens the lifespan of the compressor.
Let’s say you install a 12,000 BTU LG window AC in a room that’s slightly too large. The unit will run constantly, never quite reaching the desired temperature. Over time, this constant strain can lead to overheating and premature failure. On the flip side, a properly sized and installed unit will cool your room quickly, cycle off when needed, and save you money in the long run.
Safety First: Avoiding Common Hazards
Safety is another critical reason to follow LG air conditioner installation instructions to the letter. Air conditioners involve electrical components, refrigerant lines, and sometimes water drainage. A mistake during installation—like loose wiring or improper grounding—can lead to electrical shocks or even fires. In split systems, incorrect handling of refrigerant can be dangerous and is actually illegal without proper certification.
I once helped a friend install a window unit, and we almost made a big mistake. We didn’t check the window frame’s weight capacity, and the sash started to crack under the strain. Luckily, we caught it in time. That’s why LG emphasizes using the right mounting hardware and ensuring structural support. Always double-check your window or wall before drilling.
Warranty Protection
Here’s something many people overlook: improper installation can void your warranty. LG offers solid warranties on its air conditioners—often covering parts for up to 10 years on certain models. But if the unit fails due to incorrect installation, LG may deny your claim. The manual usually states that the warranty is valid only if the unit is installed according to their guidelines. So, even if you’re handy, skipping steps to save time could cost you hundreds in repairs down the line.
Pre-Installation Checklist: Getting Ready for Success
Before you even unbox your LG air conditioner, there’s some prep work to do. Rushing into installation without planning is a recipe for frustration. Think of this as your “pre-game” routine—simple steps that set you up for a smooth process.
Choose the Right Location
The first step is deciding where to install your unit. For window units, you’ll want a window that gets good airflow but isn’t in direct sunlight all day. Direct sun can overheat the unit and reduce efficiency. Also, avoid placing it near heat sources like ovens or heaters.
For split systems, the indoor unit should be mounted high on an interior wall, away from curtains and furniture that could block airflow. The outdoor unit needs a flat, stable surface with plenty of clearance—at least 12 inches on all sides—for proper ventilation. Never install it in a cramped space or under a roof overhang where debris can accumulate.
Measure Your Space
LG air conditioners come in different sizes, measured in BTUs (British Thermal Units). A 5,000 BTU unit might be perfect for a small bedroom, but it won’t cut it for a large living room. Use LG’s sizing guide or a general rule of thumb: 20 BTUs per square foot of living space.
For example, a 120-square-foot room needs about 2,400 BTUs, so a 5,000 BTU unit would be more than enough. But if your room has high ceilings, large windows, or poor insulation, you might need a larger unit. Over-sizing isn’t ideal either—it leads to short cycling, where the AC turns on and off too frequently, wasting energy and reducing comfort.
Gather the Right Tools and Materials
You don’t need a full toolbox, but having the essentials on hand will save time. Here’s what you’ll typically need:
- Screwdrivers (Phillips and flathead)
- Drill and drill bits
- Level
- Tape measure
- Silicone sealant or weatherstripping
- Mounting brackets (included with most LG units)
- Electrical tape and wire nuts (for hardwired models)
For split systems, you’ll also need a vacuum pump, manifold gauge set, and possibly a licensed HVAC technician for refrigerant handling. Don’t skip this—refrigerant work requires certification in most regions.
Check Electrical Requirements
Most LG window and portable units plug into a standard 120V outlet, but larger models—especially split systems—may require a dedicated 240V circuit. Check the unit’s specifications and your home’s electrical panel. If you’re not sure, consult an electrician. Overloading a circuit can trip breakers or cause fires.
Also, make sure the outlet is grounded and within reach of the power cord. Never use an extension cord—it’s a fire hazard and can void your warranty.
Step-by-Step LG Window Air Conditioner Installation
Window units are the most common type of LG air conditioner, and they’re also the easiest to install. If you’ve got a double-hung or sliding window, you’re in luck. Let’s walk through the process step by step.
Step 1: Prepare the Window
Start by opening the window and cleaning the sill. Remove any dirt, debris, or old weatherstripping. Measure the window opening to ensure your LG unit fits. Most window ACs are designed for openings between 23 and 36 inches wide and at least 14 inches tall.
If your window is too wide, you may need to install side panels or accordion-style extensions. These usually come with the unit or can be purchased separately. Make sure they’re snug—gaps let in hot air and reduce efficiency.
Step 2: Install the Mounting Bracket
Most LG window units come with a support bracket that attaches to the window sill. Position it so the AC will sit level and slightly tilted outward (about 1/4 inch) to allow condensation to drain properly.
Use a level to check alignment, then mark the screw holes. Drill pilot holes to prevent splitting the wood, then secure the bracket with the provided screws. If your window is vinyl or metal, use appropriate anchors.
Step 3: Lift and Secure the Unit
This is where teamwork helps. Window ACs can weigh 50–80 pounds. Have a friend assist you in lifting the unit into the window opening. Slide it onto the bracket and lower it gently.
Once in place, close the window sash onto the top of the unit. Secure it with the included screws or brackets. Never rely solely on the window latch—it’s not strong enough to hold the weight.
Step 4: Seal the Gaps
Use weatherstripping or foam tape to seal any gaps around the unit. This prevents air leaks and improves efficiency. Apply silicone sealant along the bottom and sides if needed. Don’t overdo it—you still need to be able to remove the unit for cleaning or winter storage.
Step 5: Plug In and Test
Plug the unit into a grounded outlet. Turn it on and set the temperature. Listen for unusual noises—rattling or grinding could mean something’s loose. Check for cool air output and ensure the unit isn’t vibrating excessively.
If everything looks good, you’re done! But don’t forget to clean the filter monthly and check the drain pan for buildup.
Installing an LG Split System: A Professional’s Touch
Split systems are more complex but offer better performance and quieter operation. They consist of an indoor unit (evaporator) and an outdoor unit (condenser), connected by refrigerant lines and electrical wiring. While some DIYers attempt this, it’s best left to professionals—especially the refrigerant part.
Indoor Unit Installation
The indoor unit mounts high on an interior wall. Use the template provided in the manual to mark the mounting holes. Drill into the wall, insert anchors, and secure the bracket with screws. Make sure it’s level—use a bubble level to check.
Next, drill a 3-inch hole through the wall for the refrigerant lines, drain hose, and electrical wiring. The hole should slope slightly downward toward the outside to prevent water from entering.
Outdoor Unit Setup
Place the outdoor unit on a concrete pad or sturdy brackets. Ensure it’s level and has at least 12 inches of clearance on all sides. Connect the refrigerant lines and electrical wiring according to the manual. Use flare nuts and torque them to the specified value—over-tightening can crack the fittings.
Vacuum and Charge the System
This is where a licensed technician is essential. They’ll use a vacuum pump to remove air and moisture from the refrigerant lines, then charge the system with the correct amount of refrigerant. Skipping this step can lead to poor cooling and compressor damage.
Once charged, the technician will test the system for leaks and ensure proper operation. You’ll get a report confirming the installation meets code.
Portable LG Air Conditioner Installation Tips
Portable units are great for renters or rooms without windows. They’re easy to move and don’t require permanent installation—but they do need a vent hose to expel hot air.
Venting the Exhaust Hose
Most portable LG models come with a window vent kit. Attach one end of the hose to the back of the unit and the other to the window adapter. Slide the adapter into the window opening and secure it with the provided brackets.
Keep the hose as short and straight as possible. Bends and kinks restrict airflow, reducing efficiency. If you must extend it, use a rigid duct instead of flexible tubing.
Drainage Options
Portable ACs produce condensation, which collects in an internal tank. Some models have a self-evaporating system that disperses moisture through the exhaust hose. Others require manual draining.
Check the tank regularly—especially in humid climates. If it fills up, the unit will shut off automatically. For continuous drainage, you can attach a hose to the drain port and run it to a floor drain or bucket.
Troubleshooting Common Installation Issues
Even with careful planning, things can go wrong. Here are a few common problems and how to fix them.
Unit Won’t Turn On
Check the power cord and outlet. Make sure the circuit breaker hasn’t tripped. If the unit has a remote, replace the batteries. For hardwired models, verify the wiring connections.
Insufficient Cooling
This could be due to poor insulation, a dirty filter, or incorrect sizing. Clean the filter and check for air leaks around the unit. If the problem persists, the refrigerant level might be low—call a technician.
Water Leaking Inside
If water drips inside the room, the drain pan might be clogged or the unit isn’t tilted correctly. Clean the pan and ensure the AC slopes slightly outward. For portable units, check the drain hose for blockages.
Maintenance Tips to Keep Your LG AC Running Smoothly
Installation is just the beginning. Regular maintenance keeps your LG air conditioner efficient and extends its lifespan.
- Clean or replace the air filter every 1–2 months.
- Wipe down the exterior with a damp cloth.
- Check the drain pan and hose for clogs.
- Inspect the outdoor unit for debris and clean the coils annually.
- Schedule a professional tune-up every 2–3 years.
By following these simple steps, you’ll enjoy cool, comfortable air for years to come.
Final Thoughts: Installation Done Right
Installing an LG air conditioner doesn’t have to be a daunting task. With the right preparation, tools, and attention to detail, you can set up your unit safely and efficiently. Whether you’re mounting a window model, setting up a split system, or venting a portable unit, following the LG air conditioner installation instructions ensures optimal performance, energy savings, and peace of mind.
Remember, when in doubt, consult the manual or call a professional. LG designs its products to be user-friendly, but some steps—like refrigerant handling—require expertise. Your comfort and safety are worth the extra care. So take your time, follow the steps, and enjoy the cool, refreshing air your LG air conditioner was designed to deliver.
Frequently Asked Questions
How do I install an LG air conditioner step by step?
Follow the LG air conditioner installation instructions in your user manual, which includes mounting the indoor/outdoor units, connecting refrigerant lines, and wiring. Always turn off power before starting and ensure proper drainage slope.
Can I install an LG AC unit myself, or do I need a professional?
While basic setup (like mounting) can be DIY, gas charging and electrical work should be handled by a licensed technician to comply with safety standards and warranty terms.
What tools are needed for LG air conditioner installation?
Essential tools include a drill, level, pipe bender, manifold gauge set, vacuum pump, and screwdrivers. The LG air conditioner installation instructions list model-specific requirements in the manual.
Why is my LG AC leaking after installation?
This often occurs due to incorrect drain pipe slope or clogged drainage. Recheck the installation manual’s guidelines for proper drainage setup and ensure the unit is level.
How far apart can the indoor and outdoor LG AC units be?
Most LG models allow a maximum distance of 15–25 feet (check your manual). Exceeding this may reduce efficiency or require additional refrigerant, which must be done by a technician.
What’s the first step in LG air conditioner installation?
Start by selecting a sturdy wall for the indoor unit, ensuring it’s away from heat sources and direct sunlight. Then, drill holes for pipes/wiring and mount the backplate per the instructions.