
Featured image for lennox air conditioner install
Image source: hvacseer.com
Proper installation is crucial for maximizing your Lennox air conditioner’s efficiency and lifespan. This guide walks you through step-by-step setup, from sizing and placement to electrical connections and refrigerant charging, ensuring cool, reliable comfort all season long.
Key Takeaways
- Hire a pro: Always use a certified HVAC technician for safe, code-compliant installation.
- Check sizing: Ensure correct unit size to maximize efficiency and comfort.
- Clear the area: Remove obstructions around the outdoor unit for optimal airflow.
- Seal ducts properly: Prevent energy loss with professional duct sealing and insulation.
- Verify refrigerant levels: Correct charge is critical for performance and longevity.
- Register your warranty: Complete registration promptly to secure full coverage benefits.
📑 Table of Contents
- Why Installing a Lennox Air Conditioner Is a Smart Move for Your Home
- Understanding Your Lennox Air Conditioner Options
- Preparing for Your Lennox Air Conditioner Install
- The Installation Process: What to Expect
- Cost Breakdown: What You’re Paying For
- Post-Install Care: Keeping Your Lennox AC Running Smoothly
- Final Thoughts: Your Path to Cool, Effortless Comfort
Why Installing a Lennox Air Conditioner Is a Smart Move for Your Home
Let’s be honest—there’s nothing quite like stepping into a cool, refreshing home after a long day under the blazing sun. If you’re tired of sweltering through summer or dealing with unreliable cooling systems, installing a Lennox air conditioner might be one of the best decisions you make for your comfort and energy savings. Lennox has built a solid reputation over the past century for engineering high-efficiency, whisper-quiet, and long-lasting HVAC systems. But here’s the thing: even the best AC unit won’t deliver optimal performance if it’s not installed correctly.
When it comes to a Lennox air conditioner install, the process is more than just connecting wires and refrigerant lines. It’s about precision, compatibility, and ensuring every component—from the thermostat to the condenser—works in harmony. A professional install ensures you get the full benefits of Lennox’s advanced technology, like variable-capacity compressors and smart home integration. Whether you’re upgrading from an older model or installing AC in a new home, this guide will walk you through everything you need to know to make the process smooth, safe, and stress-free. Think of it as your friendly, no-nonsense companion to a cooler, more comfortable summer.
Understanding Your Lennox Air Conditioner Options
Before you even schedule the Lennox air conditioner install, it’s essential to understand the different models available and which one suits your home, climate, and budget. Lennox offers a range of systems, each with unique features tailored to different needs. Let’s break them down so you can make an informed choice.
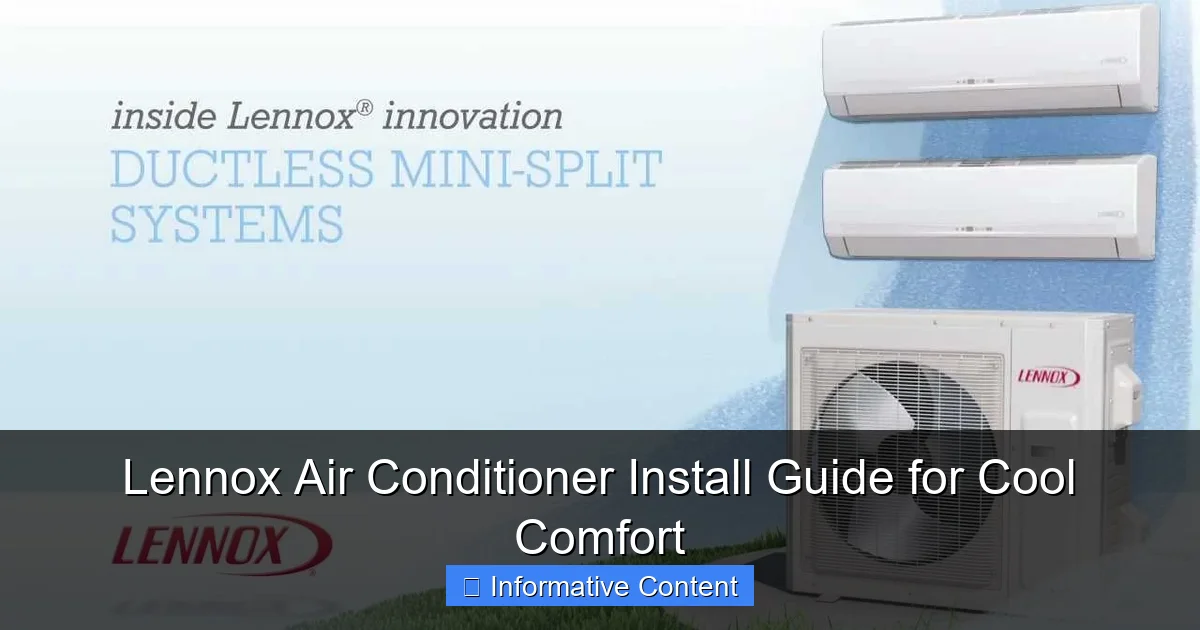
Visual guide about lennox air conditioner install
Image source: i.ytimg.com
Central Air Conditioners: The Powerhouse of Cooling
Lennox’s central AC units, like the SL28XCV and EL18XCV, are designed for whole-home cooling and are ideal for homes with existing ductwork. These models boast SEER (Seasonal Energy Efficiency Ratio) ratings of up to 28, which means they use significantly less energy than older units. For example, a homeowner in Arizona replaced their 12-year-old AC with a Lennox SL28XCV and saw a 35% drop in their summer electricity bill—enough to pay for the unit in under five years.
One standout feature is the variable-capacity compressor, which adjusts cooling output in tiny increments rather than turning on and off at full blast. This not only saves energy but also maintains consistent indoor temperatures. Plus, the quiet operation (as low as 59 decibels) means you won’t hear it running unless you’re standing right next to it.
Mini-Split Ductless Systems: Perfect for Room Additions or Older Homes
If your home lacks ductwork or you’re adding a sunroom, a Lennox mini-split ductless system like the XP20 might be the way to go. These systems consist of an outdoor condenser and one or more indoor air handlers, each controlling temperature independently. A friend of mine used a mini-split in her converted garage office—she now works in perfect comfort without affecting the rest of the house’s temperature.
The XP20 offers a SEER rating of up to 20 and includes a built-in air purifier, which is a bonus for allergy sufferers. The best part? Installation is less invasive than central AC since there’s no need for extensive ductwork.
Packaged Units: Space-Saving Solutions for Smaller Homes
For homes with limited indoor space, Lennox’s packaged air conditioners (like the XP21) combine the condenser, evaporator, and air handler into a single outdoor unit. These are great for condos, townhouses, or homes with basements that can’t accommodate a furnace and AC combo. One homeowner in Florida installed a packaged unit on the roof of their two-story home and loved the extra storage space it freed up indoors.
While slightly less efficient than split systems (SEER up to 21), they’re still a solid choice for warm climates where heating isn’t a primary concern.
Smart Thermostats and Integration: The Future of Comfort
No matter which Lennox model you choose, pairing it with a smart thermostat like the iComfort® S30 can take your comfort to the next level. These thermostats learn your schedule, adjust temperatures based on humidity, and even send alerts if your system needs maintenance. For instance, a family in Colorado used the S30 to pre-cool their home before returning from vacation—no more walking into a 90°F house!
Preparing for Your Lennox Air Conditioner Install
You’ve picked the perfect Lennox unit—great! But before the installer shows up, there are a few key steps to ensure a smooth Lennox air conditioner install. Think of this as your pre-game checklist to avoid delays, extra costs, or headaches down the line.
Assess Your Home’s Cooling Needs
Not all homes are created equal, and neither are their cooling demands. A 2,000-square-foot house in Houston needs a much larger AC than the same-sized home in Seattle. Use a Manual J Load Calculation (a standard industry tool) to determine the correct tonnage. Most reputable HVAC contractors will do this for you, but it’s good to understand the basics:
- 1 ton of cooling = 12,000 BTUs per hour
- For a 1,500 sq. ft. home in a hot climate, you might need a 3-ton unit.
- In milder areas, a 2.5-ton unit may suffice.
Oversizing or undersizing your AC leads to inefficiency, short-cycling, and higher bills. A buddy of mine skipped the load calculation and bought a 4-ton unit for his 1,200 sq. ft. home—his energy bills skyrocketed, and the system broke down within two years.
Check Your Ductwork (If Applicable)
If you’re installing a central AC system, inspect your ductwork for leaks, damage, or inadequate insulation. Leaky ducts can waste up to 30% of your cooling energy. A quick DIY test: light a stick of incense near ducts on a windy day. If the smoke moves, you’ve got a leak. For a more thorough assessment, hire a professional to perform a duct blaster test.
Pro tip: If your ducts are old or poorly insulated, consider sealing and insulating them before the install. It’s much easier (and cheaper) than doing it later.
Clear the Installation Area
Both the outdoor condenser and indoor components need clear, unobstructed space. For the condenser:
- Allow at least 12–24 inches of clearance on all sides.
- Keep it away from bushes, fences, or structures that block airflow.
- Ensure the pad is level—uneven pads cause vibration and noise.
For indoor units (like air handlers or mini-split heads), remove clutter, furniture, or decor that might block airflow. A friend once had a mini-split installed behind a bookshelf—needless to say, it didn’t cool the room well!
Schedule the Install During Mild Weather
While you can technically install an AC anytime, doing it during spring or early summer (before the heatwave hits) is ideal. This gives you time to address any issues before you’re desperate for cool air. Plus, HVAC companies are less busy, so you might get a better rate or faster service.
The Installation Process: What to Expect
Now for the main event: the Lennox air conditioner install. While every job is slightly different, here’s a step-by-step breakdown of what typically happens—and what you can expect from your HVAC team.
Site Evaluation and Equipment Setup
The installer will start by reviewing your home’s layout, ductwork (if applicable), and electrical setup. They’ll also:
- Verify the correct unit size and placement.
- Check the existing electrical panel to ensure it can handle the new load (most Lennox units require a 240-volt circuit).
- Inspect refrigerant lines and drain lines for proper routing.
For example, if you’re replacing an old AC, the installer might need to upgrade the electrical disconnect box or re-route refrigerant lines to match the new unit’s connections.
Installing the Outdoor Condenser
The condenser is the heart of your system, so this step is critical. The installer will:
- Place the condenser on a level concrete pad (or vibration-absorbing rubber mounts).
- Connect the refrigerant lines, ensuring they’re properly insulated to prevent energy loss.
- Install the condensate drain line, sloping it downward to avoid water buildup.
- Wire the unit to the electrical disconnect and thermostat.
Pro tip: Ask the installer to show you the condenser’s airflow direction. You want it facing away from your home’s windows to avoid noise issues.
Setting Up the Indoor Components
For central systems, this involves the air handler or furnace coil. For mini-splits, it’s the indoor air handler. Key steps include:
- Securing the unit to the wall or ceiling with vibration dampeners.
- Connecting the refrigerant lines and drain line (mini-splits need a small hole drilled through the wall).
- Wiring the unit to the thermostat and outdoor condenser.
A common mistake? Not sealing the hole for mini-split lines properly. This can lead to air leaks, pests, or water damage—so insist on a thorough seal.
Charging the System and Testing
Once everything is connected, the installer will:
- Evacuate the refrigerant lines (to remove air and moisture).
- Add the correct amount of refrigerant—too much or too little harms efficiency.
- Test the system’s airflow, temperature differential, and electrical components.
- Calibrate the thermostat and demonstrate its features.
Don’t skip this step! A friend’s installer rushed through the charge process, leading to poor cooling and a costly re-visit a week later.
Final Walkthrough and Paperwork
Before they leave, the installer should:
- Explain how to use and maintain the system.
- Provide the warranty information (Lennox offers up to 10 years on parts and compressors).
- Give you a copy of the load calculation and installation checklist.
Keep this paperwork—it’s essential for future service or warranty claims.
Cost Breakdown: What You’re Paying For
Let’s talk money. A Lennox air conditioner install isn’t cheap, but it’s an investment in your home’s value and comfort. Here’s what you can expect to pay and why.
| Component | Average Cost (USD) | What It Covers |
|---|---|---|
| Unit (Central AC, 3-ton) | $3,500–$6,000 | Equipment cost based on model and efficiency |
| Installation Labor | $1,500–$3,500 | Labor, refrigerant, permits, and basic modifications |
| Ductwork (if needed) | $1,000–$5,000 | Repairs, sealing, or new duct installation |
| Electrical Upgrades | $200–$1,000 | New circuits, disconnects, or panel upgrades |
| Thermostat | $100–$500 | Smart or programmable thermostat |
| Total (Average) | $6,300–$15,000 | Whole-home central AC install |
Mini-Split vs. Central AC: Cost Comparison
Mini-splits are often more affordable for small spaces. A single-zone install (one indoor head) costs $3,000–$6,000, while a multi-zone system runs $5,000–$10,000. Central AC is better for whole-home cooling but requires ductwork. In homes without ducts, the cost can jump by $3,000–$7,000.
Pro tip: Look for rebates and tax credits. The U.S. federal government offers up to $2,000 for high-efficiency AC installations through the Energy Efficient Home Improvement Credit (2023–2032). Many states and utilities also provide additional rebates.
Post-Install Care: Keeping Your Lennox AC Running Smoothly
Congratulations—your Lennox air conditioner install is complete! But the journey doesn’t end here. Proper maintenance ensures your system runs efficiently for years (Lennox units typically last 15–20 years with care).
Routine Maintenance Tasks
- Change air filters every 1–3 months (dirty filters reduce airflow and efficiency).
- Clean the condenser coils annually (use a garden hose to rinse debris).
- Inspect the condensate drain line (pour a cup of bleach down it monthly to prevent clogs).
- Check refrigerant levels (only a pro should do this—low levels mean a leak).
A friend once ignored his filter for six months—his AC froze up and needed a $400 repair. Don’t be that person!
Schedule Annual Professional Tune-Ups
Just like your car, your AC needs a yearly check-up. A technician will:
- Test electrical connections and refrigerant pressure.
- Lubricate moving parts.
- Check thermostat calibration.
- Inspect for refrigerant leaks or corrosion.
Many HVAC companies offer service plans for $150–$300/year. It’s worth it for peace of mind.
Smart Thermostat Tips
If you have an iComfort® thermostat, use these features:
- Schedule mode to cool your home only when you’re there.
- Humidity control to prevent stuffiness.
- Airflow alerts to remind you to change filters.
One family in Texas saved 15% on energy bills just by adjusting their thermostat settings.
Final Thoughts: Your Path to Cool, Effortless Comfort
Installing a Lennox air conditioner is more than just a home improvement—it’s a commitment to comfort, efficiency, and peace of mind. From choosing the right model for your needs to preparing your home and understanding the install process, every step matters. While the upfront cost might seem steep, the long-term savings, reliability, and advanced features (like smart integration and whisper-quiet operation) make it a worthwhile investment.
Remember, the key to a successful Lennox air conditioner install is partnering with a licensed, reputable HVAC contractor. Don’t cut corners on labor—poor installation can negate even the best equipment. And once it’s in, stay on top of maintenance to keep your system running smoothly for years.
So go ahead, take the plunge. With a well-installed Lennox AC, you’re not just buying a cooler home—you’re buying the freedom to enjoy every summer day without breaking a sweat. And that, my friend, is priceless.
Frequently Asked Questions
How much does a Lennox air conditioner install typically cost?
The cost of a Lennox air conditioner install varies based on unit size, complexity, and location, but most homeowners spend between $3,500 and $7,500. Always request a detailed quote from a certified HVAC technician to account for labor, permits, and equipment.
Can I install a Lennox air conditioner myself?
DIY installation is not recommended for Lennox air conditioner install projects due to the need for specialized tools, refrigerant handling, and electrical work. Hiring a licensed professional ensures safety, warranty compliance, and optimal system performance.
How long does a Lennox air conditioner installation take?
A standard Lennox air conditioner install typically takes 4–8 hours, depending on system complexity and whether existing ductwork is used. Complex retrofits or new constructions may require additional time.
What size Lennox air conditioner do I need for my home?
Proper sizing depends on your home’s square footage, insulation, and climate. A professional load calculation (like Manual J) during your Lennox air conditioner install consultation ensures the right capacity for efficiency and comfort.
Does Lennox offer rebates or incentives for new installations?
Yes, Lennox frequently provides rebates, tax credits, and financing options for qualifying energy-efficient models. Check their official website or ask your installer about available Lennox air conditioner install promotions.
What maintenance is required after a Lennox air conditioner install?
Regular maintenance includes changing air filters every 1–3 months, scheduling annual professional tune-ups, and keeping the outdoor unit clear of debris. Proper care extends your Lennox system’s lifespan and efficiency.