
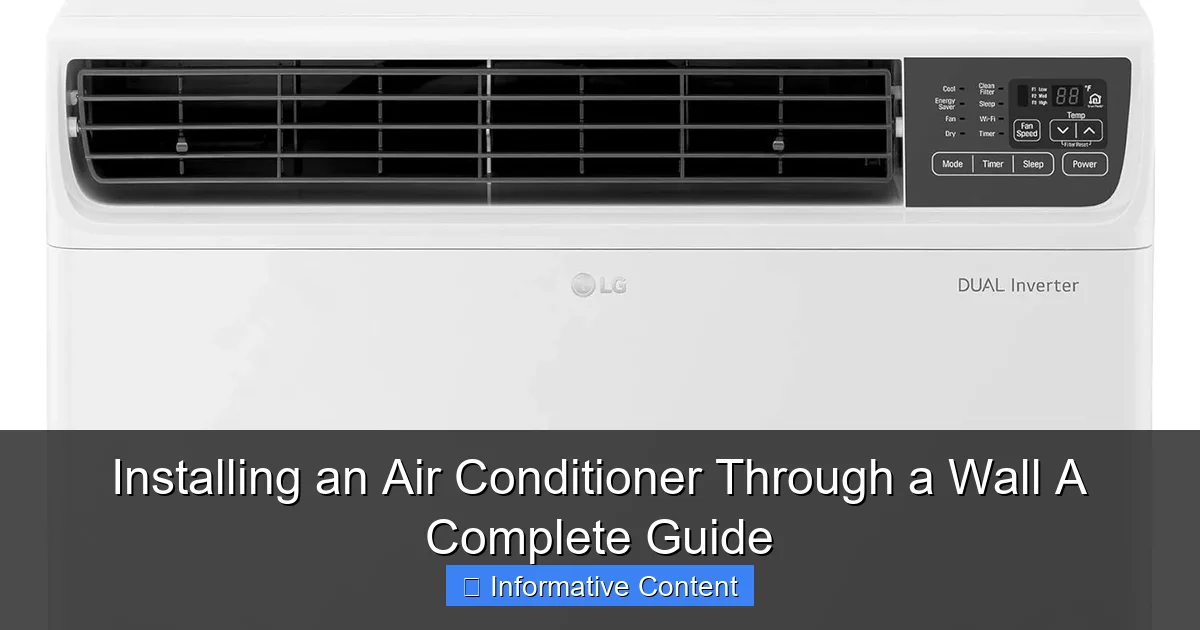
Featured image for installing an air conditioner through a wall
Image source: images-na.ssl-images-amazon.com
Installing an air conditioner through a wall offers a permanent, space-saving cooling solution ideal for rooms without windows. Proper sizing, structural assessment, and weatherproofing are critical to ensure efficient operation, safety, and long-term durability. This guide walks you through every step—from selecting the right unit to sealing the opening—for a professional-quality installation.
Key Takeaways
- Measure carefully: Ensure precise wall and AC unit dimensions for a snug fit.
- Choose the right AC: Opt for a through-the-wall model designed for permanent installation.
- Seal gaps tightly: Use weatherstripping to prevent air leaks and improve efficiency.
- Secure mounting is critical: Anchor the unit firmly to avoid vibrations or falls.
- Check local codes: Verify permits and regulations before starting your project.
- Prioritize drainage: Slope the unit slightly outward for proper water runoff.
📑 Table of Contents
- Why Installing an Air Conditioner Through a Wall is a Game-Changer
- 1. Understanding Through-the-Wall Air Conditioners: What Are They?
- 2. Planning Your Installation: What You Need to Know First
- 3. Tools and Materials: What You’ll Need
- 4. Step-by-Step Installation Guide
- 5. Maintenance and Troubleshooting: Keeping Your AC Running Smoothly
- 6. Safety, Efficiency, and Long-Term Tips
- Final Thoughts: Is It Worth It?
Why Installing an Air Conditioner Through a Wall is a Game-Changer
Let’s be honest—summer heat can be brutal. You’ve probably tried every trick in the book: ceiling fans, ice-cold lemonade, even sleeping on the kitchen floor (we’ve all been there). But nothing beats the cool, consistent relief of an air conditioner. And if you’re tired of bulky window units that block natural light or portable ACs that feel like they’re barely making a dent, installing an air conditioner through a wall might be your best move.
Unlike window units, through-the-wall air conditioners offer permanent, space-saving cooling without sacrificing your window view. They’re sleek, efficient, and—once installed—require minimal maintenance. But here’s the catch: this isn’t a simple plug-and-play job. It’s more like a mini home renovation project, and doing it right means avoiding leaks, drafts, and costly mistakes down the line. In this guide, I’ll walk you through everything you need to know to install a through-the-wall air conditioner safely, efficiently, and without losing your sanity.
1. Understanding Through-the-Wall Air Conditioners: What Are They?
Before you start measuring and drilling, it’s important to understand what a through-the-wall air conditioner is—and how it’s different from other options.

Visual guide about installing an air conditioner through a wall
Image source: breathebetterair.org
How They Work
Through-the-wall AC units are designed to be mounted in a sleeve that’s inserted into a hole cut into an exterior wall. The back of the unit sits outside, where it expels hot air, while the front cools the interior. They’re typically used in rooms where window units aren’t practical—like apartments with strict HOA rules, historic homes with non-standard windows, or rooms with limited window access.
Think of them like a hybrid between a window unit and a mini-split system. They’re self-contained (no need for refrigerant lines or a separate condenser), but they require a permanent opening in your wall. Once installed, they’re out of sight, out of mind—and far more efficient than dragging a portable unit in and out every summer.
Key Benefits Over Other AC Types
- Space-saving: No need to block a window or store a heavy unit during winter.
- Energy efficiency: Sealed installation reduces air leaks, which means lower energy bills.
- Better airflow: Units are designed to distribute cool air evenly, unlike portable models that often blow air in one direction.
- Permanent solution: Once installed, you’re set for years—no seasonal setup or breakdown.
For example, my neighbor Sarah lives in a pre-war apartment with original windows she can’t modify. She switched from a portable AC to a through-the-wall model last year. Not only did her electricity bill drop by 20%, but she finally got her living room back—no more tripping over hoses or dealing with condensation buckets.
Common Misconceptions
One myth I hear often is that through-the-wall ACs are “harder to install than window units.” While they do require more effort, they’re actually easier to seal and insulate. Another misconception? That you need a contractor. With the right tools and patience, many homeowners can handle the job themselves. (More on that later.)
2. Planning Your Installation: What You Need to Know First
Installing an air conditioner through a wall isn’t something you should rush into. A little planning goes a long way in avoiding headaches—like realizing the unit won’t fit after you’ve already cut the hole.
Choosing the Right Location
Start by identifying the best wall for installation. Here’s what to look for:
- Exterior wall: The hole must go through an outside-facing wall. Interior walls won’t work.
- Clear of obstructions: Avoid areas with pipes, electrical wiring, or structural supports (like studs or beams). Use a stud finder to map the wall.
- Near an electrical outlet: Most through-the-wall units require a 115V or 230V circuit. If there’s no outlet nearby, you may need an electrician to install one.
- Good airflow: The exterior side should have at least 12–18 inches of clearance for proper exhaust.
Pro tip: Measure your room’s square footage to ensure the AC has enough BTUs. A 10,000 BTU unit works well for a 300–400 sq ft room, while a 14,000 BTU unit is better for larger spaces. Oversizing wastes energy; undersizing means constant running.
Checking Building Codes and HOA Rules
This is a big one. In some areas, modifying exterior walls requires a permit—especially in multi-unit buildings or historic districts. Call your local building department or check their website. If you’re in an HOA, read the bylaws carefully. Some communities ban through-the-wall units for aesthetic reasons.
For example, a friend of mine in Chicago had to get approval from his condo board before installing his AC. The process took three weeks, but it saved him from a $500 fine. Moral of the story? Check first, drill later.
Selecting the Right Unit
Not all through-the-wall ACs are created equal. Look for these features:
- Energy Star rating: Saves on electricity and may qualify for rebates.
- Adjustable louvers: Helps direct airflow where you need it.
- Remote control and programmable thermostat: Adds convenience.
- Quiet operation: Check the decibel rating (look for under 60 dB).
- Sleeve compatibility: Some brands sell the sleeve separately—make sure it’s included or available.
I recommend brands like Friedrich, LG, and Frigidaire for reliability. Avoid cheap off-brand models—they often lack proper insulation and leak over time.
3. Tools and Materials: What You’ll Need
Before you start, gather your tools. Having everything ready saves time and prevents mid-project trips to the hardware store.
Essential Tools
- Measuring tape: For precise dimensions.
- Stud finder: To locate studs and avoid cutting through them.
- Level: Ensures the sleeve is perfectly horizontal.
- Circular saw or reciprocating saw: For cutting the hole (a jigsaw works too, but it’s slower).
- Drill and masonry bits: If your wall has brick or stucco.
- Caulking gun and exterior-grade caulk: For sealing gaps.
- Utility knife: For trimming insulation.
- Screwdrivers and wrenches: For securing the sleeve and unit.
- Safety gear: Gloves, goggles, and a dust mask (sawdust is no joke).
Materials Checklist
- Through-the-wall AC unit with sleeve (or separate sleeve)
- Exterior-grade plywood or flashing (for weatherproofing)
- Insulation foam (to seal around the sleeve)
- Exterior trim (optional, for a finished look)
- Electrical extension cord (if needed, but permanent wiring is better)
Pro tip: Buy a sleeve slightly larger than the unit. This gives you room to adjust and seal properly. Most sleeves are 16” x 26”, but double-check your model’s specs.
4. Step-by-Step Installation Guide
Now for the fun part: actually installing the unit. Follow these steps carefully, and you’ll avoid the most common pitfalls.
Step 1: Mark and Cut the Hole
1. Place the sleeve on the wall and trace its outline. Use a level to ensure it’s straight.
2. Drill pilot holes in each corner. This prevents the saw from wandering.
3. Cut along the lines with your saw. If your wall has brick or stucco, start with a small hole to check for obstructions.
4. Remove the cut section and clean up debris.
Warning: Cutting through a wall can expose electrical wires or pipes. If you hit something, stop immediately and consult a professional.
Step 2: Install the Sleeve
1. Slide the sleeve into the hole. The exterior side should extend 1–2 inches past the wall.
2. Use the level to check that it’s perfectly horizontal. Adjust with shims if needed.
3. Secure the sleeve with screws through the mounting tabs (usually on the top and sides).
4. From the outside, install flashing around the sleeve to direct rainwater away. This is crucial for preventing leaks.
Example: When I installed my unit, I used aluminum flashing cut into a “Z” shape. It overlapped the top and sides of the sleeve and was nailed to the siding. After two rainy seasons, no leaks.
Step 3: Insulate and Seal
1. Fill the gaps around the sleeve with insulation foam. Expanding foam works best—it seals air leaks and prevents drafts.
2. From the inside, trim excess foam with a utility knife.
3. Apply exterior-grade caulk around the sleeve’s edges (both inside and outside). This adds a second layer of protection.
Pro tip: Don’t overdo the foam. Too much can warp the sleeve. Apply in layers, letting each dry before adding more.
Step 4: Install the AC Unit
1. Slide the unit into the sleeve until it clicks or locks.
2. Secure it with the provided screws (usually on the top or sides).
3. Connect the power cord to a dedicated outlet. If using an extension cord, make sure it’s heavy-duty and rated for the unit’s amperage.
Safety note: Never plug a through-the-wall AC into a regular outlet with other high-wattage appliances. It can overload the circuit.
Step 5: Test and Adjust
1. Turn on the unit and check for airflow, noise, and cooling.
2. Use a thermometer to verify the air temperature (should be 10–20°F cooler than room temp).
3. Adjust the louvers to direct airflow where you need it.
If the unit vibrates or makes loud noises, double-check that it’s level and securely mounted. Loose units can damage the sleeve over time.
5. Maintenance and Troubleshooting: Keeping Your AC Running Smoothly
Even the best-installed AC needs regular care. A little maintenance prevents costly repairs and extends the unit’s life.
Routine Maintenance Checklist
- Clean the filter monthly: A dirty filter restricts airflow and reduces efficiency. Wash with mild soap and water, then dry completely before reinstalling.
- Inspect the exterior: Check for debris, leaves, or pests blocking the exhaust. Clean the fins with a soft brush.
- Check seals and caulk: Look for cracks or gaps. Reseal if needed.
- Drain the condensate pan: Some units collect water. Empty it if it gets full (usually once a season).
Common Issues and Fixes
| Problem | Likely Cause | Solution |
|---|---|---|
| Unit isn’t cooling | Dirty filter or blocked condenser | Clean filter and check exterior fins |
| Loud noises or vibrations | Unit not level or loose sleeve | Re-level and secure the unit |
| Water leaks inside | Poor drainage or damaged seal | Clear drain line and reseal sleeve |
| High energy bills | Dirty filter or poor insulation | Clean filter and check for air leaks |
For example, my cousin’s AC started leaking last summer. Turns out, a bird had built a nest in the exhaust grill, blocking airflow. A quick clean fixed it—and now he checks the grill monthly.
When to Call a Pro
Some issues—like refrigerant leaks or electrical problems—require a licensed technician. If your unit stops cooling after a few years, it might need a recharge. But if you’ve maintained it well, it should last 8–12 years.
6. Safety, Efficiency, and Long-Term Tips
Installing an air conditioner through a wall isn’t just about comfort—it’s about safety and efficiency too.
Safety First
- Turn off the power: Before touching electrical connections, switch off the circuit breaker.
- Use a GFCI outlet: Protects against electrical shocks, especially in humid areas.
- Secure the sleeve: Loose units can fall, especially in windy areas.
One friend in Florida installed his AC without flashing. During a storm, rain poured in and damaged his wall. A $20 piece of flashing would’ve saved him $500 in repairs.
Maximizing Efficiency
- Use a programmable thermostat: Set it to turn off when you’re away.
- Close curtains during the day: Reduces heat from sunlight.
- Insulate the sleeve: Add foam board around the interior edges to prevent cold air loss.
Bonus tip: In winter, remove the unit and seal the sleeve with an insulated cover. This prevents drafts and saves on heating costs.
Long-Term Considerations
Eventually, you’ll need to replace the unit. When that time comes, consider upgrading to a heat pump model—it can cool in summer and heat in winter, saving you money year-round.
Final Thoughts: Is It Worth It?
Installing an air conditioner through a wall takes effort, but the payoff is huge. You get permanent, efficient cooling without sacrificing your window view or dealing with seasonal setup. Plus, a well-installed unit can boost your home’s value—especially in hot climates.
Remember: patience is key. Take your time with measurements, sealing, and testing. If you’re unsure about cutting into your wall or handling electrical work, don’t hesitate to hire a pro. A few hundred dollars upfront can save you thousands in repairs later.
At the end of the day, this project is about more than just comfort—it’s about creating a space where you can relax, sleep, and live without sweating through the summer. And trust me, once you’ve experienced the cool, steady breeze of a through-the-wall AC, you’ll never go back.
Frequently Asked Questions
Can I install an air conditioner through a wall myself, or do I need a professional?
While DIY installation is possible for those with handyman skills, hiring a professional ensures safety, proper sealing, and adherence to local building codes. Installing an air conditioner through a wall requires precise measurements, electrical knowledge, and weatherproofing expertise.
What tools are needed for installing an air conditioner through a wall?
Essential tools include a drill, hole saw, level, stud finder, silicone caulk, measuring tape, and screwdrivers. For masonry walls, a hammer drill and masonry bit are also necessary to create the opening for the AC unit.
How do I choose the right size hole for my wall air conditioner?
Measure your AC unit’s wall sleeve or chassis dimensions and add 1/4 inch to each side for clearance. Always follow the manufacturer’s guidelines for the correct hole size and slope (typically 1/4 inch downward tilt outward) to ensure proper drainage.
What type of wall is best for installing an air conditioner through a wall?
Wood-framed or insulated walls are ideal, as they’re easier to cut and seal. Avoid load-bearing walls, electrical conduits, or pipes. For masonry or concrete walls, use specialized tools and consult a professional for structural safety.
How do I prevent air leaks after installing an air conditioner through a wall?
Seal gaps with high-quality silicone caulk or expanding foam, and use an exterior-grade mounting bracket or flange. Check for drafts yearly and reseal as needed to maintain energy efficiency and weather resistance.
Does installing an air conditioner through a wall require permits or approvals?
Some areas require permits for wall modifications or electrical work, especially in multi-family buildings. Check local regulations before starting your project to avoid fines or insurance issues.