
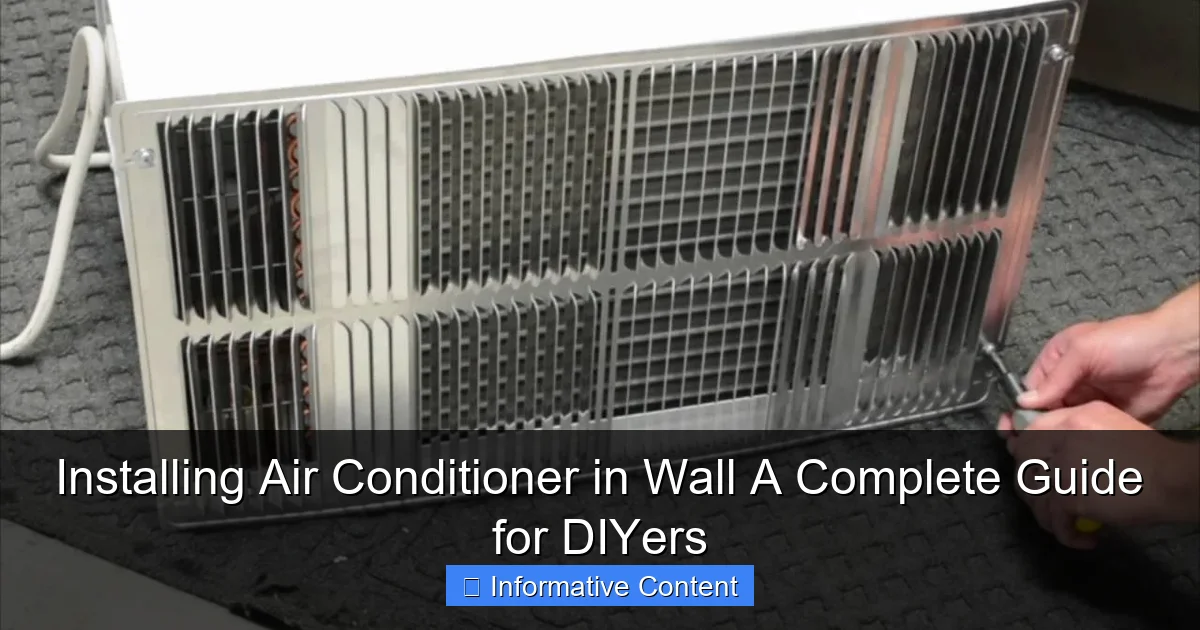
Featured image for installing air conditioner in wall
Image source: i.ytimg.com
Installing an air conditioner in a wall is a practical DIY upgrade that boosts cooling efficiency and saves floor space when done correctly. Proper sizing, secure framing, and weatherproofing are critical to ensure safe operation and long-term performance—always follow local codes and manufacturer guidelines. With the right tools and preparation, this project can be completed in a weekend.
Key Takeaways
- Measure twice, cut once: Ensure accurate wall opening dimensions before installing the AC unit.
- Seal gaps tightly: Use foam or caulk to prevent air leaks and improve efficiency.
- Prioritize drainage slope: Tilt the unit slightly outward for proper condensation drainage.
- Check electrical requirements: Verify voltage and circuit compatibility before connecting power.
- Reinforce support brackets: Securely anchor the unit to avoid sagging or vibration issues.
- Test before finishing: Run the AC to check for leaks, noise, or cooling problems.
📑 Table of Contents
- Why Installing an Air Conditioner in Wall Might Be Your Best Summer Upgrade
- 1. Is a Wall Air Conditioner Right for Your Space?
- 2. Tools, Materials, and Safety Prep (Don’t Skip This!)
- 3. Step-by-Step Installation: From Measuring to Mounting
- 4. Electrical Work: When to DIY vs. Call an Electrician
- 5. Finishing Touches: Sealing, Testing, and Maintenance
- 6. Troubleshooting Common Issues (And How to Fix Them)
- Final Thoughts: Your DIY Wall AC Journey Starts Here
Why Installing an Air Conditioner in Wall Might Be Your Best Summer Upgrade
Let me paint a picture for you. It’s the middle of July. The sun is relentless, and your living room feels more like a sauna than a cozy retreat. You’ve tried fans, ice packs, even sleeping with a frozen water bottle—nothing works. Then it hits you: “Why am I suffering when I could install an air conditioner in wall?” That’s exactly what I thought last summer when I finally decided to take the plunge.
Installing an air conditioner in wall isn’t just about cooling your space—it’s about reclaiming comfort, saving energy, and boosting your home’s value. Unlike portable units that take up floor space and window ACs that block your view, wall-mounted units are sleek, efficient, and built to last. But here’s the catch: it’s not as simple as plugging in a fan. It’s a project that requires planning, precision, and a bit of courage. The good news? If you’re a DIYer with basic tools and a can-do attitude, you can totally handle it. This guide walks you through every step, from choosing the right unit to testing your newly installed system. No fluff, no jargon—just honest, practical advice to help you beat the heat.
1. Is a Wall Air Conditioner Right for Your Space?
Understanding Wall AC Units vs. Other Types
Before you grab a saw and start cutting into drywall, let’s talk about wall air conditioners. These units are installed directly into a wall—usually an exterior wall—and vent hot air outside while cooling the room. They’re different from window units (which sit in a window opening) and mini-splits (which require refrigerant lines and outdoor compressors).

Visual guide about installing air conditioner in wall
Image source: pickhvac.com
Wall ACs are perfect for:
- Rooms without windows (like basements or interior bedrooms)
- Homes where window units are impractical (e.g., high-rise apartments)
- Spaces where you want a permanent, built-in look
<
<
But they’re not ideal if:
- You’re renting (landlord approval is a must)
- Your wall is load-bearing or made of concrete block (harder to cut)
- You need to cool multiple rooms (a ducted system may be better)
<
Key Features to Look For
Not all wall ACs are created equal. Here’s what to prioritize:
- BTU Rating: Match it to your room size. A 5,000 BTU unit cools ~150 sq. ft., while a 12,000 BTU unit handles ~550 sq. ft. Oversizing wastes energy; undersizing leaves you sweaty.
- Energy Efficiency: Look for an EER (Energy Efficiency Ratio) of 10+ or ENERGY STAR certification. My 8,000 BTU unit has an EER of 11.2—it uses 30% less power than my old window AC!
- Installation Kit: Most wall ACs come with a metal sleeve and insulation strips. Check if it’s included—otherwise, you’ll pay extra.
- Noise Level: Measured in decibels (dB). Under 55 dB is quiet enough for bedrooms. My unit runs at 52 dB—quieter than my fridge!
Real-World Example: My Basement Office
I installed a 10,000 BTU wall AC in my 300 sq. ft. basement office. The room has no windows, and summer temps hit 85°F. A portable AC would’ve been too noisy for Zoom calls, and a window unit wasn’t an option. The wall unit keeps the space at 72°F with minimal noise. Total cost: $600 (unit + tools). Worth every penny.
2. Tools, Materials, and Safety Prep (Don’t Skip This!)
Essential Tools for the Job
You don’t need a full workshop, but these tools are non-negotiable:
- Measuring tape: For marking the cutout
- Level: Ensures the unit sits straight (critical for drainage)
- Jigsaw or reciprocating saw: For cutting wood or drywall
- Stud finder: To locate framing and avoid pipes/wires
- Power drill: For securing the sleeve and unit
- Utility knife: For trimming insulation
- Work gloves and safety glasses: Trust me, drywall dust gets everywhere
Pro tip: Borrow or rent a saw if you don’t own one. I rented a jigsaw from my local hardware store for $25/day.
Materials Checklist
Grab these before you start:
- Wall AC unit (with installation kit)
- Exterior-grade caulk (for sealing gaps)
- Insulation foam (to fill voids around the sleeve)
- Exterior trim (optional, for a finished look)
- Electrical wire (if extending a circuit—more on this later)
Safety First: What Could Go Wrong?
Installing an air conditioner in wall involves power tools, electrical work, and heavy lifting. Here’s how to stay safe:
- Turn off power: Even if you’re not wiring, shut off the circuit breaker. A stray nail near a live wire? Not worth the risk.
- Check for hazards: Use your stud finder to scan for pipes, wires, or structural beams. I once hit a water line—lesson learned: always double-check!
- Lift with care: Wall ACs weigh 60–100 lbs. Use a dolly or ask a friend to help. My back thanked me for the extra pair of hands.
- Ventilation: Work in a well-ventilated area. Cutting drywall creates a lot of dust.
3. Step-by-Step Installation: From Measuring to Mounting
Step 1: Choose the Perfect Location
Location is everything. Here’s what to consider:
- Height: Mount the unit 12–18 inches above the floor. This optimizes airflow and avoids blocking furniture.
- Proximity to outlets: Most units need a dedicated 120V or 240V circuit. If the outlet is far, you’ll need an electrician to run new wiring.
- Exterior access: The unit must vent outside. Avoid interior walls unless you’re installing a ducted system (which is a whole other project).
- Shade: Direct sun on the exterior side can reduce efficiency. My unit is on the north-facing wall—no sun, no problem.
Step 2: Mark and Measure the Cutout
Follow your AC’s manual for exact dimensions. Most units require a sleeve that’s 2–3 inches wider and taller than the AC itself.
- Use a pencil and level to mark the outline.
- Double-check with the stud finder: the cutout should avoid framing (unless you’re cutting through non-load-bearing studs).
- Pro tip: Trace the sleeve on cardboard first. Hold it up to the wall to visualize the fit. I did this—saved me from a costly mistake!
Step 3: Cut the Wall (The Nervous Part)
Now for the scary part: cutting the hole. Here’s how to do it cleanly:
- Drill pilot holes in each corner of the marked area.
- Attach a wood block to your saw to limit blade depth (prevents cutting into exterior siding).
- Cut slowly, following the lines. For drywall, use a jigsaw with a fine-tooth blade. For wood, use a reciprocating saw.
- Remove the cutout and check the cavity for wires/pipes.
Real talk: My first cut was crooked. I used a drywall rasp to smooth the edges and caulked the gaps. No one can tell—it’s the thought that counts!
Step 4: Install the Sleeve
The sleeve is the metal frame that holds the AC. Here’s the process:
- Slide the sleeve into the hole. It should sit flush with the interior wall.
- Use a level to ensure it’s perfectly horizontal. Tilted sleeves cause water leaks.
- Secure the sleeve to the wall with screws (usually included in the kit). For wood framing, use 2-inch screws. For metal studs, use self-tapping screws.
- Seal the exterior gap with caulk. I used silicone-based exterior caulk—it’s weatherproof and flexible.
Step 5: Mount the AC Unit
Time to lift! This is the heaviest step:
- Slide the AC into the sleeve until it clicks into place (most units have a locking mechanism).
- Secure it with the provided screws. Don’t overtighten—this can warp the sleeve.
- Attach the interior trim (if included) for a clean look.
My tip: Have a friend hold the unit while you secure it. One-handed drilling is a recipe for disaster.
4. Electrical Work: When to DIY vs. Call an Electrician
Understanding Electrical Requirements
Wall ACs need more power than standard outlets. Here’s the breakdown:
- 120V units: Plug into a standard outlet but need a dedicated circuit (no other appliances). Common for 5,000–8,000 BTU units.
- 240V units: Require a special outlet (like a dryer plug). Needed for 10,000+ BTU units. You’ll need an electrician to install the outlet and run new wiring.
Never plug a wall AC into an extension cord! It can overheat and cause a fire.
DIY Electrical: Extending a 120V Circuit
If you’re extending an existing 120V circuit:
- Turn off the breaker and verify with a voltage tester.
- Run 14/2 NM-B cable (for 15-amp circuits) or 12/2 NM-B (for 20-amp circuits) from the outlet to the AC location.
- Mount a junction box at the AC site and wire the outlet (black to brass, white to silver, ground to green).
- Label the circuit in your breaker panel.
Warning: If you’re not 100% confident, hire an electrician. My neighbor tried this and tripped the breaker—cost him $200 to fix.
When to Call a Pro
Always hire an electrician for:
- Installing a 240V outlet
- Upgrading your panel (if your home has 100-amp service)
- Any work involving the main electrical panel
Cost note: Electricians charge $80–$150/hour. A 240V install typically costs $400–$800. But it’s cheaper than a fire!
5. Finishing Touches: Sealing, Testing, and Maintenance
Seal All Gaps (Don’t Skip This!)
Gaps around the sleeve let hot air in and cool air out. Here’s how to seal them:
- Apply foam insulation around the exterior of the sleeve (don’t use spray foam indoors—it expands unpredictably).
- Caulk the interior edges where the AC meets the wall.
- Install a weather-resistant exterior cover (if not included).
My trick: I used low-expansion foam and trimmed the excess with a utility knife. Looks professional!
Test the Unit
Before you celebrate, test everything:
- Turn on the power and set the thermostat to “cool.”
- Check for airflow from the vents. It should feel strong, not weak.
- Listen for unusual noises (grinding, rattling). My unit hums softly—no issues.
- Check the condensate drain: water should drip outside, not inside. If it leaks, the unit isn’t level.
Maintenance Tips for Longevity
Wall ACs last 10–15 years with care. Here’s how to maintain yours:
- Clean the filter monthly: Rinse it under water and let it dry. A dirty filter reduces efficiency by 15%.
- Clear debris from the exterior: Leaves and dirt block airflow. I check mine every season.
- Inspect seals annually: Re-caulk or add insulation if gaps appear.
- Winterize (if needed): In cold climates, cover the exterior unit with a breathable cover to prevent ice buildup.
6. Troubleshooting Common Issues (And How to Fix Them)
Even the best installations have hiccups. Here’s how to solve them:
| Issue | Likely Cause | Solution |
|---|---|---|
| No cooling | Low refrigerant, dirty filter, or faulty thermostat | Clean the filter, check thermostat settings. If no improvement, call an HVAC pro (refrigerant leaks require a license). |
| Leaking water inside | Clogged drain, unit not level, or frozen evaporator | Clear the drain with a pipe cleaner, re-level the unit, or defrost it by turning off the AC for 24 hours. |
| Loud noises | Loose parts, debris in the fan, or worn motor | Tighten screws, remove debris, or replace the fan/motor (if comfortable with electrical work). |
| High energy bills | Dirty coils, poor insulation, or oversized unit | Clean coils with a soft brush, seal gaps, or consider downsizing if the unit runs constantly. |
Real-world fix: My AC leaked once. I discovered the drain line was kinked. A 10-minute fix with a zip tie saved me a service call.
Final Thoughts: Your DIY Wall AC Journey Starts Here
Installing an air conditioner in wall isn’t just a summer project—it’s an investment in your comfort and home’s efficiency. Yes, it’s a challenge. You’ll sweat, you’ll curse, and you might even call an electrician. But when you finally feel that cool air hit your face, you’ll know it was worth it.
Remember: take your time, follow the steps, and don’t rush the safety checks. And if you get stuck? That’s normal. I spent an hour just leveling my sleeve! The key is to treat it like a puzzle—not a race. Before you know it, you’ll have a sleek, quiet, energy-efficient AC that makes every room a sanctuary.
So, what are you waiting for? Grab your tools, measure twice, and cut once. Summer’s coming—but this year, you’ll be ready.
Frequently Asked Questions
Can I install an air conditioner in a wall myself, or do I need a professional?
Yes, you can install an air conditioner in a wall as a DIY project if you have basic carpentry and electrical skills. However, hiring a professional is recommended for complex electrical or structural work to ensure safety and code compliance.
What tools do I need for installing an air conditioner in a wall?
Essential tools include a stud finder, level, drill, reciprocating saw, measuring tape, and screwdrivers. You’ll also need a voltage tester and possibly a pipe bender if routing refrigerant lines through the wall.
How do I choose the right size air conditioner for wall installation?
Calculate the room’s square footage and match it to the AC’s BTU rating (e.g., 20 BTU per sq. ft.). Proper sizing ensures efficient cooling and avoids overworking the unit, which can shorten its lifespan.
Is installing an air conditioner in a wall more efficient than a window unit?
Yes, wall-mounted units are often more energy-efficient and quieter since they’re sealed tightly and insulated better than window ACs. They also save space and improve aesthetics by blending into the wall.
What are the common challenges when installing an air conditioner in a wall?
Challenges include cutting through studs or masonry, routing electrical wiring, and ensuring proper drainage. Always check local building codes and plan the layout carefully to avoid structural or moisture issues.
How do I ensure proper drainage for a wall-mounted air conditioner?
The AC unit must be installed with a slight tilt (1-2 degrees) toward the outside to allow condensate water to drain freely. Connect the drain hose to an exterior outlet or drip pan to prevent leaks.