

Featured image for installing a window air conditioner
Image source: windowdigest.com
Installing a window air conditioner securely and efficiently starts with choosing the right unit for your window size and cooling needs. Follow a step-by-step approach—measuring the opening, reinforcing the frame, sealing gaps, and ensuring proper drainage—to prevent air leaks, improve energy efficiency, and extend the unit’s lifespan. With basic tools and careful attention to safety, you can complete the job in under an hour and enjoy professional-level results.
Key Takeaways
- Measure your window first: Ensure the AC unit fits securely before purchasing or installing.
- Check local codes: Verify electrical and installation requirements to avoid safety hazards.
- Use a support bracket: Prevent sagging or falling with proper bracing underneath the unit.
- Seal all gaps: Apply foam or weatherstripping to block hot air and pests.
- Tilt slightly outward: Angle the AC to ensure proper drainage and efficiency.
- Secure the window sash: Lock it down to prevent movement and improve insulation.
📑 Table of Contents
- Why Installing a Window Air Conditioner Is Easier Than You Think
- Step 1: Choose the Right Window and Air Conditioner
- Step 2: Gather Tools and Safety Gear
- Step 3: Prepare the Window and Install the Frame
- Step 4: Secure the Air Conditioner and Seal Gaps
- Step 5: Electrical Setup and Final Checks
- Data Table: Common Window AC Installation Mistakes and Fixes
- Final Thoughts: Enjoy Cool, Confident Comfort
Why Installing a Window Air Conditioner Is Easier Than You Think
Let’s be honest—when summer hits, the last thing you want is to sweat through your clothes before you even get out of bed. That’s where a window air conditioner comes in. It’s affordable, effective, and, believe it or not, easier to install than most people assume. I remember my first time installing one—I was sweating bullets, convinced I’d break the window or drop the unit. But after a few deep breaths, a quick YouTube tutorial, and a little trial and error, I had it up and running in under an hour. And guess what? It worked perfectly.
Whether you’re a DIY newbie or a seasoned home improver, installing a window air conditioner is a skill worth mastering. Not only does it save you the cost of a professional installer (which can range from $100 to $300), but it also gives you full control over timing, placement, and maintenance. Plus, once you’ve done it once, you’ll never dread the summer heat again. In this guide, I’ll walk you through how to install a window air conditioner like a pro—step by step, with real-world tips, common mistakes to avoid, and everything you need to know to stay cool and confident.
Step 1: Choose the Right Window and Air Conditioner
Assess Your Window Type and Size
Not all windows are created equal. Before you buy or install anything, take a close look at your window. Most window air conditioners are designed for double-hung windows—the kind that slide up and down from the top and bottom. But some models work with sliding (horizontal) windows too. Measure the width and height of your window opening when fully opened. You’ll need this to ensure the AC unit fits snugly.
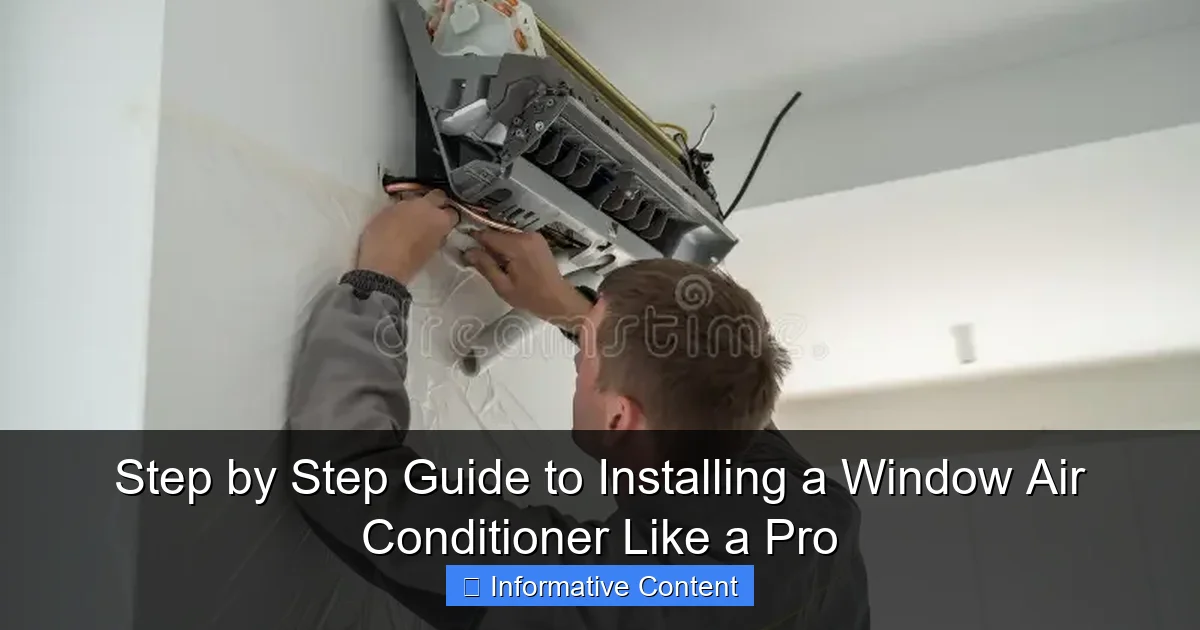
Visual guide about installing a window air conditioner
Image source: thumbs.dreamstime.com
For example, if your window opening is 22 inches wide and 30 inches tall, you’ll need an AC unit with a minimum window width compatibility of 22 inches and a maximum of 36 inches (most units cover a range). Always check the manufacturer’s specs—don’t assume “standard” sizes will work. I once bought a unit that claimed to fit “most windows,” only to realize the side panels extended 2 inches too far on each side. Not fun.
Match the AC Unit to Your Room Size
Buying the wrong-sized air conditioner is a common mistake. Too small, and it’ll run constantly without cooling. Too big, and it’ll cycle on and off too quickly, wasting energy and failing to dehumidify properly. Use the British Thermal Unit (BTU) rating as your guide:
- 100–150 sq. ft.: 5,000 BTU
- 150–250 sq. ft.: 6,000–7,000 BTU
- 250–350 sq. ft.: 8,000–10,000 BTU
- 350–450 sq. ft.: 12,000 BTU
- 450–550 sq. ft.: 14,000 BTU
Pro tip: If your room gets a lot of sun or has poor insulation, add 10% more BTUs. For kitchens or rooms with heat-generating appliances, go up 4,000 BTUs. I learned this the hard way when my 8,000 BTU unit struggled in my sun-drenched home office. A 10,000 BTU upgrade fixed it instantly.
Check Electrical Requirements
Most window ACs run on 115 volts (standard household outlet), but larger units (14,000+ BTU) often need a 230-volt circuit. Before buying, check your outlet with a multimeter or consult an electrician. Using a 230V unit on a 115V circuit can damage the compressor—and your wallet. Also, make sure your circuit isn’t overloaded. Plug the AC into its own outlet if possible. I once tripped a breaker trying to run my AC, a space heater, and a hair dryer at the same time. Rookie mistake.
Step 2: Gather Tools and Safety Gear
Essential Tools You’ll Need
You don’t need a full toolbox, but having the right gear makes the process smoother and safer. Here’s what I keep in my “AC install kit”:
- Measuring tape
- Phillips screwdriver
- Adjustable wrench or pliers
- Level (a $10 bubble level works fine)
- Scissors or utility knife
- Work gloves (protects hands from sharp edges)
- Eye protection (dust and debris happen)
- Drop cloth or old towel (to protect the floor from scratches)
Optional but helpful: a second person. Air conditioners can weigh 50–100 pounds. Trying to balance one while securing it is risky. I always ask my partner to help—even if just to hold the unit steady while I fasten the brackets.
Safety First: Don’t Skip These Precautions
- Turn off the power to the outlet you’ll use. Even though ACs have internal fuses, it’s better to be safe.
- Clear the area around the window. Remove blinds, curtains, or anything that could get caught.
- Inspect the window frame for rot, cracks, or weak spots. A damaged frame can’t support the weight.
- Check the outside of the window for obstructions—gutters, plants, or awnings that might block airflow.
One time, I didn’t notice a small crack in my window frame. The AC was fine for a week, then the frame gave way during a storm. Water damage, ruined drywall, and a $200 repair bill. Lesson learned: inspect everything.
Step 3: Prepare the Window and Install the Frame
Clean and Measure the Window Opening
Start by cleaning the window sill and tracks. Dust, old caulk, or debris can prevent a tight seal. Measure the width at the top, middle, and bottom—windows aren’t always perfectly square. Use the smallest measurement for your AC width requirement.
Open the window fully and lock it if possible. Most AC units come with a locking bracket or safety lock to prevent the window from opening accidentally. Install this first—usually with a single screw into the window frame. This is crucial for security, especially if you live in an urban area.
Assemble and Install the Side Panels (or Accordion Fillers)
Most window ACs use extendable side panels to fill the gap between the unit and the window frame. Here’s how to do it right:
- Extend the panels to match your window width. Some have adjustable sliders; others need to be cut with scissors.
- Attach the panels to the AC unit using the included screws or clips. Make sure they’re flush and secure.
- Place the AC (with panels attached) into the window opening. The unit should sit on the sill, with the back extending outside and the front inside.
Pro tip: Don’t fully extend the panels yet. Leave them slightly loose so you can adjust the AC’s position. Once the unit is level and centered, tighten the panel screws.
Check for Level and Proper Tilt
Use a level to ensure the AC is perfectly horizontal. But here’s the catch: the back should tilt slightly downward (about 1/4 inch) to allow condensation to drain outside. If it’s level or tilted inward, water will drip inside your home.
I once ignored this and woke up to a puddle under my AC. The fix? I placed a thin wooden shim under the front feet. Problem solved—and no more indoor rain.
Step 4: Secure the Air Conditioner and Seal Gaps
Fasten the Window Support Brackets
Most units come with L-brackets or support arms that attach to the window sash (the movable part of the window). Here’s the process:
- Lower the window sash until it rests on top of the AC unit.
- Align the brackets with the sash and drill pilot holes (if needed) to avoid splitting the wood.
- Secure the brackets with screws. Don’t over-tighten—this can crack the frame.
For sliding windows, use a horizontal support bar that attaches to the window frame and the AC. This prevents the window from sliding open.
Seal Gaps to Prevent Air Leaks
Even small gaps around the AC can let hot air in and cool air out—wasting energy and reducing efficiency. Use these sealing methods:
- Foam weatherstripping: Cut to size and stick it along the top and sides of the AC where it meets the window frame.
- Plastic film or vinyl side seals: Some kits include clear plastic that attaches to the window frame and AC with Velcro or adhesive.
- Acrylic window insulation kits: For a tighter seal, apply double-sided tape around the frame and attach a clear plastic sheet. Shrink it with a hairdryer for a snug fit.
One winter, I kept my AC in the window (I know, not ideal) and used an insulation kit. It kept the cold out and saved me from removing and storing it. A great temporary solution if you’re lazy like me.
Install the Exhaust Hose (For Portable Units)
If you’re using a portable air conditioner (which vents through a window), attach the exhaust hose to the AC and the window adapter. Use the included clamps or tape to secure it. Make sure the hose is straight—no kinks or bends. A bent hose reduces airflow and makes the AC work harder.
Step 5: Electrical Setup and Final Checks
Plug In and Test the Unit
Plug the AC into a grounded outlet (look for three prongs). Don’t use an extension cord—they can overheat and cause fires. If the outlet is far away, consider hiring an electrician to install a new one.
Turn on the AC and set it to “cool” mode. Listen for:
- Smooth startup (no loud bangs or grinding)
- Even airflow from the vents
- No unusual vibrations or rattling
If the unit shakes, check that it’s level and all screws are tight. A loose bracket can cause noise and vibration.
Check for Leaks and Proper Drainage
Run the AC for 15–20 minutes. Then, go outside and check the back of the unit. You should see condensation dripping from the drain holes. If not, the tilt might be wrong or the drain is clogged.
Inside, look for water pooling under the unit. If you see any, recheck the tilt and seals. A small leak can lead to big problems over time.
Insulate and Weatherproof (Optional but Recommended)
For extra efficiency, insulate the AC and surrounding area:
- Use foam pipe insulation around the AC’s power cord where it passes through the window.
- Apply a window AC cover when not in use (to keep out dust and pests).
- For winter storage, remove the unit, clean it, and store it indoors.
I once left my AC in all year. By spring, it was full of leaves and spiderwebs. Cleaning it took hours. Now I remove it every fall—it runs better, lasts longer, and keeps bugs out.
Data Table: Common Window AC Installation Mistakes and Fixes
| Mistake | Why It’s a Problem | Fix |
|---|---|---|
| Unit tilted inward | Water leaks inside the house | Place a shim under the front feet to tilt back |
| Loose side panels | Hot air leaks in, cool air escapes | Tighten screws and add foam weatherstripping |
| Using an extension cord | Fire hazard and voltage drop | Plug directly into a grounded outlet |
| Over-tightening brackets | Cracks the window frame | Use pilot holes and hand-tighten screws |
| Ignoring the lock | Security risk and air leaks | Install the safety lock and test it |
| Not cleaning the unit | Reduced efficiency and mold growth | Clean filters monthly, coils annually |
Final Thoughts: Enjoy Cool, Confident Comfort
Installing a window air conditioner isn’t rocket science—it’s a practical, empowering DIY project that pays off every time you walk into a cool, comfortable room. From choosing the right unit to sealing every gap, each step builds your confidence and saves you money. I’ve installed ACs in old apartments, new homes, and even my mom’s place (she still thanks me every summer).
Remember, the key to success is preparation and patience. Measure twice, install once. Don’t rush the sealing or electrical steps—they’re what keep your AC efficient and safe. And if you hit a snag? That’s normal. I’ve had units that wouldn’t sit level, windows that were slightly crooked, and even a squirrel that tried to nest in my AC one winter. The solution? Stay calm, troubleshoot, and keep going.
Now that you know how to install a window air conditioner like a pro, you’re ready to beat the heat—on your terms. Whether you’re cooling a studio apartment, a home office, or a sunroom, a properly installed AC is your summer MVP. So go ahead, grab your tools, and get ready to enjoy the cool side of life. You’ve got this.
Frequently Asked Questions
How do I install a window air conditioner safely?
To install a window air conditioner safely, ensure the unit is securely mounted and the window frame is structurally sound. Always follow the manufacturer’s instructions and use support brackets or mounting hardware to prevent the unit from falling. Never install the AC in a window that can’t fully support its weight.
What tools do I need to install a window air conditioner?
You’ll typically need a measuring tape, screwdriver, level, drill, and support brackets (often included with the unit). Additional materials like foam insulation panels or weatherstripping can help seal gaps and improve efficiency during installation.
Can I install a window air conditioner alone?
While it’s possible to install a window air conditioner alone, having a helper is highly recommended due to the unit’s weight and awkward positioning. For larger units, professional installation may be safer and more efficient.
How do I ensure a proper seal when installing a window AC?
Use foam insulation panels or weatherstripping to seal gaps between the air conditioner and the window frame. A tight seal prevents hot air from entering and cool air from escaping, boosting energy efficiency.
What’s the best way to level a window air conditioner?
Use a bubble level to check the unit’s tilt—it should slope slightly outward (about 1/4 inch) to allow condensation to drain outside. Adjust the support brackets or shims until the unit is properly leveled.
Do I need to remove the air conditioner in winter?
Yes, removing the window air conditioner in winter is recommended to prevent drafts, heat loss, and potential damage from freezing temperatures. If removal isn’t possible, cover the unit securely with an AC cover or heavy-duty tarp.