
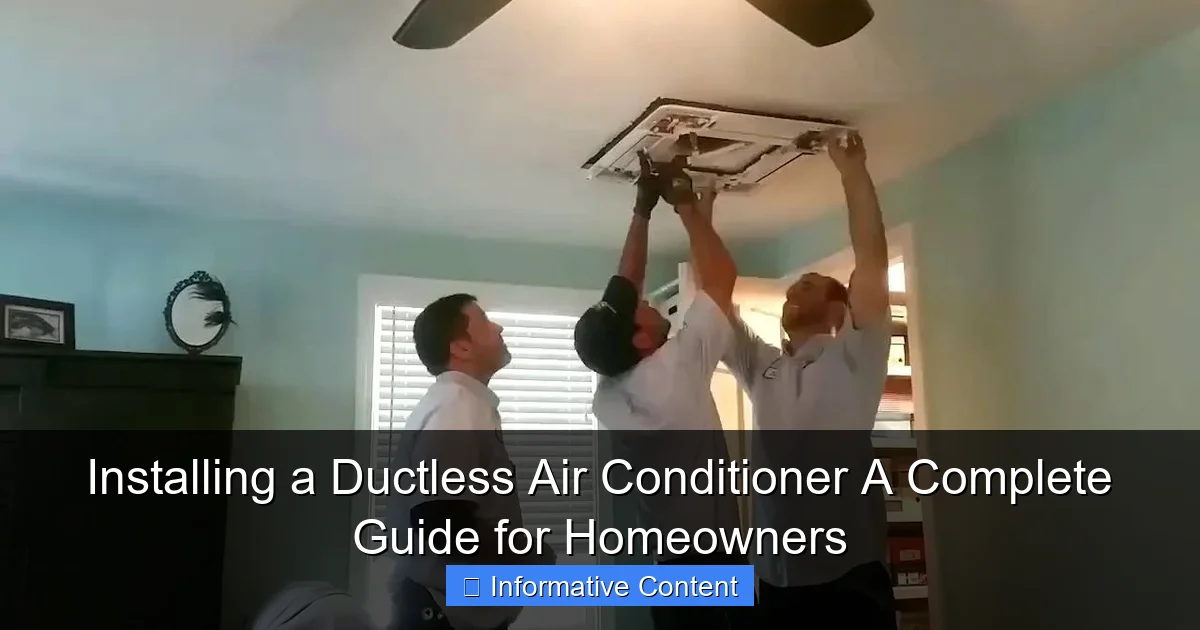
Featured image for installing a ductless air conditioner
Image source: i.ytimg.com
Installing a ductless air conditioner offers homeowners an efficient, flexible cooling solution without the need for bulky ductwork, making it ideal for retrofits or room additions. Proper sizing, professional installation, and strategic indoor unit placement are critical to maximizing energy efficiency and comfort—ensuring optimal airflow and performance. This guide walks you through every step, from choosing the right model to final setup, so you can enjoy reliable, targeted climate control year-round.
Key Takeaways
- Plan carefully: Choose the right unit size and location for optimal efficiency.
- Hire a pro: Professional installation ensures safety, performance, and warranty compliance.
- Seal properly: Prevent air leaks around the wall penetration to maximize efficiency.
- Use a disconnect: Install a local disconnect switch for easy maintenance and safety.
- Test thoroughly: Verify refrigerant levels, drainage, and airflow after installation.
- Maintain regularly: Clean filters quarterly and schedule annual professional checkups.
- Check rebates: Look for local incentives to offset installation costs.
📑 Table of Contents
- Why Ductless Air Conditioning Might Be Your Home’s Best Upgrade Yet
- What Is a Ductless Air Conditioner (And How Does It Work)?
- Pre-Installation: Planning Your Ductless AC Setup
- Step-by-Step Installation Guide (DIY vs. Professional)
- Cost Breakdown: What to Expect (And How to Save)
- Maintenance and Troubleshooting: Keeping Your System Running Smoothly
- Final Thoughts: Is a Ductless Air Conditioner Right for You?
Why Ductless Air Conditioning Might Be Your Home’s Best Upgrade Yet
Imagine this: It’s a sweltering summer afternoon. You’ve just come back from the grocery store, arms full of bags, and the heat outside feels like a wall. You open your front door, expecting relief—but instead, you’re met with a stale, warm breeze. Your central AC is running, but the airflow is weak, and certain rooms are still muggy. If this sounds familiar, you’re not alone. Many homeowners face this exact frustration, especially in older homes or spaces where ductwork is inefficient or nonexistent.
Enter the ductless air conditioner—a game-changer for modern comfort. Unlike traditional systems that rely on bulky ductwork, ductless units deliver cooling (and heating) directly where you need it, room by room. I learned about their power firsthand when my in-laws installed one in their sunroom, a space that used to be unusable in summer. Now, it’s their favorite spot in the house. After seeing the difference, I dove into researching how to install a ductless air conditioner—not just the mechanics, but the real-world pros, cons, and what homeowners like you should know before taking the plunge.
What Is a Ductless Air Conditioner (And How Does It Work)?
Before we get into installation, let’s break down what makes ductless systems unique. At first glance, a ductless air conditioner might look like a fancy wall-mounted unit, but it’s actually a smart, modular system with three main components:
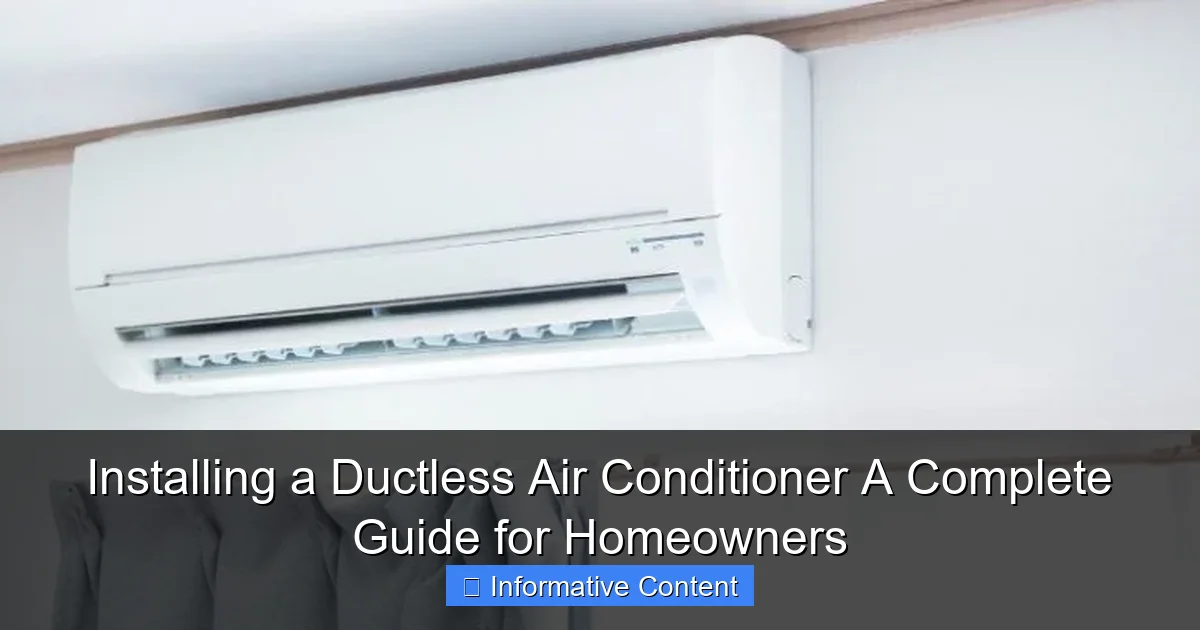
Visual guide about installing a ductless air conditioner
Image source: airtreatment.net
- Indoor unit(s): Mounted on walls or ceilings, these blow cool air into your space. Some models can be floor-standing or recessed into the ceiling for a sleeker look.
- Outdoor compressor: A compact unit installed outside, similar to a traditional AC condenser. This houses the compressor and condenser coil.
- Refrigerant lines: A small conduit (usually 3–4 inches in diameter) connects the indoor and outdoor units. It carries refrigerant, power, and drainage—no ducts needed.
How It Differs from Traditional AC
Ductless systems, also called mini-splits, are a breath of fresh air compared to central AC. Here’s why:
- No ductwork: Ducts can lose up to 30% of energy due to leaks, gaps, or poor insulation. Ductless systems eliminate this waste.
- Zoning: Each indoor unit operates independently. You can cool the living room while keeping the bedroom off, saving energy and money.
- Heating included: Many models are heat pumps, providing both cooling and heating. In mild climates, this can replace your furnace entirely.
For example, my neighbor Sarah installed a ductless system in her 1920s home, where adding ducts was impossible. She now cools her home office (a converted attic) and her main floor separately. “I used to spend $200 a month on central AC and still felt hot,” she told me. “Now, my bills are half that, and the temperature is perfect where I need it.”
Types of Ductless Systems: Finding Your Fit
Not all ductless units are the same. Here are the main types to consider:
- Single-zone: One indoor unit connected to one outdoor unit. Ideal for small spaces, like a sunroom, basement, or home addition.
- Multi-zone: One outdoor unit powers multiple indoor units (usually 2–8). Perfect for whole-home cooling or homes with varying temperature needs.
- Ceiling cassette: Recessed into the ceiling, these offer a clean, modern look. Great for rooms with limited wall space.
- Floor-mounted: Installed at floor level, ideal for rooms with low ceilings or where wall mounting isn’t possible.
Tip: If you’re retrofitting an older home, single-zone systems are often easier to install. For new builds or major renovations, multi-zone systems offer more flexibility.
Pre-Installation: Planning Your Ductless AC Setup
Installing a ductless air conditioner isn’t just about slapping a unit on the wall and calling it a day. A little planning goes a long way. Here’s what to consider before the first hole is drilled.
Assess Your Home’s Needs
Start by answering these questions:
- Which rooms need cooling? Focus on spaces that are too hot or rarely used in summer.
- Do you need heating? If you live in a mild climate (think coastal California or the Pacific Northwest), a heat pump might cover both needs. In colder regions, pair it with a backup heater.
- What’s your home’s layout? Multi-zone systems work best in open-plan homes. For older homes with many small rooms, single-zone units might be more practical.
For example, my friend Mark installed a single-zone system in his garage workshop. He works there year-round, and the space was unbearable in summer. A single indoor unit with a 9,000 BTU capacity was perfect—no need for a complex multi-zone setup.
Calculate BTUs and Sizing
BTUs (British Thermal Units) measure cooling capacity. Too few BTUs, and the unit will struggle. Too many, and you’ll waste energy and money. Here’s a quick rule of thumb:
- 150–250 sq ft: 6,000–8,000 BTUs
- 250–350 sq ft: 9,000–10,000 BTUs
- 350–450 sq ft: 12,000 BTUs
- 450–550 sq ft: 14,000–18,000 BTUs
Pro tip: Use an online BTU calculator, but also consider:
- Ceiling height: Rooms with vaulted ceilings need more cooling.
- Sun exposure: South- or west-facing rooms get hotter.
- Insulation: Poor insulation means higher BTUs needed.
I once saw a homeowner install a 12,000-BTU unit in a 600 sq ft room. The system cycled on and off constantly, never fully cooling the space. A 18,000-BTU unit fixed the issue.
Choose the Right Location
Where you place your indoor and outdoor units matters. Here’s what to keep in mind:
- Indoor unit:
- Install on an interior wall, ideally opposite a heat source (like a window).
- Leave at least 6–8 feet of clearance from the floor.
- Avoid placing it behind furniture or curtains.
- Outdoor unit:
- Place it on a level, stable surface (concrete pad or brackets).
- Keep it 10–15 feet from windows to reduce noise.
- Ensure good airflow—don’t box it in with plants or fencing.
Real-world example: A couple in Arizona installed their outdoor unit on a shaded side of their house, away from afternoon sun. This kept the compressor cooler, improving efficiency by 15%.
Step-by-Step Installation Guide (DIY vs. Professional)
Now, the big question: Can you install a ductless air conditioner yourself? The short answer is maybe. While some steps are DIY-friendly, others require a licensed HVAC pro. Let’s break it down.
DIY-Friendly Steps (With Caution)
If you’re handy with tools, you can handle these tasks:
- Mount the indoor unit: Use a stud finder to locate wall studs. Drill a 3-inch hole for the conduit, then secure the mounting plate with screws. Tip: Use a laser level to ensure the unit is perfectly straight.
- Install the outdoor unit: Place it on a concrete pad or brackets. Make sure it’s level—use a spirit level.
- Connect the conduit: Run the refrigerant lines, power cable, and drain hose from the indoor unit through the hole to the outdoor unit. Warning: Don’t kink or bend the refrigerant lines—this can damage the system.
I helped my brother install a single-zone unit in his basement. We spent a Saturday mounting the indoor unit, drilling the hole, and connecting the conduit. It was straightforward, but we had to be careful with the refrigerant lines.
Professional-Only Steps (Don’t Skip These!)
These tasks require specialized tools and expertise:
- Evacuate and charge the refrigerant lines: This ensures the system has the right amount of refrigerant. Too little, and it won’t cool. Too much, and it can damage the compressor. Only a licensed technician should do this.
- Electrical connections: The outdoor unit needs a dedicated circuit. Improper wiring can cause fires or void the warranty.
- Leak testing: Technicians use nitrogen to pressurize the lines and check for leaks. A small leak can reduce efficiency by 20% or more.
Real story: A homeowner in Colorado tried to install his own system but skipped the refrigerant charge. The unit ran but never cooled properly. A technician later found the lines were undercharged by 30%. The repair cost more than hiring a pro in the first place.
When to Hire a Pro (And Why)
While DIY saves money, here’s why most homeowners hire a pro:
- Warranty protection: Many manufacturers require professional installation to honor the warranty.
- Permits and inspections: Some states require permits for HVAC work. A pro will handle the paperwork.
- Complex setups: Multi-zone systems or homes with tricky layouts (like my in-laws’ sunroom) are best left to experts.
- Peace of mind: A pro guarantees the job is done right. If something fails, they’ll fix it.
Cost note: Professional installation typically costs $1,000–$3,000, depending on complexity. But it’s often worth it for the long-term reliability.
Cost Breakdown: What to Expect (And How to Save)
Let’s talk money. Ductless air conditioners aren’t cheap, but they’re often more affordable than adding ductwork. Here’s a realistic cost breakdown.
Upfront Costs
Here’s what you’ll pay for a typical single-zone system (indoor + outdoor unit + installation):
| Item | Low-End | Mid-Range | High-End |
|---|---|---|---|
| Unit (9,000–12,000 BTU) | $1,200 | $2,000 | $3,500 |
| Installation (labor) | $500 | $1,200 | $2,000 |
| Permits/inspections | $0 | $100 | $300 |
| Total | $1,700 | $3,300 | $5,800 |
For multi-zone systems, multiply the cost per indoor unit (add $800–$2,000 per additional unit). High-end brands like Mitsubishi or Daikin offer better efficiency and quieter operation but cost more.
Running Costs and Savings
Ductless systems are energy-efficient. Here’s what to expect:
- Energy use: A 12,000-BTU unit uses about 1.2–1.5 kWh per hour. At $0.15/kWh, that’s $0.18–$0.22 per hour.
- Seasonal savings: Zoning can reduce energy use by 20–30% compared to central AC.
- Lifespan: With proper maintenance, ductless units last 15–20 years—longer than most central systems.
Real-world example: A family in Texas replaced their 10-year-old central AC with a multi-zone ductless system. Their summer bills dropped from $250 to $150 per month, and they saved $2,400 in the first two years.
Ways to Save Money
Want to cut costs without sacrificing quality? Try these:
- Buy during off-season: Prices drop in fall and winter. Some brands offer rebates.
- Get multiple quotes: Compare 3–4 HVAC companies. Look for ones with good reviews and certifications (like NATE or EPA 608).
- Check for rebates: Many states and utilities offer rebates for energy-efficient systems. For example, California’s TECH Clean CA program gives up to $1,000 back.
- DIY the easy parts: Mount the indoor unit yourself, but hire a pro for refrigerant and electrical work.
Maintenance and Troubleshooting: Keeping Your System Running Smoothly
You’ve installed your ductless air conditioner—now what? Like any appliance, it needs regular care to stay efficient and reliable.
Monthly and Seasonal Tasks
Do these simple checks yourself:
- Clean the air filter: Every 4–6 weeks in summer. A clogged filter reduces airflow and efficiency. Most units have a washable filter—rinse it with water and let it dry.
- Check the drain line: Ensure the drain hose isn’t blocked. A clog can cause water leaks.
- Clear debris from the outdoor unit: Remove leaves, grass, or dirt from the condenser coils. Use a garden hose to rinse it (don’t use a pressure washer).
- Inspect refrigerant lines: Look for oil stains or ice buildup—signs of a leak.
I clean my unit’s filter every month. It takes five minutes and makes a noticeable difference in airflow.
Annual Professional Maintenance
Once a year, call a technician to:
- Clean the evaporator and condenser coils
- Check refrigerant levels
- Inspect electrical connections
- Test the thermostat and sensors
This costs $100–$200 but can prevent major repairs. A friend skipped this for two years, and his unit’s compressor failed—a $1,500 repair.
Common Issues and Fixes
Most problems are easy to solve:
- Unit won’t turn on: Check the circuit breaker. Reset the remote’s batteries.
- Weak airflow: Clean the filter. Check for obstructions in the indoor unit.
- Water leaks: Clear the drain line. Ensure the unit is level (tilt it slightly toward the drain side).
- Ice buildup: Turn the unit off for 24 hours to thaw. If it happens again, call a pro—it could mean low refrigerant.
Pro tip: Keep the manual handy. It has troubleshooting steps and part numbers if you need replacements.
Final Thoughts: Is a Ductless Air Conditioner Right for You?
After researching, testing, and talking to homeowners, here’s my take: A ductless air conditioner is one of the smartest upgrades you can make—if it fits your home and needs. It’s not magic, but it comes close. You’ll get precise temperature control, lower energy bills, and a system that’s easier to maintain than central AC.
That said, it’s not for everyone. If you’re in a very cold climate, you’ll still need a backup heater. If you’re on a tight budget, the upfront cost might be steep. And if you’re not comfortable with DIY (or don’t want to pay a pro), it might not be worth the hassle.
But for most homeowners—especially those in older homes, additions, or spaces with poor airflow—a ductless system is a game-changer. My advice? Start with a single-zone unit in one room. Test it for a season. If you love it, expand to other areas. You’ll wonder how you ever lived without it.
Remember: A well-planned, well-installed ductless air conditioner isn’t just a purchase. It’s an investment in comfort, efficiency, and peace of mind. And on that hot summer day, when you walk into a perfectly cooled room? You’ll know it was worth every penny.
Frequently Asked Questions
How much does it cost to install a ductless air conditioner?
The cost to install a ductless air conditioner typically ranges from $3,000 to $7,000, depending on unit size, number of zones, and labor. Factors like electrical upgrades and wall materials can also influence the final price.
Can I install a ductless air conditioner myself?
While DIY installation is possible, hiring a licensed HVAC technician is strongly recommended. Improper installation can void warranties, reduce efficiency, and lead to refrigerant leaks or electrical hazards.
What is the best location to install a ductless air conditioner indoor unit?
Mount the indoor unit on an exterior wall, 6–7 feet above the floor, away from direct sunlight and heat sources. This ensures optimal airflow and temperature sensing for efficient cooling or heating.
How long does a ductless air conditioner installation take?
Most single-zone ductless air conditioner installations take 4–8 hours. Multi-zone systems or complex setups (e.g., concrete walls) may require a full day or more.
Do I need a permit to install a ductless air conditioner?
In many areas, yes—especially if the project involves electrical work or refrigerant lines. A professional installer will typically handle permit applications to ensure compliance with local codes.
What maintenance is required after installing a ductless air conditioner?
Regularly clean or replace filters every 2–4 weeks and schedule annual professional maintenance. Keeping the outdoor unit clear of debris ensures optimal performance and extends system lifespan.