The installation of a split AC involves positioning the indoor and outdoor units, connecting the refrigerant pipes, power supply, and drainage, and ensuring proper insulation. Split AC installation is a crucial step to ensure optimal cooling and energy efficiency in your home or office.
It is essential to hire a professional technician who has experience and knowledge in AC installations to avoid any complications or damage during the process. With proper installation, you can enjoy the benefits of a split AC system efficiently cooling your space while minimizing energy consumption.
1. Key Considerations Before Installing A Split Ac
Installing a split air conditioning (AC) system requires careful planning and consideration of several key factors. By taking these considerations into account, you can ensure a proper installation that maximizes the efficiency and longevity of your split AC. In this section, we will explore the essential aspects that you should keep in mind before proceeding with the installation. Let’s dive right in!
Selecting The Right Location For Installation
Choosing the ideal location for installing your split AC is crucial for its performance and effectiveness. Here are some factors to consider:
- Ensure the chosen location has sufficient space to accommodate both the indoor and outdoor units.
- Opt for a location with adequate ventilation to allow proper airflow.
- Avoid placing the indoor unit in direct sunlight or near any heat sources.
- Consider a location where the condensate water from the indoor unit can be easily drained.
Factors To Consider For Indoor Unit Placement
The indoor unit placement significantly impacts the cooling distribution within your space. Here’s what you should keep in mind:
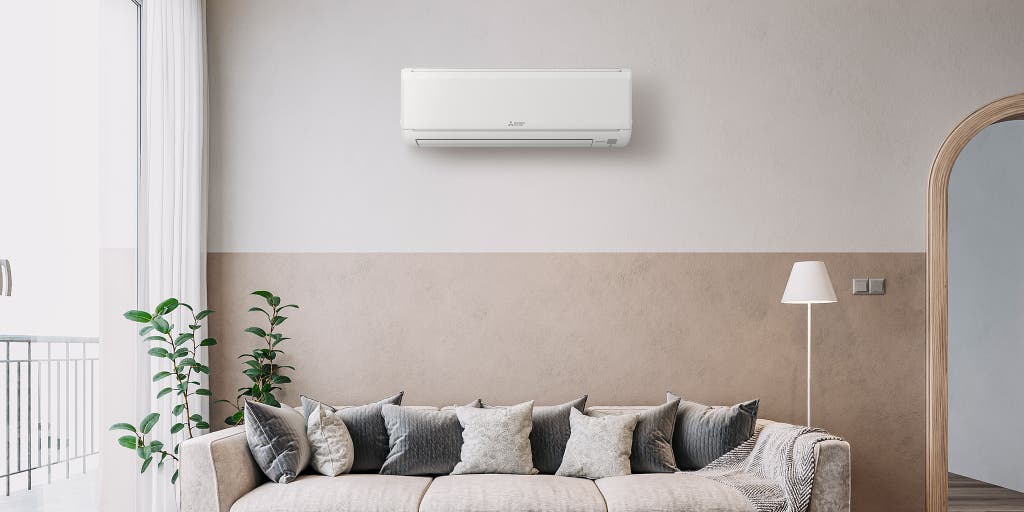
- Position the indoor unit at a height of at least seven feet above the ground for optimal air circulation.
- Avoid installing the indoor unit near obstacles or furniture that might obstruct the airflow.
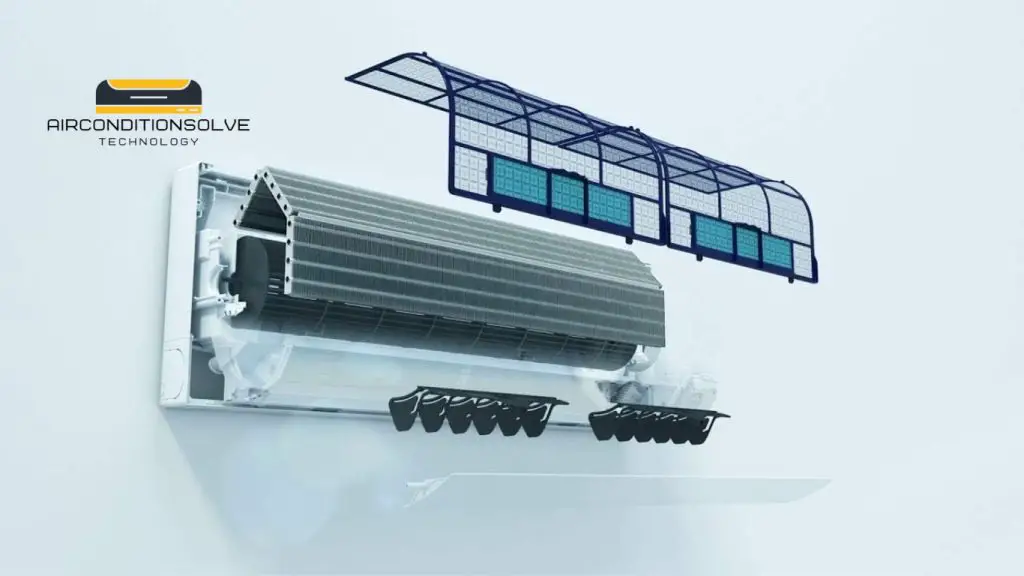
- Ensure that the indoor unit is easily accessible for regular maintenance and filter cleaning.
Factors To Consider For Outdoor Unit Placement
Proper outdoor unit placement plays a vital role in the overall performance and longevity of your split AC system. Take note of the following:
- Place the outdoor unit on a firm and stable surface to minimize vibrations and noise.
- Ensure the outdoor unit is installed in an area with ample space for airflow and servicing.
- Avoid crowded spaces and areas where the unit may be exposed to excessive dust, debris, or direct sunlight.
Ensuring Proper Electrical Requirements
Adequate electrical considerations are crucial to ensure safe and efficient operation of your split AC. Take the following steps:
- Ensure the electrical supply meets the AC unit’s voltage and amperage requirements.
- Have a dedicated circuit for the AC installation to prevent overload and potential tripping issues.
- Hire a certified electrician to handle electrical connections and ensure compliance with local electrical codes.
Calculating Power Needs For The Ac
Properly calculating the power requirements of your split AC system is essential. Consider the following:
- Determine the cooling capacity required for your space based on its size and insulation.
- Consult the manufacturer’s specifications and guidelines to select an AC unit with the appropriate cooling capacity.
Proper Wiring And Connections
The correct wiring and connections are vital to ensure maximum efficiency and safety of your split AC. Here’s what to keep in mind:
- Use copper tubing for refrigerant lines and follow the manufacturer’s instructions for proper installation.
- Ensure all wiring connections are secure, following the diagram and guidelines provided by the manufacturer.
- Consider hiring a professional HVAC technician for wiring and connection tasks to avoid risks.
Preparing The Installation Area
Properly preparing the installation area can make the process smoother and more efficient. Follow these steps:
- Clear the installation area of any obstacles, furniture, or objects that may hinder the installation process.
- Ensure there is sufficient space for the technicians to work comfortably and safely.
Clearing The Space For Installation
Prior to the installation, it is important to clear any clutter or items from the designated area. This will facilitate an organized and hassle-free installation process.
Making Sure The Area Is Dust-free
A dust-free environment is essential for a proper split AC installation. Dust and debris can obstruct airflow and affect the overall performance of the system. Ensure the installation area is clean and free from dust particles.

2. Step 1: Preparing For Installation
Installing a split AC requires careful preparation to ensure the process goes smoothly and safely. Before you begin, it is crucial to gather the necessary tools and equipment, have a list to refer to, and take necessary safety precautions. In this section, we will guide you through the steps and measures to take during the preparation stage.
Gathering The Necessary Tools And Equipment
To start the installation process, you need to have the right tools and equipment at your disposal. Ensure that you have the following items ready before proceeding with the installation:
| Tools | Quantity |
|---|---|
| Screwdriver | 1 |
| Drill | 1 |
| Adjustable wrench | 1 |
| Duct tape | 1 roll |
| Measuring tape | 1 |
| Cable ties | 10 to 15 |
Additional Equipment For Proper Installation
Apart from the basic tools mentioned above, you may also require some additional equipment for a proper installation. Make sure to have the following on hand:
- Wall mount brackets
- Electric drill bits
- Electrical tape
- Insulated copper tubing
- Condenser platform
- Level
Safety Precautions To Follow
When working with split AC installation, prioritizing safety is of utmost importance. Here are some essential safety precautions to follow throughout the process:
- Ensure the power supply is turned off before starting the installation.
- Wear protective gear such as gloves and safety glasses to prevent injuries.
- Avoid installing the AC near any flammable substances or hazardous materials.
- Read and follow the manufacturer’s instructions carefully to ensure correct installation.
- Have a fire extinguisher nearby in case of emergencies.
Safety Measures For The Installer
The person responsible for the installation also needs to take specific safety measures to protect themselves during the process. These include:
- Avoid installing the AC alone, have someone as a backup.
- Stay hydrated and take regular breaks to prevent fatigue.
- Use proper lifting techniques when handling heavy components.
- Never rush through the installation process; take your time and ensure everything is done correctly.
Safety Measures For The Surrounding Area
With AC installation, it is crucial to consider the safety of the surrounding area as well. Keep these safety measures in mind:
- Clear the installation area of any obstacles or clutter to provide enough space for the installation process.
- Ensure there is proper ventilation and airflow in the room where the AC is being installed.
- Cover any nearby furniture or belongings to protect them from dust or damage during the installation.
- Keep children and pets away from the installation area to prevent accidents.
3. Step 2: Installing The Indoor Unit
In the second step of the split AC installation guide, you will learn how to properly install the indoor unit. Follow these instructions for a successful installation.
Once you have successfully mounted the brackets for the outdoor unit, it’s time to move on to the next crucial step in the installation process – installing the indoor unit. This step requires careful positioning and securing of the brackets to ensure optimal performance of your split AC system. Additionally, you will need to connect the refrigerant lines and properly insulate them to prevent any leaks or loss of efficiency.
Mounting The Brackets For The Indoor Unit
To begin with, make sure you have thoroughly cleaned the wall where you plan to mount the indoor unit brackets. Use a level to ensure that the brackets are installed perfectly straight. This is essential for the stability and safety of your unit. Once you have determined the appropriate spot and level position, mark the drilling points on the wall.
Next, using a power drill and suitable drill bit, carefully drill holes at the marked points. Insert the provided wall plugs into the holes, and then attach the brackets securely using the screws provided with your AC unit. Use a screwdriver to tighten the screws, ensuring that the brackets are fixed firmly to the wall.
Determining The Proper Position
When determining the proper position for your indoor unit, consider a few factors. First, ensure that the unit is positioned at a suitable height that allows for easy access and maintenance. Additionally, make sure that the airflow from the unit is not obstructed by furniture or other objects in the room. This will allow for efficient cooling and circulation of air.
Securing The Brackets To The Wall
After mounting the brackets, it’s crucial to double-check their stability. Gently apply pressure to the brackets to ensure that they are securely attached to the wall. Any loose fittings can result in the unit becoming unstable, leading to potential damage and a compromised performance.
Connecting The Refrigerant Lines
Once you have securely installed the indoor unit brackets, it’s time to connect the refrigerant lines. These lines carry the refrigerant gas from the outdoor unit to the indoor unit, allowing for the cooling process to take place. Ensure that the lines are properly aligned and tightly connected to prevent any leaks or loss of cooling efficiency.
Properly Insulating The Lines
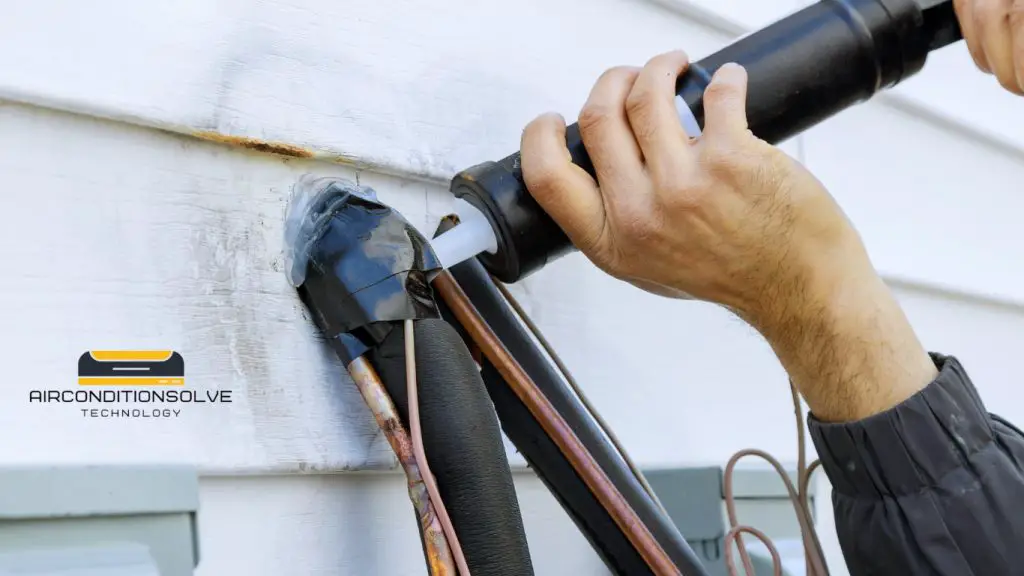
To ensure optimal performance and prevent any condensation issues, it’s essential to properly insulate the refrigerant lines. Use high-quality insulation tape or foam sleeves to wrap the lines, ensuring a tight seal. This insulation will not only prevent any energy loss but also reduce vibration and noise from the unit.
Securing The Lines To The Indoor Unit
Lastly, secure the refrigerant lines to the indoor unit. Use zip ties or clamps to fasten the lines to the designated areas on the unit. This will help keep the lines organized and prevent any accidental damage or interference with the unit’s components.
By following these steps and ensuring proper installation of the indoor unit, you are well on your way to enjoying the comfort and efficiency of your newly installed split AC system. Remember, proper installation is crucial for the long-term performance and durability of your unit.

4. Step 3: Installing The Outdoor Unit
Once you have determined the ideal location for your split AC’s outdoor unit, it’s time to proceed with the installation process. This step is crucial as it directly impacts the performance and longevity of your air conditioning system. In this section, we will guide you through the necessary steps to ensure a proper and secure installation of the outdoor unit.
Determining The Best Location For The Outdoor Unit
Choosing the perfect spot for your outdoor unit is crucial for the efficient operation of your split AC. Consider the following factors when determining the best location:
- Proper Clearance for Airflow
- Protecting the Unit from Environmental Factors
Proper Clearance For Airflow
It is important to allow adequate space around the outdoor unit to ensure proper airflow. Insufficient clearance can hinder the unit’s performance and lead to unnecessary strain on the system. Follow these guidelines to ensure proper clearance:
- Leave a minimum of 12 inches of clearance on all sides of the unit.
- Ensure there are no obstructions such as bushes, fences, or walls in close proximity.
- Keep the unit at least 5 feet away from any heat sources or direct sunlight.
Protecting The Unit From Environmental Factors
The outdoor unit is exposed to various environmental factors that can impact its performance and lifespan. To protect the unit from these factors, consider the following:
- Place the unit on an elevated platform or a concrete pad to avoid contact with the ground.
- Install a protective cover (specifically designed for your unit) to shield it from rain, snow, debris, and other environmental elements.
- Ensure the unit is away from areas prone to excess dirt, leaves, or dust accumulation.
Mounting The Outdoor Unit
Properly mounting the outdoor unit ensures stability and prevents unnecessary vibrations. Follow these steps for a secure mounting:
- Use proper supports and brackets that are specifically designed for your unit. Refer to the manufacturer’s instructions for guidance.
- Ensure the mounting surface is sturdy, level, and capable of supporting the weight of the unit.
Securing The Unit To The Mounting Surface
Once the outdoor unit is properly positioned, follow these steps to secure it to the mounting surface:
- Align the unit with the pre-drilled holes on the brackets or supports.
- Insert the mounting screws through the holes and into the brackets or supports.
- Tighten the screws firmly, but avoid over-tightening to prevent damage to the unit.
5. Step 4: Connecting The Indoor And Outdoor Units
Connecting the indoor and outdoor units is a crucial step in the installation of a split AC. Properly following the manufacturer’s instructions and ensuring a secure connection will ensure efficient cooling and optimal performance of the system.
Connecting The Refrigerant Lines
Once you have positioned your indoor and outdoor units in their designated locations, the next step is to connect the refrigerant lines. These lines carry the refrigerant, which is responsible for cooling the indoor air. It is crucial to connect these lines properly to ensure the efficient functioning of your split AC system.
To connect the refrigerant lines, follow the steps below:
- First, identify the liquid line and the suction line. The liquid line carries the high-pressure refrigerant from the outdoor unit to the indoor unit, while the suction line carries the low-pressure refrigerant back to the outdoor unit for cooling.
- Ensure that both the liquid and suction lines are clean and free from any debris or obstructions. Use a pipe cutter to cut the lines to the required length, if needed.
- Attach a flare nut to each end of the refrigerant lines. Make sure they are tightened securely using a wrench or spanner.
- Connect the liquid line to the smaller valve on the outdoor unit and the larger valve on the indoor unit. Connect the suction line to the larger valve on the outdoor unit and the smaller valve on the indoor unit.
Properly Insulating The Lines
Insulating the refrigerant lines is crucial to prevent any loss of cooling capacity and increase the overall efficiency of your split AC system. Proper insulation helps to prevent condensation on the lines and ensures that the cooling process is not compromised.
To properly insulate the lines, follow these simple steps:
- Measure the length of the refrigerant lines between the indoor and outdoor units.
- Choose insulation material suitable for your climate and requirements. Insulation foam tubes are commonly used for this purpose.
- Cut the insulation material to the measured length of the lines.
- Slit the foam tubes lengthwise, and then wrap them tightly around the refrigerant lines, ensuring a snug fit.
- Secure the insulation in place with adhesive tape or zip ties.
Making Sure The Lines Are Leak-free
It is essential to ensure that the refrigerant lines are free from any leaks to maintain the optimal performance of your split AC system. Even a small leak can cause a loss of cooling capacity and increase energy consumption. Follow these steps to check for leakages:
- Inspect the connections between the refrigerant lines and the valves on both the indoor and outdoor units. Ensure that they are tight and secure.
- Apply a soapy water solution to the connections and check for any bubbles. If bubbles appear, it indicates a leak that needs to be addressed.
- If you notice any leaks, tighten the connections or consider using a sealant specifically designed for refrigerant lines.
Connecting The Electrical Wires
Now that the refrigerant lines are properly connected and insulated, it’s time to connect the electrical wires. This step is crucial to ensure that power is properly supplied to both the indoor and outdoor units, allowing them to function effectively.
To connect the electrical wires, follow these steps:
- Ensure that the power supply is turned off.
- Connect the electrical wires from the indoor unit to the corresponding terminals on the outdoor unit. Follow the manufacturer’s instructions and use appropriate wire connectors or terminal blocks to make secure connections.
- Double-check that the electrical connections are tight and secure to avoid any potential hazards.
Properly Wiring The Indoor And Outdoor Units
Before testing the electrical connections, it’s important to make sure that the indoor and outdoor units are properly wired to each other. This ensures that they can communicate and work together seamlessly.
To wire the indoor and outdoor units, follow these steps:
- Refer to the wiring diagram provided by the manufacturer for your specific split AC model. This diagram will show you the proper connections between the indoor and outdoor units.
- Identify the appropriate wires based on their color codes and connect them as indicated in the wiring diagram.
- Secure the wiring connections with appropriate wire connectors or terminal blocks.
Testing The Electrical Connections
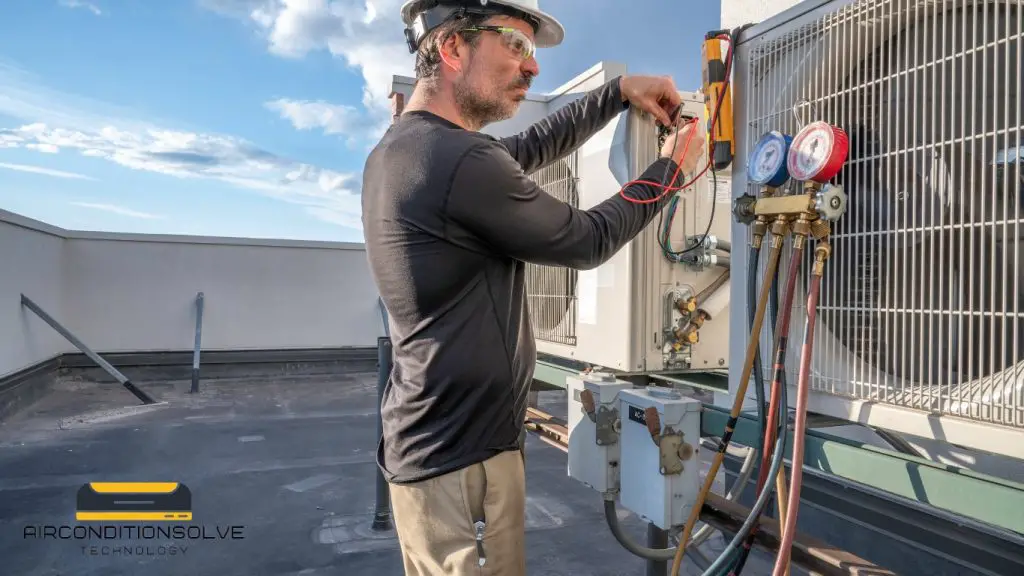
Once the electrical connections are in place, it’s crucial to test them to ensure that power is flowing correctly and that all components are functioning as they should. This step helps prevent any potential issues or malfunctions in the future.
To test the electrical connections, follow these steps:
- Turn on the power supply.
- Check that power is reaching the indoor and outdoor units.
- Verify that the fan and compressor motors are running smoothly.
- Ensure that the display panel on the indoor unit is functioning properly.
By following these steps for connecting the indoor and outdoor units of your split AC system, you can ensure a seamless installation process. Taking the time to properly connect the refrigerant lines, insulate them, check for leaks, connect the electrical wires, wire the units, and test the connections will help guarantee optimal performance and cooling efficiency for years to come.

Credit: www.simplilearn.com
Frequently Asked Questions On Installation Of Split Ac Guide
How Do I Install A Split Ac In My Home?
Installing a split AC in your home involves a few steps. First, choose the right location for the indoor and outdoor units. Then, mount the indoor unit on the wall, making sure to create a hole for the copper piping and electrical connections.
Next, connect the outdoor unit to the indoor unit using the copper piping and electrical wires. Finally, test the AC to ensure it is working properly.
What Tools Do I Need To Install A Split Ac?
To install a split AC, you will need a few basic tools. These include a drill, a hammer, a screwdriver, a pipe cutter, pliers, a level, a tape measure, and an electrical tester. Additionally, you may need a vacuum pump, a manifold gauge set, and a refrigerant charging scale for certain installation tasks.
Can I Install A Split Ac Myself Or Do I Need Professional Help?
While DIY installation of a split AC is possible, it is recommended to seek professional help for a few reasons. Installing a split AC requires knowledge of electrical work, refrigerant handling, and proper mounting techniques. Professionals have the expertise and tools to ensure a safe and efficient installation, as well as compliance with local regulations.
How Long Does It Take To Install A Split Ac?
The installation time for a split AC can vary depending on factors such as the complexity of the installation, the location of the units, and the availability of skilled labor. On average, professional installation of a split AC can take anywhere from a few hours to a full day.
It is important to factor in additional time for any necessary electrical work or modifications to the space.
Conclusion
To ensure a smooth installation of your split AC, follow the step-by-step guide provided in this blog post. From choosing the right location to connecting the unit properly, every detail has been covered. By carefully adhering to the instructions, you can enjoy a comfortable and efficient cooling experience.
Remember to regularly maintain and clean your AC for optimal performance. If you have any doubts or difficulties during the installation process, consult a professional for assistance. Stay cool and enjoy the benefits of your newly installed split AC!

