
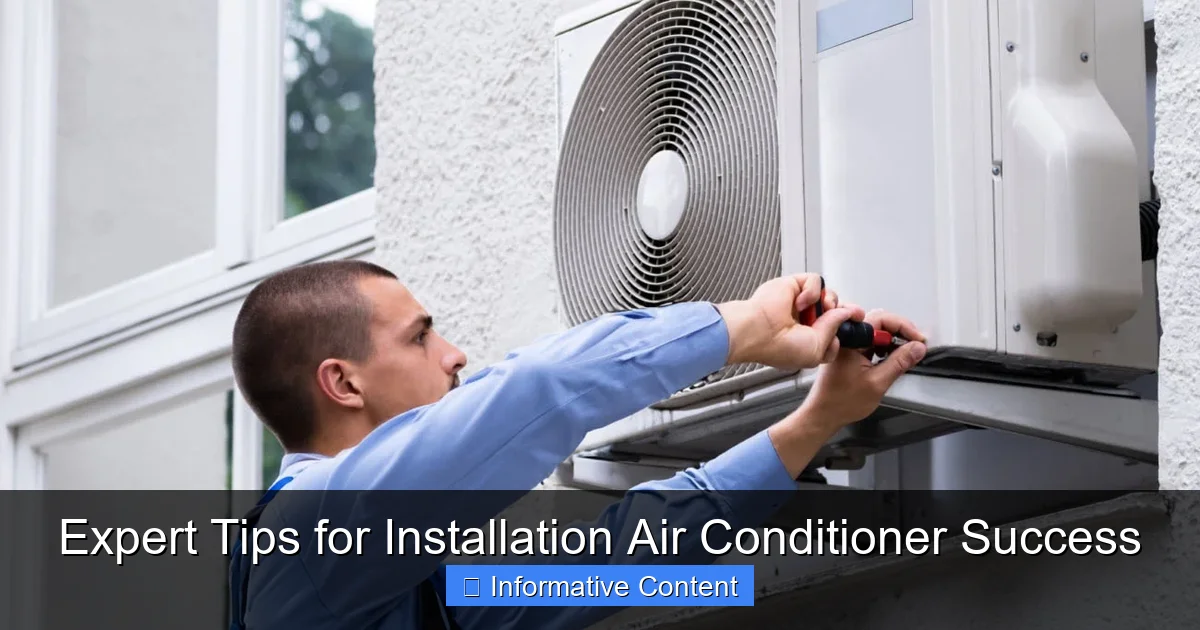
Featured image for installation air conditioner
Image source: superiorplumbing.ca
Proper installation air conditioner is critical for peak efficiency, longevity, and energy savings. Follow expert guidelines—like correct sizing, optimal placement, and professional electrical connections—to avoid costly mistakes and ensure consistent cooling performance. Skipping DIY shortcuts and investing in certified technicians pays off with lower bills and fewer repairs.
Key Takeaways
- Choose the right size: Match AC capacity to room size for optimal efficiency.
- Hire certified technicians: Ensure safe, code-compliant installation by licensed professionals.
- Seal ductwork properly: Prevent air leaks to maximize cooling and reduce energy costs.
- Position the unit wisely: Install outdoor units in shaded, well-ventilated areas.
- Test post-installation: Verify airflow, drainage, and thermostat function before finalizing.
- Follow maintenance schedules: Clean filters and coils regularly to extend AC lifespan.
📑 Table of Contents
- Expert Tips for Installation Air Conditioner Success
- Choosing the Right Type of Air Conditioner for Your Space
- Preparing Your Space for Installation Air Conditioner
- Step-by-Step Installation Air Conditioner Guide
- Common Mistakes and How to Avoid Them
- Cost, Time, and Professional Help: What to Expect
- Final Thoughts: Setting Yourself Up for Cool Success
Expert Tips for Installation Air Conditioner Success
Installing an air conditioner can feel like a big leap—especially if you’re doing it for the first time. Maybe you’ve just moved into a new home without built-in cooling, or your old unit finally gave up the ghost after a decade of loyal service. Whatever the reason, you’re standing at the threshold of a decision that will affect your comfort, energy bills, and even the value of your home.
I’ve been there. I remember sweating through my first summer in a second-floor apartment, trying to decide whether to go portable, window-mounted, or invest in a split system. I made a few mistakes—like underestimating the importance of proper insulation and drainage—and learned the hard way that a rushed installation air conditioner job can cost more in the long run than doing it right the first time. The good news? With a little planning, the right tools, and a few expert-backed strategies, you can set yourself up for cooling success. This guide is packed with practical advice, real-world examples, and tips to help you avoid common pitfalls and get the most out of your new system.
Choosing the Right Type of Air Conditioner for Your Space
Match Your AC to Your Home Layout
Not all air conditioners are created equal—and the first step in a successful installation air conditioner project is picking the right type. Your choice will depend on your space, budget, and whether you’re retrofitting or starting from scratch. Let’s break down the most common options:
Visual guide about installation air conditioner
Image source: i.ytimg.com
- Window Units: Ideal for single rooms, especially apartments or rentals. They’re affordable and easy to install, but can be noisy and block natural light. Best for spaces under 500 square feet.
- Portable ACs: Great for renters or temporary solutions. They require a window for exhaust, but you can move them between rooms. Downsides include lower efficiency and the need to empty water tanks regularly.
- Split Systems (Ductless Mini-Splits): A popular choice for modern homes. They have an outdoor condenser and an indoor air handler, connected by refrigerant lines. They’re energy-efficient, quiet, and allow zoned cooling. Perfect for homes without ductwork.
- Central Air Systems: Best for whole-home cooling. Requires ductwork, so it’s a big investment—ideal if you’re building or doing a major renovation.
- Through-the-Wall Units: Similar to window units but installed in a wall sleeve. They’re more permanent and efficient but require structural changes.
Real-life example: A friend of mine installed a window unit in her 700 sq ft studio. It struggled to cool the space, especially near the kitchen. After switching to a 12,000 BTU ductless mini-split, her energy bill dropped by 30%, and the room stayed consistently cool—even during heatwaves.
Consider BTU, Efficiency, and Room Size
One of the biggest mistakes people make is choosing the wrong size. A unit that’s too small will run constantly and fail to cool the room. One that’s too large will cool too quickly, leading to short cycling—which reduces efficiency and wears out the compressor faster.
Use this simple rule of thumb:
- 150–250 sq ft: 6,000 BTU
- 250–350 sq ft: 8,000 BTU
- 350–450 sq ft: 10,000 BTU
- 450–550 sq ft: 12,000 BTU
- 550–700 sq ft: 14,000 BTU
But don’t stop there. Adjust for:
- Sun exposure: Add 10% BTU for rooms with large south- or west-facing windows.
- Occupancy: Add 600 BTU per extra person beyond two.
- Kitchens: Add 4,000 BTU if the room is a kitchen or open to one.
Also, look for the SEER (Seasonal Energy Efficiency Ratio) rating. Higher SEER = better efficiency. Aim for at least SEER 14, but 16+ is ideal for long-term savings. A unit with SEER 16 uses about 20% less energy than one with SEER 13.
Preparing Your Space for Installation Air Conditioner
Inspect the Installation Site
Before you even unbox your new AC, take a walk around the intended spot. For window units, check the window frame’s strength. Is it made of wood, vinyl, or metal? Wooden frames are best for support. Avoid flimsy aluminum or old, warped wood.
For split systems, you’ll need:
- A sturdy wall (preferably brick or concrete) for the indoor unit.
- Clear access to the outside for the condenser.
- At least 6 feet of clearance around the outdoor unit for airflow.
- A nearby GFCI outlet for the indoor unit (don’t use an extension cord).
Pro tip: Measure the space twice. I once bought a window AC that was 1/4 inch too wide—ended up returning it and waiting two weeks for the right model. A $2 tape measure could’ve saved me the hassle.
Check Electrical Requirements
This is critical. Never assume your outlet can handle the load. Most window and portable units run on 115V, but larger models (especially 14,000+ BTU) may need 230V. Split systems often require a dedicated circuit.
Here’s how to check:
- Look at the unit’s nameplate (usually on the back or side). It lists voltage, amps, and wattage.
- Compare it to your circuit breaker. If the AC draws 15 amps and other devices on the same circuit draw 8 amps, you’re overloading it.
- Call an electrician if you’re unsure. It’s better to spend $100 now than risk a fire or blown fuse later.
Anecdote: My cousin tried to install a 230V window AC into a 115V outlet. The unit hummed loudly, tripped the breaker, and nearly melted the plug. An electrician had to install a new line—costing $250. A simple $5 outlet tester would’ve caught it.
Prepare Tools and Safety Gear
Even a DIY-friendly installation air conditioner requires the right tools. Here’s a basic checklist:
- Measuring tape
- Level
- Screwdrivers (Phillips and flathead)
- Drill with masonry bits (for wall mounts)
- Adjustable wrench
- Silicone sealant (for weatherproofing)
- Work gloves and safety goggles
- Vacuum (for cleaning the window or wall opening)
And don’t forget: turn off the power before doing any electrical work. Even if you’re just installing a plug-in unit, it’s a good habit.
Step-by-Step Installation Air Conditioner Guide
Window Unit Installation: A DIY-Friendly Approach
Let’s walk through installing a standard window AC. This is one of the most common installation air conditioner jobs—and one where small mistakes can lead to big problems.
- Open the window: Remove the sash or slide the lower pane up. Clean the track and frame.
- Assemble the support brackets: Most units come with a metal or plastic bracket. Attach it to the window frame using screws. Make sure it’s level—use a spirit level. A tilted unit can leak or strain the compressor.
- Install the side panels: Extend them to fit the window width. They seal the gaps and prevent hot air from sneaking in.
- Set the AC in place: Lift the unit (get help—these can weigh 50+ lbs) and slide it onto the bracket. The unit should slope slightly outward (about 1/4 inch) so condensation drains outside.
- Secure the unit: Use the provided screws to attach the AC to the window frame. Don’t overtighten—this can warp the casing.
- Seal gaps: Apply foam or rubber weatherstripping around the edges. Use silicone caulk on the exterior to prevent water leaks.
- Plug it in: Use a surge protector. Avoid daisy-chaining power strips.
Tip: If your window is too narrow, don’t force it. Some units come with extendable side panels. Others require a custom bracket—check the manual.
Ductless Mini-Split Installation: When to Call a Pro
Mini-splits are fantastic, but their installation air conditioner process is more involved. You’ll need to:
- Drill a 3-inch hole through the wall for refrigerant lines, drain hose, and electrical cable.
- Mount the indoor unit with a level and secure wall anchors.
- Connect the refrigerant lines—this requires a vacuum pump and gauges to prevent leaks.
- Install the outdoor condenser on a vibration-absorbing pad.
- Charge the system with refrigerant (a job for a licensed HVAC technician).
While mounting the indoor unit is DIY-possible, the refrigerant and electrical work should be left to pros. A single leak can reduce efficiency by 20% or more. Plus, most warranties require professional installation.
Example: A neighbor tried to install his own mini-split. He drilled the hole, mounted the unit, and even connected the lines—but skipped the vacuum process. The system ran poorly, froze up, and cost $400 to fix. The installer had to evacuate the lines and recharge the refrigerant.
Central Air: A Full-Home Commitment
Installing central air is a major project. You’ll need:
- A new furnace or air handler (if you don’t have one).
- Ductwork—either existing or new.
- An outdoor condenser unit.
- A thermostat (smart models are worth the upgrade).
This is almost always a job for professionals. The system must be sized correctly (using Manual J calculations), and ductwork must be sealed and insulated to prevent energy loss. A poorly designed system can cost hundreds extra in energy bills each year.
Common Mistakes and How to Avoid Them
Improper Sealing and Insulation
Even the best AC can’t cool your home if hot air sneaks in. Gaps around window units or poorly insulated refrigerant lines are major culprits.
What to do:
- Use foam tape or rubber gaskets to seal window units.
- Wrap refrigerant lines with insulation foam (available at hardware stores).
- Check for drafts near doors, windows, and outlets. Use weatherstripping or spray foam to seal them.
Real issue: A client installed a window AC but left a 1/2-inch gap on one side. The unit ran 24/7 but only cooled half the room. After sealing the gap, the temperature dropped by 8°F in under an hour.
Ignoring Drainage and Condensation
ACs produce condensate—about 5–20 gallons per day in humid climates. If it doesn’t drain properly, you’ll get water damage, mold, or a flooded floor.
Solutions:
- For window units, ensure the unit tilts outward. Clean the drain pan and hose annually.
- For mini-splits, run the drain hose downward and away from the wall. Use a condensate pump if gravity won’t work.
- For central systems, clean the drain line every spring. Pour a cup of vinegar down it to kill algae.
Overlooking Maintenance Needs
Installation isn’t the end—it’s the beginning. Neglecting maintenance leads to reduced efficiency, breakdowns, and shorter lifespan.
Maintenance checklist:
- Clean or replace filters every 1–2 months (more often if you have pets).
- Vacuum indoor and outdoor coils annually.
- Clear debris from around the outdoor unit.
- Check refrigerant lines for leaks (look for oily residue).
- Inspect electrical connections for corrosion.
Fact: A dirty filter can reduce airflow by 15%, making your AC work harder and increasing energy use by up to 20%.
Cost, Time, and Professional Help: What to Expect
DIY vs. Professional Installation: Weighing the Options
DIY saves money but carries risks. Professional installation air conditioner services cost more but offer peace of mind, warranties, and compliance with local codes.
Here’s a quick comparison:
| Type | DIY Cost | Pro Cost | Time (DIY) | Time (Pro) | Best For |
|---|---|---|---|---|---|
| Window Unit | $200–$500 | $100–$200 (labor) | 1–2 hours | 30–60 mins | Small rooms, rentals |
| Portable AC | $300–$700 | Not typically installed by pros | 30 mins | N/A | Temporary cooling |
| Mini-Split | $800–$2,000 (unit only) | $1,500–$3,500 (full install) | 4–8 hours (partial DIY) | 4–6 hours | Whole rooms, ductless homes |
| Central Air | N/A (not DIY) | $3,000–$7,000 | N/A | 1–3 days | Whole-home cooling |
Note: Costs vary by region, brand, and unit size. Always get 2–3 quotes from licensed HVAC contractors.
When to Hire a Professional
Call a pro if you:
- Need electrical or refrigerant work.
- Are installing a unit that requires a permit (common for central air and mini-splits).
- Have a complex layout (e.g., multiple floors, poor access).
- Want to ensure warranty validity (many manufacturers require professional installation).
Look for technicians with NATE certification (North American Technician Excellence) and check online reviews. Ask if they offer a service agreement—many include annual tune-ups.
Final Thoughts: Setting Yourself Up for Cool Success
Installing an air conditioner isn’t just about staying cool—it’s about creating a comfortable, efficient, and healthy home environment. Whether you’re mounting a window unit in a studio apartment or upgrading to a whole-home system, the key to installation air conditioner success lies in preparation, attention to detail, and knowing when to call in the experts.
Remember: a well-installed AC can last 10–15 years (or more) with proper care. A poorly installed one? It might fail in half that time—and cost you more in repairs and energy bills. Take your time. Read the manual. Measure twice. Seal everything. And don’t skip maintenance.
As I learned from my own sweaty summers, the effort you put in upfront pays off every time you walk into a cool, quiet room. So grab your tools, follow these tips, and enjoy the breeze—your future self will thank you.
Frequently Asked Questions
What’s the best location for installation air conditioner?
The ideal spot is a shaded, well-ventilated area away from direct sunlight and heat sources. For split units, ensure the indoor unit is mounted high on a wall for optimal airflow.
Can I install an air conditioner myself, or do I need a professional?
While DIY installation is possible for portable or window units, professional help is recommended for split or central systems. Improper installation air conditioner setup can void warranties and reduce efficiency.
How long does air conditioner installation take?
Most residential installations take 4–8 hours, depending on complexity. Split systems may require longer due to refrigerant line routing and electrical work.
What tools are needed for installation air conditioner?
Basic tools include a drill, level, wrench, vacuum pump, and refrigerant gauges. Always follow the manufacturer’s guidelines to avoid damaging components during installation.
How do I prepare my home for air conditioner installation?
Clear the work area, shut off power to the site, and ensure access to windows or walls for mounting. For split systems, plan the route for refrigerant lines and drainage pipes.
What common mistakes occur during installation air conditioner?
Incorrect refrigerant charge, poor unit leveling, or leaky ductwork are frequent errors. These issues reduce efficiency and may shorten the unit’s lifespan—always double-check connections.