
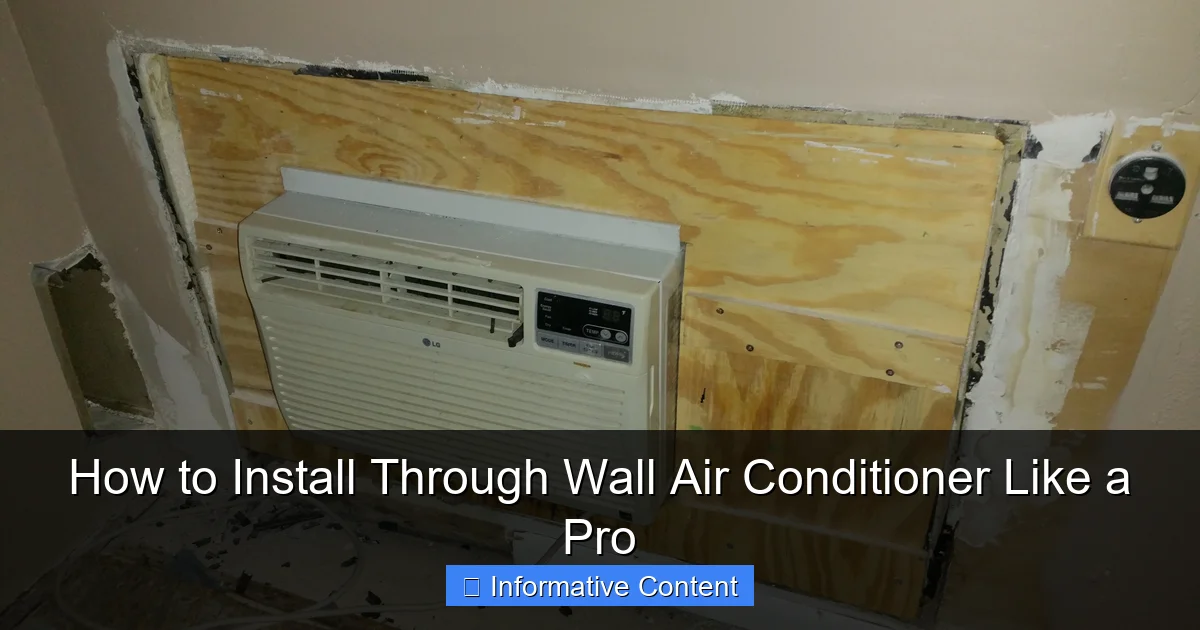
Featured image for install through wall air conditioner
Image source: coolandportable.com
Installing a through-wall air conditioner properly ensures optimal cooling, energy efficiency, and long-term reliability. This guide walks you through precise steps—from selecting the right wall location and cutting the opening to sealing gaps and securing the unit—so you avoid common pitfalls like water leaks or poor insulation. With the right tools and careful attention to detail, you can install your unit safely and like a pro in just a few hours.
Key Takeaways
- Measure carefully: Ensure precise wall opening dimensions before installation.
- Seal gaps properly: Use weatherproof caulk to prevent air leaks.
- Check electrical needs: Verify outlet type and circuit compatibility first.
- Secure the unit: Anchor the AC firmly to avoid vibrations or falls.
- Insulate well: Add foam strips to reduce noise and energy loss.
- Follow manual instructions: Always adhere to manufacturer guidelines for safety.
📑 Table of Contents
How to Install Through Wall Air Conditioner Like a Pro
So, you’ve decided to beat the summer heat with a through-wall air conditioner—smart move! Whether you’re tired of dragging window units in and out every season or just want a cleaner, more permanent cooling solution, a through-wall AC can be a game-changer. I remember when I installed my first one. I was nervous, honestly. I kept thinking, “What if I mess up the wall? What if it leaks? What if the whole thing falls out?” But after a weekend of careful planning and a few minor mishaps (okay, maybe one dropped screwdriver), I had a perfectly functioning unit that’s kept my living room cool for three summers straight.
Installing a through-wall air conditioner isn’t rocket science, but it does require attention to detail, the right tools, and a bit of patience. Unlike window units, these are built to stay put—mounted directly into an exterior wall, they offer better insulation, less noise, and a sleeker look. But because they’re permanent fixtures, you can’t afford to cut corners. The good news? With the right guidance, you can absolutely do this yourself and save hundreds on professional installation. In this guide, I’ll walk you through every step, from choosing the right spot to sealing it up like a pro. No fluff, no sales pitch—just real, practical advice from someone who’s been there.
Why Choose a Through Wall Air Conditioner?
Before we dive into the installation, let’s talk about why you might want a through-wall unit in the first place. Window air conditioners are convenient, sure, but they come with a lot of downsides. They block natural light, can be noisy, and often don’t seal properly, letting in drafts and outdoor noise. Plus, removing and storing them every winter is a hassle. A through-wall AC solves many of these problems.
Visual guide about install through wall air conditioner
Image source: askmehelpdesk.com
These units are designed to be installed directly into an exterior wall, typically between studs, and remain in place year-round. They’re more energy-efficient because they create a tighter seal, and they don’t obstruct your windows. You also get better airflow and cooling power, especially with higher BTU models. And let’s be honest—there’s something satisfying about having a clean, built-in look that blends with your home’s architecture.
Benefits Over Window Units
- Better insulation: Through-wall units are sealed tightly into the wall, reducing air leaks and improving energy efficiency.
- More permanent and secure: No risk of the unit falling out of a window, which is especially important in multi-story homes.
- Cleaner appearance: No bulky window unit sticking out, blocking light or views.
- Quieter operation: Many models are designed with sound-dampening features, making them quieter than window units.
- Year-round installation: No need to remove and store the unit seasonally.
Things to Consider Before Installing
While through-wall ACs have clear advantages, they’re not for everyone. Here are a few things to think about before you commit:
- Wall structure: You’ll need an exterior wall with enough space between studs (usually 14–16 inches) and no major obstructions like plumbing or electrical lines.
- Permanent modification: Cutting a hole in your wall is a big step. Once it’s done, it’s not easy to reverse.
- Professional help may be needed: If your home has unusual framing, brick or concrete walls, or complex electrical needs, you might want to consult a contractor.
- Cost: While the unit itself may be comparable to a window AC, installation costs (if hiring help) can add up.
That said, if you’re comfortable with basic carpentry and electrical work, this is absolutely a DIY-friendly project. Just make sure you do your homework first.
Choosing the Right Through Wall Air Conditioner
Not all through-wall air conditioners are created equal. Picking the right one is crucial for both performance and ease of installation. I learned this the hard way when I bought a unit that was too big for my wall cavity—ended up having to modify the framing, which added hours to the job.
BTU and Room Size
The first thing to consider is cooling capacity, measured in BTUs (British Thermal Units). Too little, and your room will stay warm. Too much, and you’ll waste energy and create humidity issues. As a general rule:
- 100–300 sq. ft.: 5,000–6,000 BTUs
- 300–500 sq. ft.: 7,000–8,000 BTUs
- 500–700 sq. ft.: 10,000–12,000 BTUs
- 700+ sq. ft.: 14,000+ BTUs
But don’t just go by square footage. Consider factors like ceiling height, sunlight exposure, number of windows, and insulation quality. A south-facing room with large windows will need more cooling power than a shaded, well-insulated space of the same size.
Unit Dimensions and Wall Cavity
Measure your wall cavity carefully. Most through-wall units are designed to fit standard 2×4 or 2×6 wall frames, but you’ll need to check the exact dimensions. The unit should fit snugly between studs with at least 1 inch of clearance on each side for insulation and sealing.
Also, consider the depth of the unit. Some models extend further into the room than others. If you’re tight on space, look for a low-profile design. I once installed a unit that stuck out too far and blocked a walkway—had to adjust the furniture layout, which was annoying.
Energy Efficiency and Features
Look for units with a high Energy Efficiency Ratio (EER). The higher the EER, the less electricity the unit uses to cool your space. Many modern through-wall ACs come with features like:
- Remote control
- Programmable timers
- Multiple fan speeds
- Energy-saving modes
- Washable filters
These extras can make a big difference in comfort and convenience. I personally love the timer function—I set it to turn on 30 minutes before I get home, so the room is cool when I walk in.
Brand and Warranty
Stick with reputable brands like LG, Frigidaire, GE, or Friedrich. They tend to have better build quality, customer support, and longer warranties. Most units come with a 1–2 year warranty, but some offer extended coverage for compressors or parts. Read the fine print—some warranties are voided if installed improperly, so follow the manufacturer’s instructions to the letter.
Tools and Materials You’ll Need
Before you start cutting into your wall, make sure you have all the tools and materials on hand. There’s nothing worse than getting halfway through and realizing you need a special drill bit or sealant. Here’s what I used for my installation, and what I’d recommend for yours:
Essential Tools
- Circular saw or reciprocating saw (for cutting the wall opening)
- Stud finder (to locate wall studs)
- Level (to ensure the unit is installed straight)
- Tape measure
- Pencil or marker
- Drill and drill bits
- Screwdriver set
- Utility knife
- Caulk gun
- Safety gear (gloves, goggles, dust mask)
Materials
- Through-wall air conditioner unit
- Mounting brackets (usually included with the unit)
- Exterior-grade wood or metal flashing
- High-quality silicone or polyurethane caulk
- Insulation foam board or fiberglass batts
- Screws ( corrosion-resistant, like galvanized or stainless steel)
- Weatherproof outlet and electrical wiring (if not already present)
- Duct tape or foil tape (for sealing seams)
Safety First
Always turn off power to the area where you’re working. If you’re installing a 240-volt unit, you’ll need to run a dedicated circuit—this is not something to DIY unless you’re experienced with electrical work. When in doubt, hire a licensed electrician. Also, wear safety goggles and a dust mask when cutting drywall or insulation—drywall dust is no joke for your lungs.
Step-by-Step Installation Guide
Now for the fun part—actually installing the unit. I’ll walk you through each step as if we’re doing it together. Take your time, double-check measurements, and don’t rush. A little patience now saves a lot of headaches later.
Step 1: Choose the Location
Pick an exterior wall that’s free of obstructions like pipes, wires, or HVAC ducts. Use a stud finder to locate the studs—you’ll want to center the unit between two studs. Avoid corners if possible, as they can be harder to seal properly. Also, consider the height: install the unit so the front is about 30–36 inches off the floor for optimal airflow.
Step 2: Measure and Mark the Opening
Refer to your AC unit’s installation manual for the exact dimensions of the required wall opening. Add about 1/2 inch to the width and height for clearance. Use a level and pencil to mark the outline on the interior wall. Then, go outside and mark the same area on the exterior. Double-check that the markings align—this is critical.
Step 3: Cut the Interior Wall
Carefully cut along the interior markings using a utility knife and drywall saw. Remove the drywall section and set it aside—you might be able to reuse it later as a patch if you ever remove the unit. Be cautious of any electrical wires or plumbing behind the wall. If you hit something unexpected, stop and reassess.
Step 4: Cut the Exterior Wall
Go outside and cut through the siding and sheathing using a circular saw or reciprocating saw. Be precise—this is what people will see from the outside. If you have vinyl or wood siding, you may need to remove a few panels first. For brick or stucco, you’ll need a masonry drill bit and hammer drill, which is more involved and may require professional help.
Step 5: Install the Mounting Frame
Most through-wall units come with a metal or plastic mounting sleeve. Slide this into the wall opening from the inside. Secure it to the studs using screws. Use a level to make sure it’s perfectly horizontal and vertical. This frame will support the weight of the AC unit, so it needs to be sturdy.
Step 6: Run Electrical Wiring
If you don’t already have a dedicated outlet, now’s the time to install one. This usually involves running a new circuit from your electrical panel. Again, if you’re not comfortable with this, hire an electrician. Safety can’t be overstated. Once the wiring is in place, connect it to the unit according to the manufacturer’s instructions.
Step 7: Insert the Air Conditioner
Carefully slide the AC unit into the mounting sleeve from the inside. Make sure it sits flush and level. Secure it with the provided screws or brackets. Don’t overtighten—this can warp the unit or damage the sleeve.
Step 8: Insulate and Seal
This step is crucial for energy efficiency and preventing air leaks. Fill any gaps around the unit with insulation foam board or fiberglass batts. Then, apply a generous bead of high-quality caulk around the interior and exterior edges. Use exterior-grade caulk on the outside to withstand weather. Seal all seams with foil tape for extra protection.
Step 9: Install Exterior Flashing
To prevent water intrusion, install flashing around the exterior opening. This usually involves overlapping pieces of metal or plastic that direct water away from the wall. Follow the manufacturer’s instructions carefully—improper flashing is a common cause of leaks.
Step 10: Test the Unit
Turn the power back on and test the air conditioner. Check for proper cooling, airflow, and any unusual noises. Make sure the thermostat responds correctly. If everything looks good, you’re done!
Common Mistakes to Avoid
Even with the best intentions, things can go wrong. Here are some common pitfalls I’ve seen (and made myself):
- Not checking for obstructions: Always scan the wall cavity before cutting. Hitting a water pipe or electrical wire can be dangerous and costly.
- Skipping the level: An uneven unit can cause drainage issues and reduce efficiency. Always use a level.
- Poor sealing: Gaps around the unit let in hot air and moisture. Take the time to insulate and caulk properly.
- Ignoring electrical requirements: Don’t overload existing circuits. Use a dedicated line for best performance and safety.
- Rushing the job: Installation can take 4–8 hours, especially for first-timers. Don’t try to finish in one rushed session.
Maintenance Tips for Long-Term Performance
Once your through-wall AC is installed, a little maintenance goes a long way. I clean my unit’s filter every month during peak season. It takes five minutes and makes a huge difference in airflow and efficiency. Also, check the exterior vent annually for debris like leaves or dirt. And if you notice reduced cooling or strange noises, don’t ignore it—small issues can become big problems.
Final Thoughts
Installing a through-wall air conditioner might seem intimidating at first, but with the right preparation and a steady hand, it’s totally doable. You’ll save money, gain a more efficient cooling system, and enjoy a cleaner, more comfortable living space. Just remember: measure twice, cut once, and when in doubt, consult a professional. Now go enjoy that cool, quiet breeze—you’ve earned it.
Frequently Asked Questions
How do I choose the right size through wall air conditioner for my room?
To pick the correct size, calculate your room’s square footage and match it to the unit’s BTU (British Thermal Unit) rating. A 10,000–12,000 BTU unit typically covers 300–450 sq. ft., ensuring efficient cooling without overworking the system.
Can I install a through wall air conditioner in an existing wall without major modifications?
Yes, but you’ll need to cut an opening in the wall and frame it securely to fit the sleeve. Ensure the wall isn’t load-bearing and has no electrical wiring or plumbing in the way to avoid complications.
What tools do I need to install a through wall air conditioner?
Basic tools include a stud finder, level, measuring tape, reciprocating saw, drill, and screwdriver. For sealing, you’ll also need weatherproof caulk and foam insulation to secure the unit and prevent air leaks.
How do I ensure proper drainage when installing a through wall air conditioner?
Tilt the unit slightly downward toward the outside to allow condensation to drain naturally. Use a drain pan or kit if your model requires one, and seal gaps to prevent water from entering the room.
Do I need a professional to install a through wall air conditioner, or can I DIY?
If you’re comfortable with basic carpentry, framing, and electrical work, DIY installation is possible. However, hiring a pro is safer for complex tasks like modifying walls or handling electrical connections to meet local codes.
What’s the best way to seal a through wall air conditioner to prevent drafts?
Use weatherstripping or foam tape around the sleeve’s interior edges and seal exterior gaps with waterproof caulk. Proper sealing improves efficiency and keeps pests or outdoor air from entering the room.