
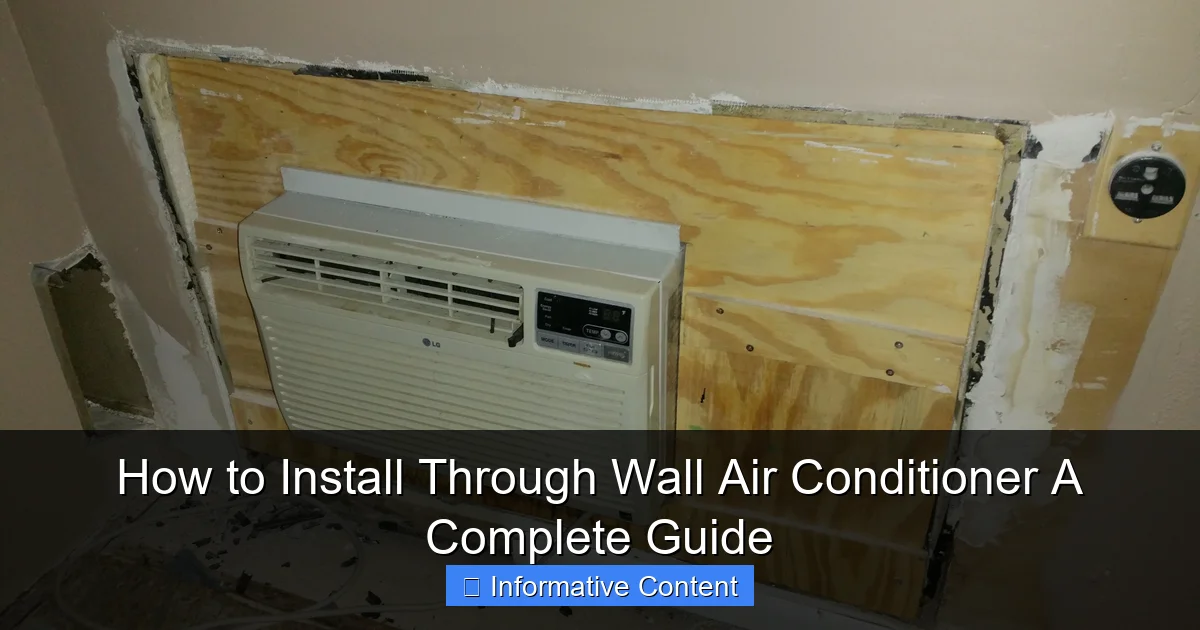
Featured image for install through wall air conditioner
Image source: askmehelpdesk.com
Installing a through-wall air conditioner requires precise wall preparation, proper unit sizing, and secure mounting to ensure efficient cooling and prevent air leaks. This guide walks you through every step—from measuring and cutting the opening to sealing and wiring—for a safe, professional-quality installation. Always follow manufacturer instructions and local electrical codes to avoid hazards and maintain warranty coverage.
Key Takeaways
- Measure carefully: Ensure precise wall opening dimensions before installation.
- Choose the right unit: Match AC size to room square footage.
- Seal all gaps: Use weatherstripping to prevent air leaks.
- Check electrical needs: Verify outlet compatibility or hire an electrician.
- Secure the unit: Anchor firmly to avoid vibration or noise.
- Insulate properly: Reduce energy loss with proper side insulation.
📑 Table of Contents
How to Install Through Wall Air Conditioner: A Complete Guide
Let’s be honest—summer heat can be brutal. I remember one particularly sweltering July when my old window unit finally gave up the ghost. I was sweating through my shirt at 8 PM, trying to figure out how to cool down my apartment without spending a fortune. That’s when I discovered the through wall air conditioner. Unlike clunky window units, these sleek, permanent fixtures cool rooms efficiently and don’t block your view. But here’s the catch: installing one isn’t as simple as just sliding it into a window.
If you’ve ever looked at a wall and thought, “How on earth do I get an AC in here?”, you’re not alone. Installing a through wall air conditioner requires careful planning, the right tools, and a good understanding of your home’s structure. Whether you’re replacing an old unit or adding cooling to a room that’s never had it, this guide will walk you through every step—from choosing the right model to sealing it up for maximum efficiency. No fluff, no sales pitch. Just real, practical advice to help you stay cool without breaking a sweat (or the bank).
Why Choose a Through Wall Air Conditioner?
Before we dive into the nuts and bolts of installation, let’s talk about why a through wall air conditioner might be the perfect fit for your home. These units are designed to sit inside a wall opening, with the back (condenser) facing outside and the front (fan and controls) inside. They’re a step up from portable or window ACs, offering better performance, quieter operation, and a more polished look.
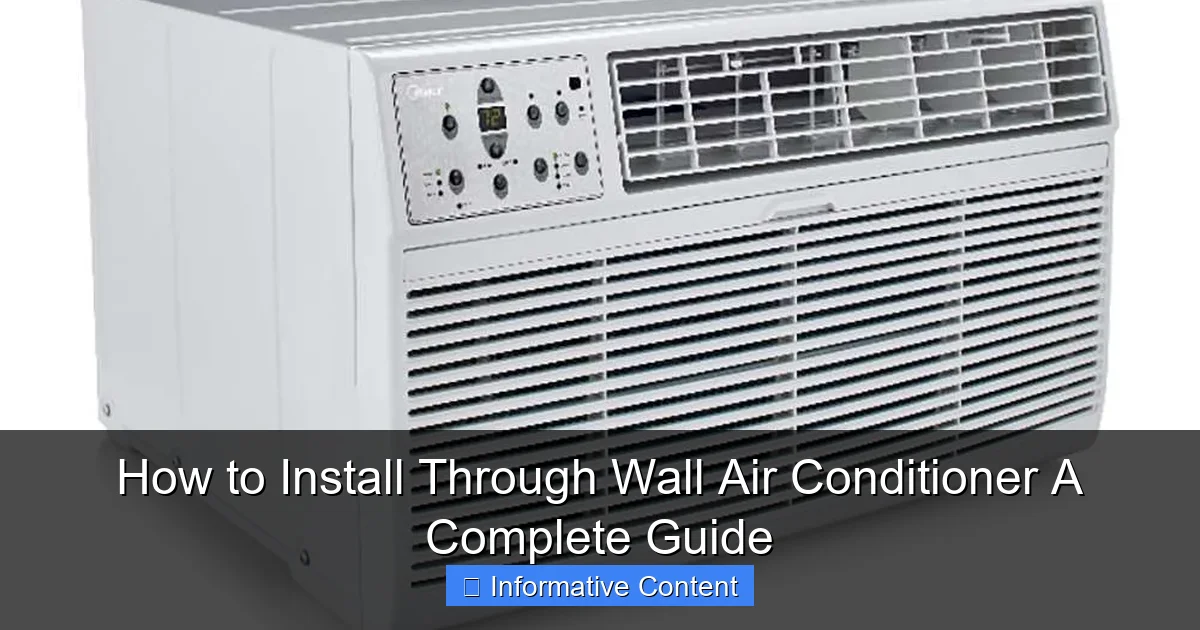
Visual guide about install through wall air conditioner
Image source: d1pjg4o0tbonat.cloudfront.net
Benefits of Through Wall Units
- Energy Efficiency: Because they’re sealed tightly in the wall, there’s less air leakage. This means your unit doesn’t have to work as hard to cool the room, saving you money on energy bills. For example, a well-installed 10,000 BTU unit can cool a 400 sq. ft. room while using 20-30% less power than a comparable window AC.
- Space-Saving: Unlike window units that block light and views, through wall ACs sit flush with the wall. You can still open your window, hang curtains, or place furniture nearby.
- Durability: These units are built to last. With no exposure to the elements (like rain dripping on a window AC), they tend to have a longer lifespan—often 10+ years with proper maintenance.
- Quiet Operation: The condenser (noisier part) is outside, so indoor noise levels are much lower. I’ve had guests not even realize my through wall unit was running!
When a Through Wall AC Is (and Isn’t) the Right Choice
These units shine in apartments, older homes with thick walls, or rooms where windows aren’t practical. But they’re not ideal for:
- Historic homes where wall modifications are restricted.
- DIY beginners—cutting through walls requires confidence with power tools.
- Rooms with load-bearing walls (always check with a structural engineer first).
Pro Tip: If you’re renting, check with your landlord before cutting into walls. Some allow it with written approval, but you’ll likely need to restore the wall when you move out.
Pre-Installation Planning: What You Need to Know
Installing a through wall air conditioner isn’t a one-day project. It’s more like a mini home renovation. Rushing through prep can lead to costly mistakes—like cutting into a load-bearing wall or realizing too late that your electrical circuit can’t handle the load. Let’s break down what to consider before you pick up a saw.
Step 1: Measure the Room and Choose the Right BTU
Size matters. Too small, and your room will never cool down. Too large, and you’ll waste energy and create a clammy, overcooled space. Use this rule of thumb:
- 150–250 sq. ft.: 6,000–8,000 BTU
- 250–400 sq. ft.: 10,000–12,000 BTU
- 400–600 sq. ft.: 14,000–18,000 BTU
Adjust based on factors like:
- Sun exposure (south-facing rooms need 10–15% more BTUs).
- Ceiling height (over 8 ft? Add 1,000 BTUs).
- Number of occupants (each person adds ~600 BTUs).
Example: A 350 sq. ft. bedroom with two people and a sunlit wall might need a 12,000 BTU unit instead of 10,000 BTU.
Step 2: Check Your Wall Type
Not all walls are created equal. You’ll need to:
- Confirm the wall isn’t load-bearing (look for vertical studs in the basement or attic, or use a stud finder with a “deep scan” mode).
- Identify wall material: Drywall, plaster, brick, or concrete block? Each requires different cutting tools and techniques.
- Ensure there’s no plumbing or electrical wiring in the area (use a non-contact voltage tester and a stud finder with wire detection).
Red Flag: If you hit a stud or wire while cutting, stop immediately. You might need to reposition the unit or call a pro.
Step 3: Electrical Requirements
Most through wall ACs require a dedicated 110V–120V circuit (check your unit’s manual). If your room shares a circuit with outlets or lights, you risk tripping the breaker. I learned this the hard way when my unit shut off mid-afternoon, leaving me sweating in 90°F heat. To avoid this:
- Use a clamp meter to test your circuit’s capacity.
- For units over 12,000 BTUs, you may need a 220V circuit (best left to an electrician).
Tools and Materials You’ll Need
Having the right gear makes all the difference. I once tried installing a unit with just a basic toolbox—let’s just say my walls weren’t happy. Here’s what you’ll need, broken down by category.
Essential Tools
- Measuring tape: For precise cuts and spacing.
- Level: To ensure the unit sits straight (a wonky AC leaks air and water).
- Jigsaw or reciprocating saw: For cutting through drywall, wood, or metal. Use a fine-tooth blade for clean edges.
- Utility knife: To score drywall before cutting.
- Stud finder with wire detection: Crucial for avoiding pipes and wires.
- Caulking gun: For sealing gaps with weatherproof caulk.
- Drill and screws: To secure the mounting frame.
- Safety gear: Goggles, dust mask, and gloves (drywall dust is no joke).
Materials
- Through wall air conditioner (obviously).
- Mounting frame or sleeve: Often included with the unit, but check the manual.
- Exterior-grade plywood or backer board: For reinforcing thin walls (e.g., drywall over studs).
- Weatherproof caulk (silicone or polyurethane): To seal gaps and prevent leaks.
- Insulation foam: To fill small gaps around the unit.
- Exterior trim (optional): For a finished look outside.
Pro Tips for Tool Success
- Rent a laser level if you’re not confident with a bubble level. It’s a game-changer for alignment.
- Use a shop vac during cutting to minimize dust. I duct-taped a vacuum hose to my saw for a DIY dust extractor.
- Buy extra screws—drywall anchors can strip easily.
Step-by-Step Installation Process
Now for the main event. This is where your prep pays off. I’ll walk you through each step, with real-world hacks I’ve picked up over the years.
Step 1: Cut the Wall Opening
- Mark the opening using the template from your AC’s manual. Use a level to ensure it’s perfectly horizontal.
- Score the drywall with a utility knife (this prevents tearing).
- Cut along the lines with your saw. For brick or block walls, use a masonry bit and chisel.
- Remove the cut section and check for hidden wires/pipes. If you find any, reposition the opening.
Pro Tip: Cut slightly smaller than the template—you can always trim more, but you can’t add wall back.
Step 2: Install the Sleeve or Frame
- Slide the sleeve into the opening. Most units have adjustable sides to fit different wall thicknesses.
- Secure it to the wall studs with screws. Use shims if the wall isn’t perfectly flat.
- Seal gaps around the sleeve with foam insulation (don’t overfill—it can warp the frame).
Red Flag: If the sleeve wobbles, your unit will vibrate and leak. Reinforce with plywood if needed.
Step 3: Connect the Electrical
- Turn off the circuit breaker.
- Run a dedicated electrical line to the sleeve (if not already there). Use 14-gauge wire for 15-amp circuits.
- Connect the AC’s power cord to the outlet inside the sleeve (most units have a plug-in design).
Pro Tip: Label the breaker with “AC Only” to avoid future confusion.
Step 4: Mount the Air Conditioner
- Lift the unit into the sleeve (get a friend—these things are heavy!).
- Secure it to the sleeve with the included screws or clips.
- Check that the unit tilts slightly outward (1/4 inch) to let condensation drain outside.
Red Flag: If the unit doesn’t sit flush, it’ll leak air and water. Adjust the sleeve or use shims.
Step 5: Seal and Insulate
- Apply weatherproof caulk around the interior and exterior edges of the sleeve.
- Fill gaps with foam insulation (sparingly—foam expands).
- For exterior walls, install trim to cover the gap between the sleeve and siding.
Pro Tip: Use a paintable caulk for a seamless look. I once used clear caulk and regretted it when the sun bleached it yellow.
Common Mistakes and How to Avoid Them
Even seasoned DIYers make mistakes. Here are the top pitfalls—and how to steer clear of them.
Mistake 1: Ignoring Drainage
Through wall ACs produce condensation. If the unit isn’t tilted correctly, water will drip inside. How to fix it: Use a level to ensure the back is 1/4 inch lower than the front. If water still leaks, check the drain pan (it might be cracked or clogged).
Mistake 2: Poor Sealing
Air leaks = wasted energy and higher bills. How to fix it: After caulking, test for drafts with a lit candle. If the flame flickers, you’ve got a gap. Seal it with more caulk or foam.
Mistake 3: Overlooking Electrical Load
Tripped breakers are annoying and dangerous. How to fix it: Before turning the unit on, test the circuit with other appliances off. If it trips, upgrade to a dedicated 20-amp circuit.
Mistake 4: Rushing the Cut
Jagged edges or misaligned cuts make sealing hard. How to fix it: Cut slowly, and use a straightedge guide for your saw. Sand edges smooth before installing the sleeve.
Mistake 5: Skipping Maintenance
Dirty filters and coils reduce efficiency. How to fix it: Clean the filter monthly with soapy water. Vacuum the condenser coils annually (turn off power first).
Performance and Maintenance Tips
You’ve installed your through wall air conditioner—congrats! Now let’s keep it running smoothly for years to come.
Maximizing Efficiency
- Use a programmable thermostat: Set it to 78°F when you’re home, and 85°F when you’re out. This can cut energy use by 10–15%.
- Close blinds during peak sun: Solar heat gain can overwhelm your AC. I use blackout curtains on my south-facing wall.
- Run the fan on “auto” mode: Constant fan use wastes energy and dries out the air.
Routine Maintenance
| Task | Frequency | How-To |
|---|---|---|
| Clean filter | Monthly | Rinse with soapy water, dry completely, then reinstall. |
| Check drain pan | Seasonally | Remove the front panel, inspect for cracks, and clear debris. |
| Vacuum condenser coils | Annually | Turn off power, remove the unit, and use a soft brush and vacuum. |
| Inspect seals | Bi-Annually | Check caulk for cracks. Reseal if needed. |
Troubleshooting Common Issues
- Unit not cooling: Check the filter, thermostat, and outdoor vents for obstructions.
- Water leaking inside: Ensure the unit is tilted correctly and the drain pan is intact.
- Excessive noise: Tighten screws, check for loose panels, or lubricate the fan motor (if accessible).
Installing a through wall air conditioner is a big project, but it’s one of the best investments you can make for home comfort. Done right, it’ll cool your space efficiently, quietly, and without the hassle of seasonal removal. Just remember: patience and precision are key. Take your time, double-check your work, and don’t hesitate to call a pro for electrical or structural concerns. Before you know it, you’ll be kicking back in a cool, comfortable room—no sweat, no stress. And when summer hits? You’ll be ready.
Frequently Asked Questions
What tools do I need to install a through wall air conditioner?
You’ll need a drill, level, screwdriver, measuring tape, and safety gear like goggles and gloves. Some models may require a wall sleeve or support brackets, which are often included with the unit.
Can I install a through wall air conditioner without professional help?
Yes, if you’re comfortable with basic DIY tasks and follow the manufacturer’s instructions carefully. However, for complex wiring or structural modifications, hiring a licensed HVAC technician is recommended for safety and compliance.
How do I prepare the wall for a through wall air conditioner installation?
Measure the unit’s dimensions and cut a hole in the wall using a reciprocating saw or hole saw. Ensure the wall cavity is clear of obstructions like pipes or wires, and reinforce the opening if needed.
Where should I place a through wall air conditioner for optimal cooling?
Install the unit on a shaded exterior wall, ideally on the north or east side of your home. Avoid direct sunlight and ensure the indoor side has unobstructed airflow for even cooling.
Do I need a wall sleeve for a through wall air conditioner?
Most through wall air conditioners require a wall sleeve to secure the unit and prevent air leaks. Check your model’s specifications—some include a sleeve, while others sell it separately.
How do I ensure proper drainage for my through wall air conditioner?
Tilt the unit slightly downward toward the exterior to allow condensation to drain outside. Use a drain pan or hose attachment if your model supports it, especially in humid climates.