
Featured image for install split air conditioner
Image source: i.ytimg.com
Installing a split air conditioner properly ensures optimal cooling, energy efficiency, and long-term reliability. This guide walks you through every step—from selecting the ideal indoor and outdoor unit locations to securely mounting components, connecting refrigerant lines, and wiring safely to code. Professional installation is recommended for gas charging and electrical work to avoid hazards and maintain warranty coverage.
Key Takeaways
- Plan carefully: Choose the right location for indoor and outdoor units to ensure efficiency.
- Check power supply: Verify voltage and circuit compatibility before installation begins.
- Mount securely: Use sturdy brackets and level surfaces to prevent unit vibration or damage.
- Seal gaps properly: Insulate and seal wall gaps to avoid air leaks and energy loss.
- Test thoroughly: Run a full system test to confirm cooling, drainage, and airflow performance.
- Follow manufacturer instructions: Adhere to guidelines for refrigerant levels and electrical connections.
📑 Table of Contents
- Why Installing a Split Air Conditioner Is Worth the Effort
- Understanding the Basics: What You Need to Know Before Starting
- Step-by-Step Installation Process
- Handling Refrigerant and Vacuuming the System
- Common Pitfalls and How to Avoid Them
- Data Table: Split AC Installation Checklist
- When to Call a Professional (and How to Choose One)
- Final Thoughts: Enjoy Your Cool, Quiet Oasis
Why Installing a Split Air Conditioner Is Worth the Effort
Imagine this: it’s the peak of summer, and the heat is relentless. You’re sweating through your shirt, and your old window AC unit is wheezing like a tired marathon runner. You’ve heard great things about split air conditioners—efficient, quiet, and stylish—but you’re not sure where to start with the installation. Don’t worry, you’re not alone. I remember my first split AC install. I thought, “How hard can it be?” Spoiler: it’s not *rocket science*, but it’s not a plug-and-play job either. That’s why I’m here to walk you through how to install split air conditioner systems step by step.
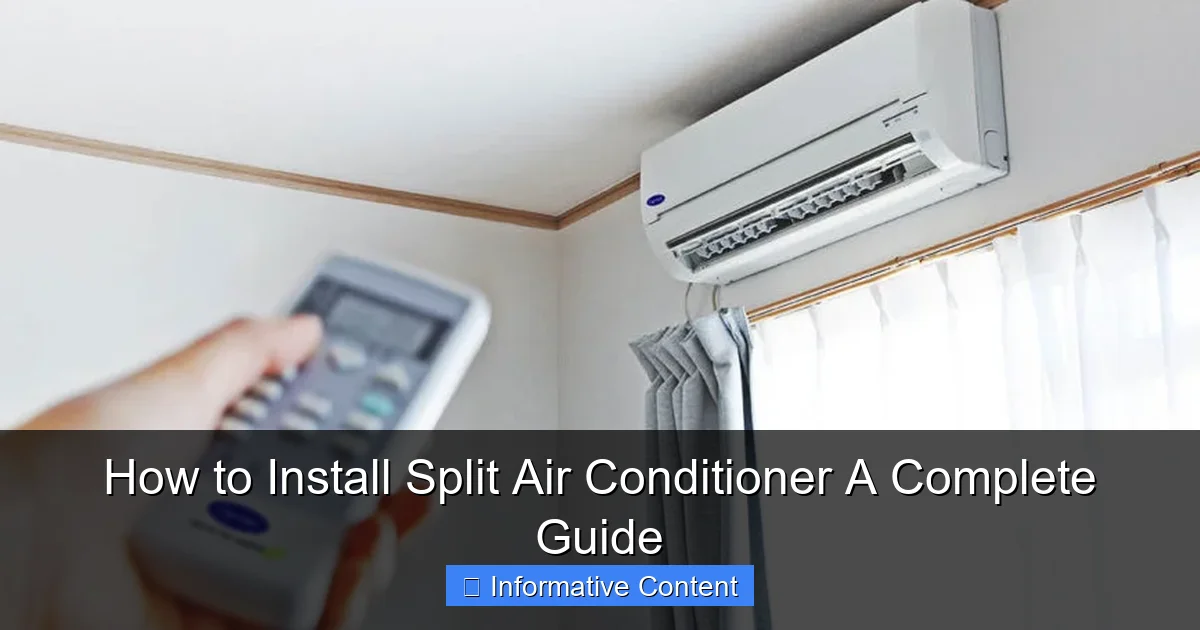
Split ACs are a game-changer. Unlike window units, they’re whisper-quiet, energy-efficient, and blend seamlessly into your home decor. The indoor unit sits high on the wall, while the outdoor unit sits outside, connected by refrigerant lines and electrical wiring. But here’s the catch: a proper installation is critical. A poorly installed unit can lead to leaks, inefficiency, or even safety hazards. So, whether you’re a DIY enthusiast or just want to understand the process before hiring a pro, this guide will give you the confidence to tackle (or supervise) the job. Let’s dive in!
Understanding the Basics: What You Need to Know Before Starting
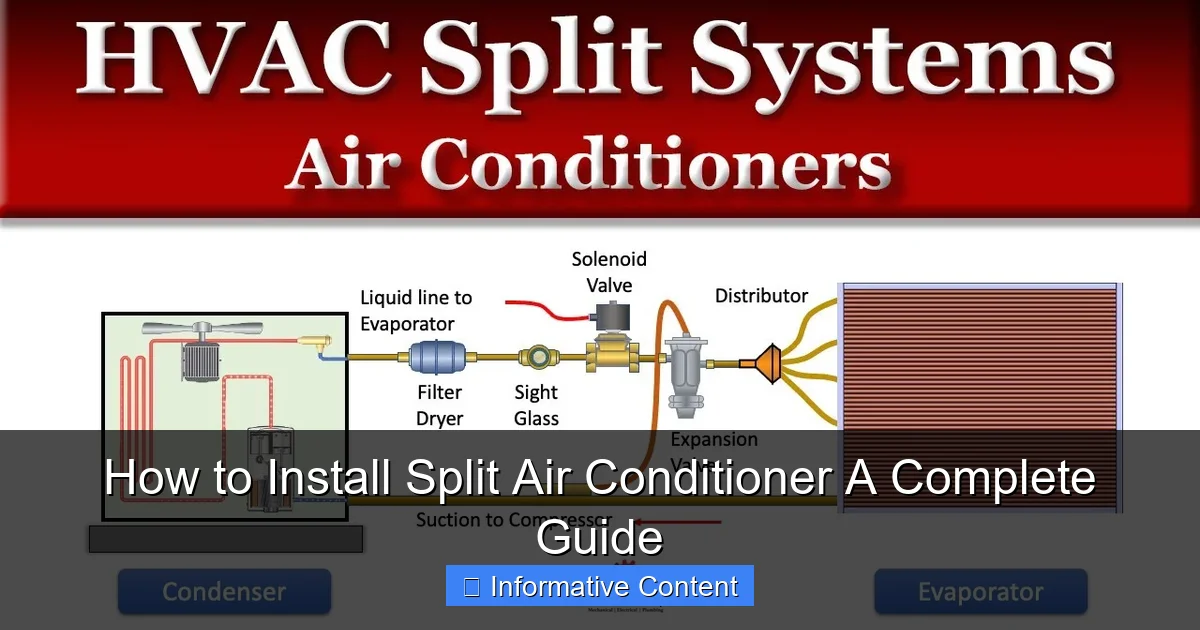
Components of a Split AC System
Before you grab your tools, let’s break down what you’re working with. A split AC consists of two main parts:
Visual guide about install split air conditioner
Image source: airc.com.au
- Indoor Unit: The evaporator, mounted high on an interior wall. It blows cool air into the room.
- Outdoor Unit: The condenser and compressor, placed outside. It dissipates heat and houses the noisy components.
- Refrigerant Lines: Copper pipes connecting the two units. They carry the refrigerant.
- Drain Hose: Removes condensation from the indoor unit.
- Electrical Wiring: Powers both units and ensures communication between them.
Think of it like a team: the indoor unit handles the “cooling,” while the outdoor unit handles the “heat rejection.” They work together, but they’re physically separated—hence the name *split* AC.
Tools and Materials Checklist
Here’s what you’ll need (don’t skip this!):
- Drill with masonry bits (for wall holes)
- Pipe cutter and flaring tool (for refrigerant lines)
- Vacuum pump and manifold gauge set (for refrigerant handling)
- Level and measuring tape
- Wrench set (metric/imperial)
- Insulation tape and foam (for pipes)
- Electrical wire stripper and connectors
- Safety gear (gloves, goggles, ladder)
Pro tip: Rent or borrow a vacuum pump if you don’t have one. You can’t skip this step—moisture in the refrigerant lines will ruin your AC’s efficiency.
Choosing the Right Location
Location is everything. A poorly placed unit will struggle to cool your room. Here’s how to pick the best spots:
- Indoor Unit: Mount it high on a wall (at least 7 feet above the floor) with no obstructions. Avoid direct sunlight or heat sources like ovens.
- Outdoor Unit: Place it on a stable, level surface (like a concrete pad) with at least 2 feet of clearance on all sides for airflow. Avoid areas with debris or direct rain exposure.
- Distance Between Units: Most split ACs work best within 25-30 feet. Longer distances reduce efficiency.
Example: I once installed an indoor unit too close to a ceiling fan. The airflow conflict caused uneven cooling. Learn from my mistake!
Step-by-Step Installation Process
Step 1: Mount the Indoor Unit Bracket
Start by marking the wall where the indoor unit will go. Use a level to ensure the bracket is perfectly horizontal. Drill holes and anchor the bracket with wall plugs. This is the backbone of your installation—if it’s crooked, the unit will be too.
Tip: If you’re drilling into concrete, use a hammer drill. For drywall, locate the studs first. A loose bracket can lead to vibrations and noise.
Step 2: Drill the Hole for Refrigerant Lines
Measure the distance between your indoor and outdoor units. Drill a 2-3 inch diameter hole at a slight downward angle (toward the outside) to let condensation drain. This prevents water from pooling inside your home.
Common mistake: Drilling straight through the wall. That’s how you end up with a puddle in your living room!
Step 3: Install the Outdoor Unit
Place the outdoor unit on a vibration-resistant pad (rubber or concrete). Secure it with bolts to prevent movement in high winds. Ensure the unit is level—use shims if needed. Poor leveling can cause refrigerant flow issues.
Pro tip: If your outdoor unit is on a balcony, check local noise regulations. Some areas have decibel limits for AC compressors.
Step 4: Connect the Refrigerant Lines
Cut the copper refrigerant lines to length, then flare the ends. Connect them to the indoor and outdoor units, tightening with a wrench. Important: Wrap the lines with insulation tape to prevent condensation and energy loss.
Example: I once skipped insulation on a humid day. The lines sweated so much, the floor got wet. Insulation isn’t optional!
Step 5: Electrical Wiring and Drain Hose
Run the electrical wiring and drain hose through the wall hole alongside the refrigerant lines. Connect the wiring to the indoor unit’s terminal block, then to the outdoor unit. For the drain hose, ensure it has a slight downward slope to let water flow out.
Safety note: Turn off the power at the breaker before handling wires. If you’re unsure about electrical work, hire a licensed electrician.
Handling Refrigerant and Vacuuming the System
Why Vacuuming Is Non-Negotiable
Air and moisture in the refrigerant lines are your enemies. They cause corrosion, reduce efficiency, and shorten the AC’s lifespan. Here’s how to do it right:
- Attach the manifold gauge to the service valves on the outdoor unit.
- Connect the vacuum pump to the gauge.
- Open both service valves and run the pump for 20-30 minutes. This evacuates air and moisture.
- Close the valves and check the gauge. It should hold a vacuum (around -30 inHg) for 5 minutes. If it rises, there’s a leak.
Pro tip: Use a micron gauge for precision. A “deep vacuum” (below 500 microns) is ideal.
Charging the Refrigerant (If Needed)
Most split ACs come pre-charged, but longer line sets may need extra refrigerant. Only a licensed technician should handle this—refrigerant is regulated and dangerous if mishandled. If you’re DIYing, stick to vacuuming and let a pro charge it.
Warning: Overcharging or undercharging will cripple your AC’s performance. When in doubt, call a pro.
Common Pitfalls and How to Avoid Them
Leaky Refrigerant Lines
Leaks are a nightmare. They cause poor cooling, higher bills, and environmental harm. To prevent them:
- Always use a torque wrench to tighten connections.
- Check for leaks with a soapy water solution (bubbles = leak).
- Insulate lines properly to avoid condensation-induced corrosion.
Example: A friend ignored a small leak. Within a year, his AC stopped cooling entirely. The fix cost 3x the price of a proper install.
Poor Drainage
A clogged or improperly sloped drain hose leads to water damage. Avoid this by:
- Testing the drain with water before sealing the wall.
- Cleaning the hose annually with vinegar to prevent algae growth.
Electrical Issues
Wrong wiring can fry your AC or trip breakers. Always:
- Double-check wire colors and labels.
- Use a dedicated circuit for the AC (no sharing with other appliances).
Noise and Vibration
Noisy ACs are often due to:
- Loose brackets (tighten them).
- Outdoor unit on a weak surface (reinforce with concrete).
- Refrigerant flow issues (call a pro).
Data Table: Split AC Installation Checklist
| Task | Tools Needed | Common Mistakes | Pro Tips |
|---|---|---|---|
| Mount indoor bracket | Drill, level, anchors | Bracket not level | Use a laser level for precision |
| Drill wall hole | Masonry bit, drill | Hole too small or straight | Use a 3-inch hole saw at a 5° angle |
| Connect refrigerant lines | Flaring tool, wrench, insulation | Uninsulated lines | Wrap lines with foam pipe insulation |
| Vacuum system | Vacuum pump, gauge | Skipping vacuuming | Run pump for 30+ minutes |
| Test drain hose | Water, funnel | Clogged hose | Add a drain line cleaner annually |
When to Call a Professional (and How to Choose One)
DIY vs. Hiring a Pro
You can handle most steps if you’re handy, but some tasks are best left to experts:
- Refrigerant charging: Requires EPA certification and specialized tools.
- Electrical work: If you’re not 100% confident, hire an electrician.
- Structural modifications: For example, if you need to cut a concrete wall.
Example: I once tried to charge refrigerant myself. I overfilled it, and the AC ran like a broken fridge. A pro fixed it in 10 minutes.
Choosing the Right Installer
Not all HVAC techs are equal. Look for:
- Licenses and certifications (EPA, NATE, etc.).
- Insurance (liability and workers’ comp).
- Warranty on labor (at least 1 year).
- Online reviews (check Google and Yelp).
Tip: Get multiple quotes. A $100 difference could mean better service.
Final Thoughts: Enjoy Your Cool, Quiet Oasis
Installing a split air conditioner isn’t just about beating the heat—it’s about creating a comfortable, energy-efficient home. While the process might seem daunting, breaking it down into steps makes it manageable. Remember: a well-installed split AC can last 15+ years, saving you money and headaches in the long run.
Whether you DIY or hire a pro, the key is attention to detail. From choosing the right location to vacuuming the refrigerant lines, every step matters. And when you finally turn on your new AC, listening to the quiet hum of the compressor and feeling that cool air? It’s worth every minute. So take a deep breath, grab your tools, and get to work. Your future self will thank you when the next heatwave hits.
Final tip: After installation, run the AC for a few hours and check for leaks, odd noises, or drainage issues. Catching problems early saves big later. Happy cooling!
Frequently Asked Questions
How to install a split air conditioner in a room without existing ductwork?
Installing a split air conditioner is an ideal solution for rooms without ductwork, as it requires only a small hole for the refrigerant line and electrical wiring. The indoor and outdoor units are connected through this line, making it a ductless and efficient cooling option.
What tools are needed to install a split air conditioner?
Essential tools include a drill, level, pipe bender, vacuum pump, wrenches, and a hole saw. You’ll also need refrigerant lines, insulation tape, and a mounting plate for the indoor unit.
Can I install a split air conditioner myself, or do I need a professional?
While DIY installation is possible for experienced users, hiring a licensed technician is recommended for proper refrigerant handling, electrical connections, and warranty compliance. Incorrect installation can reduce efficiency or damage the system.
How much space is required around the indoor and outdoor units during split AC installation?
The indoor unit needs at least 6 inches of clearance on all sides for optimal airflow, while the outdoor unit requires 12-18 inches of space for heat dissipation. Avoid placing the outdoor unit near heat sources or debris.
What is the average cost to install a split air conditioner?
Installation costs range from $500 to $2,500, depending on unit size, labor rates, and complexity (e.g., long refrigerant lines or electrical upgrades). Always get a detailed quote before starting the project.
How long does it take to install a split air conditioner?
Most installations take 4-8 hours, including mounting units, connecting lines, evacuating the refrigerant, and testing. Complex setups or hard-to-reach locations may take longer.