
Removing the drip pan from your LG air conditioner is essential for cleaning, maintenance, and preventing water damage. This guide walks you through the process safely and efficiently, ensuring your unit stays in top condition.
Key Takeaways
- Safety first: Always unplug your LG air conditioner before starting any maintenance to avoid electrical hazards.
- Locate the drip pan correctly: The drip pan is typically found at the bottom of the indoor unit, beneath the evaporator coils.
- Use the right tools: A screwdriver, gloves, and a flashlight will make the removal process smoother and safer.
- Clean the pan thoroughly: Once removed, wash the drip pan with mild soap and water to eliminate mold, algae, and debris.
- Check for clogs in the drain line: While the pan is out, inspect and clear the condensate drain to prevent future overflow.
- Reinstall carefully: Ensure the drip pan is properly aligned and secured before reconnecting power.
- Schedule regular maintenance: Removing and cleaning the drip pan every 3–6 months helps maintain optimal AC performance.
How to Remove Drip Pan from LG Air Conditioner
Keeping your LG air conditioner in peak condition isn’t just about changing filters or adjusting the thermostat. One of the most overlooked yet critical maintenance tasks is removing and cleaning the drip pan. Over time, dust, mold, algae, and debris can accumulate in the drip pan, leading to clogs, unpleasant odors, and even water leakage. If left unchecked, these issues can reduce your AC’s efficiency, increase energy bills, and potentially damage your home.
In this comprehensive 2026 guide, we’ll walk you through the entire process of safely removing the drip pan from your LG air conditioner. Whether you own a window unit, a portable AC, or a ductless mini-split system, this step-by-step tutorial will help you access, clean, and reinstall the drip pan with confidence. You’ll also learn essential tips for troubleshooting common issues and maintaining your unit for long-term performance.
By the end of this guide, you’ll not only know how to remove the drip pan but also understand why it’s so important for your air conditioner’s health. Let’s get started!
Why the Drip Pan Matters
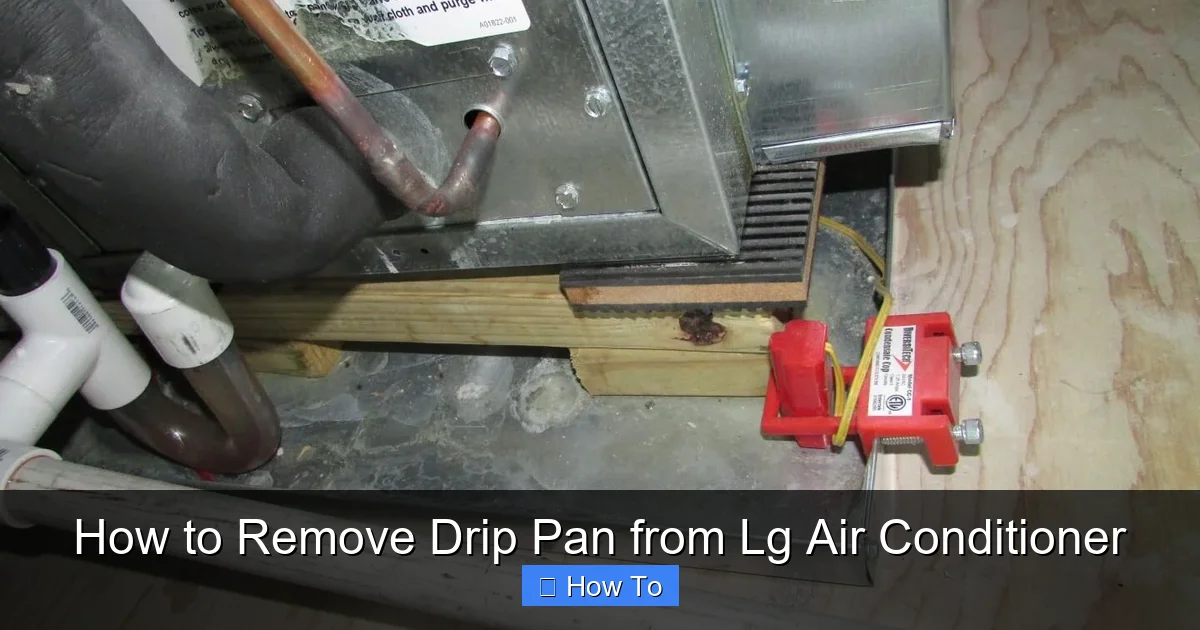
Visual guide about How to Remove Drip Pan from Lg Air Conditioner
Image source: structuretech1.com
Before diving into the removal process, it’s important to understand what the drip pan does and why it needs regular attention. The drip pan—also known as the condensate pan—is a shallow tray located at the bottom of your LG air conditioner’s indoor unit. Its primary job is to collect condensation that forms when warm, humid air passes over the cold evaporator coils.
As your AC cools your home, moisture in the air condenses into water droplets. This water drips down into the pan and is then channeled out through a drain line. However, over time, the pan can collect dirt, mold, and algae, especially in humid climates or if the unit isn’t used frequently. This buildup can lead to:
- Clogged drain lines causing water to back up
- Unpleasant musty odors circulating through your home
- Reduced cooling efficiency due to restricted airflow
- Potential water damage to floors or walls
- Increased risk of bacterial growth and indoor air quality issues
Regularly removing and cleaning the drip pan helps prevent these problems and extends the life of your LG air conditioner. In 2026, with more homeowners relying on energy-efficient cooling systems, proactive maintenance like this is more important than ever.
Tools and Materials You’ll Need
Before you begin, gather the following tools and materials to ensure a smooth and safe process:
- Screwdriver set: Most LG units use Phillips or flat-head screws. A multi-bit screwdriver is ideal.
- Work gloves: Protect your hands from sharp edges, dust, and potential mold.
- Safety goggles: Prevent debris from getting into your eyes during disassembly.
- Flashlight or headlamp: Helps you see into tight or dark spaces inside the unit.
- Bucket or container: To catch any water that may spill when removing the pan.
- Soft brush or old toothbrush: For scrubbing away grime and algae.
- Mild detergent or vinegar solution: Safe and effective for cleaning without damaging components.
- Clean cloth or paper towels: For drying the pan and surrounding areas.
- Plastic putty knife (optional): Useful for gently prying off stubborn panels without scratching.
Having these items ready will save you time and frustration. Always prioritize safety—especially when working with electrical appliances.
Step 1: Turn Off and Unplug the Unit
The very first step—and one of the most important—is to ensure your LG air conditioner is completely powered down. Even if the unit appears off, residual electricity can still pose a risk.
Unplug the Power Cord
Locate the power cord and unplug it from the wall outlet. If your unit is hardwired (common in ductless mini-splits), turn off the circuit breaker that supplies power to the AC. Use a voltage tester to confirm there’s no electricity flowing to the unit.
Wait 10–15 Minutes
After disconnecting power, wait at least 10 to 15 minutes before proceeding. This allows any capacitors inside the unit to discharge fully, reducing the risk of electric shock.
Label the Plug (Optional but Helpful)
If you’re working in a busy household, consider placing a note or tag on the plug saying “Do Not Plug In – Maintenance in Progress.” This prevents someone from accidentally turning the unit back on while you’re working.
Safety is non-negotiable. Never skip this step, even if you’re in a hurry.
Step 2: Access the Indoor Unit
The location of the drip pan depends on your LG air conditioner model. Here’s how to access it based on the type of unit you have.
Window or Portable AC Units
For window or portable LG air conditioners, the drip pan is usually accessible from the front or bottom of the indoor section.
- Remove the front grille or air filter panel. This is typically held in place by clips or screws.
- Gently pull the grille forward and set it aside.
- Look for screws securing the lower front panel. Remove them using your screwdriver.
- Carefully lower the panel to expose the internal components, including the drip pan.
Ductless Mini-Split Systems
Ductless units have a more enclosed design, so accessing the drip pan requires removing the front cover.
- Locate the front panel of the indoor unit. It’s usually held by four to six screws along the top and sides.
- Unscrew them and gently tilt the panel forward. Some models have a hinge, so it may swing open like a door.
- Support the panel with one hand to prevent it from falling.
- Once open, you should see the evaporator coils and, below them, the drip pan.
Central Air Handlers (If Applicable)
If your LG system includes a central air handler, the drip pan is typically located inside the furnace or air handler cabinet. You’ll need to remove the access panel on the side or bottom of the unit.
Always refer to your owner’s manual for model-specific instructions. LG’s 2026 models often include QR codes on the unit that link to digital manuals and video guides.
Step 3: Locate the Drip Pan
Once you’ve opened the unit, the drip pan should be clearly visible at the bottom, directly beneath the evaporator coils. It’s usually made of plastic or metal and may have a slight slope to direct water toward the drain outlet.
Identify the Drain Outlet
Look for a small tube or pipe connected to the side or back of the pan—this is the condensate drain line. Water flows through this tube to the outside of your home. If you see water pooling or dripping from this area, it’s a sign the pan or drain is clogged.
Check for Obstructions
Before removing the pan, inspect the area around it. Look for:
- Excess water or sludge
- Mold or algae growth (often green or black)
- Debris like leaves or dust
- Loose screws or damaged seals
If you notice standing water, place your bucket underneath before proceeding to catch any spills.
Take a Photo (Optional)
Snap a quick photo of the pan and its position. This can help you remember how to reinstall it correctly, especially if you’re new to AC maintenance.
Step 4: Remove the Drip Pan
Now it’s time to carefully remove the drip pan. The method varies slightly depending on your model, but the general process is the same.
Disconnect the Drain Line (If Necessary)
Some LG models have the drain line attached directly to the pan. If yours does:
- Gently twist or pull the tube to disconnect it. Some use quick-connect fittings; others may require loosening a clamp.
- Have your bucket ready to catch any water that drains out.
- Plug the open end of the drain line with a rag to prevent insects or debris from entering.
Unscrew or Unclip the Pan
Most drip pans are secured with screws or plastic clips.
- Use your screwdriver to remove any screws holding the pan in place.
- If clips are used, gently press or pry them open with a flat-head screwdriver or plastic putty knife.
- Support the pan with one hand as you remove the last fastener to prevent it from falling.
Lift the Pan Out
Once all fasteners are removed, slowly lift the drip pan straight up and out of the unit. Be careful—it may still contain water or sludge. Tilt it slightly to pour out any liquid into your bucket.
Inspect the Pan and Surrounding Area
While the pan is out, take a moment to examine the space where it sat. Look for:
- Corrosion or rust on metal parts
- Cracks or warping in the pan
- Blockages in the drain channel
- Loose wiring or damaged insulation
If you find any damage, consider replacing the pan or consulting a professional.
Step 5: Clean the Drip Pan
A dirty drip pan is a breeding ground for bacteria and mold. Cleaning it thoroughly is essential for maintaining indoor air quality and preventing odors.
Rinse with Water
Start by rinsing the pan under warm running water to remove loose debris. Use a soft brush or old toothbrush to scrub away stubborn grime.
Use a Cleaning Solution
For deeper cleaning, mix a solution of:
- 1 part white vinegar to 1 part water, or
- Mild dish soap with warm water
Soak the pan for 10–15 minutes, then scrub all surfaces, especially corners and the drain outlet. Vinegar is especially effective at killing mold and algae.
Rinse and Dry Completely
Rinse the pan thoroughly to remove all soap or vinegar residue. Shake off excess water and dry it with a clean cloth or let it air dry completely before reinstalling. Any remaining moisture can lead to mold growth.
Disinfect (Optional)
For extra sanitation, wipe the pan with a cloth dipped in a diluted bleach solution (1 tablespoon bleach per gallon of water). Rinse well afterward to avoid chemical odors.
Step 6: Clean the Drain Line and Surrounding Area
While the pan is out, take the opportunity to clean the condensate drain line and the area around the evaporator coils.
Flush the Drain Line
Use a wet/dry vacuum to suck out any clogs from the drain line. Alternatively, pour a cup of vinegar or a commercial drain cleaner into the line and let it sit for 30 minutes before flushing with water.
Clean the Evaporator Coils (Optional)
If you notice dirt or mold on the coils, use a soft brush or coil cleaner spray to gently clean them. Avoid using high-pressure water, which can damage the fins.
Wipe Down the Interior
Use a damp cloth to wipe down the interior of the unit, removing dust and debris. Be careful not to bend any delicate components.
Step 7: Reinstall the Drip Pan
Once everything is clean and dry, it’s time to put the drip pan back in place.
Position the Pan Correctly
Slide the pan back into the unit, ensuring it sits flat and level. Make sure the drain outlet aligns with the drain line.
Reattach the Drain Line
If you disconnected the drain line, reconnect it securely. Ensure there are no kinks or bends that could block water flow.
Secure the Pan
Replace any screws or clips to hold the pan in place. Don’t overtighten screws, as this can crack plastic components.
Close the Unit
Reattach the front panel or grille, securing it with screws or clips. Make sure all parts are snug and properly aligned.
Step 8: Restore Power and Test
With the drip pan reinstalled, it’s time to power up your LG air conditioner.
Plug In or Turn On the Breaker
Reconnect the power cord or turn the circuit breaker back on.
Turn On the Unit
Set your AC to cool mode and let it run for 10–15 minutes. Listen for unusual noises and check for leaks or drips.
Monitor for Issues
If you notice water pooling, strange smells, or reduced cooling, turn the unit off and recheck your installation. You may need to adjust the pan or clear a clog.
Troubleshooting Common Issues
Even with careful steps, you might encounter problems. Here’s how to handle them:
Water Still Leaking After Cleaning
This could mean the drain line is still clogged or the pan isn’t seated properly. Recheck the drain line and ensure the pan is level.
Pan Doesn’t Fit Back In
Double-check that all components are aligned. Sometimes, reassembling in the wrong order can prevent the pan from fitting.
Unusual Odors Persist
Mold may have spread to other areas. Consider using an HVAC-safe disinfectant spray or calling a professional for a deep clean.
Unit Won’t Turn On After Reassembly
Ensure all panels are securely closed. Some LG models have safety switches that prevent operation if the cover isn’t properly installed.
Maintenance Tips for 2026 and Beyond
To keep your LG air conditioner running smoothly, follow these best practices:
- Clean the drip pan every 3–6 months, especially during peak cooling seasons.
- Replace air filters monthly to reduce dust buildup.
- Use a condensate drain pan treatment tablet to prevent algae growth.
- Schedule annual professional maintenance to inspect coils, refrigerant levels, and electrical components.
- Keep the area around the indoor unit clean to prevent debris from entering.
With smart home integration in 2026, some LG models now send maintenance alerts to your phone when the drip pan needs attention. Take advantage of these features to stay ahead of problems.
Conclusion
Removing the drip pan from your LG air conditioner might seem like a small task, but it plays a big role in your unit’s performance, efficiency, and longevity. By following this step-by-step guide, you’ve learned how to safely access, clean, and reinstall the drip pan—keeping your home cool, dry, and odor-free.
Regular maintenance like this not only prevents costly repairs but also improves indoor air quality and energy efficiency. In 2026, as air conditioners become more advanced and integrated into smart home systems, taking care of the basics remains essential.
So, the next time your AC starts to smell musty or you notice water dripping, don’t panic—just grab your tools and give your drip pan the attention it deserves. Your LG air conditioner will thank you with years of reliable service.