
This guide walks you through how to remove the cover LG window air conditioner safely and efficiently. Whether you’re cleaning, repairing, or maintaining your unit, we’ve got you covered with clear instructions and expert tips.
Key Takeaways
- Always unplug the unit first: Safety is critical—never work on your LG window AC while it’s plugged in to avoid electrical shock.
- Use the right tools: A Phillips-head screwdriver, flathead screwdriver, and possibly a socket wrench are typically needed for most LG models.
- Identify your model type: LG window ACs vary by series (e.g., LW8016ER, LW1216ER), so check your user manual or model number before starting.
- Take photos during disassembly: Snap pictures at each step to make reassembly easier and prevent misplaced parts.
- Handle the cover gently: The plastic casing can crack or warp if forced—work slowly and follow the correct removal sequence.
- Clean while the cover is off: Use this opportunity to clean coils, filters, and internal components for better efficiency.
- Reinstall securely: Ensure all screws are tightened and the cover is flush to prevent air leaks and maintain performance.
How to Remove Cover LG Window Air Conditioning: A Complete 2026 Guide
If you’ve ever opened your LG window air conditioner to clean it, replace a filter, or troubleshoot an issue, you know that removing the cover is the first—and often trickiest—step. Whether you’re a DIY enthusiast or just trying to keep your home cool and efficient in 2026, knowing how to remove the cover LG window air conditioner properly can save you time, money, and frustration.
In this comprehensive guide, we’ll walk you through every step of safely and correctly removing the front or outer cover of your LG window AC unit. We’ll cover everything from safety precautions and required tools to model-specific tips and troubleshooting common problems. By the end, you’ll be confident in handling your AC cover like a pro—no technician required.
Let’s get started.
Why You Might Need to Remove the Cover
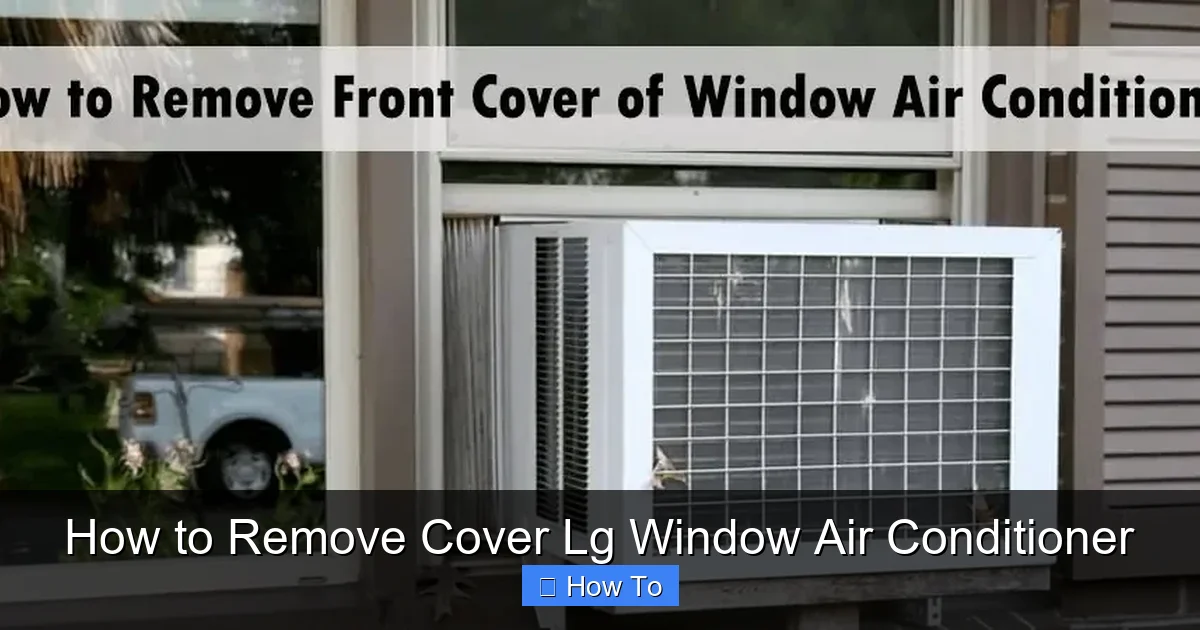
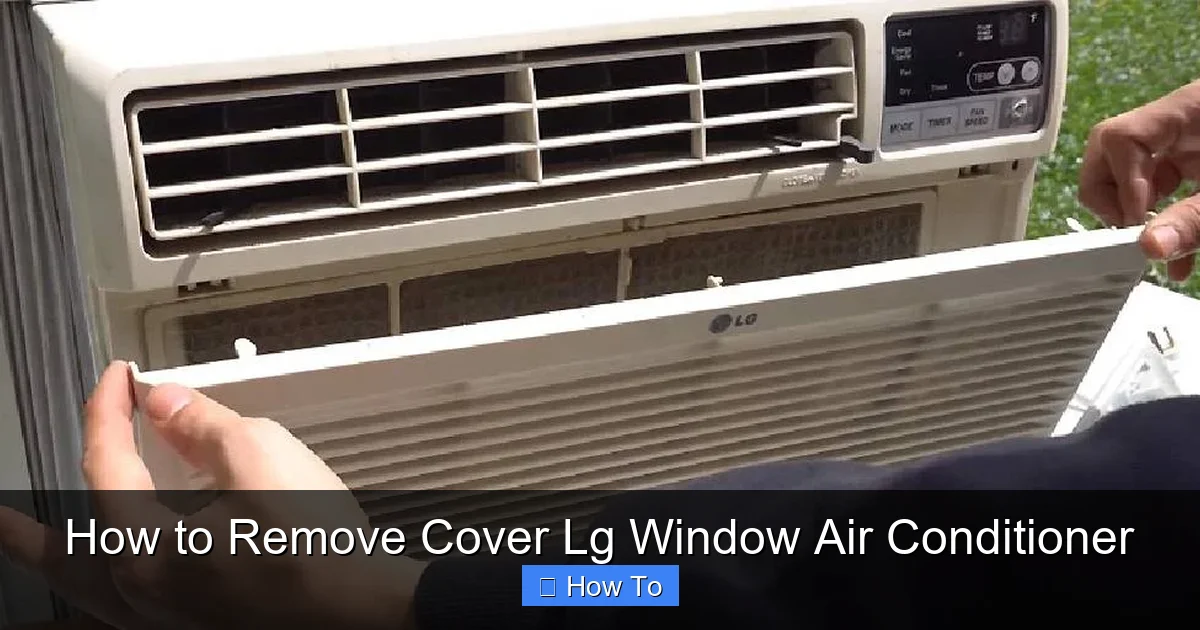
Visual guide about How to Remove Cover Lg Window Air Conditioner
Image source: homegearslab.com
Before diving into the removal process, it’s helpful to understand why you’d want to take off the cover in the first place. Here are the most common reasons:
- Cleaning the air filter: The filter traps dust, pollen, and debris. Over time, it gets clogged and reduces airflow. Removing the cover gives you access to clean or replace it.
- Deep cleaning the unit: Dust builds up on the evaporator coils, fan blades, and interior panels. Removing the cover allows for thorough cleaning, which improves efficiency and extends the unit’s lifespan.
- Repairing or replacing parts: If your AC isn’t cooling properly, making strange noises, or leaking water, you may need to inspect internal components like the compressor, fan motor, or drainage system.
- Seasonal maintenance: Before storing your window AC for winter or preparing it for summer use, removing the cover lets you inspect and clean critical parts.
- Upgrading components: Some users replace thermostats, capacitors, or control boards—tasks that require full access to the interior.
No matter your reason, the process is similar across most LG window AC models. However, slight variations exist depending on the year and series, so always refer to your user manual when possible.
Safety First: Precautions Before You Begin
Working with any electrical appliance—especially one that’s been running—requires caution. Your safety is the top priority.
1. Turn Off and Unplug the Unit
Never attempt to remove the cover while the air conditioner is plugged in. Even if it’s turned off at the control panel, residual power can still pose a risk.
- Locate the power cord and unplug it from the wall outlet.
- If your unit is hardwired (less common in window models), turn off the circuit breaker that supplies power to the AC.
- Wait at least 10–15 minutes before starting work. This allows capacitors inside the unit to discharge fully.
2. Work in a Dry, Well-Lit Area
Moisture and poor lighting increase the risk of accidents.
- Choose a dry, flat surface—like a garage floor or workbench—to lay out tools and parts.
- Use a bright LED work light if natural light is insufficient.
- Avoid working outdoors on wet or humid days, especially if the unit has been exposed to rain.
3. Wear Protective Gear
While not always necessary, basic protection helps prevent injury.
- Wear gloves to protect your hands from sharp edges or dust.
- Safety goggles are recommended if you’re cleaning coils or fans, as debris can fly loose.
- If you have respiratory sensitivities, consider wearing a dust mask.
4. Keep Children and Pets Away
Small screws, tools, and loose parts can be choking hazards. Designate a safe workspace away from curious hands or paws.
Gather Your Tools and Supplies
You don’t need a full toolbox, but having the right items on hand makes the job much smoother.
Essential Tools
- Phillips-head screwdriver: Most LG window AC covers are secured with Phillips screws. A #2 size is usually sufficient.
- Flathead screwdriver: Useful for prying open clips or gently separating plastic panels.
- Socket wrench or nut driver (optional): Some models use hex-head screws or bolts, especially on older units.
- Needle-nose pliers: Helpful for removing small clips or disconnected wires.
Optional but Helpful Items
- Digital camera or smartphone: Take photos before and during disassembly to guide reassembly.
- Magnetic tray or small container: Keeps screws and small parts organized and prevents loss.
- Soft cloth or towel: Place under the unit to protect it from scratches.
- Vacuum with brush attachment: For cleaning dust from internal components.
- Compressed air can: Blows out stubborn dust from coils and fans.
Check Your Model Number
LG window air conditioners come in many models, and the cover removal process can vary slightly. To find your model number:
- Look on the side of the unit (inside the room).
- Check the back of the unit (outside the window).
- Refer to the user manual or warranty card.
- Visit LG’s official support site and enter your serial number for model-specific guides.
Common 2026 LG window AC models include the LW8016ER, LW1216ER, LW1517IVSM, and the newer Smart Wi-Fi enabled series like the LW1822IVSM. Most follow a similar design, but always confirm your model before proceeding.
Step-by-Step Guide: How to Remove the Cover
Now that you’re prepared, let’s walk through the actual removal process. We’ll use a typical LG window AC as our example, but the steps apply to most models.
Step 1: Remove the Front Grille or Control Panel
Many LG units have a front grille that must be removed before accessing the main cover.
- Look for small tabs or clips along the top and sides of the grille.
- Gently press or pry these tabs with a flathead screwdriver. Work from one side to the other to avoid cracking the plastic.
- Lift the grille upward and set it aside.
Tip: Some models have a control panel attached to the grille. If yours does, disconnect the ribbon cable carefully before fully removing the grille. Use needle-nose pliers if needed, but avoid pulling on the wires.
Step 2: Locate and Remove the Screws
With the grille off, you’ll see the main front cover. It’s usually held in place by 4–8 screws.
- Check the top, bottom, and sides of the cover for Phillips-head screws.
- Use your screwdriver to remove each one. Place them in your magnetic tray as you go.
- Some models have hidden screws behind the air filter. Remove the filter first by sliding it out of its slot.
Note: On newer LG Smart models (2024–2026), some screws may be concealed under rubber caps or stickers. Peel these back gently with a fingernail or flat tool.
Step 3: Disconnect Any Attached Wires (If Applicable)
Some LG covers have wires connected to sensors, lights, or control boards.
- Look for thin wires running from the cover to the main unit.
- Carefully unplug any connectors. Most use simple snap-in plugs—press the tab and pull gently.
- Label the wires with tape or take a photo to remember where they go.
Warning: Never yank wires. If a connector feels stuck, wiggle it slightly while pulling. Forcing it can damage the port.
Step 4: Gently Lift the Cover Off
Once all screws and wires are disconnected, the cover should lift free—but not always easily.
- Start at the top and gently pull the cover away from the unit.
- If it feels stuck, check for additional clips or screws you may have missed.
- Work slowly around the edges, using your hands or a flathead screwdriver to release any remaining clips.
- Lift the cover straight up and set it aside on a soft surface.
Tip: If the cover resists, don’t force it. Double-check for hidden fasteners. Forcing it can crack the plastic or damage internal components.
Step 5: Inspect and Clean (Optional but Recommended)
With the cover off, take the opportunity to clean and inspect the interior.
- Vacuum dust from the evaporator coils, fan blades, and drain pan.
- Use compressed air to blow out tight spaces.
- Wipe down the interior panels with a damp cloth (avoid electrical components).
- Check for signs of mold, corrosion, or pest infestation.
- Replace the air filter if it’s dirty or damaged.
Pro Tip: Apply a coil cleaner spray (available at hardware stores) to the evaporator coils for deeper cleaning. Let it sit for 10–15 minutes, then rinse with water (if the unit is designed for it) or wipe clean.
Troubleshooting Common Issues
Even with careful preparation, you might run into problems. Here’s how to handle the most common ones.
Problem: Cover Won’t Come Off
- Cause: Hidden screws or clips.
- Solution: Recheck all edges, especially near the control panel and filter slot. Look for rubber caps or stickers covering screws.
Problem: Screws Are Stripped or Rusted
- Cause: Over-tightening or moisture exposure.
- Solution: Use a screw extractor tool or gently drill out the screw. Replace with a new one of the same size.
Problem: Wires Are Tangled or Hard to Reach
- Cause: Poor cable management during previous repairs.
- Solution: Use zip ties to organize wires next time. Label each connector clearly.
Problem: Cover Cracks During Removal
- Cause: Forcing the cover or brittle plastic (common in older units).
- Solution: Use a heat gun on low setting to soften the plastic slightly before prying. For cracks, use plastic epoxy or contact LG for a replacement cover.
Problem: Unit Doesn’t Work After Reassembly
- Cause: Loose wires, misaligned cover, or forgotten screws.
- Solution: Double-check all connections. Ensure the cover is fully seated and all screws are tightened. Test the unit before final installation.
Reinstalling the Cover: Best Practices
Once your maintenance or repair is complete, it’s time to put everything back together.
Step 1: Reconnect Wires
- Match each wire to its labeled port.
- Push connectors in firmly until they click.
- Avoid bending pins or forcing connections.
Step 2: Align the Cover
- Position the cover so it sits flush against the unit.
- Start at the top and work your way down, ensuring clips engage properly.
Step 3: Replace Screws
- Insert all screws by hand first to avoid cross-threading.
- Tighten with a screwdriver—don’t over-tighten, as this can crack the plastic.
- Replace any rubber caps or stickers.
Step 4: Reattach the Grille
- Slide the grille back into place.
- Press clips until they snap securely.
- Test the control panel to ensure buttons respond.
Step 5: Plug In and Test
- Plug the unit back in.
- Turn it on and check for proper cooling, airflow, and noise levels.
- Listen for unusual sounds or vibrations.
Maintenance Tips for 2026 and Beyond
To minimize future cover removals and keep your LG window AC running smoothly:
- Clean the filter monthly: A clean filter reduces strain on the system and improves air quality.
- Schedule seasonal inspections: Check the unit before summer and after winter storage.
- Use a cover when not in use: Protect the exterior from weather and debris.
- Upgrade to a smart model: Newer LG units offer app-based diagnostics, so you can monitor performance without opening the cover.
- Keep the area around the unit clear: Ensure at least 12 inches of clearance on all sides for proper airflow.
Conclusion
Removing the cover from your LG window air conditioner doesn’t have to be intimidating. With the right tools, safety precautions, and a step-by-step approach, you can access the interior of your unit confidently and efficiently. Whether you’re cleaning, repairing, or performing routine maintenance, this guide equips you with everything you need for success in 2026 and beyond.
Remember: always unplug the unit, take photos during disassembly, and handle components gently. And when in doubt, consult your user manual or reach out to LG customer support.
By following these instructions, you’ll not only extend the life of your air conditioner but also enjoy cooler, cleaner air all season long—without calling a technician.
Now go ahead—remove that cover and give your LG window AC the care it deserves.