
Putting together a LG portable air conditioner doesn’t have to be stressful. This guide walks you through every step, from unboxing to final setup, ensuring your unit runs efficiently in 2026. You’ll save time and avoid common mistakes with our expert tips.
Key Takeaways
- Unbox carefully: Remove all parts gently and check for damage or missing components before starting assembly.
- Install the exhaust hose correctly: A secure, airtight connection prevents hot air from re-entering your room and improves cooling efficiency.
- Use the window kit properly: The adjustable window bracket must fit snugly to support the hose and block outside air.
- Level the unit on a stable surface: Placing the AC on an uneven floor can cause vibration, noise, or drainage issues.
- Connect to a dedicated outlet: LG portable ACs require a grounded 120V outlet to avoid electrical hazards and ensure optimal performance.
- Run a test cycle: After setup, turn on the unit and check for leaks, unusual noises, or error codes before regular use.
- Maintain regularly: Clean filters monthly and inspect hoses annually to keep your LG portable air conditioner running smoothly.
How to Put Together a LG Portable Air Conditioner
Welcome to your complete guide on how to put together a LG portable air conditioner in 2026! Whether you’re cooling a small bedroom, a home office, or a studio apartment, LG’s portable air conditioners offer powerful, energy-efficient performance with easy mobility. But before you can enjoy that refreshing cool air, you need to assemble and set up your unit correctly.
Don’t worry—this process is simpler than it looks. With the right tools, a little patience, and this step-by-step guide, you’ll have your LG portable AC up and running in under an hour. We’ll cover everything from unboxing to troubleshooting, so you can avoid common pitfalls and get the most out of your investment.
By the end of this guide, you’ll know exactly how to put together a LG portable air conditioner safely and efficiently. You’ll also learn pro tips to maximize cooling, reduce noise, and extend the life of your unit. Let’s get started!
What You’ll Need Before You Begin
Visual guide about How to Put Together a Lg Portable Air Conditioner
Image source: acsupportspoint.com
Before diving into assembly, make sure you have the following items ready:
- The LG portable air conditioner unit
- Exhaust hose (usually included)
- Window installation kit (adjustable bracket, foam seals, screws)
- Hose connectors and clamps
- User manual (download the 2026 version from LG’s website if needed)
- A Phillips-head screwdriver
- Measuring tape
- A helper (optional, but helpful for lifting and positioning)
- A level (to ensure the unit sits flat)
- A vacuum or cloth (for cleaning the area)
It’s also a good idea to choose the installation location ahead of time. Look for a spot near a window, away from direct sunlight, and close to a grounded electrical outlet. Avoid placing the unit near heat sources like ovens or radiators.
Step 1: Unbox Your LG Portable Air Conditioner
The first step in how to put together a LG portable air conditioner is unboxing. Carefully carry the box to your chosen setup area—don’t drag it, as this can damage internal components.
Open the Box Safely
Use scissors or a box cutter to slice along the tape seams. Lift the flaps and remove the top layer of packaging. You’ll likely find the unit wrapped in protective plastic and secured with foam inserts.
Remove the Unit and Accessories
Gently lift the air conditioner out of the box. Place it on a soft surface like a carpet or blanket to avoid scratching the finish. Next, remove all accessories from the packaging. These typically include:
- Exhaust hose
- Window kit (bracket, seals, screws)
- Hose connectors
- Remote control (with batteries)
- Drain hose (on some models)
- User manual and warranty card
Inspect for Damage
Check the unit and all parts for any visible damage—dents, cracks, or loose components. If anything looks off, contact LG customer support immediately. It’s better to resolve issues before assembly.
Keep the Packaging
Hold onto the box and foam inserts for at least 30 days. If you need to return or move the unit, the original packaging offers the best protection.
Step 2: Prepare the Installation Area
A successful setup starts with the right location. Here’s how to prepare your space:
Choose the Right Spot
Place the unit on a flat, level surface inside the room you want to cool. Ideal locations include:
- Near a window that opens horizontally (sliding or double-hung)
- At least 12–18 inches away from walls or furniture for proper airflow
- On a hard floor (tile, wood, or vinyl) rather than carpet, which can trap dust
Avoid placing the unit in direct sunlight or near heat sources. This forces the AC to work harder and reduces efficiency.
Clear the Area
Remove any clutter, rugs, or objects that could block airflow or interfere with the exhaust hose. Vacuum the floor to prevent dust from entering the unit.
Check the Window
Measure your window opening to ensure the window kit will fit. Most LG kits accommodate windows from 18 to 48 inches wide. If your window is larger, you may need to purchase an extension kit from LG or a third-party supplier.
Step 3: Assemble the Exhaust Hose
The exhaust hose is a critical part of your LG portable air conditioner. It vents hot air and moisture outside, allowing the unit to cool your room effectively.
Attach the Hose Connectors
Most LG models come with two hose connectors—one for the unit and one for the window bracket. Slide each connector onto the ends of the exhaust hose. Secure them with the provided clamps or twist-lock mechanisms.
Connect the Hose to the Unit
Locate the exhaust port on the back of your LG portable air conditioner. It’s usually a round opening with a removable cap. Remove the cap and insert the hose connector. Push it in firmly until it clicks or feels secure.
Check for Airtight Seal
Give the hose a gentle tug to ensure it’s locked in place. A loose connection can cause hot air to leak back into the room, reducing cooling performance.
Tip: Keep the Hose Straight
Avoid sharp bends or kinks in the hose. A straight, slightly upward slope helps hot air flow smoothly outside. If the hose must bend, use a wide curve—never fold it.
Step 4: Install the Window Kit
The window kit seals the opening and supports the exhaust hose. Proper installation prevents drafts and improves efficiency.
Assemble the Window Bracket
Lay out the adjustable window bracket and extension panels. Slide the extensions into the main bracket to match your window width. Secure them with the provided screws using a Phillips-head screwdriver.
Install the Foam Seals
Attach the foam weather stripping to the edges of the bracket. This creates a tight seal against the window frame. Some kits include adhesive-backed foam; others use removable strips.
Place the Bracket in the Window
Open your window and place the bracket inside the frame. Slide the window down until it rests on top of the bracket. Make sure the bracket is level and centered.
Secure the Bracket
Use the included screws to fasten the bracket to the window frame. Don’t overtighten—this can crack wood or warp vinyl. The goal is a snug fit, not maximum force.
Attach the Exhaust Hose to the Bracket
Insert the other end of the exhaust hose into the hole in the window bracket. Secure it with a clamp or twist-lock connector. Ensure the connection is airtight.
Seal Gaps
Use additional foam or weather stripping to fill any gaps around the bracket. Even small leaks can let hot air back in and reduce cooling power.
Step 5: Position and Level the Unit
Now it’s time to place your LG portable air conditioner in its final position.
Roll the Unit into Place
Most LG portable ACs have built-in casters (wheels) for easy movement. Roll the unit to the spot near the window. Make sure the exhaust hose isn’t stretched or pinched.
Check for Level
Use a level to ensure the unit sits flat. An uneven surface can cause water to pool inside, leading to leaks or drainage issues. If needed, place small shims under the wheels to level it.
Allow Space for Airflow
Keep at least 12 inches of clearance around the unit—especially in front of the air intake and outlet. Blocking airflow forces the compressor to work harder and can trigger overheating.
Tip: Use a Drain Pan (Optional)
If you’re concerned about condensation, place a shallow drain pan under the unit. Some models have built-in drainage systems, but extra protection never hurts.
Step 6: Connect to Power
Electrical safety is crucial when setting up any appliance.
Use a Dedicated Outlet
Plug your LG portable air conditioner into a grounded 120V outlet. Avoid using extension cords or power strips, which can overheat and cause fires. If you must use an extension cord, choose a heavy-duty, 14-gauge or thicker model rated for at least 15 amps.
Check the Circuit
Make sure the outlet is on a circuit that can handle the load. LG portable ACs typically draw between 800 and 1500 watts. Running other high-power devices (like microwaves or space heaters) on the same circuit can trip the breaker.
Inspect the Power Cord
Look for frayed wires, cracks, or damage. If the cord is compromised, do not use the unit. Contact LG for a replacement.
Turn On the Power
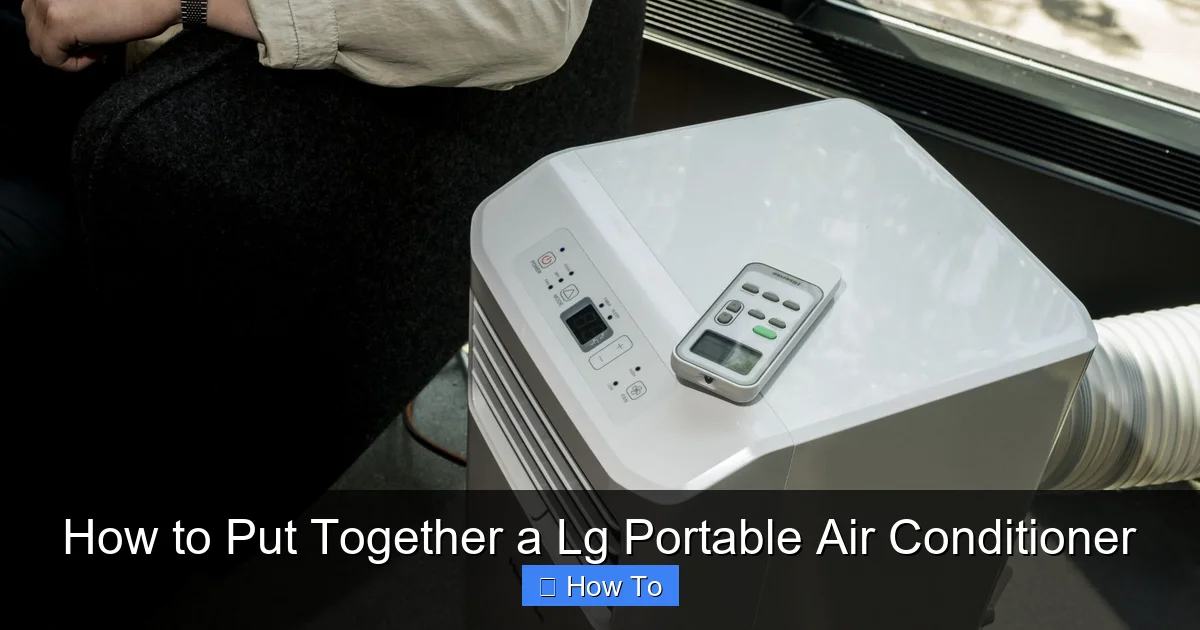
Once plugged in, press the power button on the unit or remote. The display should light up, and you should hear the fan start.
Step 7: Configure the Settings
Now that your LG portable air conditioner is powered on, it’s time to customize the settings.
Set the Mode
Use the remote or control panel to select your desired mode:
- Cool: Lowers room temperature
- Fan: Circulates air without cooling
- Dry: Reduces humidity (great for humid climates)
- Auto: Adjusts settings based on room conditions
Adjust the Temperature
Set your target temperature using the up/down arrows. Most LG models allow settings between 60°F and 86°F (15°C–30°C).
Choose the Fan Speed
Select from low, medium, or high fan speeds. Higher speeds cool faster but are louder. Use low or medium for quiet operation at night.
Enable Energy-Saving Features
Many 2026 LG models include smart features like:
- Sleep Mode: Gradually adjusts temperature for comfort and efficiency
- Timer: Turns the unit on or off at set times
- Wi-Fi Connectivity: Control via the LG ThinQ app (on select models)
Download the LG ThinQ app to monitor energy use, receive maintenance alerts, and control your AC from your phone.
Step 8: Run a Test Cycle
Before relying on your unit, run a test to ensure everything works properly.
Listen for Unusual Noises
During the first few minutes, listen for grinding, rattling, or excessive vibration. These could indicate loose parts or improper installation.
Check for Leaks
Inspect the exhaust hose connections and window seal for air leaks. Feel around the joints—if you sense warm air escaping, tighten the connections.
Monitor Cooling Performance
After 15–20 minutes, check if cool air is coming from the front vent. If the room isn’t cooling, double-check the settings and ensure the exhaust hose is properly vented.
Watch for Error Codes
If the display shows an error code (like E1, E2, or FL), refer to the user manual or LG’s support site. Common issues include clogged filters or drainage problems.
Troubleshooting Common Issues
Even with careful setup, problems can arise. Here’s how to fix the most common issues when putting together a LG portable air conditioner.
Unit Won’t Turn On
- Check the power cord and outlet.
- Ensure the remote has working batteries.
- Press the power button on the unit itself—sometimes the remote fails.
Not Cooling Enough
- Verify the exhaust hose is connected and not kinked.
- Clean or replace the air filter (dirty filters block airflow).
- Close doors and windows to prevent hot air from entering.
Loud or Vibrating Noise
- Make sure the unit is level and on a stable surface.
- Check that the exhaust hose isn’t hitting the wall or window.
- Tighten any loose panels or screws on the unit.
Water Leaking Inside
- Ensure the unit is level—tilting can cause water to spill.
- Check the drain plug (on some models) and remove it if needed.
- Clean the internal condensate tray if it’s full or clogged.
Error Code FL (Full Tank)
This means the internal water tank is full. Most LG portable ACs have an auto-shutoff feature to prevent leaks. To fix:
- Turn off the unit.
- Locate the drain hose (usually at the back or bottom).
- Place a bucket underneath and drain the water.
- Reconnect the hose and restart the unit.
Maintenance Tips for Long-Term Performance
To keep your LG portable air conditioner running efficiently in 2026 and beyond, follow these maintenance tips:
Clean the Air Filter Monthly
A dirty filter reduces airflow and forces the compressor to work harder. Remove the filter, rinse it with warm water, and let it dry completely before reinstalling.
Inspect the Exhaust Hose Annually
Over time, the hose can crack or develop leaks. Check for wear and replace it every 2–3 years or as needed.
Wipe Down the Exterior
Use a damp cloth to clean the unit’s surface. Avoid harsh chemicals that could damage the finish.
Store Properly Off-Season
If you won’t use the AC for months, drain all water, clean the filter, and store it in a dry place. Cover it with a breathable cloth to prevent dust buildup.
Schedule Professional Service
Every 2–3 years, consider having a technician inspect the refrigerant levels and internal components.
Conclusion
Putting together a LG portable air conditioner in 2026 is a straightforward process when you follow the right steps. From unboxing and assembling the exhaust hose to installing the window kit and configuring settings, each stage plays a vital role in ensuring optimal performance.
By choosing the right location, securing all connections, and maintaining your unit regularly, you’ll enjoy cool, comfortable air all season long. Plus, with smart features and energy-efficient designs, LG’s 2026 models offer even greater convenience and savings.
Remember: a well-assembled portable AC not only cools better but also lasts longer. Take your time, follow this guide, and don’t hesitate to reach out to LG support if you run into issues.
Now that you know how to put together a LG portable air conditioner, you’re ready to beat the heat with confidence. Stay cool!