
Installing an LG portable air conditioner hose in a window is easier than you think—when you follow the right steps. This guide walks you through everything from choosing the right kit to sealing gaps and maintaining airflow for optimal cooling in 2026.
Key Takeaways
- Choose the right window kit: LG portable ACs require a compatible window venting kit, which may come included or be purchased separately depending on your model.
- Measure your window opening: Accurate measurements ensure a snug fit and prevent hot air from sneaking back in.
- Secure the hose properly: Always attach the exhaust hose to both the unit and the window bracket using the provided clamps or adapters.
- Seal gaps to maximize efficiency: Use foam tape, weather stripping, or adjustable panels to close any openings around the vent panel.
- Angle the hose downward slightly: This prevents condensation buildup and allows moisture to drain outside naturally.
- Check hose positioning regularly: Over time, hoses can shift or kink—inspect monthly during peak cooling season.
- Follow safety guidelines: Never block the hose with furniture or run it across walkways to avoid tripping or damage.
How to Put LG Portable Air Conditioner Hose in Window: A Complete 2026 Guide
If you’ve just bought an LG portable air conditioner or are setting one up for the first time, you’re probably wondering: “How do I actually get this hose out the window?” You’re not alone. Many users feel overwhelmed by the venting process—but it doesn’t have to be complicated. In this comprehensive 2026 guide, we’ll walk you through every step of installing your LG portable AC hose in a window safely, efficiently, and without frustration.
Whether you live in a rental apartment, a house with sliding windows, or a space with limited ventilation options, this guide covers all scenarios. We’ll explain what tools you need, how to prepare your window, how to connect the hose correctly, and how to troubleshoot common issues. By the end, you’ll have a cool, comfortable room and peace of mind knowing your setup is secure and energy-efficient.
Let’s dive in!
Why Proper Hose Installation Matters
Visual guide about How to Put Lg Portable Air Conditioner Hose in Window
Image source: m.media-amazon.com
Before we get into the “how,” let’s talk about the “why.” Your LG portable air conditioner works by pulling warm indoor air in, cooling it, and then expelling hot exhaust air outside through a flexible hose. If that hose isn’t installed correctly, hot air can leak back into your room, reducing cooling efficiency and increasing energy bills.
In 2026, with rising temperatures and energy costs, even small inefficiencies add up. A poorly sealed window vent can reduce your AC’s effectiveness by up to 30%. That means your unit has to work harder, wear out faster, and cost more to run. Plus, improper installation can create safety hazards—like tripping over a loose hose or causing water damage from condensation buildup.
Proper installation ensures:
– Maximum cooling performance
– Lower electricity usage
– Longer lifespan for your AC unit
– Safer indoor environment
So yes—taking the time to install your hose correctly is absolutely worth it.
What You’ll Need
Most LG portable air conditioners come with a basic window installation kit, but it’s smart to double-check what’s included with your specific model. Here’s a checklist of what you’ll likely need:
- LG portable air conditioner unit
- Exhaust hose (usually 5–6 feet long)
- Window venting kit (includes adjustable panels, brackets, and screws)
- Hose connector/adapters (to attach hose to unit and window bracket)
- Screwdriver or drill (for securing brackets)
- Measuring tape
- Scissors or utility knife (to trim panels if needed)
- Foam weather stripping or sealant tape (for sealing gaps)
- Level (optional, but helpful for alignment)
Some newer LG models (like the 2026 LG Dual Inverter Smart Portable AC) include upgraded kits with magnetic seals or quick-connect hoses. If yours didn’t come with a kit, you can purchase an LG-compatible universal window kit online or at major retailers like Home Depot, Lowe’s, or Amazon.
Pro tip: Always check your user manual first. LG often includes model-specific instructions and compatibility notes.
Step 1: Choose the Right Window for Venting
Not all windows are created equal when it comes to AC venting. Before you start drilling or cutting, decide which window you’ll use. Here are the most common types and how they work with portable ACs:
Sliding Windows (Horizontal or Vertical)
These are the easiest to work with. Most LG window kits are designed for sliding windows. You’ll open the window just enough to insert the vent panel, then slide it closed to hold the panel in place.
Casement Windows (Crank-Out)
These require a different approach. You may need a casement window adapter or a flexible vent panel that fits into the opening when the window is slightly cracked. Some users use plexiglass cut to size as a custom solution.
Double-Hung Windows
Similar to sliding windows, but vertical. Make sure the lower sash can open wide enough for the vent panel. If not, you might need to modify the kit or use a different window.
Avoid using windows that:
– Are above the second floor (risk of hose detachment)
– Face heavy wind or rain exposure (can cause water intrusion)
– Are blocked by screens, awnings, or security bars (unless removable)
Once you’ve chosen your window, clean the frame and sash to ensure a tight seal.
Step 2: Measure Your Window Opening
Accuracy is key. If your vent panel is too small, hot air will leak in. If it’s too big, it won’t fit securely.
Use a measuring tape to determine:
– The width (for horizontal sliders) or height (for vertical sliders) of the opening when the window is partially open
– The depth of the window track (so the panel sits flush)
Most LG kits include adjustable panels that expand from about 18 to 48 inches. Match your measurement to the kit’s range. If your window is outside that range, you may need to purchase an extension panel or a custom-sized kit.
Write down your measurements and keep them handy—you’ll need them when assembling the vent panel.
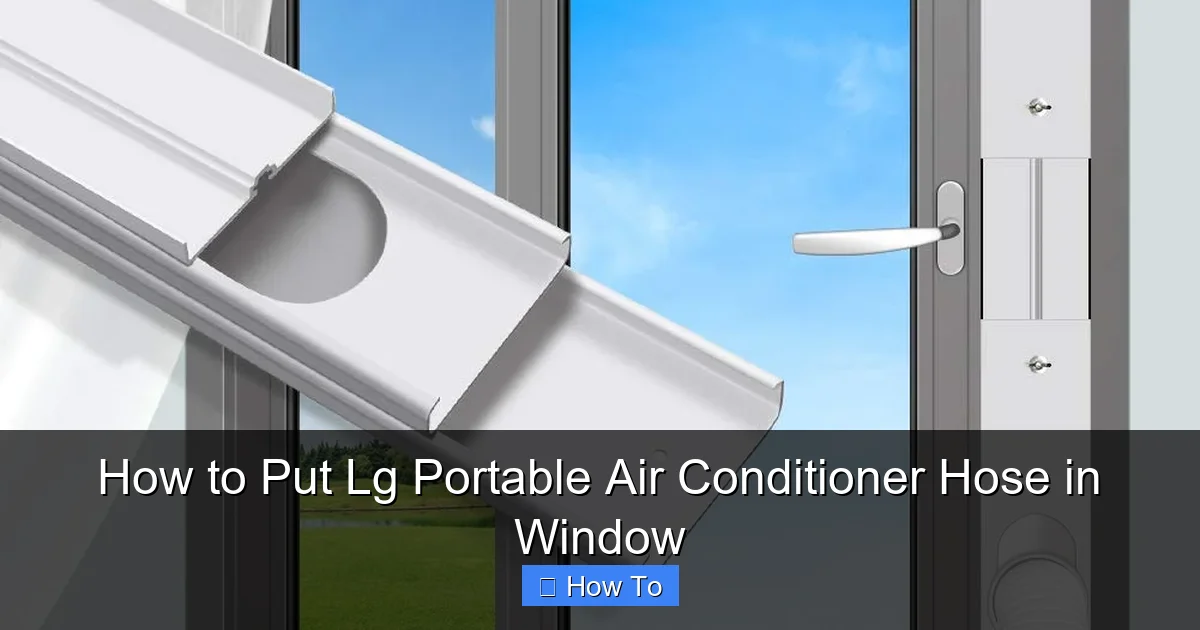
Step 3: Assemble the Window Vent Panel
Now it’s time to build the vent bracket that will hold your hose in place.
Unpack and Identify Parts
Open your window kit and lay out all components. You should have:
– Two or three adjustable panels (usually made of plastic or aluminum)
– A vent hole with a built-in bracket or flap
– Screws or locking knobs
– Possibly a foam gasket or rubber seal
Adjust the Panel to Fit
Slide the panels together until they match your window opening measurement. Most kits have markings or notches to help you align them correctly. Tighten any locking knobs or screws to hold the length in place.
Attach the Vent Bracket
The vent hole piece usually snaps or screws into the center of the panel. Make sure it’s secure and aligned with where the hose will exit. Some 2026 LG models use a twist-lock mechanism—just rotate the bracket until it clicks.
Test Fit in the Window
Before securing anything permanently, place the assembled panel into the window opening. Slide the window closed to see if it holds snugly. There should be no large gaps on the sides or top/bottom.
If it’s loose, you’ll need to add sealing material (more on that soon). If it’s too tight, adjust the panel length slightly.
Step 4: Install the Vent Panel in the Window
Once your panel fits, it’s time to install it securely.
Position the Panel
Place the assembled vent panel into the window track. For horizontal sliders, rest it on the bottom track and push it against the closed side of the window. For vertical sliders, position it between the upper and lower sashes.
Secure with Screws or Clamps
Most LG kits include small screws to anchor the panel to the window frame. Drill pilot holes if needed (especially in wood frames), then screw in the fasteners. Don’t overtighten—this can crack plastic panels.
Some kits use pressure-fit designs that don’t require screws. These rely on tension between the window and frame. Make sure they’re tight enough to prevent movement but not so tight that they warp the panel.
Check for Stability
Give the panel a gentle tug. It shouldn’t move or wobble. If it does, reinforce it with additional screws or add foam padding to fill gaps.
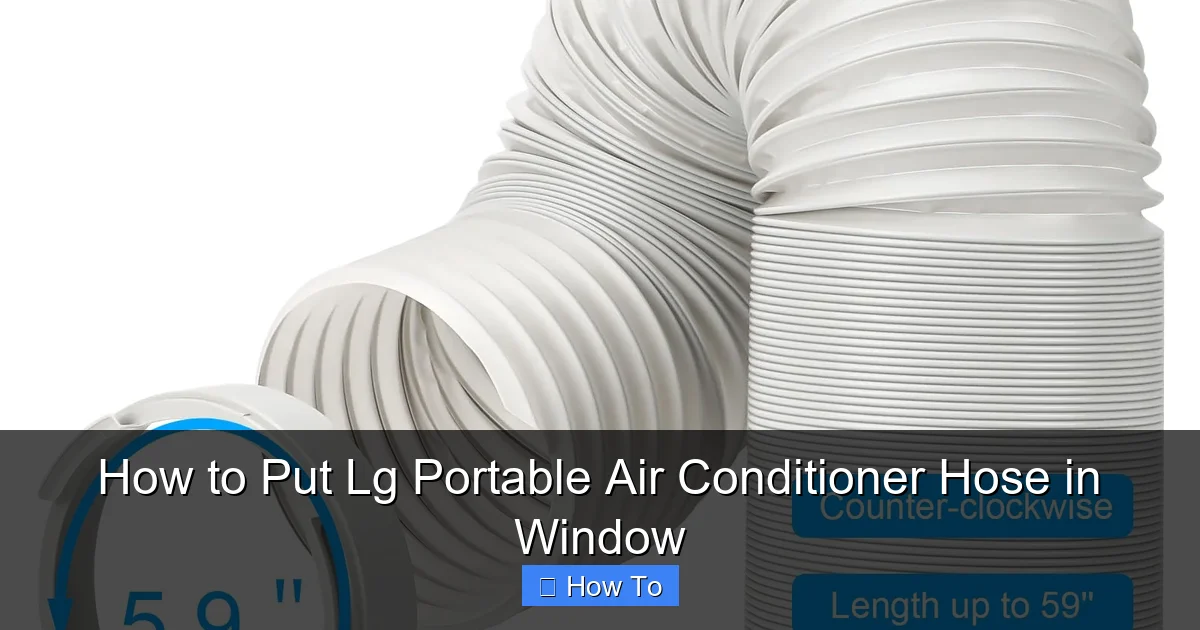
Step 5: Connect the Exhaust Hose
This is the heart of the installation. The hose carries hot air from your AC unit to the outside.
Attach Hose to the AC Unit
Locate the exhaust port on the back or side of your LG portable AC. It’s usually labeled “Exhaust” or has a hose icon. Take one end of the hose and push it onto the port. Most LG hoses use a twist-lock or snap-fit design—rotate clockwise until it locks in place.
If your model uses a clamp, wrap the hose tightly around the port and tighten the clamp with a screwdriver. Make sure there’s no slack or gap.
Attach Hose to the Window Bracket
Now take the other end of the hose and connect it to the vent bracket on your window panel. Again, use the twist-lock or clamp method. Ensure the connection is airtight—any leak here defeats the purpose of venting.
Pro tip: Don’t stretch the hose too tight. Leave a little slack so it doesn’t pull on the unit or the window bracket. But don’t let it sag too much either—this can cause kinks or water pooling.
Angle the Hose Correctly
For best performance, the hose should slope slightly downward from the AC unit to the window. This allows condensation (which forms inside the hose during cooling) to drain outside instead of dripping back into your room.
If your unit is lower than the window, you may need to elevate it slightly with a stand or platform. Never run the hose uphill unless absolutely necessary.
Step 6: Seal All Gaps
Even the smallest gap can let hot air sneak back in. Sealing is crucial for efficiency.
Use Foam Weather Stripping
Cut strips of self-adhesive foam tape and apply them around the edges of the vent panel where it meets the window frame. Focus on the sides and top/bottom where the window closes against the panel.
For sliding windows, apply tape to the moving sash so it presses against the panel when closed.
Fill Large Gaps with Expandable Foam or Caulk
If there’s a significant gap (more than ¼ inch), use low-expansion foam sealant or silicone caulk. Apply carefully—don’t overfill, as expanding foam can warp panels.
Check for Drafts
Turn on your AC and feel around the edges of the panel with your hand. If you feel warm air coming in, you’ve got a leak. Reapply sealant or adjust the panel.
In 2026, some users are opting for smart sealing solutions like magnetic vent covers or inflatable window seals that adjust to fit any opening. These can be great upgrades if you frequently move your AC between rooms.
Step 7: Test and Optimize Your Setup
You’re almost done! Now it’s time to test everything.
Turn On the AC
Set your LG portable AC to cool mode and let it run for 10–15 minutes. Listen for unusual noises (like rattling or hissing) and check for warm air blowing from the hose or panel.
Monitor Temperature and Airflow
Use a thermometer to check if the room is cooling effectively. If it’s not, double-check your hose connections and seals.
Adjust as Needed
If the hose is kinked, reposition it. If the panel shifts, tighten the screws. If condensation is dripping inside, adjust the hose angle.
Troubleshooting Common Issues
Even with careful installation, problems can happen. Here’s how to fix the most common ones:
Hose Keeps Coming Loose
This usually means the connection isn’t secure. Reattach the hose using the twist-lock or clamp. Consider adding a zip tie as a backup fastener (but don’t overtighten).
Water Dripping Inside
Condensation buildup is normal, but it shouldn’t drip into your room. Ensure the hose slopes downward. If needed, drill a small drainage hole at the lowest point of the hose (outside only).
Hot Air Leaking Back In
Check all seals around the window panel. Reapply foam tape or caulk. Make sure the window is fully closed and pressing against the panel.
AC Not Cooling Enough
This could be due to poor venting, a dirty filter, or low refrigerant. Clean the air filter, check the hose for blockages, and ensure the exhaust isn’t recirculating hot air.
Window Panel Won’t Stay in Place
Add rubber bumpers or non-slip pads to the bottom of the panel. For extra security, use clear suction cups or temporary brackets.
Safety Tips for 2026
Safety should always come first. Here are key reminders:
– Never run the hose across walkways—it’s a tripping hazard.
– Don’t block the hose with furniture, curtains, or rugs.
– Keep the hose away from heat sources like stoves or radiators.
– Inspect connections monthly during cooling season.
– If you smell burning or see smoke, turn off the unit immediately and unplug it.
In 2026, many LG portable ACs come with smart alerts that notify you via app if the hose becomes disconnected or blocked. Enable these features for added peace of mind.
Maintenance and Long-Term Care
To keep your setup working smoothly all summer:
– Clean the air filter every 2 weeks.
– Wipe down the hose and vent panel monthly.
– Check seals before each cooling season.
– Store the window kit indoors when not in use to prevent UV damage.
If you move your AC to a different room or window, take photos of your setup before disassembling. This makes reinstallation much faster.
Conclusion
Putting an LG portable air conditioner hose in a window might seem daunting at first, but with the right tools and steps, it’s a straightforward process. By choosing the right window, measuring accurately, assembling the vent panel correctly, and sealing all gaps, you’ll enjoy efficient, reliable cooling all season long.
Remember: a well-installed hose isn’t just about comfort—it’s about energy savings, safety, and extending the life of your AC unit. In 2026, with smarter designs and better materials, installing your LG portable AC has never been easier.
So grab your toolkit, follow this guide, and get ready to beat the heat. Your cool, comfortable home is just a few steps away.