
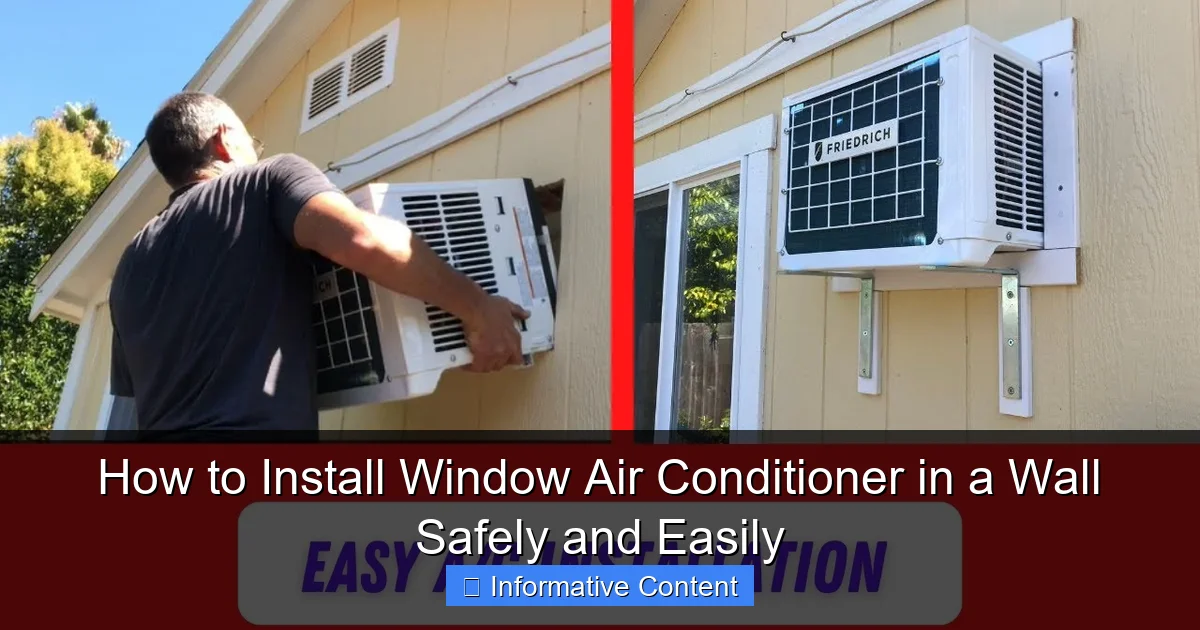
Featured image for how to install window air conditioner in a wall
Image source: i.ytimg.com
Installing a window air conditioner in a wall requires precise framing and secure support to ensure safety and efficiency. This guide walks you through measuring, cutting, and anchoring the unit properly, minimizing leaks and maximizing cooling performance—all without professional help. Perfect for DIYers looking to upgrade comfort with confidence.
Key Takeaways
- Measure carefully: Ensure the wall opening matches the AC unit’s dimensions precisely.
- Secure framing: Reinforce the wall cavity to support the unit’s weight safely.
- Seal gaps: Use weatherstripping to prevent air leaks and improve efficiency.
- Check electrical: Verify the circuit meets the AC’s voltage and amperage needs.
- Level installation: Keep the unit tilted slightly outward for proper drainage.
- Inspect regularly: Maintain seals and brackets to ensure long-term safety.
📑 Table of Contents
- Why Installing a Window Air Conditioner in a Wall Might Be the Best Decision You Make This Summer
- Assessing Your Space: Is a Wall Installation Right for You?
- Tools and Materials You’ll Need (And What to Skip)
- Step-by-Step Installation: From Measuring to Mounting
- Common Mistakes (And How to Avoid Them)
- Maintenance Tips to Keep Your AC Running Smoothly
- Data Table: Wall vs. Window AC Installation Comparison
Why Installing a Window Air Conditioner in a Wall Might Be the Best Decision You Make This Summer
Let’s face it: summer heat can be brutal. You’re sweating through your clothes, your pets are lying flat on the floor, and even your coffee seems to turn lukewarm in five minutes. You’ve probably considered a central AC system, but the cost and complexity feel overwhelming. That’s where the humble window air conditioner comes in—reliable, affordable, and surprisingly powerful. But here’s the thing: what if your apartment doesn’t have a traditional window, or the window you have is too small, or you just don’t want to block your view or natural light? That’s when installing a window air conditioner in a wall becomes a game-changer.
I learned this the hard way last summer. I moved into a converted loft with huge, fixed glass panels instead of traditional double-hung windows. I was stuck with a portable AC unit that barely cooled the room and sounded like a jet engine. After some research (and a few YouTube videos), I realized I could cut a hole in the wall and install a standard window AC unit. It felt scary at first—like I was committing a home renovation sin—but once I did it, my apartment was cool, quiet, and energy-efficient. And best of all? No more tripping over that portable unit in the middle of the night. If you’re considering this route, you’re not alone. More and more people are choosing to install window air conditioners in walls, especially in apartments, older homes, or spaces with non-standard windows. The good news? With the right tools, preparation, and a little patience, you can do it too—safely and easily.
Assessing Your Space: Is a Wall Installation Right for You?
Before you grab a saw and start cutting into your drywall, take a step back. Installing a window air conditioner in a wall isn’t for every home, and it’s important to know whether your space is a good fit. Let’s break this down into practical considerations that will save you time, money, and potential headaches.
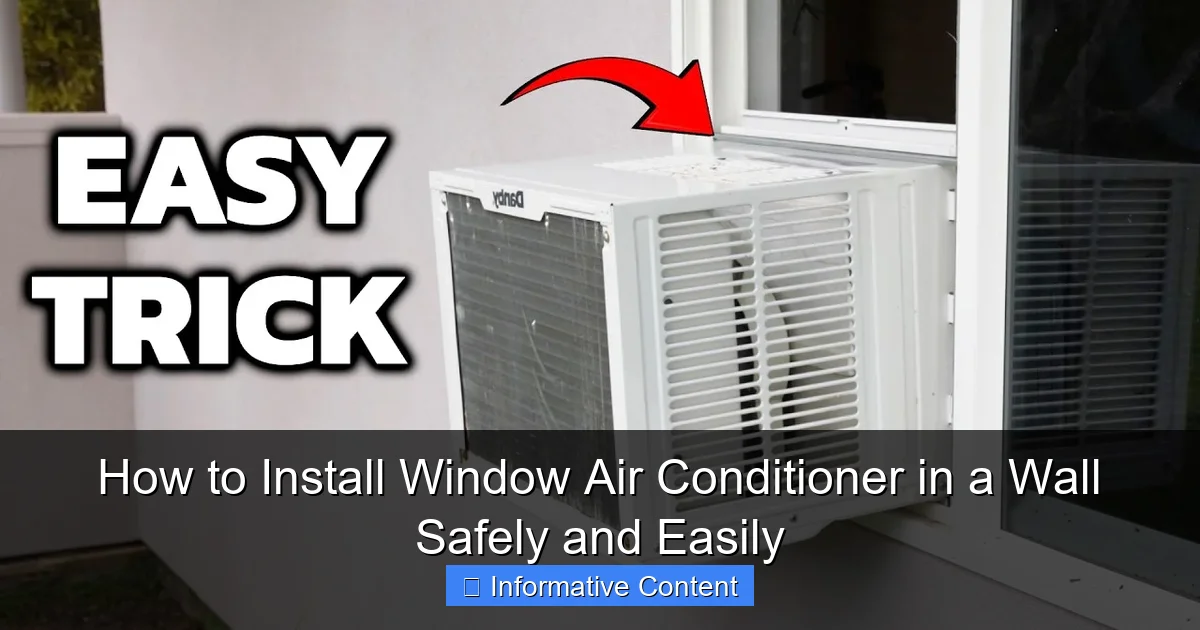
Visual guide about how to install window air conditioner in a wall
Image source: i.ytimg.com
Check Your Wall Type and Structure
The first thing you need to know: what kind of wall are you working with? Interior drywall is much easier to cut than exterior brick, stucco, or concrete walls. If you’re in an apartment or a rental, you’ll likely be dealing with interior walls, which are usually 2×4 or 2×6 studs covered with drywall or plaster. These are manageable for DIYers. But if you’re dealing with an exterior masonry wall, you’ll need special tools like a masonry blade and possibly professional help. Pro tip: Use a stud finder to locate studs and avoid cutting through load-bearing structures. You don’t want to weaken your wall or create a safety hazard.
Also, consider whether the wall is insulated. If it’s an exterior wall, it probably has insulation. That’s great for energy efficiency, but you’ll need to remove it carefully and reseal it after installation. For interior walls, insulation may be minimal, but you’ll still want to check for electrical wires or plumbing—especially in older homes.
Measure the Air Conditioner and the Wall Opening
Not all window air conditioners are created equal. Some are compact (18–24 inches wide), while others are wide and heavy (30+ inches). Before you start, measure your AC unit’s height, width, and depth. Then, measure the wall space where you plan to install it. You need at least 1–2 inches of clearance on all sides for proper ventilation and to allow for a snug fit. For example, if your AC is 22 inches wide, your wall opening should be 23–24 inches wide. The depth matters too—make sure the wall cavity is deep enough to accommodate the unit without it sticking out too far on the inside or outside.
Here’s a real-life example: I had a 12,000 BTU unit that was 23.5 inches wide and 17 inches deep. My wall was framed with 2×6 studs, giving me about 5.5 inches of depth—perfect. But if I’d used a 2×4 wall, it might have been too tight. Always double-check these measurements before cutting.
Evaluate Ventilation and Drainage Needs
Air conditioners need airflow. The intake and exhaust vents must be unobstructed. When you install in a wall, the unit should extend slightly on the outside to allow hot air to escape. On the inside, you want at least 6–8 inches of clearance around the unit for air circulation. Also, consider condensation. All ACs produce water, and you’ll need a way to drain it. Most units come with a built-in drip tray and a small hose or drain plug. You can route this to a bucket, a floor drain, or even outside through a small hole near the bottom of the wall sleeve. Never skip this step—standing water can cause mold and damage your wall.
Tools and Materials You’ll Need (And What to Skip)
One of the best things about installing a window air conditioner in a wall is that it doesn’t require a full construction crew or expensive tools. Most of what you need is probably already in your garage or can be borrowed. But there are a few essentials you shouldn’t skip.
Essential Tools
- Jigsaw or reciprocating saw: For cutting through drywall and wood framing. A jigsaw is quieter and more precise for clean cuts.
- Stud finder: To locate studs, electrical wires, and pipes. A must-have for safety.
- Measuring tape and level: Accuracy is key. A crooked installation leads to poor performance and leaks.
- Utility knife: For scoring drywall and trimming edges.
- Drill with wood and masonry bits: For pilot holes and securing the frame.
- Screwdriver set: For assembling the sleeve and securing the unit.
- Safety gear: Goggles, dust mask, gloves. Drywall dust is no joke.
Materials to Buy or Prepare
- Wall sleeve (optional but recommended): A metal or plastic frame that fits the AC unit and provides structural support. You can buy one made for your model or build one from wood.
- Exterior-grade wood or plywood (for framing): If you’re building a custom sleeve, use treated or exterior-grade wood to resist moisture.
- Insulation foam or spray foam: To seal gaps and prevent air leaks.
- Silicone caulk: For sealing the exterior where the sleeve meets the siding or stucco.
- Weather-resistant flashing (if exterior wall): To prevent water intrusion.
- Drain hose or extension: If your unit’s built-in drain isn’t long enough.
What You Can Skip (But Shouldn’t)
You don’t need a full HVAC certification or a contractor’s license. You also don’t need to hire someone to cut a hole in your wall—unless you’re working with brick, concrete, or a load-bearing wall. But here’s what you shouldn’t skip: turning off the power if you’re near electrical outlets, and checking with your landlord or HOA if you’re in a rental or managed property. I made the mistake of not checking with my landlord once—luckily, they were cool with it, but I could have faced fines or been forced to reverse the installation.
Step-by-Step Installation: From Measuring to Mounting
Now comes the fun part: actually installing the unit. This is where preparation meets action. Follow these steps carefully, and you’ll have a clean, professional-looking installation in a weekend or less.
Step 1: Cut the Wall Opening
Start by marking the opening on the wall using a pencil and level. Double-check your measurements. Then, use your stud finder to ensure you’re not cutting through a stud or wire. If you hit a stud, you may need to notch it or shift the opening slightly—just don’t cut it out completely unless you’re reinforcing it with headers.
Score the drywall with a utility knife, then use your jigsaw to cut along the lines. Work slowly and steadily. For deeper walls (like 2×6), you may need to cut through both sides. Once the hole is made, remove the drywall and any insulation. Tip: Take photos of the wiring and framing before you cut—this helps if you need to patch the hole later.
Step 2: Build or Install the Wall Sleeve
If you’re using a pre-made sleeve, follow the manufacturer’s instructions. Most slide into the opening and are secured with screws. If you’re building one, cut a frame from exterior-grade plywood to match the AC unit’s dimensions. The sleeve should extend slightly beyond the opening on both sides. Secure it to the studs with wood screws. Make sure it’s level and plumb—use a level to check both horizontally and vertically.
Step 3: Install the Air Conditioner
Now, carefully lift the AC unit and slide it into the sleeve. Most units have side panels or brackets that extend to secure them. Tighten the screws until the unit is snug but not over-tightened (which can warp the housing). Make sure the unit is tilted slightly backward (about 1/4 inch) so condensation drains outside. This is critical—without the tilt, water can pool inside the unit or drip into your home.
Step 4: Seal the Gaps
Use spray foam or foam tape to fill any gaps between the sleeve and the AC unit. On the outside, apply silicone caulk around the edges to prevent water and air leaks. If you’re in a rainy climate, consider adding a small roof or awning above the unit to protect it from direct rain.
Step 5: Set Up the Drainage System
Attach the drain hose to the AC’s drip tray and route it to a safe drainage point. You can use a bucket, a floor drain, or run it outside through a small hole. Secure the hose with zip ties to prevent kinks. Test the drainage by pouring a little water into the tray—make sure it flows freely.
Step 6: Power Up and Test
Plug in the unit and turn it on. Listen for odd noises, check for vibrations, and make sure the airflow is strong. Use a thermometer to verify the room is cooling. If everything works, you’re done! If not, double-check the seals, tilt, and power supply.
Common Mistakes (And How to Avoid Them)
Even with the best intentions, things can go wrong. I’ve made a few of these myself—and learned from them. Here are the most common pitfalls and how to avoid them.
Cutting the Wrong Size Opening
Too small? The unit won’t fit. Too big? Gaps cause drafts and inefficiency. Always measure twice, cut once. And leave a little extra space—you can always fill gaps with foam or wood shims.
Ignoring the Tilt
Remember: the back of the unit must be slightly lower than the front. I once installed a unit perfectly level—only to find a puddle on my floor the next day. A simple shim under the front feet fixed it.
Skipping the Drainage Setup
Condensation happens. Even in dry climates. Don’t assume “it’ll evaporate.” Set up a drain system from day one. A small leak can lead to mold, rot, and costly repairs.
Forgetting to Seal the Exterior
Rain, wind, and pests can get in if you don’t seal the outside properly. Use caulk, flashing, or even a custom cover. One summer, I found a wasp nest in my AC sleeve because I didn’t seal it well enough. Lesson learned.
Overlooking Electrical Safety
AC units draw a lot of power. Make sure your outlet is grounded and on a dedicated circuit if possible. Avoid extension cords—they can overheat and cause fires. If you’re unsure, consult an electrician.
Maintenance Tips to Keep Your AC Running Smoothly
Installation is just the beginning. To keep your wall-installed AC efficient and long-lasting, regular maintenance is key. Think of it like changing the oil in your car—small effort, big payoff.
Clean the Filters Monthly
Dirty filters reduce airflow and efficiency. Most window units have washable filters. Remove them, rinse with water, and let them dry completely before reinstalling. Do this every 3–4 weeks during peak season.
Inspect the Drain System
Check the drain hose for clogs or leaks. Flush it with a mix of vinegar and water to prevent mold and algae buildup. I do this at the start and end of every summer.
Check Seals and Insulation
Over time, foam and caulk can degrade. Inspect the seals around the sleeve every 6 months. Reapply foam or caulk as needed to maintain a tight fit.
Schedule Annual Professional Cleaning
Once a year, consider having a technician clean the coils and check refrigerant levels. This can extend the life of your unit and improve performance. It costs $75–$150, but it’s worth it.
Winterize the Unit
If you live in a cold climate, remove the AC in winter or cover it with a weatherproof cover. This protects it from snow, ice, and debris.
Data Table: Wall vs. Window AC Installation Comparison
| Factor | Window Installation | Wall Installation |
|---|---|---|
| Ease of Install | Very Easy (no tools needed) | Moderate (requires cutting, sealing) |
| Energy Efficiency | Good (if sealed well) | Better (less air leakage) |
| Noise Level | Moderate (unit in living space) | Lower (unit partially outside) |
| Drainage Setup | Simple (built-in) | Requires planning (hose or drain) |
| Reversibility | Fully reversible | Semi-reversible (patch wall) |
| Best For | Standard windows, rentals | Non-standard windows, permanent setups |
Installing a window air conditioner in a wall isn’t just about beating the heat—it’s about creating a comfortable, efficient, and permanent cooling solution. It’s not always the easiest path, but for many homes, it’s the most practical. Whether you’re in a rental, a historic building, or just tired of window units falling out during storms, a wall installation can be a smart, long-term investment.
The key is to plan carefully, measure accurately, and respect the process. Take your time, use the right tools, and don’t skip the sealing and drainage steps. And remember: every cut, every screw, every bead of caulk brings you one step closer to a cooler, quieter home. I can’t tell you how many times I’ve walked into my living room on a 95-degree day and felt nothing but relief—thanks to that little AC unit hidden in the wall. If I can do it, so can you. Just stay safe, stay patient, and enjoy the cool.
Frequently Asked Questions
Can I install a window air conditioner in a wall instead of a window?
Yes, you can install a window air conditioner in a wall if the wall has proper structural support and ventilation. This method is common in homes without suitable windows, but ensure the unit is designed for through-the-wall installation to avoid safety risks.
How to install window air conditioner in a wall safely?
To install safely, use a wall sleeve or metal enclosure to support the unit and prevent shifting. Always check local building codes and ensure the wall cavity is clear of electrical wires or pipes before cutting.
Do I need special tools to install a window AC unit in a wall?
Basic tools like a stud finder, level, jigsaw, and drill are sufficient for most installations. A wall sleeve kit (often sold separately) is recommended to secure the unit and insulate the opening.
What are the risks of installing a window air conditioner in a wall?
The main risks include improper sealing (leading to air leaks), inadequate support (causing the unit to fall), and reduced efficiency if ventilation is blocked. Always follow the manufacturer’s guidelines to avoid these issues.
How do I seal a window air conditioner installed in a wall?
Use foam insulation strips or weatherstripping around the unit’s edges to seal gaps and prevent drafts. For added protection, apply silicone caulk along the exterior trim to block moisture and pests.
Can I convert a window AC unit for in-wall installation?
Some window AC units can be adapted for in-wall use with a compatible wall sleeve kit, but check the manufacturer’s specifications first. Units not designed for walls may overheat or lack proper drainage.