
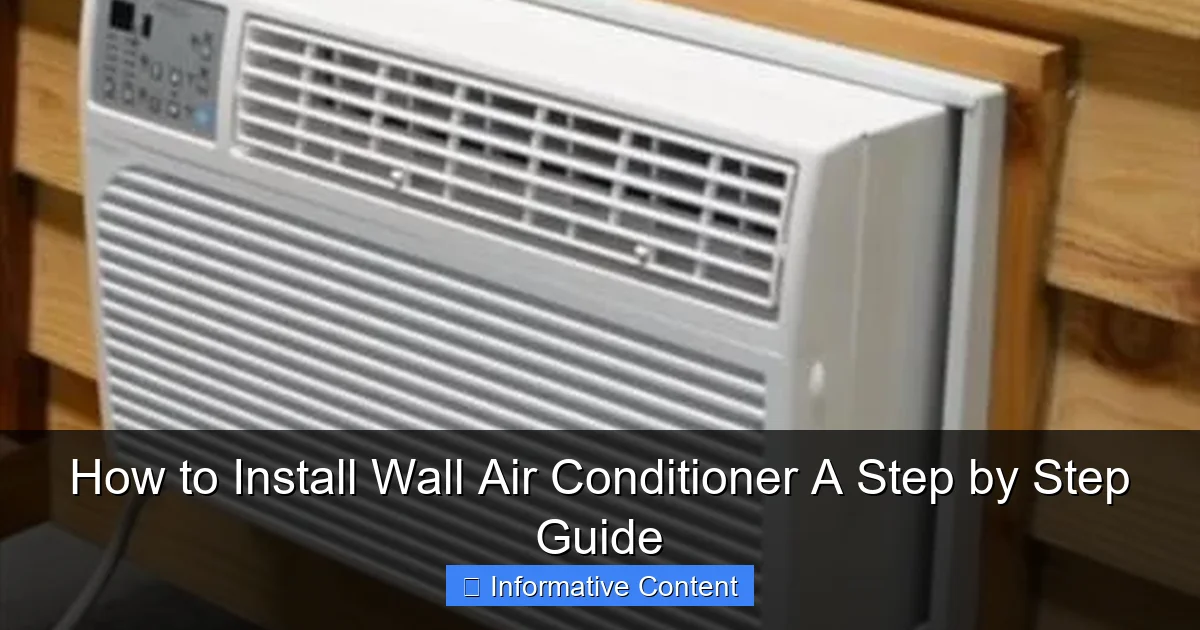
Featured image for how to install wall air conditioner
Image source: hvachowto.com
Installing a wall air conditioner requires careful planning and precision to ensure optimal performance and safety. Begin by selecting the right unit size, preparing the wall opening, and securely mounting the sleeve before sliding in the AC and sealing gaps to prevent air leaks. Always follow manufacturer instructions and turn off power before wiring for a safe, efficient setup.
Key Takeaways
- Measure carefully: Ensure proper wall opening size for a secure fit.
- Turn off power: Always disconnect electricity before starting installation.
- Seal gaps: Use foam tape to prevent air leaks and improve efficiency.
- Check slope: Tilt unit slightly outward for proper drainage.
- Secure firmly: Anchor brackets tightly to support the AC’s weight.
- Test operation: Run the unit and verify cooling before finishing.
📑 Table of Contents
- Why Installing a Wall Air Conditioner is a Game-Changer
- Choosing the Right Wall Air Conditioner for Your Space
- Tools and Materials You’ll Need (and Where to Get Them)
- Preparing the Installation Site (The Critical First Step)
- Step-by-Step Installation Process (From Cutting to Sealing)
- Troubleshooting Common Installation Issues (And How to Fix Them)
- Data Table: Wall Air Conditioner Installation Checklist
- Final Thoughts: Enjoy Your Cool, DIY Victory
Why Installing a Wall Air Conditioner is a Game-Changer
Let’s be real—there’s nothing worse than sweltering in your own home during a heatwave. I remember one summer, my old window unit gave up the ghost, and I was left sweating through my clothes while trying to watch TV. That’s when I decided to upgrade to a wall air conditioner. Not only did it solve my cooling woes, but it also freed up window space and looked sleeker. If you’re thinking about making the switch, you’re in the right place. Installing a wall air conditioner might seem like a big task, but with the right tools and a little patience, it’s totally doable—even if you’re not a DIY pro.
This guide will walk you through every step of the process, from choosing the right unit to sealing up that hole in your wall like a pro. Whether you’re a first-timer or just need a refresher, I’ll share practical tips, real-world examples, and a few “oops” moments I’ve learned from along the way. By the end, you’ll feel confident tackling this project yourself—and maybe even impress your friends with your newfound skills.
Choosing the Right Wall Air Conditioner for Your Space
Size Matters: BTUs and Room Dimensions
Before you start drilling holes, you need to pick the right wall air conditioner for your room. It’s not just about the price or brand—it’s about matching the unit’s cooling power (measured in BTUs) to your room size. Too small, and it’ll struggle to keep up; too large, and it’ll cycle on and off too quickly, wasting energy and leaving your space clammy.
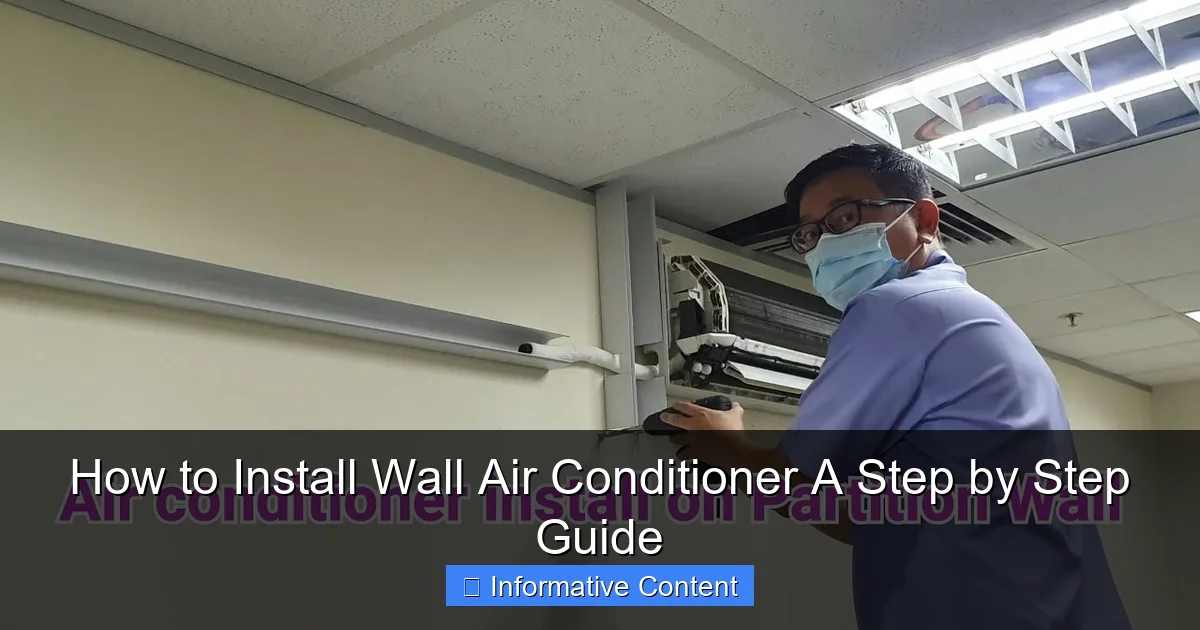
Visual guide about how to install wall air conditioner
Image source: i.ytimg.com
- Small rooms (100-250 sq ft): 5,000-6,000 BTUs. Perfect for a bedroom or home office.
- Medium rooms (250-400 sq ft): 7,000-8,000 BTUs. Ideal for a living room or large bedroom.
- Large rooms (400-600 sq ft): 9,000-12,000 BTUs. Great for open-concept spaces or basements.
For example, my 12×15 ft bedroom needed a 7,000-BTU unit. I initially considered a 10,000-BTU model but realized it would cool too quickly and shut off before dehumidifying properly. A pro tip: Measure your room’s dimensions and check the manufacturer’s BTU recommendations—they’re usually spot-on.
Types of Wall Air Conditioners
Not all wall units are the same. Here’s a quick breakdown:
- Through-the-wall units: Permanent installation with the back sticking outside. Best for long-term cooling and quieter operation (since the noisy compressor is outside). Example: LG LW1017ERSM (10,000 BTU).
- Wall sleeve models: Slide into a pre-installed sleeve (common in apartments). Easier to remove or replace later. Example: Frigidaire FFRA082WA1.
- Ductless mini-splits: More efficient and quieter but pricier and require a pro for refrigerant line installation. Not covered here, but worth considering if you’re renovating.
I went with a through-the-wall model because I wanted a permanent solution. But if you rent or plan to move soon, a sleeve-style unit might be smarter. Always check your building’s rules if you’re in an apartment—some HOA’s restrict wall modifications.
Key Features to Look For
Don’t get distracted by flashy features. Focus on what matters:
- Energy Efficiency Ratio (EER): Aim for 10+ for lower energy bills. The higher, the better.
- Noise level: Look for decibel (dB) ratings. Under 60 dB is quiet (like a normal conversation).
- Thermostat and controls: Digital thermostats are more accurate than dials. Bonus if it has a remote or app control.
- Installation kit: Some units include a sleeve, sealant, or mounting hardware. Others don’t—check the box!
When I bought my LG unit, I almost missed that it didn’t include a mounting bracket. A quick call to customer service saved me a trip to the hardware store. Lesson learned: Always read the fine print.
Tools and Materials You’ll Need (and Where to Get Them)
Basic Tools for a DIY Job
You don’t need a fully stocked workshop, but these basics are non-negotiable:
- Power drill and drill bits: For making pilot holes and securing screws. A cordless drill is easier to handle.
- Jigsaw or reciprocating saw: To cut the wall opening. A jigsaw gives cleaner lines, but a reciprocating saw is faster for thick walls.
- Tape measure and level: Precision is key. A laser level helps, but a bubble level works fine.
- Stud finder: Avoid cutting into structural supports. I once accidentally hit a stud and had to patch the hole—not fun.
- Pencil and marker: For outlining the cut and marking drill points.
- Safety gear: Safety glasses, gloves, and a dust mask. Drywall dust is no joke.
Pro tip: Rent a jigsaw from your local hardware store if you don’t own one. They’re cheaper than buying for a one-time project.
Materials and Supplies Checklist
Here’s what else you’ll need (most can be found at Home Depot, Lowe’s, or online):
- Wall air conditioner unit (with installation manual): The manual is your bible. Keep it handy.
- Wall sleeve (if not included): Prevents drafts and supports the unit. Example: Koldfront WAC12001W comes with one.
- Mounting brackets or frame: Secures the unit to the wall. Some kits include these.
- Exterior-grade sealant (silicone or butyl tape): For weatherproofing. I like GE Silicone II—it’s durable and easy to apply.
- Insulation foam (optional): For sealing gaps around the sleeve. Great for older homes with drafty walls.
- Wood shims (optional): For leveling the unit if your wall isn’t perfectly flat.
When I installed my unit, I forgot to buy sealant and had to run to the store mid-project. Save yourself the hassle—double-check your list before starting.
Where to Buy and Budgeting Tips
You can buy everything at a big-box store, but compare prices:
- Units: $300-$1,500, depending on BTUs and features.
- Tools: Borrow from a friend or rent. A basic drill costs $50+, but a rental is $15/day.
- Materials: $50-$200 (sealant, sleeve, insulation).
Total cost for a DIY job: $400-$800. Hiring a pro? Expect to pay $200-$500 extra for labor. If you’re handy, DIY is the way to go.
Preparing the Installation Site (The Critical First Step)
Pick the Perfect Spot
Not every wall is created equal. Here’s how to choose wisely:
- Near an electrical outlet: The unit needs a dedicated 115V or 230V circuit (check the manual). Avoid extension cords—they’re a fire hazard.
- On an exterior wall: The back of the unit must vent outside. Interior walls won’t work.
- Clear of obstructions: No furniture, curtains, or shelves blocking airflow. At least 12 inches of clearance on all sides.
- High up on the wall: Cool air sinks, so install it 12-18 inches from the ceiling.
I picked a wall behind my bed, but later realized it was too close to my nightstand. I had to rearrange furniture—lesson learned: Plan your layout first!
Check for Hidden Hazards
Before you start cutting, make sure you’re not about to hit:
- Wires or pipes: Use a stud finder with a wire/pipes mode. I once hit a water pipe—luckily, it was just a small leak, but it still cost $200 to fix.
- Structural studs: If you hit a stud, you’ll need to notch it (not ideal). Better to adjust the location.
- Insulation: Some walls have dense insulation. A reciprocating saw makes quick work of it.
Pro tip: Turn off the power to the room at the breaker box. Even if you’re not cutting near outlets, it’s safer.
Measure and Mark the Opening
Follow these steps:
- Measure the wall sleeve or unit’s dimensions (usually in the manual).
- Use a level to draw a rectangle on the wall. For a 10,000-BTU unit, the opening is typically 26” x 15.5”.
- Double-check the measurements. A 1/2-inch error can mean a wobbly unit or gaps that leak air.
- Drill a pilot hole in one corner. This lets you insert the jigsaw blade.
I used a laser level for this step, but a regular level and pencil worked fine. Just take your time—rushing leads to crooked cuts.
Step-by-Step Installation Process (From Cutting to Sealing)
Cutting the Wall Opening
Now the fun begins:
- Put on safety gear. Drywall dust is nasty.
- Insert the jigsaw blade into the pilot hole. Cut slowly along the lines. If you hit resistance, stop—you might be cutting a stud or pipe.
- Remove the drywall or siding. Save the piece! You’ll need it later to patch the interior.
- Check the opening size. The sleeve or unit should fit snugly.
When I cut my opening, I accidentally went 1/4 inch too wide on one side. I fixed it by adding a thin wood shim before installing the sleeve. Not perfect, but it worked.
Installing the Sleeve (If Applicable)
For sleeve models:
- Slide the sleeve into the opening. It should be flush with the exterior wall.
- Secure it with screws through the pre-drilled holes. Use a level to ensure it’s straight.
- Seal the gaps with exterior-grade silicone. I used a caulk gun—apply a thick, even bead.
If you’re using a through-the-wall unit without a sleeve, skip to the next step. But sealing is still critical!
Mounting the Air Conditioner
Here’s where it gets heavy:
- Lift the unit into the opening (or sleeve). Get a friend to help—most units weigh 70+ pounds.
- Secure it with the provided brackets or frame. Tighten the screws firmly, but don’t overdo it.
- Check for level. If it’s uneven, use shims to adjust.
- Seal around the unit’s edges with silicone. Don’t forget the top and sides—gaps cause drafts and noise.
My unit came with a mounting frame that attached to the wall with four screws. I used a stud finder to hit the studs—this gave it extra stability.
Electrical Connections
Warning: If you’re not comfortable with wiring, call an electrician. Mistakes can be deadly.
- Turn off the power at the breaker.
- Connect the unit’s wires to the outlet or circuit. Most units plug into a standard outlet, but larger models may need a dedicated line.
- Use wire nuts to secure the connections. Wrap with electrical tape for extra safety.
- Restore power and test the unit.
I lucked out—my unit had a 115V plug, so I just plugged it in. But my neighbor had to upgrade his circuit for a 230V model. It cost $300, but he saved on energy bills long-term.
Final Sealing and Insulation
This step is often overlooked, but it’s crucial for efficiency:
- Exterior: Seal all gaps with silicone. Add a drip cap (a small metal or plastic cover) over the top to prevent water from seeping in.
- Interior: Patch the drywall around the unit. I used drywall tape and joint compound, then painted it to match the wall.
- Insulation: If you have a large gap, stuff it with foam or fiberglass insulation. I used spray foam for a tight seal.
When I skipped sealing the exterior, my unit leaked during a rainstorm. A quick fix with silicone solved it—but it could’ve caused water damage.
Troubleshooting Common Installation Issues (And How to Fix Them)
Unit Won’t Turn On
Check these first:
- Power: Is the outlet working? Test with a lamp.
- Thermostat: Is it set below room temperature?
- Filter: A dirty filter can prevent startup. Clean or replace it.
- Circuit breaker: Reset it if it’s tripped.
I once spent 20 minutes troubleshooting before realizing my remote’s batteries were dead. Always check the simple stuff first!
Water Leaks or Condensation
Causes and fixes:
- Poor slope: The unit should tilt slightly (about 1/4 inch) toward the exterior. Adjust the mounting brackets.
- Clogged drain: Clear the drain hole with a pipe cleaner or compressed air.
- Damaged seal: Reapply silicone around the unit.
My unit leaked after a heavy rain because the drip cap wasn’t installed. A $10 part from Home Depot fixed it.
Excessive Noise or Vibration
Possible reasons:
- Loose mounting: Tighten all screws and brackets.
- Unlevel unit: Use shims to level it.
- Dirty fan: Clean the fan blades with a damp cloth.
I noticed a rattling sound after installation. Turns out, a loose screw was vibrating against the wall. A quick tighten solved it.
Airflow Issues
If the unit cools poorly:
- Check the filter: Clean it monthly.
- Inspect the coils: Clean with a coil cleaner if they’re dirty.
- Seal gaps: Use foam or weatherstripping around the unit.
My unit cooled slowly because I forgot to remove the plastic film from the air intake. Rookie mistake!
Data Table: Wall Air Conditioner Installation Checklist
| Task | Tools/Materials | Time Required | Difficulty Level |
|---|---|---|---|
| Measure and mark opening | Tape measure, level, pencil | 15-30 minutes | Easy |
| Cut wall opening | Jigsaw, safety gear | 30-60 minutes | Medium |
| Install sleeve (if needed) | Sleeve, screws, silicone | 30 minutes | Easy |
| Mount unit | Brackets, screws, shims | 60-90 minutes | Hard |
| Electrical connections | Wire nuts, tape | 30-60 minutes | Hard (or hire pro) |
| Seal and insulate | Silicone, foam, drywall patch | 60 minutes | Easy |
Final Thoughts: Enjoy Your Cool, DIY Victory
Installing a wall air conditioner isn’t just about staying cool—it’s about taking control of your home’s comfort. I’ll never forget the first time I turned mine on after installation. The quiet hum of the fan, the crisp air hitting my face… it was pure satisfaction. And the best part? No more sweating through summer nights.
This project isn’t without its challenges. You might hit a stud, mis-measure the opening, or spend an hour troubleshooting a leak. But every mistake is a lesson. And with this guide, you’re already ahead of the game. Remember: Take your time, follow the steps, and don’t rush the sealing—it’s the difference between a pro job and a drafty, noisy mess.
Now, go grab your tools, measure twice, and cut once. Your future cool, comfortable self will thank you. And if you ever need a reminder, just think of that first blast of cold air. It’s worth every bit of effort.
Frequently Asked Questions
How do I prepare for a wall air conditioner installation?
Start by selecting the right location on an exterior wall, ensuring it’s near an electrical outlet and free of obstructions. Measure the unit and cut the opening according to the manufacturer’s specifications, typically using a jigsaw or reciprocating saw.
Can I install a wall air conditioner myself, or do I need a professional?
While DIY installation is possible for those with basic handyman skills, hiring a professional ensures safe electrical connections and proper sealing. If you’re unsure about wiring or wall modifications, it’s best to consult a licensed technician.
What tools are needed to install a wall air conditioner?
Common tools include a level, drill, jigsaw, screwdriver, measuring tape, and safety gear. You’ll also need a mounting bracket, sealant, and possibly an electrical disconnect box, depending on local codes.
How do I ensure my wall air conditioner is properly sealed?
Apply high-quality exterior-grade caulk around the unit’s frame to prevent air leaks and water intrusion. Use foam insulation strips between the AC and wall opening for added thermal efficiency.
Is it necessary to have a dedicated circuit for a wall air conditioner?
Yes, most wall air conditioners require a dedicated 240-volt circuit to handle their power demands safely. Check the unit’s manual and local electrical codes to confirm requirements before installation.
What are common mistakes to avoid when installing a wall air conditioner?
Skipping the level check, improper sealing, or ignoring electrical safety protocols can reduce efficiency and cause damage. Always follow the manufacturer’s instructions and local building codes for a secure, long-lasting installation.