
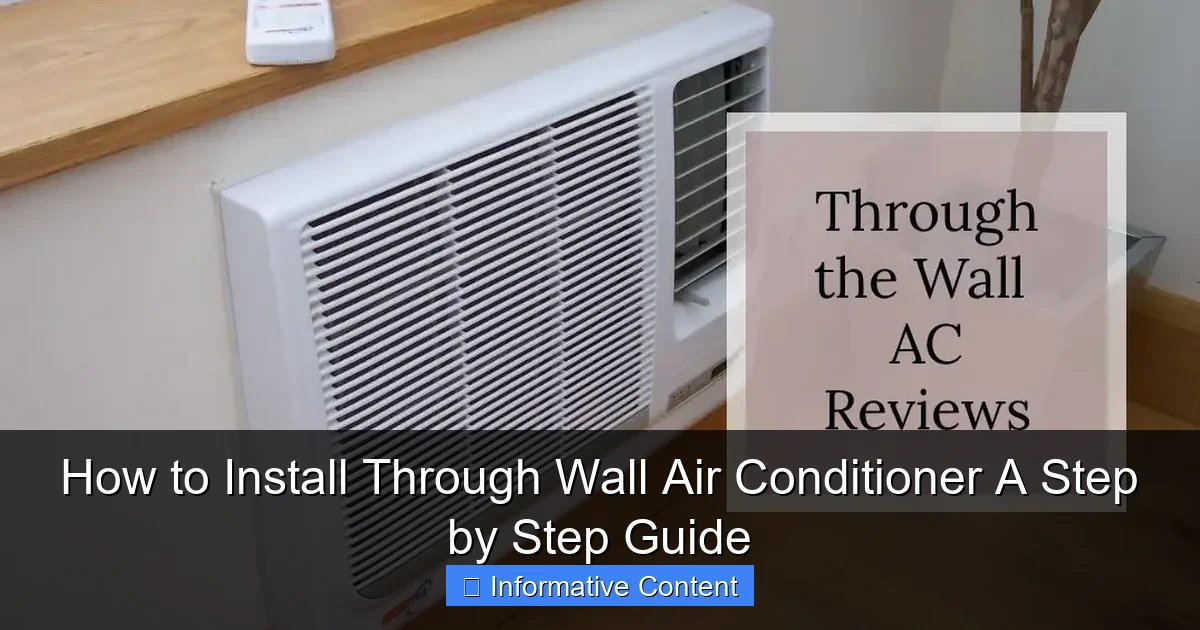
Featured image for how to install through wall air conditioner
Image source: pickhvac.com
Installing a through-wall air conditioner requires precise wall preparation and secure unit mounting to ensure optimal performance and energy efficiency. This guide walks you through cutting the opening, sealing gaps, and connecting electrical wiring safely, making it easy to enjoy cool, quiet comfort without professional help.
Key Takeaways
- Measure carefully: Ensure the wall opening matches the AC unit’s dimensions for a secure fit.
- Choose the right location: Pick a spot near an electrical outlet and away from direct sunlight.
- Seal all gaps: Use weatherproof caulk or foam to prevent air leaks and improve efficiency.
- Secure the unit properly: Anchor the air conditioner firmly to avoid vibrations and movement.
- Check local codes: Verify electrical and structural requirements before installation.
- Test after installation: Run the AC to confirm proper operation and cooling performance.
📑 Table of Contents
- How to Install Through Wall Air Conditioner A Step by Step Guide
- 1. Understanding Through Wall Air Conditioners: Types and Key Features
- 2. Tools and Materials You’ll Need
- 3. Preparing the Wall: Measuring, Cutting, and Safety Checks
- 4. Installing the Wall Sleeve and Air Conditioner
- 5. Sealing, Insulating, and Finishing Touches
- 6. Maintenance and Troubleshooting Tips
How to Install Through Wall Air Conditioner A Step by Step Guide
Let’s be honest—summer heat can turn your cozy home into a sauna. If you’re like me, you’ve probably spent countless evenings wiping sweat off your brow, wishing for a cool breeze. That’s when I decided to install a through wall air conditioner. It wasn’t as intimidating as I thought, and the relief was instant. Whether you’re a DIY enthusiast or someone who just wants to avoid the cost of a professional installer, this guide is for you.
Installing a through wall air conditioner is a practical way to cool specific rooms without the hassle of window units or the expense of central air. These units are designed to fit snugly into a wall sleeve, offering a permanent, clean, and efficient cooling solution. But before you grab your tools, there are a few things you need to know. From measuring the right space to ensuring proper drainage and electrical safety, every step matters. I’ll walk you through the entire process—what worked for me, what I wish I’d done differently, and how you can avoid common pitfalls. By the end of this guide, you’ll feel confident tackling this project yourself.
1. Understanding Through Wall Air Conditioners: Types and Key Features
Before diving into installation, it’s important to understand what makes a through wall air conditioner different from other cooling units. These systems are built to be installed in an exterior wall, with the condenser (the noisy, hot side) outside and the evaporator (the cool, quiet side) inside. They’re ideal for apartments, offices, or homes where window units aren’t practical or allowed.
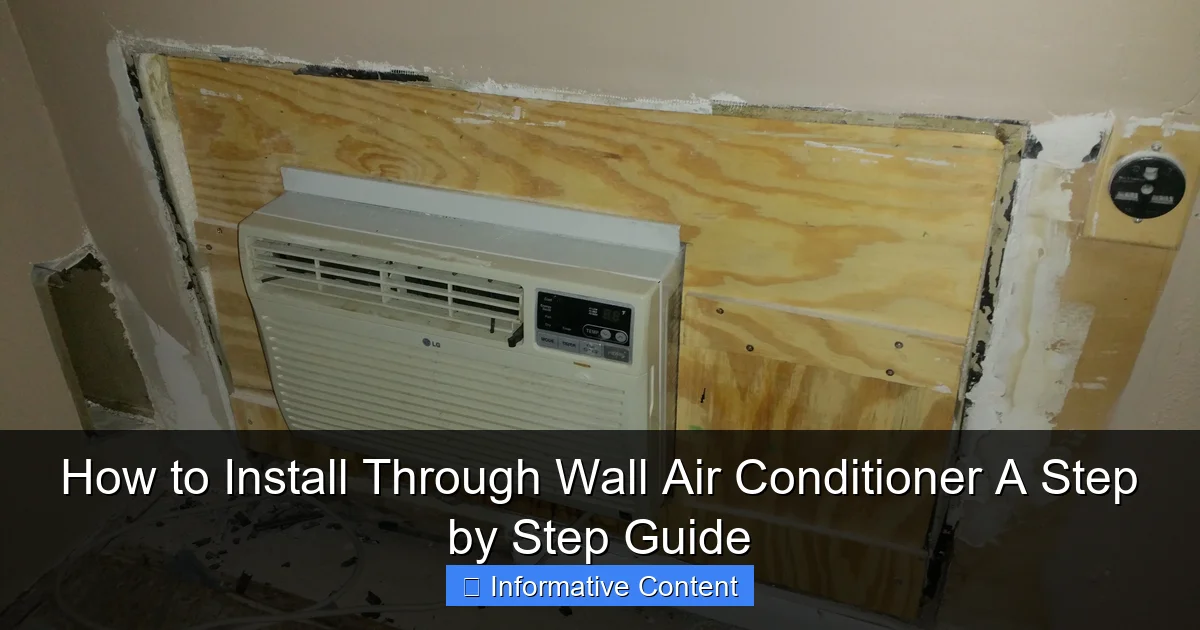
Visual guide about how to install through wall air conditioner
Image source: askmehelpdesk.com
Types of Through Wall Air Conditioners
There are two main types: ductless mini-split systems and self-contained through wall units.
- Ductless Mini-Splits: These consist of an outdoor compressor and an indoor air handler connected by refrigerant lines. They’re more efficient and quieter but require professional installation for the refrigerant lines and electrical work.
- Self-Contained Units: These are all-in-one systems with both the condenser and evaporator in a single unit. They’re easier to install and perfect for DIYers. Most people opt for this type because they plug into a standard outlet (though some need 240V).
When I chose my unit, I went with a self-contained 10,000 BTU model. It had a built-in thermostat, remote control, and a washable air filter—all features that made it feel like a smart investment. I also checked the Energy Efficiency Ratio (EER)—mine was 11.5, which is solid for its class.
Key Features to Consider
When picking your through wall air conditioner, keep these features in mind:
- BTU Rating: Match the unit to your room size. For example, 10,000 BTUs cools about 400–500 sq ft. Too small, and it’ll struggle; too big, and it’ll cycle on and off too often.
- Voltage: Most units run on 115V, but larger ones (14,000+ BTUs) may need 230V. Check your circuit breaker panel—don’t overload a 15-amp circuit.
- Wall Sleeve Compatibility: Some units come with a sleeve; others don’t. If your wall already has a sleeve, make sure the new unit fits it. Standard sleeve sizes are 24″ x 14″ or 26″ x 15″.
- Drainage Options: Look for a unit with a built-in condensate drain or a pump if you’re in a humid climate. No one wants water dripping inside!
- Smart Features: Wi-Fi, app control, and programmable timers are nice-to-haves but not essential.
Pro Tip: I almost bought a unit without checking the sleeve depth. My wall was 7 inches thick, but the unit needed 8 inches. I caught it just in time. Always measure your wall thickness before ordering!
2. Tools and Materials You’ll Need
You don’t need a full workshop, but having the right tools makes the job safer and faster. Here’s what I gathered before starting:
- Measuring tape and level – for precision
- Jigsaw or reciprocating saw – to cut the wall opening (if no sleeve exists)
- Circular saw or handsaw – for cutting wood framing or siding
- Drill with masonry and wood bits – for securing the sleeve and unit
- Hammer and pry bar – to remove drywall or siding
- Safety gear: goggles, gloves, ear protection, dust mask
- Caulking gun and exterior-grade sealant – to weatherproof the outside
- Insulation foam – for sealing gaps
- Screwdrivers and wrenches – for unit mounting
- Stud finder – to avoid hitting studs or pipes
- Shims – to level the sleeve
- Exterior-grade screws or bolts – for securing the sleeve
- Extension cord (temporary) – for testing before final installation
One thing I wish I had: a second pair of hands. The unit was heavy (about 70 lbs), and holding it in place while drilling was tricky. If you can, recruit a friend or use a temporary support stand.
Optional but Helpful Tools
- Vacuum – to clean up sawdust and debris
- Shop vac – for wet cleanup if you cut into insulation
- Laser level – for perfect alignment
- Moisture meter – to check for water damage behind drywall
I also picked up a wall sleeve kit (around $50–$100) from my local hardware store. It included brackets, foam insulation, and a cover—worth every penny for a clean finish.
3. Preparing the Wall: Measuring, Cutting, and Safety Checks
This step is where many DIYers go wrong—rushing through without proper prep. Take your time here. A misaligned cut or weak support can lead to water leaks, drafts, or even a falling unit.
Step 1: Choose the Right Location
Pick a spot on an exterior wall that:
- Is at least 12 inches from any corner (to avoid studs)
- Has access to an electrical outlet (within 6 feet)
- Is clear of pipes, wires, or ductwork (use a stud finder with AC detection)
- Is shaded if possible (to reduce cooling load)
I chose the wall behind my couch—it was the sunniest spot, but I added a curtain to block afternoon sun. The outlet was 4 feet away, so I knew I could reach it without an extension cord.
Step 2: Measure and Mark the Cutout
Most through wall units need a cutout of about 24″ wide x 14″ high, but check your unit’s manual. I measured twice, then used a level to draw a precise rectangle. I also marked the center point so I could align the sleeve perfectly.
Pro Tip: Use a pencil and a long straightedge. A wobbly line leads to a wobbly cut!
Step 3: Check for Obstacles
Before cutting, I used my stud finder to scan the area. I hit a stud on the left side, so I shifted the cutout 6 inches to the right. I also checked for wires—thankfully, none were in the way. If you’re unsure, turn off the power and use a non-contact voltage tester.
Step 4: Cut the Opening
This was the scariest part for me—making the first cut. I started by drilling pilot holes in each corner, then used a jigsaw to cut along the lines. For the exterior, I cut through siding and sheathing with a circular saw. Inside, I removed drywall and insulation.
- Inside cut: Use a drywall saw or utility knife. Cut slowly to avoid damaging pipes or wires.
- Outside cut: Work from the top down to keep debris out of the cut. Wear goggles—sawdust flies everywhere!
I left a 1/4-inch gap around the opening for shims and insulation. Too tight, and you can’t level the sleeve; too loose, and you’ll have drafts.
Step 5: Prepare the Sleeve
If you’re using a new sleeve, install it now. Slide it into the opening and use a level to check plumb and level. Shim the sides with wooden or plastic shims to keep it straight. Secure it with screws through the pre-drilled holes.
Pro Tip: I sealed the sleeve’s outer flange with exterior-grade caulk before installing. This prevented water from seeping behind it.
4. Installing the Wall Sleeve and Air Conditioner
Now comes the main event—installing the sleeve and unit. This step is all about precision and patience.
Step 1: Insulate and Seal the Sleeve
Before inserting the unit, I wrapped the sleeve with foam insulation tape (included in my kit). I also added a thin bead of sealant around the inside edge to block drafts. If your sleeve has a drain pan, make sure it slopes slightly toward the outside.
Step 2: Slide in the Unit
This is where I wished I had a helper. I lifted the unit (it’s heavy!) and carefully slid it into the sleeve. The front panel should sit flush with the wall. If it doesn’t, adjust the sleeve with shims.
Once in, I checked for level and plumb. Even a slight tilt can cause condensation to drip inside instead of draining outside.
Step 3: Secure the Unit
Most units have mounting brackets on the sides. I aligned them with the sleeve and drilled screws through the pre-drilled holes. I didn’t overtighten—just snug enough to hold it in place.
If your unit has a front panel, attach it now. Mine snapped into place with a satisfying click.
Step 4: Electrical Connection
This is critical. Turn off the power at the breaker before touching any wires. Most units plug into a standard outlet, but if yours requires hardwiring, call an electrician. I was lucky—my unit had a 6-foot cord, and the outlet was just behind the unit.
Pro Tip: Use a surge protector for extra safety. Power fluctuations can damage the compressor.
Step 5: Test the Unit
Before sealing everything, I plugged it in and turned it on. It powered up, the fan started, and cool air blew into the room. I checked for unusual noises or vibrations—none. The condensate drain dripped water outside, just as it should.
I ran it for 15 minutes to make sure it cooled properly. Success!
5. Sealing, Insulating, and Finishing Touches
You’re almost done! This step ensures your unit is energy-efficient and weatherproof.
Step 1: Seal Gaps Around the Sleeve
I used expanding foam to fill gaps between the sleeve and wall. I applied it sparingly—too much foam can warp the sleeve. After it dried, I trimmed the excess with a utility knife.
On the outside, I caulked the seam between the sleeve flange and siding. I used a high-quality, flexible sealant that could handle temperature changes.
Step 2: Install the Exterior Cover (If Included)
Some sleeves come with a plastic or metal cover. I snapped mine on—it gave the unit a clean, finished look and protected the condenser from debris.
Step 3: Add Interior Trim (Optional)
For a polished look, I added a wooden trim ring around the unit. It covered the foam and made the installation look professional. I painted it to match the wall.
Step 4: Clean Up
I vacuumed the room and wiped down the unit. I also cleaned the air filter (it was dusty from installation). A clean filter improves airflow and efficiency.
Data Table: Common Through Wall AC Sizes and Requirements
| BTU Range | Room Size (sq ft) | Voltage | Wall Cutout (W x H) | Sleeve Depth (in) | Amps |
|---|---|---|---|---|---|
| 8,000–10,000 | 300–450 | 115V | 24″ x 14″ | 7–8 | 6–9 |
| 12,000–14,000 | 500–700 | 115V or 230V | 26″ x 15″ | 8–10 | 10–12 |
| 18,000+ | 700+ | 230V | 28″ x 16″ | 10–12 | 12–15 |
Note: Always check your unit’s manual for exact specs. Wall thickness and insulation affect performance.
6. Maintenance and Troubleshooting Tips
Now that your through wall air conditioner is installed, keep it running smoothly with regular care.
Monthly Maintenance
- Clean the filter: Wash it with soap and water, then let it dry completely. A clogged filter reduces airflow and efficiency.
- Check the condensate drain: Pour a cup of bleach down the drain every few months to prevent mold.
- Inspect seals and insulation: Look for cracks or gaps. Reseal as needed.
Seasonal Tasks
- Winter: Cover the outside unit with a breathable cover to protect it from snow and debris.
- Spring: Remove the cover, clean the condenser coils with a soft brush, and check for obstructions.
Common Issues and Fixes
- Unit won’t turn on: Check the outlet, breaker, and power cord. Test with a voltage tester.
- Water dripping inside: The sleeve may be tilted inward. Adjust the shims or re-caulk the seal.
- Not cooling enough: Clean the filter, check for obstructions, and ensure the thermostat is set correctly.
- Noisy operation: Tighten loose screws or panels. If it’s a rattling sound, the compressor may be failing—call a pro.
I had a minor issue with condensation dripping inside after a heavy rain. I found that the sealant on the outside had cracked. A quick re-caulk fixed it.
Installing a through wall air conditioner isn’t a walk in the park, but it’s totally doable with the right prep. The key is patience—measure twice, cut once, and don’t rush the sealing steps. The result? A cool, quiet, and efficient room that makes summer bearable.
Looking back, I’m glad I tackled this myself. Not only did I save $300–$500 on labor, but I also learned a ton about home systems. Plus, there’s a real sense of pride in saying, “I installed that.” If I can do it, so can you. Just take it step by step, stay safe, and enjoy the cool air!
Frequently Asked Questions
What tools do I need to install a through wall air conditioner?
To install a through wall air conditioner, you’ll need a drill, level, measuring tape, screwdriver, wrench, and a saw (if cutting a new opening). Having a helper is also recommended for safely handling the unit during installation.
Can I install a through wall air conditioner myself, or do I need a professional?
Many homeowners can install a through wall air conditioner themselves if they’re comfortable with basic tools and following instructions. However, if electrical work or structural modifications are needed, hiring a licensed professional is safer and ensures compliance with local codes.
How do I choose the right size through wall air conditioner for my room?
Select a through wall air conditioner based on the room’s square footage and insulation quality. Use the manufacturer’s BTU guide—typically 20 BTUs per square foot—and consider factors like sunlight exposure and ceiling height for optimal cooling.
What are the steps to safely cut a wall opening for the air conditioner?
First, locate wall studs and mark the opening according to the unit’s specifications. Use a reciprocating saw to carefully cut through drywall and framing, ensuring the opening is level and properly supported before inserting the air conditioner sleeve.
Do I need to seal the around the through wall air conditioner after installation?
Yes, sealing around the through wall air conditioner is essential to prevent air leaks and moisture intrusion. Use weatherproof caulk or foam insulation around the exterior and interior edges of the sleeve for an airtight, energy-efficient seal.
How do I connect the electrical wiring for a through wall air conditioner?
Most through wall units require a dedicated 220-240V circuit. Turn off power at the breaker, run the correct gauge wire to the unit, and connect it according to the manufacturer’s wiring diagram. If unsure, consult an electrician to ensure safe and code-compliant installation.