
Featured image for how to install split air conditioner
Image source: wikihow.com
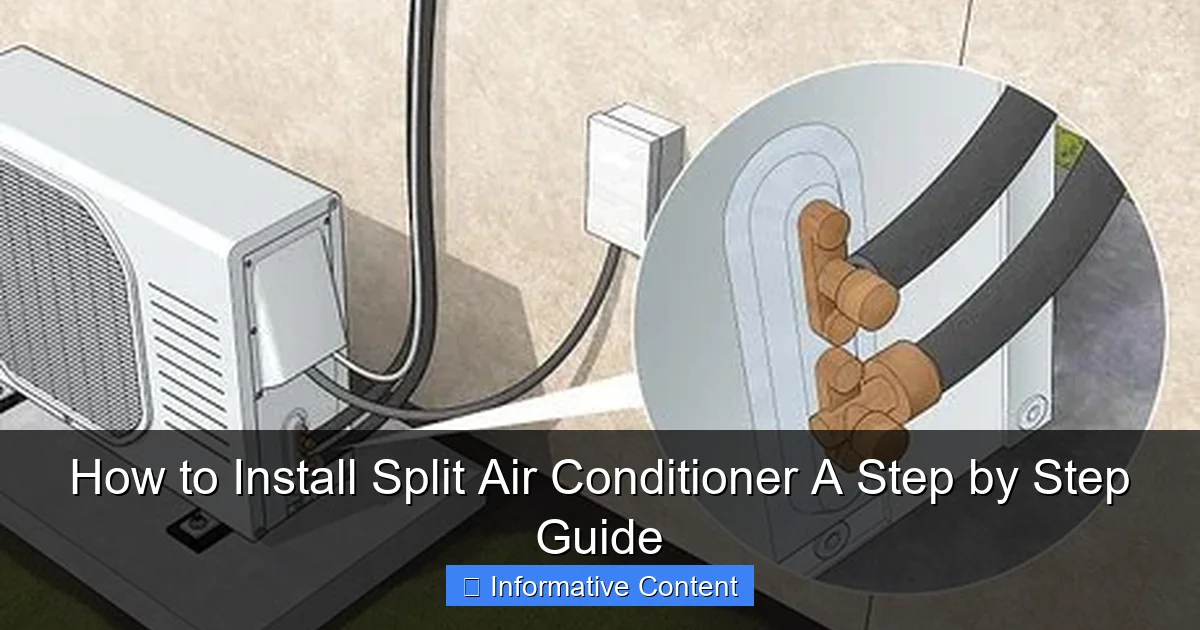
Installing a split air conditioner requires precise placement, proper mounting, and correct refrigerant line connection to ensure optimal performance and efficiency. Follow a systematic approach: mount the indoor unit high on an exterior wall, securely install the outdoor unit on a stable surface, and carefully connect the refrigerant lines, electrical wiring, and drainage hose while ensuring a slight downward slope for condensate flow. Always adhere to manufacturer guidelines and local codes—or hire a certified technician for refrigerant handling and final testing—to guarantee safety and peak cooling performance.
Key Takeaways
- Plan carefully: Choose optimal indoor and outdoor unit locations before starting.
- Secure mounting: Use a level and strong brackets for safe indoor unit installation.
- Drill precisely: Create a 3-inch hole for refrigerant lines and electrical wiring.
- Connect lines correctly: Match flare nuts to fittings and torque to spec.
- Vacuum the system: Remove air and moisture to prevent future issues.
- Test thoroughly: Run and inspect the system before finalizing installation.
📑 Table of Contents
- How to Install Split Air Conditioner: A Step-by-Step Guide
- 1. Gather Your Tools and Materials
- 2. Choose the Right Location for Indoor and Outdoor Units
- 3. Prepare the Wall and Drill the Hole
- 4. Mount the Indoor and Outdoor Units
- 5. Connect Refrigerant Lines, Electrical Wiring, and Drainage
- 6. Vacuum the System, Test, and Commission
How to Install Split Air Conditioner: A Step-by-Step Guide
Imagine it’s the peak of summer, and your old air conditioner finally gives up. The heat is relentless, and you’re sweating even while sitting still. You’ve just bought a shiny new split air conditioner, but now comes the daunting task of installing it. Don’t worry — you’re not alone. Installing a split AC might seem like a job for the pros, but with the right tools, a little patience, and this guide, it’s totally doable. I remember my first attempt at installing one — I was nervous, fumbled with the drill, and nearly dropped the indoor unit. But after a few deep breaths and a YouTube tutorial, I got it done. And so can you.
Split air conditioners are a popular choice for homes and offices because they’re energy-efficient, quiet, and offer powerful cooling. Unlike window units, split systems separate the noisy compressor (outside) from the air-handling unit (inside), giving you peace and comfort. But the key to enjoying these benefits is a proper installation. A poorly installed unit can leak refrigerant, vibrate excessively, or even stop working altogether. That’s why I’m sharing this step-by-step guide — based on real-world experience — to help you install your split AC safely, correctly, and without unnecessary stress. Whether you’re a DIY enthusiast or just want to understand what goes into the process, this guide has you covered.
1. Gather Your Tools and Materials
Before you even touch the AC units, preparation is everything. Rushing into the installation without the right tools is like trying to bake a cake without measuring cups — messy and frustrating. Here’s what you’ll need to get started.
Visual guide about how to install split air conditioner
Image source: wikihow.com
Essential Tools and Supplies
- Drill with masonry and metal bits – For making holes in walls and mounting brackets.
- Stud finder (optional but helpful) – To locate wall studs for secure mounting.
- Measuring tape and level – Accuracy is critical for alignment and drainage.
- Adjustable wrench and spanners – For tightening refrigerant line connections.
- Pipe cutter or hacksaw – To cut copper refrigerant lines if needed.
- Vacuum pump – To remove air and moisture from the refrigerant lines (don’t skip this!).
- Manifold gauge set – For checking pressure and charging refrigerant (if required).
- Insulated copper pipes (usually included with the AC) – For refrigerant flow between units.
- Drain pipe (PVC or rubber) – For condensate water removal.
- Electrical wire (if not pre-wired) – Must match the AC’s voltage and amperage.
- Wall sleeve or insulation foam – To seal the hole and prevent air leaks.
- Safety gear – Gloves, goggles, and a mask (especially when drilling).
Check the Manufacturer’s Kit
Most split ACs come with a mounting kit that includes brackets, screws, rubber gaskets, and sometimes even a pre-cut wall sleeve. Open the box and verify everything is there. I once opened a unit only to find a missing bracket — it delayed my project by two days! Also, check the user manual. It will list the exact tools required and any special instructions for your model. Some high-end units even include a vacuum pump and manifold set, which is a big help.
Pro Tip: Rent or Borrow Specialized Tools
If you don’t own a vacuum pump or manifold gauge, don’t buy them just for one job. Rent them from a local hardware store. I’ve seen people try to skip the vacuum step — big mistake. Moisture in the refrigerant lines can freeze and damage the compressor. A 24-hour rental costs less than $30 and saves you hundreds in potential repairs.
2. Choose the Right Location for Indoor and Outdoor Units
Location matters — a lot. Picking the wrong spot can lead to poor airflow, drainage issues, or even structural damage. Let’s break it down.
Indoor Unit: Where to Mount It
- Height: Mount the indoor unit at least 7-8 feet above the floor. This ensures cool air circulates evenly and doesn’t just blow at your ankles.
- Distance from ceiling: Leave about 6-8 inches between the top of the unit and the ceiling. This allows for proper airflow and prevents condensation buildup.
- Avoid direct sunlight and heat sources: Don’t install it near a window, stove, or heater. Heat can trick the AC into working harder than needed.
- Clearance: Ensure at least 12 inches of space on all sides for airflow. I once installed a unit too close to a bookshelf — it kept short-cycling and never cooled the room properly.
- Drainage slope: The unit must be tilted slightly (about 1-2 degrees) toward the drain pipe side. Use a level to check this. No slope means water will pool inside and leak.
Outdoor Unit: Placement Tips
- Ventilation: Place it where air can flow freely on all sides. Avoid enclosed spaces like balconies with solid railings. At least 12-18 inches of clearance is ideal.
- Shade: While the unit is designed for outdoor use, keeping it in shade (like under an overhang) improves efficiency and extends lifespan.
- Stable surface: Use a concrete pad or metal stand. Never place it directly on soft ground — it can sink and tilt, causing vibration and noise.
- Distance from indoor unit: Keep the refrigerant lines as short as possible. Most manufacturers allow up to 50 feet, but longer lines reduce efficiency. I recommend under 30 feet for best performance.
- Noise: If you’re installing it near a bedroom or shared wall, consider a noise-reducing pad or enclosure (but ensure airflow isn’t blocked).
Example: Balcony vs. Side Wall
Say you live in an apartment. A balcony might seem convenient, but if it’s narrow and enclosed, the AC will overheat. Instead, a side wall with open air on three sides is better. I helped a friend install his unit on a windy balcony — it kept shutting off due to overheating. We moved it to a side wall, and the problem vanished.
3. Prepare the Wall and Drill the Hole
This is where the physical work begins. Drilling a hole through the wall sounds intimidating, but it’s just a matter of careful measurement and the right technique.
Mark the Mounting Points
Use the indoor unit’s mounting bracket as a template. Hold it against the wall (at the correct height and tilt), and mark the screw holes with a pencil. Use a level to ensure it’s perfectly straight. A crooked bracket means a crooked unit — and that leads to drainage problems. I once rushed this step and ended up with a unit that leaned to the right. It looked silly and leaked every time it ran.
Drill the Wall Hole for Pipes and Wires
- Hole size: Usually 2.5 to 3 inches in diameter. Check your AC manual for the exact size.
- Location: The hole should be just below the indoor unit’s mounting bracket, slightly to the side (to accommodate the refrigerant lines and drain pipe).
- Drill carefully: Use a masonry bit for brick/concrete walls. Start with a small pilot hole, then expand it. If you’re drilling through a stud, use a stud finder first to avoid damaging it.
- Angle: Drill at a slight downward angle (about 10 degrees) toward the outside. This helps with drainage and prevents rainwater from entering.
Install the Wall Sleeve (Optional but Recommended)
A wall sleeve (a plastic or metal tube that fits in the hole) protects the pipes and wires from moisture and pests. Slide it into the hole and seal it with insulation foam or silicone. I skipped this once — a year later, I noticed a draft and found ants nesting in the gap. Never again!
Pro Tip: Use a Vacuum Hose as a Guide
If you’re worried about drilling the hole in the wrong place, tape a vacuum hose to the indoor unit’s pipe outlet and feed it through the hole. This ensures the hole lines up perfectly with the unit’s connections.
4. Mount the Indoor and Outdoor Units
Now comes the heavy lifting — literally. Mounting the units securely is crucial for safety and performance.
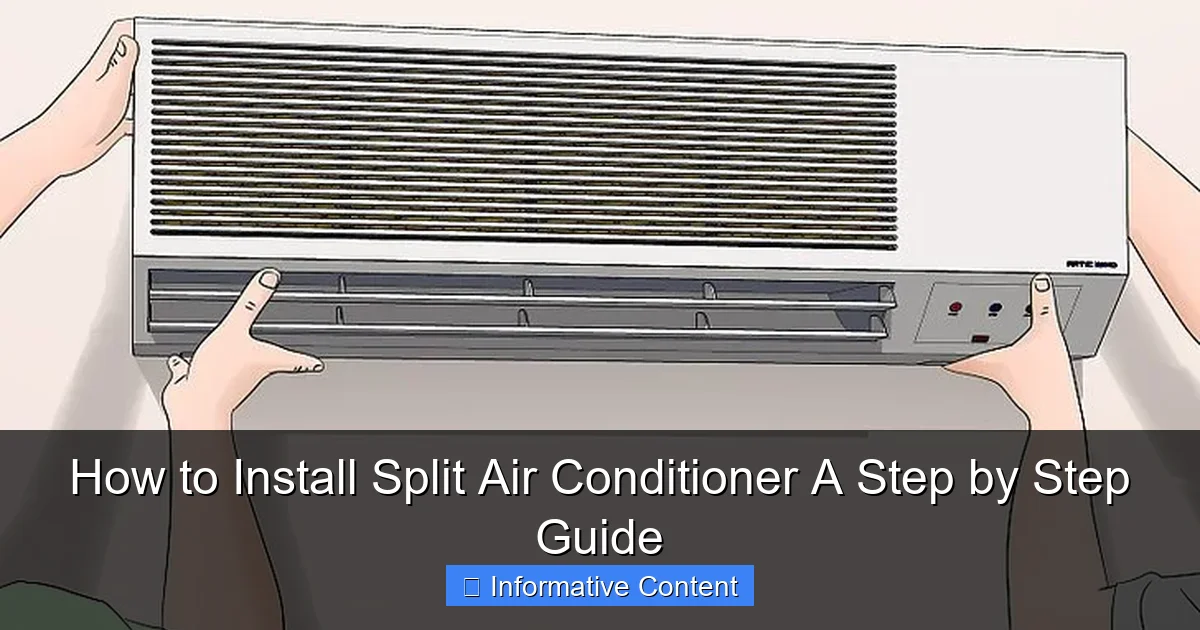
Indoor Unit Installation
- Attach the mounting bracket to the wall using the marked holes. Use wall anchors for drywall or concrete screws for masonry. Tighten firmly — the unit can weigh 20-30 pounds.
- Hang the indoor unit on the bracket. Most units have hooks or slots that click into place. Give it a gentle tug to ensure it’s secure.
- Connect the refrigerant lines and drain pipe to the unit’s outlets. Use the rubber gaskets provided to prevent leaks. Don’t overtighten — copper pipes are soft and can crack.
- Route the lines and wires through the wall hole. Keep them organized and avoid kinks. I use zip ties to bundle them neatly.
Outdoor Unit Installation
- Place the unit on its stand or pad. Ensure it’s level and stable. Use shims if needed.
- Attach the mounting feet to the unit (if not pre-attached) and secure them to the stand with bolts. Tighten firmly to reduce vibration.
- Connect the refrigerant lines to the outdoor unit’s valves. These are usually labeled “liquid” and “gas” (or “suction”). Use a wrench to tighten the flare nuts — but don’t force them. A little refrigerant oil on the threads helps prevent leaks.
- Connect the electrical wires to the outdoor unit’s terminal block. Match the colors (e.g., black to L1, white to L2, green to ground). Use wire nuts or terminals for a secure connection.
- Connect the drain pipe to the outdoor unit (if it has a drain outlet). This is less common but important for some models.
Pro Tip: Test the Mounting Before Finalizing
Once the outdoor unit is mounted, gently shake it. If it wobbles, tighten the bolts or adjust the stand. A wobbly unit can damage pipes and cause noise over time.
5. Connect Refrigerant Lines, Electrical Wiring, and Drainage
This is the most technical part, but don’t panic. Take your time, and follow the steps carefully.
Refrigerant Line Connection
- Insulate the lines: Wrap the refrigerant pipes with insulation foam to prevent condensation and energy loss. I use pre-slit foam tubes — they’re easy to install.
- Flare the ends: If the lines aren’t pre-flared, use a flaring tool to create a smooth, leak-free connection. A poor flare is the #1 cause of refrigerant leaks.
- Tighten the nuts: Use two wrenches — one to hold the valve steady, the other to tighten the nut. This prevents stress on the valve body.
- Check for leaks: Apply soapy water to the connections. If bubbles form, it’s leaking. Tighten slightly or re-flare the pipe.
Electrical Wiring
- Power off: Turn off the main circuit breaker before working on electrical connections.
- Run the wire: Feed the power cable through the wall hole and connect it to the indoor unit’s terminal block. Then, run it to the outdoor unit. Use a conduit for protection if the wire runs along the wall.
- Voltage check: Ensure the voltage matches your AC’s requirements (usually 220-240V). I once connected a 110V wire to a 220V unit — it didn’t work, and I had to rewire it.
- Grounding: Connect the green/yellow wire to the grounding terminal. This is critical for safety.
Drainage System
- Connect the drain pipe: Attach it to the indoor unit’s drain outlet. Use a hose clamp to secure it.
- Slope the pipe: Ensure it slopes downward (at least 1 inch per foot) to the outdoor unit or a drain outlet. No slope = no drainage.
- Test it: Pour a cup of water into the indoor unit’s drain pan. It should flow smoothly through the pipe. If not, check for kinks or blockages.
Data Table: Refrigerant Line Specifications (Common Models)
| AC Size (BTU) | Liquid Line Diameter (inches) | Gas Line Diameter (inches) | Max Line Length (feet) |
|---|---|---|---|
| 9,000 BTU | 1/4″ | 3/8″ | 50′ |
| 12,000 BTU | 1/4″ | 1/2″ | 50′ |
| 18,000 BTU | 3/8″ | 5/8″ | 65′ |
| 24,000 BTU | 3/8″ | 3/4″ | 80′ |
6. Vacuum the System, Test, and Commission
You’re almost there! This final step ensures your AC runs efficiently and safely.
Evacuate the Refrigerant Lines
- Connect the manifold gauge set to the service valves on the outdoor unit.
- Attach the vacuum pump to the gauge set and turn it on. Open the gauge valves.
- Run the pump for 30-60 minutes. This removes air and moisture from the lines. A proper vacuum reads 500 microns or lower on the gauge.
- Close the valves and turn off the pump. Wait 15 minutes — if the pressure rises, there’s a leak. Find and fix it before continuing.
Charge the Refrigerant (If Needed)
Most split ACs come pre-charged with refrigerant. If your lines are longer than standard, you may need to add more. Use a refrigerant scale and follow the manufacturer’s instructions. Never guess the amount — overcharging or undercharging hurts performance.
Test the System
- Turn on the power. Open the service valves on the outdoor unit.
- Start the AC. Set it to cooling mode and let it run for 15-20 minutes.
- Check for cool air from the indoor unit. The temperature should drop by 10-15°F.
- Listen for unusual noises or vibrations. A properly installed unit should be quiet.
- Verify drainage — water should flow steadily from the drain pipe.
Final Touches
- Seal the wall hole with insulation foam or silicone.
- Clean up tools and debris.
- Program the thermostat and enjoy your cool, comfortable space!
Installing a split air conditioner is a rewarding DIY project — if done right. It saves money, gives you control over the process, and boosts your home improvement skills. But remember: if you’re unsure about electrical work, refrigerant handling, or structural modifications, call a professional. Safety always comes first. With this guide, you now have the knowledge to tackle the job or at least understand what a technician is doing. So go ahead — beat the heat with confidence!
Frequently Asked Questions
How do I install a split air conditioner properly?
To install a split air conditioner, first mount the indoor unit on a sturdy wall, ensuring it’s level and away from heat sources. Then, connect the refrigerant pipes, drain hose, and electrical wiring to the outdoor unit, following the manufacturer’s instructions for safety and efficiency.
What tools are needed to install a split AC unit?
Common tools for split air conditioner installation include a drill, level, pipe cutter, vacuum pump, wrenches, and a stud finder. You may also need refrigerant gauges and a multimeter for proper setup and electrical checks.
Can I install a split air conditioner myself, or do I need a professional?
While DIY installation is possible, hiring a certified HVAC technician is recommended to handle refrigerant handling, electrical connections, and system commissioning. Improper DIY installation can void warranties and reduce efficiency.
How far apart can the indoor and outdoor units be for a split AC?
Most split air conditioners allow a maximum distance of 15–30 feet between units, depending on the model. Exceeding this limit may require larger refrigerant pipes or a professional evaluation to maintain performance.
What is the correct way to connect refrigerant pipes during split AC installation?
Cut and flare the copper pipes precisely, then connect them with flare nuts, ensuring no leaks. After connecting, evacuate the lines with a vacuum pump to remove moisture and air for optimal system function.
How do I ensure proper drainage when installing a split air conditioner?
Attach the drain hose to the indoor unit’s condensate outlet and slope it downward toward a drain or outside. Test the drainage by pouring water into the pan to confirm it flows freely without leaks.