
Installing a portable LG air conditioner is simpler than you think. This guide walks you through every step—from unboxing to cooling your space—with clear instructions and expert tips for 2026 models.
Key Takeaways
- Choose the right location: Place your portable LG AC near a window for venting and on a flat, stable surface to ensure proper airflow and stability.
- Ventilation is critical: Always install the exhaust hose correctly using the included window kit to prevent hot air from re-entering the room.
- Check power requirements: Use a dedicated outlet with proper voltage to avoid tripping breakers or damaging the unit.
- Secure the window kit: Adjust the window bracket to fit your window type (sliding or hinged) and seal gaps to maximize efficiency.
- Test before full use: Run a short test cycle to confirm cooling, drainage, and noise levels are normal.
- Maintain regularly: Clean filters monthly and inspect hoses annually to keep your LG portable AC running efficiently.
- Use smart features wisely: Connect to the LG ThinQ app for remote control, scheduling, and energy monitoring in 2026 models.
How to Install Portable LG Air Conditioner: A Complete 2026 Guide
If you’ve just bought a portable LG air conditioner—or you’re thinking about it—you’re making a smart choice. LG’s 2026 lineup of portable ACs combines energy efficiency, smart connectivity, and powerful cooling in a compact design. But even the best air conditioner won’t work well if it’s not installed correctly.
Don’t worry—installing a portable LG air conditioner is easier than assembling flat-pack furniture. With the right steps, you can have cool, comfortable air flowing in under an hour. This guide will walk you through everything you need to know, from unboxing to first use, with practical tips and troubleshooting advice tailored for 2026 models.
Whether you’re cooling a bedroom, home office, or small living space, this step-by-step guide ensures your LG portable AC is set up safely, efficiently, and correctly. Let’s get started.
What You’ll Need Before Installation
Visual guide about How to Install Portable Lg Air Conditioner
Image source: familyhandyman.com
Before you begin, gather these tools and materials. Most are included with your LG portable air conditioner, but it’s good to double-check.
Included in the Box
- Portable LG air conditioner unit
- Exhaust hose (usually 5–6 feet long)
- Window installation kit (adjustable bracket, foam seals, screws)
- Hose connectors and adapters
- Remote control (with batteries)
- User manual and quick start guide
- Drain hose (for models with manual drainage)
Additional Tools You May Need
- Measuring tape
- Screwdriver (Phillips or flathead, depending on your window kit)
- Scissors or utility knife (for trimming foam seals)
- Level (optional, to ensure the unit sits flat)
- Smartphone or tablet (for app setup)
Optional but Helpful
- Weather stripping or foam tape (to seal gaps)
- Extension cord (only if absolutely necessary and rated for AC use)
- Assistant (for lifting and positioning the unit)
Pro tip: Always read the user manual that comes with your specific LG model. While most portable ACs follow similar installation steps, 2026 models may have unique features like improved hose designs or app-based diagnostics.
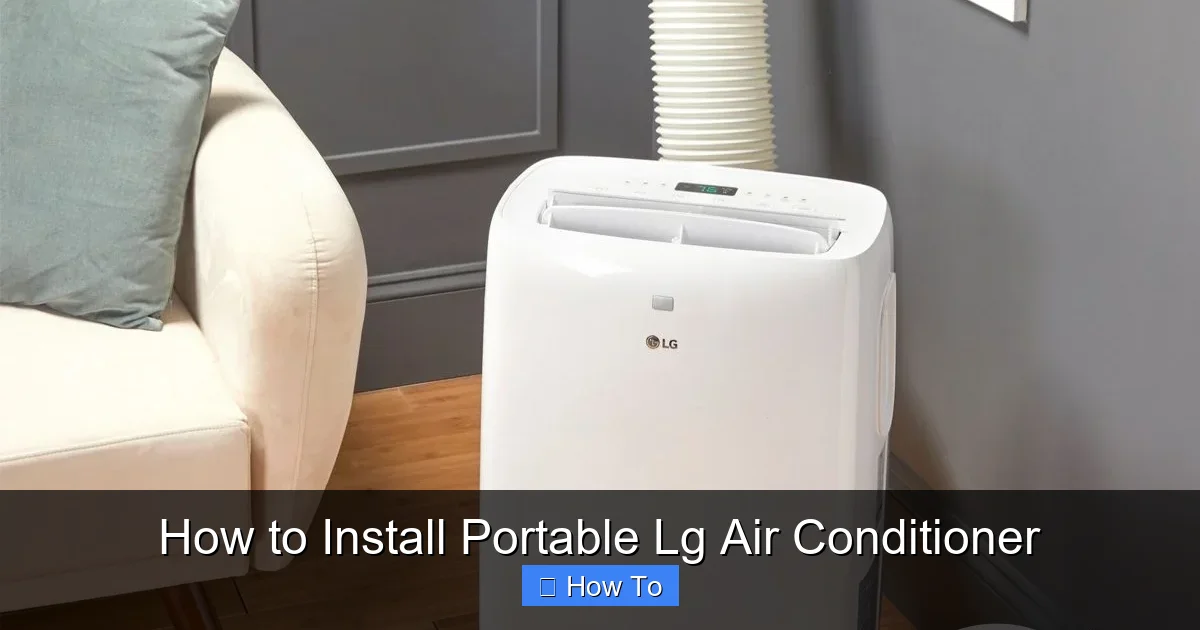
Step 1: Choose the Right Location
Where you place your portable LG air conditioner makes a big difference in performance and safety.
Ideal Placement Tips
- Near a window: The exhaust hose must vent hot air outside, so your unit should be within 5–6 feet of a window.
- Flat, level surface: Place the AC on a hard, stable floor. Avoid carpets or rugs that can block airflow underneath.
- Clear space around the unit: Leave at least 12–18 inches of clearance on all sides for proper air intake and exhaust.
- Accessible power outlet: Make sure there’s a grounded outlet nearby. Avoid daisy-chaining power strips.
- Avoid direct sunlight: Don’t place the unit in a spot that gets intense sun—this can make it work harder.
What to Avoid
- Placing the unit in a corner with poor airflow
- Near heat sources like ovens, radiators, or space heaters
- On uneven or sloped surfaces (can cause water leakage)
- In high-humidity areas like bathrooms (unless the model is rated for it)
Example: If you’re installing in a bedroom, place the AC near the window but away from the bed to reduce noise disturbance. In a home office, position it so the airflow doesn’t blow directly on your desk—unless you want a personal cooling zone!
Step 2: Prepare the Window for Venting
The exhaust hose removes hot air from the room, so a proper window setup is essential.
Measure Your Window
Use a measuring tape to check the height or width of your window opening, depending on whether it’s a vertical (sliding) or horizontal (casement) window.
Most LG window kits are adjustable from about 24 to 48 inches. If your window is larger, you may need to purchase an extension kit (available from LG or third-party sellers).
Install the Window Bracket
- Open your window to the desired height or width.
- Insert the adjustable window bracket into the opening.
- Extend the bracket until it fits snugly.
- Secure it in place using the provided screws or locking mechanism.
- Use the included foam seals to fill any gaps between the bracket and window frame.
Seal Gaps for Efficiency
Even small gaps can let hot air back in, reducing cooling efficiency. Use the foam tape or weather stripping to seal around the bracket. If needed, trim the foam with scissors for a tight fit.
Pro tip: For sliding windows, install the bracket so the window can still close securely. For hinged windows, you may need to remove the screen and install the bracket from the outside.
Step 3: Connect the Exhaust Hose
The exhaust hose is the lifeline of your portable AC. If it’s not connected properly, your unit will struggle to cool and may overheat.
Attach the Hose to the Unit
- Locate the exhaust port on the back or side of your LG portable AC.
- Take one end of the exhaust hose and connect it to the port. It should snap or twist into place securely.
- Make sure the connection is tight—loose hoses can leak hot air.
Connect the Other End to the Window Kit
- Attach the other end of the hose to the window bracket adapter.
- Ensure it’s locked in place. Some 2026 models use quick-release connectors for easier removal.
- Check that the hose isn’t kinked or bent sharply—this restricts airflow.
Secure the Hose
Use zip ties or clips (included or purchased separately) to secure the hose to the wall or window frame. This prevents it from slipping out or getting damaged.
Pro tip: If your hose is too long, don’t coil it up. Instead, cut it to size (if the manufacturer allows) or route it neatly along the wall to avoid tripping hazards.
Step 4: Set Up Drainage (If Required)
Most portable LG air conditioners are self-evaporating, meaning they reuse condensation to cool the internal components. However, in high-humidity environments or during extended use, water may collect and need draining.
Check Your Model’s Drainage System
- Auto-evaporative models: No manual draining needed under normal conditions.
- Manual drain models: Include a drain hose and plug. You’ll need to empty the tank periodically.
- Continuous drain option: Some 2026 models let you connect a hose to a floor drain or bucket for uninterrupted use.
How to Set Up Continuous Drainage
- Locate the drain port on the back or bottom of the unit.
- Attach the provided drain hose.
- Route the hose to a nearby floor drain, sink, or bucket.
- Ensure the hose slopes downward to allow gravity drainage.
Warning: Never operate the unit without checking the water level if your model has a tank. Overflowing water can damage floors and the unit.
Step 5: Plug In and Power On
Now it’s time to connect your LG portable AC to power.
Use a Dedicated Outlet
Portable air conditioners draw a lot of power. Plug the unit directly into a grounded outlet that’s on its own circuit. Avoid using extension cords unless absolutely necessary—and if you must, use a heavy-duty, 14-gauge or thicker cord rated for 15 amps or more.
Check Voltage and Amperage
Most LG portable ACs in 2026 run on 115V and draw between 10–15 amps. Check the label on the back of the unit for exact specs. If your outlet is on a circuit with other high-wattage appliances (like a microwave or space heater), it may trip the breaker.
Power On the Unit
- Press the power button on the unit or remote.
- Wait for the display to light up.
- Set your desired temperature and mode (cool, fan, dry, etc.).
Pro tip: Let the unit run for a few minutes before adjusting settings. This allows the internal systems to stabilize.
Step 6: Connect to the LG ThinQ App (2026 Models)
Many 2026 LG portable air conditioners come with Wi-Fi and smart features through the LG ThinQ app.
Download the App
Search for “LG ThinQ” in the App Store (iOS) or Google Play (Android). Install and create an account if you don’t have one.
Connect Your AC to Wi-Fi
- Press and hold the Wi-Fi button on the unit (usually for 3–5 seconds) until the light blinks.
- Open the ThinQ app and tap “Add Product.”
- Follow the on-screen instructions to connect your AC to your home network.
- Name your device (e.g., “Bedroom AC”) for easy control.
Use Smart Features
Once connected, you can:
- Control temperature and modes from your phone
- Set schedules (e.g., cool the room before you get home)
- Monitor energy usage
- Receive maintenance alerts (like filter cleaning reminders)
- Use voice commands with Alexa or Google Assistant
Pro tip: Keep your app updated to access the latest features and bug fixes for 2026 models.
Step 7: Test and Optimize Performance
Before declaring victory, run a quick test to make sure everything works.
Run a Test Cycle
- Set the AC to cool mode and a low temperature (e.g., 68°F).
- Let it run for 10–15 minutes.
- Check that cold air is coming out of the front vent.
- Listen for unusual noises (grinding, rattling, or excessive buzzing).
- Feel around the exhaust hose—it should be warm, not hot or cold.
Check for Air Leaks
If the room isn’t cooling well, inspect the window seal and hose connections. Hot air leaking back in can reduce efficiency by up to 30%.
Adjust Settings for Comfort
- Use the fan speed setting to balance noise and airflow.
- Try “Dry” mode in humid weather to reduce moisture without overcooling.
- Use the timer to turn off the AC after you fall asleep.
Troubleshooting Common Installation Issues
Even with careful setup, you might run into problems. Here’s how to fix the most common ones.
Unit Won’t Turn On
- Check the power outlet—try plugging in another device.
- Ensure the circuit breaker hasn’t tripped.
- Verify the remote has working batteries.
- Look for error codes on the display (refer to the manual).
Not Cooling Effectively
- Make sure the exhaust hose is properly connected and not kinked.
- Check that the window seal is tight.
- Clean or replace the air filter (dirty filters block airflow).
- Ensure the room isn’t too large for the unit’s BTU rating.
Water Leaking from the Unit
- Check if the drain hose is clogged or disconnected.
- Empty the internal water tank if your model has one.
- Ensure the unit is level—tilting can cause leaks.
Strange Noises
- Gurgling: Normal during startup as refrigerant circulates.
- Rattling: Check for loose parts or debris in the fan.
- Clicking: May indicate a faulty relay—contact LG support.
Wi-Fi Connection Fails
- Move the unit closer to your router.
- Restart your router and the AC.
- Ensure you’re connecting to a 2.4GHz network (most LG ACs don’t support 5GHz).
- Reset the Wi-Fi settings and try again.
Maintenance Tips for Long-Term Performance
A well-maintained portable AC lasts longer and runs more efficiently.
Monthly Maintenance
- Clean the air filter with warm water and mild soap. Let it dry completely before reinstalling.
- Wipe down the exterior with a damp cloth.
- Check the exhaust hose for cracks or wear.
Seasonal Maintenance
- Inspect the window kit for damage or loose seals.
- Test the drainage system before peak summer use.
- Update the LG ThinQ app and firmware.
End-of-Season Storage
- Turn off and unplug the unit.
- Drain all water from the tank and hose.
- Clean the filter and interior (if accessible).
- Store in a dry, cool place with the hose and accessories.
Conclusion
Installing a portable LG air conditioner in 2026 is a straightforward process when you follow the right steps. From choosing the perfect spot to connecting the exhaust hose and setting up smart controls, this guide ensures your unit runs efficiently and keeps you cool all season long.
Remember: proper installation isn’t just about convenience—it’s about safety, performance, and energy savings. A well-vented, level, and maintained AC uses less power, lasts longer, and delivers better comfort.
With LG’s 2026 models offering advanced features like app control, auto-drain, and improved energy efficiency, there’s never been a better time to upgrade your cooling setup. So unbox that unit, follow these steps, and enjoy a cooler, more comfortable home.
Stay cool, stay smart, and enjoy your new LG portable air conditioner!