
This guide walks you through how to install a portable air conditioner LG safely and efficiently in 2026. From unboxing to final testing, we cover every step with clear instructions and helpful tips.
Key Takeaways
- Choose the right model: Ensure your LG portable AC matches your room size and power requirements for optimal cooling performance.
- Prepare your space: Clear the installation area, check window compatibility, and ensure access to a grounded electrical outlet.
- Install the window kit correctly: Proper sealing prevents hot air from re-entering and improves energy efficiency.
- Position the unit wisely: Keep the portable AC on a flat, stable surface and maintain proper clearance for airflow.
- Connect the exhaust hose securely: A tight seal between the hose and window adapter reduces leaks and boosts cooling power.
- Test and maintain regularly: Run a test cycle after installation and clean filters monthly to extend unit life.
- Use smart features (if available): Many 2026 LG models support Wi-Fi and voice control—set up the LG ThinQ app for remote management.
How to Install Portable Air Conditioner LG: A Complete 2026 Guide
If you’ve just bought an LG portable air conditioner, congratulations! You’re about to enjoy cool, comfortable air without the hassle of permanent installation. Whether you’re renting, living in a small apartment, or just want flexible cooling, portable ACs are a smart choice—especially LG’s 2026 lineup, which features improved energy efficiency, quieter operation, and smart home integration.
But before you can kick back and enjoy that refreshing breeze, you need to install it properly. Don’t worry—this guide will walk you through every step, from unboxing to first use. We’ll cover everything you need to know to install your LG portable air conditioner safely, efficiently, and with minimal frustration.
By the end of this guide, you’ll be able to:
– Choose the best location for your unit
– Assemble and install the window kit
– Connect the exhaust hose securely
– Power up and test your AC
– Troubleshoot common issues
– Maintain your unit for long-term performance
Let’s get started!
Step 1: Unbox and Inspect Your LG Portable Air Conditioner
Visual guide about How to Install Portable Air Conditioner Lg
Image source: reviewstream.com
Before you do anything else, carefully unbox your LG portable air conditioner. Most 2026 models come in a sturdy cardboard box with foam padding to protect the unit during shipping.
What’s in the Box?
When you open the box, you should find:
– The portable air conditioner unit
– Exhaust hose (usually 5–6 feet long)
– Window adapter kit (includes sliders, brackets, and sealing foam)
– Drain hose (for models with manual drainage)
– Remote control (with batteries)
– User manual and quick start guide
– Optional: Wi-Fi setup card (for smart models)
Inspect for Damage
Check the unit for any visible damage—dents, scratches, or loose parts. If you notice anything unusual, contact LG customer support or the retailer immediately. Don’t plug in a damaged unit.
Read the Manual
Even if you’re experienced with portable ACs, take a few minutes to skim the user manual. LG often updates features and safety guidelines, and the 2026 models may include new functions like auto-drain or improved dehumidification modes.
Step 2: Choose the Right Location
Where you place your portable air conditioner makes a big difference in performance and efficiency. Here’s how to pick the best spot.
Near a Window
Portable ACs need to vent hot air outside, so they must be placed near a window. Ideally, the window should be:
– On an exterior wall
– Able to open fully (sliding, double-hung, or casement)
– Within 5–6 feet of the unit (to accommodate the exhaust hose)
Avoid placing the unit in a corner or behind furniture. You need at least 12–18 inches of clearance on all sides for proper airflow.
Flat and Stable Surface
Place the AC on a level, hard floor—tile, wood, or concrete. Avoid carpets or rugs that can block the bottom vents. The unit should not wobble or tilt.
Access to Power
Make sure there’s a grounded electrical outlet nearby. Never use extension cords unless they’re heavy-duty and rated for air conditioners. LG recommends plugging the unit directly into a wall outlet to prevent overheating or power issues.
Minimize Obstructions
Keep the area around the unit clear. Don’t block the intake or exhaust vents with curtains, furniture, or plants. Also, avoid placing the AC in direct sunlight or near heat sources like ovens or radiators.
Step 3: Prepare the Window for Installation
The window kit is essential for venting hot air outside. LG’s 2026 models typically include a universal window adapter that fits most window types.
Measure Your Window
Before installing, measure the width and height of your window opening. Most LG kits support windows up to 47 inches wide and 43 inches tall. If your window is larger, you may need to purchase an extension kit.
Clean the Window Frame
Wipe down the window sill and frame with a damp cloth. Remove dust, dirt, or old adhesive that could prevent a tight seal.
Assemble the Window Adapter
Follow the instructions in the manual to assemble the window kit. Most 2026 LG models use a two-piece slider system:
– Slide the adjustable panels together to match your window width.
– Secure them with the included screws or locking knobs.
– Attach the foam seal strips to the edges for a snug fit.
Install the Adapter in the Window
1. Open the window slightly (about 3–4 inches).
2. Insert the adapter into the opening, with the exhaust hose outlet facing outside.
3. Slide the window down until it rests on top of the adapter.
4. Tighten any locking mechanisms to hold it in place.
Make sure the adapter is level and secure. A loose fit can cause air leaks, reducing cooling efficiency.
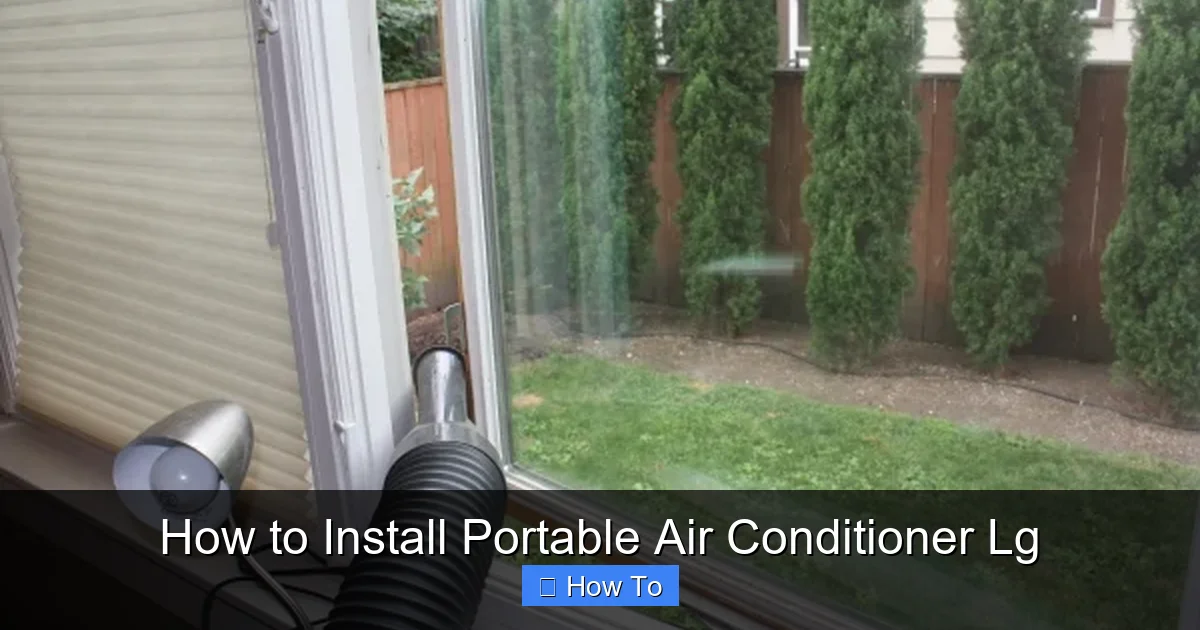
Step 4: Connect the Exhaust Hose
The exhaust hose carries hot air from the AC unit to the window adapter. A proper connection is crucial for performance.
Attach the Hose to the Unit
1. Locate the exhaust port on the back of the portable AC.
2. Push the hose connector firmly onto the port until it clicks into place.
3. Secure it with the included clamp or twist-lock mechanism.
Connect the Hose to the Window Adapter
1. Insert the other end of the hose into the adapter’s outlet.
2. Twist or clamp it securely to prevent disconnection.
3. Ensure the hose is not kinked, bent, or compressed.
Seal Any Gaps
Use the included foam tape or weather stripping to seal gaps around the hose and adapter. This prevents hot air from leaking back into the room.
Keep the Hose Short and Straight
Avoid coiling or stretching the hose. The shorter and straighter the hose, the better the airflow. If the hose is too long, trim it (if possible) or secure excess length with zip ties.
Step 5: Set Up Drainage (If Required)
Most LG portable air conditioners are self-evaporating, meaning they recycle condensation back into the cooling process. However, in high-humidity environments or during extended use, water may accumulate.
Check the Water Tank
Locate the water collection tank (usually at the bottom or back of the unit). Some 2026 models have a built-in sensor that alerts you when the tank is full.
Connect the Drain Hose (If Needed)
If your model requires manual drainage:
1. Attach the drain hose to the designated port.
2. Run the hose to a floor drain, sink, or bucket.
3. Ensure the hose slopes downward to allow gravity drainage.
Enable Auto-Drain Mode (If Available)
Some LG 2026 models feature auto-drain technology. Check the settings menu to activate this feature, which automatically pumps out excess water.
Step 6: Plug In and Power On
Now it’s time to fire up your LG portable air conditioner.
Plug Into a Dedicated Outlet
Connect the power cord to a grounded outlet. Avoid power strips or surge protectors unless they’re specifically rated for high-wattage appliances.
Turn On the Unit
Press the power button on the unit or use the remote control. The display should light up, and you should hear the fan start.
Set Your Desired Temperature
Use the remote or control panel to set the temperature. Most LG portable ACs cool between 60°F and 86°F (15°C–30°C). Start with a setting 5–7 degrees below room temperature.
Select the Mode
Choose from:
– Cool: Standard cooling mode
– Fan: Circulates air without cooling
– Dry: Dehumidifies the room (great for humid climates)
– Auto: Adjusts settings based on room conditions
Step 7: Test and Optimize Performance
After installation, run a test to ensure everything works correctly.
Listen for Unusual Noises
The unit should operate quietly. If you hear rattling, grinding, or loud banging, turn it off and check for loose parts or obstructions.
Feel the Airflow
Place your hand near the front vent. You should feel cool, consistent airflow. If the air is weak or warm, check the exhaust hose for leaks or blockages.
Monitor the Temperature
Use a thermometer to track room temperature. It should drop within 10–15 minutes. If not, verify the window seal and hose connections.
Adjust Fan Speed
Higher fan speeds cool faster but use more energy. Lower speeds are quieter and more efficient for maintaining comfort.
Step 8: Connect to Wi-Fi and Use Smart Features (Optional)
Many 2026 LG portable air conditioners support Wi-Fi and smart home integration.
Download the LG ThinQ App
Available on iOS and Android, the LG ThinQ app lets you control your AC remotely.
Connect to Wi-Fi
1. Press and hold the Wi-Fi button on the unit (usually for 3 seconds).
2. Open the ThinQ app and follow the on-screen instructions.
3. Select your home network and enter the password.
Use Voice Control
Once connected, you can use voice commands via Alexa or Google Assistant. Say, “Hey Google, set the living room AC to 72 degrees.”
Set Schedules and Notifications
Use the app to:
– Schedule on/off times
– Receive filter change alerts
– Monitor energy usage
Troubleshooting Common Installation Issues
Even with careful installation, problems can occur. Here’s how to fix the most common issues.
Unit Won’t Turn On
– Check the power outlet with another device.
– Ensure the power cord is fully plugged in.
– Reset the circuit breaker if tripped.
Weak Cooling or Warm Air
– Verify the exhaust hose is securely connected and not kinked.
– Check the window seal for air leaks.
– Clean the air filter (dirty filters restrict airflow).
Water Leaking from the Unit
– Empty the water tank if full.
– Ensure the drain hose is properly connected and not clogged.
– Check for cracks in the tank or seals.
Excessive Noise
– Make sure the unit is on a flat, stable surface.
– Tighten any loose panels or screws.
– Avoid placing the AC on soft surfaces that vibrate.
Remote Control Not Working
– Replace the batteries.
– Ensure there’s no obstruction between the remote and unit.
– Re-pair the remote if needed (see manual).
Maintenance Tips for Long-Term Performance
To keep your LG portable air conditioner running smoothly, follow these maintenance tips.
Clean the Air Filter Monthly
1. Turn off and unplug the unit.
2. Remove the front panel and pull out the filter.
3. Rinse it under warm water or vacuum it.
4. Let it dry completely before reinstalling.
Wipe Down the Exterior
Use a damp cloth to clean the outside of the unit. Avoid harsh chemicals that could damage the plastic.
Inspect the Exhaust Hose
Check the hose every few months for cracks, mold, or blockages. Replace if damaged.
Store Properly When Not in Use
If you’re not using the AC for an extended period (e.g., winter):
– Drain all water from the tank and hose.
– Clean the filter and interior.
– Cover the unit and store in a dry, cool place.
Conclusion
Installing a portable air conditioner LG in 2026 is easier than ever, thanks to improved designs and user-friendly features. By following this guide, you’ve learned how to choose the right location, assemble the window kit, connect the exhaust hose, set up drainage, and power on your unit safely.
Remember, proper installation not only ensures efficient cooling but also extends the life of your appliance. Take the time to seal gaps, maintain filters, and use smart features to get the most out of your investment.
With your LG portable air conditioner up and running, you can enjoy cool, comfortable air all season long—no permanent installation required. Stay cool, stay comfortable, and enjoy the convenience of modern cooling technology.