
Installing the LG LW5012J window air conditioner doesn’t have to be overwhelming. This guide walks you through every step—from prep to power-up—ensuring a secure, energy-efficient setup. Perfect for DIYers in 2026, it includes safety tips, tools needed, and common fixes.
Key Takeaways
- Choose the right window: Ensure your window is structurally sound, opens fully, and fits the LW5012J’s dimensions (15.4” H x 19.7” W x 16.5” D).
- Gather essential tools: You’ll need a tape measure, level, drill, screwdriver, and weather stripping for a smooth installation.
- Prioritize safety first: Always disconnect power, use gloves, and have a helper—this unit weighs over 40 pounds.
- Seal gaps properly: Use foam panels and weather stripping to prevent air leaks and improve cooling efficiency.
- Test before finalizing: Run the AC for 10–15 minutes to check for vibrations, noise, or water leaks.
- Maintain regularly: Clean filters monthly and inspect seals seasonally to keep performance optimal in 2026’s hotter summers.
- Know when to call a pro: If electrical work or structural modifications are needed, consult a licensed technician.
How to Install LG Window Air Conditioner LW5012J: A Complete 2026 Guide
As summer temperatures rise in 2026, staying cool at home is more important than ever. The LG LW5012J window air conditioner offers reliable, energy-efficient cooling for rooms up to 150 square feet—perfect for bedrooms, home offices, or small living spaces. But before you enjoy that refreshing breeze, you need to install it correctly.
This step-by-step guide will walk you through the entire process of installing your LG LW5012J window air conditioner safely and efficiently. Whether you’re a first-time DIYer or a seasoned home improver, we’ve got you covered. You’ll learn how to choose the right location, prepare your window, secure the unit, and troubleshoot common issues—all while keeping safety and performance top of mind.
By the end of this guide, you’ll have a properly installed air conditioner that keeps your space cool, reduces energy bills, and lasts for years. Let’s get started!
What You’ll Need Before You Begin
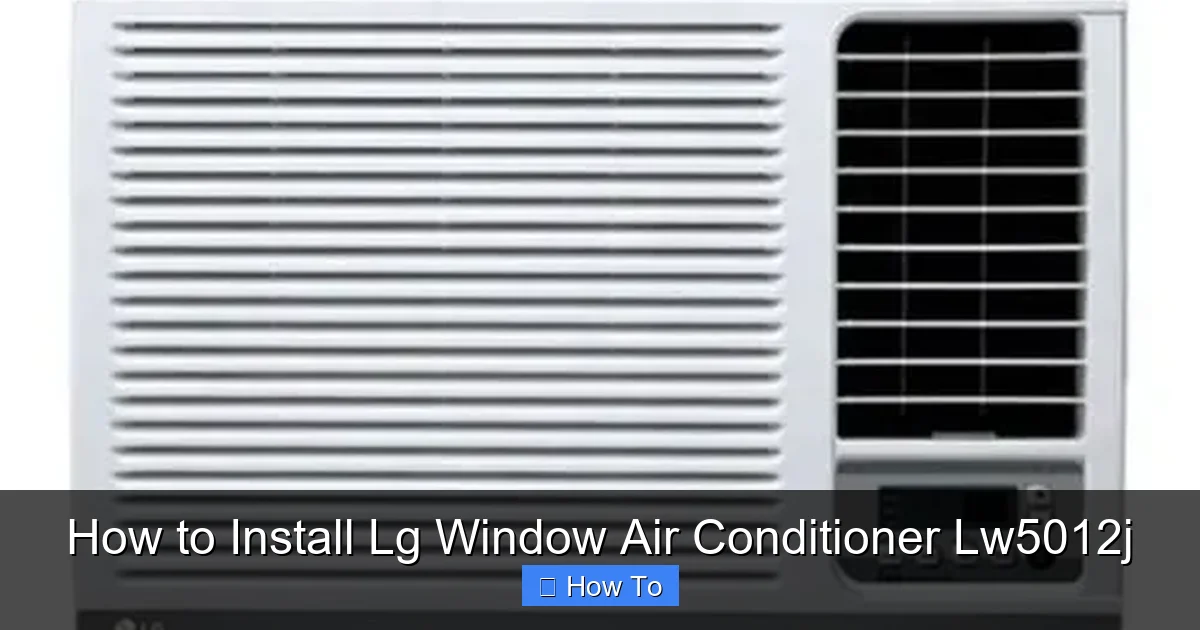
Visual guide about How to Install Lg Window Air Conditioner Lw5012j
Image source: i.ytimg.com
Before you even unbox your LG LW5012J, it’s crucial to gather the right tools and materials. Having everything ready will save time, reduce frustration, and help ensure a safe installation.
Essential Tools
- Tape measure
- Level (a 6-inch or 12-inch bubble level works best)
- Drill with drill bits (typically 1/8” and 3/16”)
- Screwdriver (Phillips and flathead)
- Pencil or marker
- Adjustable wrench (optional, for tightening bolts)
Materials and Supplies
- Foam weather stripping (included with the unit, but extras are helpful)
- Side window panels (included with LW5012J)
- Mounting brackets (if required for your window type)
- Screws and anchors (usually included, but verify)
- Support bracket or L-bracket (optional, for added stability)
- Duct tape or foil tape (for sealing gaps)
- Drop cloth or old towel (to protect your floor)
Safety Gear
- Work gloves (to protect hands from sharp edges)
- Safety goggles (especially when drilling)
- Sturdy ladder (if installing above ground level)
- A helper (the LW5012J weighs 42.3 lbs—team lifting is safer)
Check the Window Compatibility
The LG LW5012J is designed for double-hung or sliding windows. Before installation, confirm your window meets these requirements:
- Minimum window width: 22 inches
- Maximum window width: 36 inches
- Window must open at least 15.4 inches vertically
- Window frame must be strong enough to support the unit
If your window is too narrow or too wide, you may need to install a custom support bracket or consider a different AC model.
Step 1: Prepare the Installation Area
A successful installation starts with proper preparation. Take your time with this step—it sets the foundation for everything that follows.
Clear the Space
Remove any furniture, curtains, or decorations near the window. Lay down a drop cloth or old towel to protect your floor from scratches or water damage during installation.
Inspect the Window and Frame
Check for cracks, rot, or weak spots in the window frame. The LW5012J exerts downward pressure, so the frame must be sturdy. If you notice damage, repair it before proceeding or consult a professional.
Measure the Window Opening
Use your tape measure to confirm the window width and height. Compare these to the LW5012J’s dimensions:
- Height: 15.4 inches
- Width: 19.7 inches
- Depth: 16.5 inches
If your window is wider than 19.7 inches, you’ll use the included side panels to fill the gap. If it’s narrower, you may need to trim the panels or use additional sealing materials.
Check for Obstructions
Look outside the window for potential hazards:
- Low-hanging tree branches
- Nearby power lines
- Air vents or exhaust fans
- Direct sunlight or heat sources
Avoid installing the AC where it will be exposed to excessive heat or moisture, as this can reduce efficiency and lifespan.
Step 2: Assemble the Side Panels
The LG LW5012J comes with two adjustable side panels that help seal the gap between the air conditioner and the window frame. Proper assembly is key to preventing air leaks.
Unpack and Identify Parts
Open the box and locate the side panels, screws, and any included brackets. The panels are usually made of durable plastic or metal and slide into grooves on the sides of the AC unit.
Adjust the Panels to Fit
Slide the panels outward to match your window width. Most models allow adjustment from 22 to 36 inches. Use a tape measure to ensure both sides are even.
Secure the Panels
Once adjusted, tighten the screws on the side panels to lock them in place. Don’t overtighten—this can crack the plastic or strip the screws.
Test the Fit
Hold the AC unit up to the window (with help) to see how the panels align with the frame. Make minor adjustments if needed. The goal is a snug fit with no large gaps.
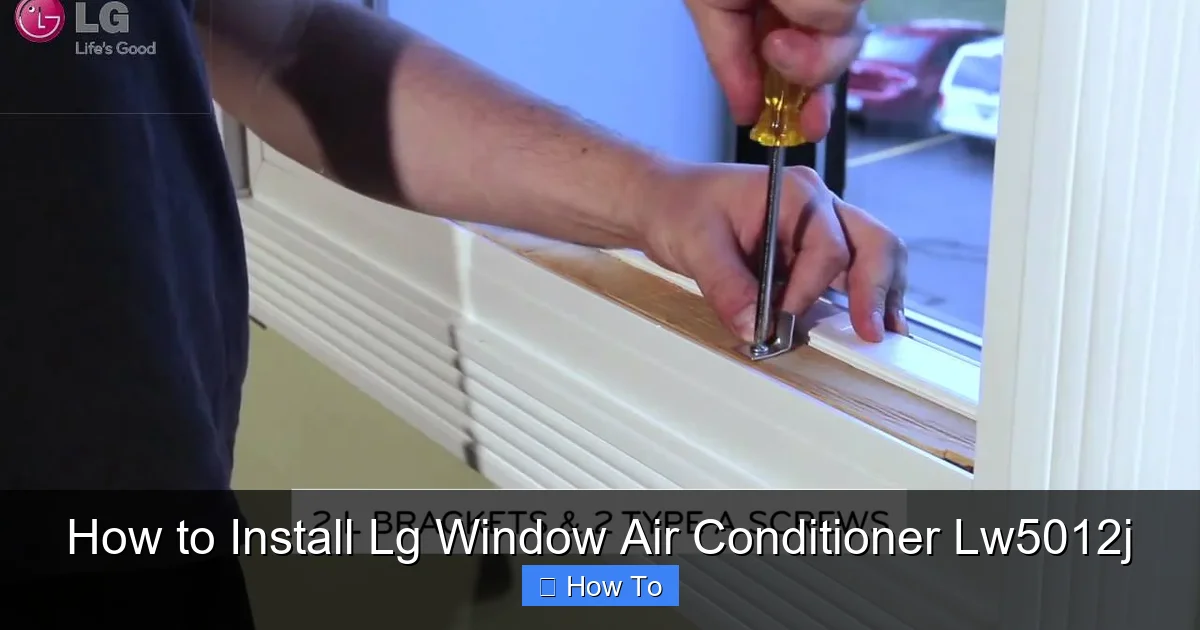
Step 3: Install the Support Bracket (Optional but Recommended)
While the LW5012J can be installed without a support bracket, adding one improves stability—especially in windy areas or upper-floor windows.
Choose the Right Bracket
You can use the included bracket (if provided) or purchase an aftermarket L-bracket. Make sure it’s rated for at least 50 pounds and compatible with your window type.
Position the Bracket
Place the bracket on the outside windowsill, centered under where the AC will sit. Use a level to ensure it’s perfectly horizontal. Mark the screw holes with a pencil.
Drill and Secure
Drill pilot holes into the windowsill, then attach the bracket using the provided screws. If your sill is made of wood, this is usually straightforward. For vinyl or composite sills, use anchors to prevent cracking.
Test Stability
Give the bracket a firm shake. It should not move. If it wobbles, tighten the screws or add additional support.
Step 4: Install the Air Conditioner
Now comes the main event—placing the LW5012J into the window. This step requires teamwork and careful handling.
Open the Window
Fully open the bottom sash of your double-hung window. If you have a sliding window, slide it open just enough to accommodate the AC unit.
Position the Unit
With a helper, lift the LW5012J and carefully slide it into the window opening. The back of the unit should rest against the window frame, and the front should extend slightly outside.
Lower the Window Sash
Gently lower the top sash until it rests on top of the AC unit. Do not force it—this could damage the unit or window.
Secure the Unit
Use the included screws to attach the top of the AC unit to the window sash. Drill pilot holes first to prevent splitting the wood. Tighten the screws securely but avoid over-tightening.
Attach the Side Panels
Slide the side panels into the window frame on both sides. Use screws to secure them to the window sash or frame. This creates a tight seal and prevents the unit from shifting.
Step 5: Seal Gaps and Improve Insulation
Even small gaps can let hot air in and cool air out, reducing efficiency. Proper sealing ensures your AC works at peak performance.
Apply Weather Stripping
Use the included foam weather stripping to fill gaps between the side panels and the window frame. Cut it to size with scissors and press it firmly into place.
Seal the Top and Bottom
If there’s a gap between the top of the AC and the window sash, use additional foam tape or duct tape to seal it. For the bottom, ensure the unit sits flat on the sill—no tilting.
Check for Drafts
Once sealed, run your hand around the edges of the unit. Feel for any air movement. If you detect drafts, add more weather stripping or use foil tape for a tighter seal.
Optional: Install an Exterior Cover
In 2026, many homeowners use decorative exterior covers to protect the AC from rain and debris. These can also improve curb appeal. Make sure the cover allows proper airflow.
Step 6: Connect Power and Test the Unit
With the AC securely in place, it’s time to power it up and make sure everything works.
Plug In the Unit
Plug the LW5012J into a dedicated 115V electrical outlet. Avoid using extension cords—they can overheat and pose a fire risk. If the outlet is far, consider hiring an electrician to install a closer one.
Turn On the AC
Press the power button on the remote or control panel. Set the temperature to a comfortable level (e.g., 72°F) and select “Cool” mode.
Listen and Observe
Listen for unusual noises like grinding, rattling, or excessive vibration. Check for water leaks inside or outside the unit. Look for proper airflow from the vents.
Run a 15-Minute Test
Let the AC run for 15 minutes. The room should start cooling, and the compressor should cycle on and off normally. If the unit shuts off immediately or doesn’t cool, see the troubleshooting section below.
Step 7: Final Adjustments and Maintenance Tips
Your installation is almost complete! A few final steps will ensure long-term performance.
Level the Unit
Use a level to check if the AC is slightly tilted outward (about 1/4 inch). This helps condensation drain properly. Adjust the feet or add shims if needed.
Secure Loose Cables
Tuck the power cord neatly along the window frame and secure it with zip ties or clips. Keep it away from moving parts.
Set a Maintenance Schedule
To keep your LW5012J running efficiently in 2026 and beyond:
- Clean the air filter every 2–4 weeks during peak use
- Wipe the exterior with a damp cloth monthly
- Inspect seals and weather stripping every season
- Check for mold or debris in the drain hole
Use a Smart Thermostat (Optional)
Pair your AC with a smart thermostat or use the LG ThinQ app (if compatible) to control temperature remotely and save energy.
Troubleshooting Common Installation Issues
Even with careful installation, problems can arise. Here’s how to fix the most common ones.
Unit Won’t Turn On
- Check the power outlet with another device
- Ensure the circuit breaker hasn’t tripped
- Verify the remote has working batteries
Insufficient Cooling
- Clean or replace the air filter
- Check for blocked vents or dirty coils
- Ensure the room isn’t too large for the unit (max 150 sq ft)
Water Leaking Inside
- Make sure the unit is tilted slightly outward
- Clear the drain hole with a pipe cleaner
- Check for clogged condensate pan
Excessive Noise or Vibration
- Tighten all screws and brackets
- Ensure the unit is level and secure
- Place rubber pads under the AC to reduce vibration
Air Leaks Around the Unit
- Reapply weather stripping
- Use foil tape for larger gaps
- Consider a window insulation kit for winter
When to Call a Professional
While the LG LW5012J is designed for DIY installation, some situations require expert help:
- Your window frame is damaged or weak
- You need to modify the window structure
- Electrical work is required (e.g., installing a new outlet)
- The unit doesn’t cool after troubleshooting
- You’re uncomfortable with any part of the process
Don’t hesitate to contact LG customer support or a licensed HVAC technician. It’s better to be safe than sorry.
Conclusion
Installing the LG LW5012J window air conditioner is a manageable DIY project that pays off with cool, comfortable air all summer long. By following this 2026 guide, you’ve learned how to choose the right location, prepare your window, assemble side panels, secure the unit, seal gaps, and troubleshoot common issues.
Remember: safety comes first. Always use proper tools, wear protective gear, and don’t hesitate to ask for help. A well-installed AC not only cools your space efficiently but also saves energy and extends the life of your unit.
With regular maintenance and smart usage, your LW5012J will keep you cool for many summers to come. Stay comfortable, stay safe, and enjoy the breeze!