
Installing an LG window air conditioner hose doesn’t have to be complicated. This guide walks you through every step—from preparation to final checks—ensuring a secure, efficient, and leak-free installation. Whether you’re a first-time user or upgrading your unit, you’ll finish with confidence and cool comfort.
Key Takeaways
- Choose the right hose type: LG window AC units typically use exhaust hoses for venting hot air. Ensure compatibility with your model (e.g., LG LW8016ER or LW1216ER) to avoid leaks or inefficiency.
- Prepare your workspace: Clear the window area, gather tools (screwdriver, tape measure, gloves), and read the manual before starting. Safety and organization prevent mistakes.
- Seal gaps properly: Use weatherstripping or foam tape around the hose and window frame to prevent air leaks, which reduce cooling efficiency and increase energy bills.
- Secure the hose at both ends: Attach the hose firmly to the AC unit and the window bracket. Loose connections cause disconnections and potential water damage.
- Test the system after installation: Run the AC for 10–15 minutes and check for unusual noises, vibrations, or warm air escaping. Early detection prevents bigger issues.
- Maintain regularly: Clean the hose every 3–6 months and inspect for cracks or wear. A well-maintained hose extends the life of your AC unit.
- Follow LG’s 2026 guidelines: Newer models may include smart features or updated mounting hardware. Always refer to the latest user manual for model-specific instructions.
How to Install LG Window Air Conditioner Hose: A Complete 2026 Guide
Welcome to your go-to guide for installing an LG window air conditioner hose—designed with 2026’s latest models and best practices in mind. Whether you’re setting up a brand-new LG LW1019IVSM or reinstalling a trusted LW1216ER after winter storage, this step-by-step walkthrough ensures a smooth, safe, and effective installation. By the end of this guide, you’ll know exactly how to attach the exhaust hose, seal it properly, and keep your home cool without leaks, noise, or energy waste.
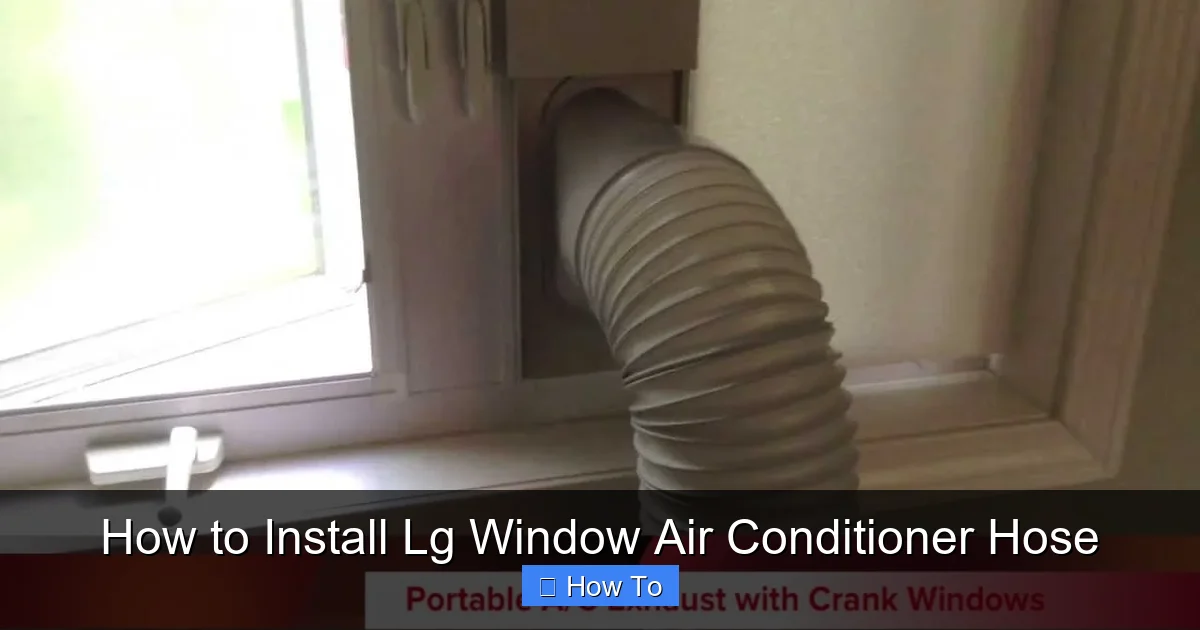
Installing an LG window AC hose might seem intimidating at first, but it’s actually a straightforward process when you follow the right steps. The hose—often called the exhaust hose or vent hose—is a critical part of your unit’s operation. It expels hot air from inside your room to the outside, allowing the air conditioner to cool your space efficiently. If the hose isn’t installed correctly, you could face reduced cooling, higher electricity bills, or even water damage from condensation leaks.
In this guide, we’ll cover everything from unboxing and preparation to final testing and maintenance. We’ll also include practical tips, troubleshooting advice, and answers to common questions. Whether you’re a DIY beginner or a seasoned home improver, this guide is written in simple, friendly language to help you succeed. Let’s get started!
What You’ll Need Before You Begin
Before you touch the air conditioner or the hose, it’s essential to gather all the tools and materials you’ll need. Having everything ready saves time and prevents frustrating mid-installation trips to the hardware store. Here’s a checklist of what you’ll need for a typical LG window AC hose installation in 2026:
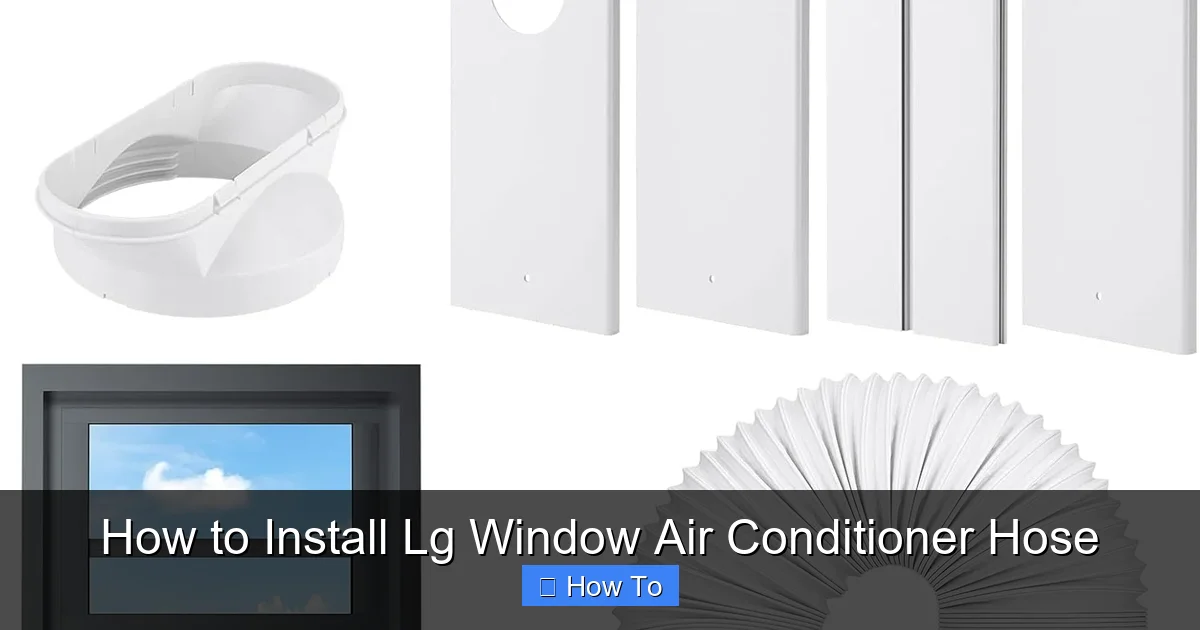
Visual guide about How to Install Lg Window Air Conditioner Hose
Image source: m.media-amazon.com
- LG window air conditioner unit (e.g., LW8016ER, LW1216ER, or newer 2026 models)
- Exhaust hose (usually included with the unit; confirm it’s the correct diameter—commonly 5.9 inches)
- Window mounting kit (often included; contains brackets, screws, and foam seals)
- Screwdriver (Phillips head is most common)
- Tape measure (to confirm window size and hose length)
- Weatherstripping or foam tape (for sealing gaps)
- Utility knife or scissors (to trim foam or tape)
- Gloves (to protect your hands during installation)
- Safety glasses (recommended when handling metal brackets)
- Level (optional, but helpful for ensuring the unit is balanced)
Most LG window AC units come with a complete installation kit, but it’s always smart to double-check. If you’re missing parts, contact LG customer support or visit their official website for replacement kits. In 2026, LG has improved packaging to include QR codes that link directly to video tutorials and digital manuals—scan the code on your box for instant access.
Step 1: Choose the Right Location and Prepare the Window
The first step in installing your LG window air conditioner hose is selecting the best window for installation. Not all windows are created equal, and choosing the right one can make a big difference in performance and safety.
Evaluate Your Window Type
LG window AC units are designed to fit double-hung or sliding windows—most commonly found in homes and apartments. Before you begin, confirm your window type:
- Double-hung windows: Two sashes that slide up and down. These are the most compatible with LG units.
- Sliding windows: One panel slides horizontally. Also compatible, but may require slight adjustments.
- Casement or awning windows: These swing outward and are not recommended for standard window AC installations. Consider a portable or wall-mounted unit instead.
If you have a double-hung or sliding window, measure the opening to ensure it can accommodate your AC unit. Most LG models require a minimum window width of 22–24 inches and a height of 14–16 inches when fully opened. Use your tape measure to check both dimensions.
Clear the Area
Once you’ve chosen the window, clear the area around it. Remove curtains, blinds, or any decorative items that could interfere with installation. Make sure there’s enough space inside the room for the AC unit to sit securely and for you to move around comfortably.
Also, check the outside of the window. Ensure there’s no obstruction—like a fence, wall, or overgrown bushes—that could block airflow from the exhaust hose. Proper ventilation is crucial for the AC to function efficiently.
Read the Manual
Before touching any components, take a few minutes to read the user manual that came with your LG unit. In 2026, LG has updated its manuals to include augmented reality (AR) features—use your smartphone to scan diagrams and see 3D installation animations. This can be especially helpful if you’re a visual learner.
The manual will also specify the exact hose length, mounting hardware, and any model-specific instructions. For example, newer LG models like the LW1019IVSM come with a quick-connect hose system that reduces installation time by up to 40%.
Step 2: Assemble the Window Mounting Bracket
The window mounting bracket is the frame that holds your air conditioner in place and supports the hose connection. Proper assembly is key to a secure installation.
Unpack the Mounting Kit
Open the box and lay out all the parts from the mounting kit. You should find:
- Two side brackets (left and right)
- One center support bracket (optional, depending on model)
- Screws and wing nuts
- Foam seals or rubber gaskets
- Adjustable extension panels (for wider windows)
Match these parts to the diagram in your manual. If anything is missing, contact LG support immediately. In 2026, LG offers same-day replacement parts in major cities through their Smart Home Service network.
Attach the Side Brackets
Place the side brackets into the window track, with the flat side facing inward. Slide them outward until they touch the window frame. Use the screws provided to secure them in place. Don’t tighten them fully yet—you’ll need to adjust the position later.
If your window is wider than the brackets, use the extension panels. These slide out to fill the gap and provide a snug fit. Trim any excess foam with a utility knife for a clean look.
Install the Center Support (If Included)
Some LG models include a center support bracket that adds stability. If yours has one, place it in the middle of the window opening and secure it with screws. This is especially helpful for heavier units or in areas with strong winds.
Once all brackets are in place, double-check that they’re level. Use a spirit level if you have one. A tilted unit can cause water to pool inside the AC, leading to leaks or mold.
Step 3: Connect the Exhaust Hose to the Air Conditioner
Now it’s time to attach the exhaust hose to your LG air conditioner. This hose is responsible for venting hot air outside, so a secure connection is essential.
Locate the Hose Port
On the back or side of your LG unit, you’ll find a circular port labeled “Exhaust” or “Vent.” This is where the hose connects. The port is usually 5.9 inches in diameter, but confirm this with your model’s specifications.
Attach the Hose to the Unit
Take the exhaust hose and align the connector with the port. Most LG hoses use a twist-lock or snap-on design. Gently push the hose into the port and rotate it clockwise until it clicks into place. You should feel it lock securely.
If your model uses a clamp-style connector, wrap the hose around the port and tighten the clamp with a screwdriver. Make sure it’s snug but not over-tightened, as this can damage the hose.
Check for Gaps
Once connected, inspect the joint for any gaps or loose areas. A poorly sealed connection can allow hot air to escape back into the room, reducing cooling efficiency. If you see a gap, use high-temperature silicone sealant (available at hardware stores) to fill it. Let it dry completely before proceeding.
Step 4: Install the Air Conditioner in the Window
With the hose attached, it’s time to place the air conditioner into the window opening. This step requires care to avoid dropping the unit or damaging the window.
Lift the Unit Safely
Window AC units can be heavy—some LG models weigh over 60 pounds. Always lift with your legs, not your back. If possible, have a friend help you. Wear gloves to improve your grip.
Position the unit so the exhaust hose faces outward and the front control panel faces into the room. Slide the unit into the window opening, resting it on the mounting brackets.
Secure the Unit
Once the unit is in place, lower the window sash until it rests on top of the AC. Use the screws from the mounting kit to secure the unit to the window frame. This prevents the unit from shifting or falling.
If your model includes a security bracket, attach it now. This is a metal strap that connects the AC to the wall or window frame, adding extra protection against theft or accidental dislodging.
Step 5: Connect the Hose to the Window Bracket
The final connection is between the exhaust hose and the window bracket. This ensures hot air is properly vented outside without leaking back in.
Attach the Hose to the Bracket
On the outside of the window, you’ll see a vent opening in the mounting bracket. Insert the free end of the exhaust hose into this opening. Like the unit connection, it should twist or snap into place.
If your bracket has a hose adapter, attach it first. These adapters help create a tighter seal and are especially useful in windy areas.
Seal the Connection
Use weatherstripping or foam tape to seal any gaps around the hose where it enters the bracket. This prevents air leaks and keeps insects out. In 2026, LG recommends using their proprietary EcoSeal tape, which is heat-resistant and mold-proof.
For extra protection, you can also install a hose cover or vent cap. These accessories shield the hose from rain, snow, and debris, extending its lifespan.
Step 6: Test the Installation
Before you relax and enjoy the cool air, it’s important to test your installation to ensure everything is working correctly.
Turn On the Unit
Plug in your LG air conditioner and turn it on. Set the temperature to a low setting (e.g., 68°F) and select “Cool” mode. Listen for any unusual noises—grinding, rattling, or hissing could indicate a problem.
Check for Air Leaks
Feel around the hose connections and window seals. If you feel warm air escaping, you may have a leak. Turn off the unit and recheck the seals. Use additional tape or sealant if needed.
Monitor Performance
Let the AC run for 10–15 minutes. The room should begin to cool, and you should hear the fan and compressor working smoothly. If the unit struggles to cool or shuts off unexpectedly, refer to the troubleshooting section below.
Troubleshooting Common Issues
Even with careful installation, problems can arise. Here are some common issues and how to fix them:
Hose Keeps Disconnecting
If the hose pops off during operation, the connection isn’t secure. Turn off the unit, remove the hose, and reattach it firmly. Check for cracks or warping in the connector. Replace the hose if damaged.
Water Leaking Inside
Condensation inside the room usually means the unit isn’t level or the drain hole is blocked. Tilt the unit slightly forward (about 1/4 inch) so water flows outside. Clean the drain hole with a pipe cleaner.
Reduced Cooling Efficiency
This could be due to a clogged filter, blocked exhaust hose, or poor insulation. Clean the air filter monthly and inspect the hose for kinks or debris. Seal all gaps with foam tape.
Strange Noises
Rattling may indicate loose parts. Tighten all screws and brackets. Hissing could mean a refrigerant leak—contact LG service immediately.
Maintenance Tips for 2026 and Beyond
To keep your LG window air conditioner running smoothly, regular maintenance is key. Here’s a simple schedule:
- Monthly: Clean the air filter with soap and water.
- Every 3 months: Inspect the hose for cracks or wear.
- Annually: Deep-clean the unit, check electrical connections, and lubricate moving parts (if applicable).
- Before winter storage: Remove the unit, clean it thoroughly, and store it in a dry place.
In 2026, LG offers a Smart Care app that sends maintenance reminders and connects you with certified technicians. Download it to stay on top of upkeep.
Conclusion
Installing an LG window air conditioner hose is a manageable task when you follow the right steps. From choosing the perfect window to testing the final setup, this guide has walked you through every detail to ensure a safe, efficient, and long-lasting installation. With proper care and attention, your LG AC will keep you cool and comfortable all summer long.
Remember, the key to success is preparation, precision, and regular maintenance. Don’t rush the process—take your time to seal gaps, secure connections, and test the system. And if you ever run into trouble, consult your manual or reach out to LG’s 2026 customer support team for expert help.
Now that you’re equipped with the knowledge and confidence to install your LG window AC hose, it’s time to enjoy the cool, refreshing air. Stay comfortable, stay safe, and beat the heat with ease!