
Installing an LG wall air conditioner doesn’t have to be overwhelming. This guide walks you through every step—from choosing the right model to final testing—ensuring a safe, efficient setup. With clear instructions and expert tips, you’ll enjoy cool, comfortable air in no time.
Key Takeaways
- Choose the right LG model: Match the unit’s BTU rating to your room size for optimal cooling and energy efficiency.
- Check wall structure and electrical requirements: Ensure your wall can support the unit and that you have a dedicated 220V circuit.
- Use proper tools and safety gear: A level, drill, stud finder, and gloves are essential for a secure and safe installation.
- Follow the mounting template precisely: Accurate hole placement prevents leaks, vibrations, and structural damage.
- Seal all gaps with weatherproofing: Prevent air leaks and moisture intrusion with foam tape and sealant.
- Test the system before finalizing: Run the AC to check for proper operation, drainage, and remote connectivity.
- Schedule professional help if unsure: When in doubt, consult an HVAC technician—especially for electrical or structural concerns.
How to Install LG Wall Air Conditioner: A Complete 2026 Guide
Welcome to your comprehensive guide on how to install an LG wall air conditioner in 2026. Whether you’re upgrading your home cooling system or installing your first wall-mounted unit, this step-by-step walkthrough will help you get the job done safely, efficiently, and correctly. LG wall air conditioners are known for their energy efficiency, smart features, and sleek design—but their performance depends heavily on proper installation.
In this guide, you’ll learn everything from selecting the right model and preparing your space to mounting the unit, connecting electrical components, and testing the system. We’ll also cover common mistakes, troubleshooting tips, and when it’s best to call in a professional. By the end, you’ll have a cool, quiet, and reliable air conditioning system that keeps your home comfortable all summer long.
Let’s get started!
Why Choose an LG Wall Air Conditioner?
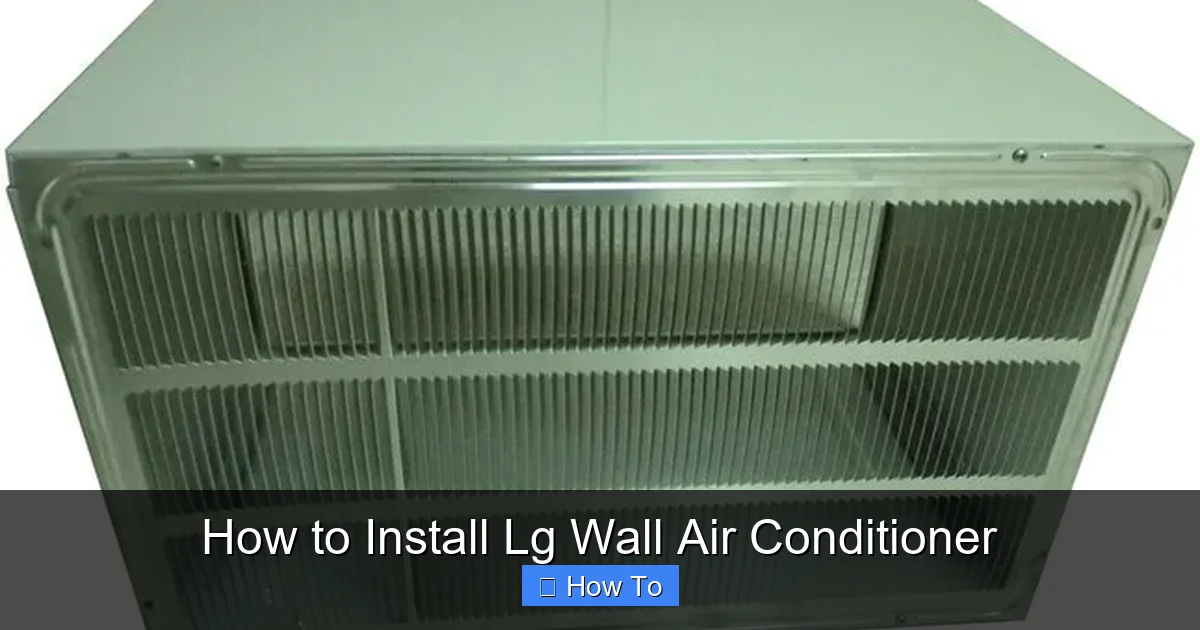
Visual guide about How to Install Lg Wall Air Conditioner
Image source: lawsonair.com.au
LG has been a leader in home appliances for decades, and their wall-mounted air conditioners are no exception. In 2026, LG continues to innovate with features like Wi-Fi connectivity, voice control via Google Assistant and Alexa, and advanced inverter technology that reduces energy consumption.
These units are ideal for rooms where central air isn’t an option—think bedrooms, home offices, garages, or additions. They’re also quieter than window units and don’t block natural light. Plus, with LG’s Smart ThinQ app, you can control your AC from your smartphone, set schedules, and monitor energy usage.
But even the best technology won’t perform well if it’s installed incorrectly. That’s why following the right steps is crucial.
Step 1: Choose the Right LG Wall Air Conditioner Model
Before you even think about drilling into your wall, you need to pick the right unit. LG offers a range of wall-mounted air conditioners with different capacities, features, and price points.
Determine the Correct BTU Rating
BTU (British Thermal Units) measures cooling power. Too little, and your room won’t cool properly. Too much, and you’ll waste energy and create humidity issues.
Use this general guideline based on room size:
- 100–150 sq. ft.: 5,000–6,000 BTU
- 150–250 sq. ft.: 7,000–8,000 BTU
- 250–350 sq. ft.: 9,000–10,000 BTU
- 350–450 sq. ft.: 12,000 BTU
- 450–550 sq. ft.: 14,000 BTU
For rooms with high ceilings, south-facing windows, or lots of electronics, add 10–20% more BTU.
Consider Smart Features and Energy Efficiency
In 2026, many LG wall ACs come with inverter technology, which adjusts compressor speed instead of turning on and off. This saves up to 30% on energy bills and keeps temperatures more consistent.
Look for models with:
- ENERGY STAR certification
- Wi-Fi and app control
- Sleep mode and auto-clean functions
- Quiet operation (under 40 dB)
Popular 2026 models include the LG Dual Inverter Smart Wall AC (12,000 BTU) and the LG Ultra Quiet Series (9,000 BTU).
Step 2: Gather Tools and Materials
Having the right tools makes installation faster and safer. Here’s what you’ll need:
Essential Tools
- Power drill with masonry and wood bits
- Level (24-inch or longer)
- Stud finder
- Tape measure
- Pencil or marker
- Screwdrivers (Phillips and flathead)
- Adjustable wrench
- Hacksaw or pipe cutter (for refrigerant lines)
- Vacuum pump (if handling refrigerant)
Safety Gear
- Work gloves
- Safety goggles
- Hard hat (if working near ceilings)
- Knee pads (for comfort during long installations)
Materials
- Mounting bracket (usually included with the unit)
- Wall sleeve or back panel (if required)
- Weatherproof sealant (silicone or foam tape)
- Electrical wire (12/3 NM-B for 220V, if not pre-wired)
- Conduit and junction box (if needed)
- Insulation foam (to fill gaps)
- Screws and anchors (masonry or wood, depending on wall type)
Tip: Always check your local building codes. Some areas require permits for electrical work or wall modifications.
Step 3: Prepare the Installation Site
A successful installation starts with proper site preparation. Rushing this step can lead to leaks, poor performance, or even structural damage.
Choose the Right Wall
The ideal wall is:
- Exterior (so condenser can vent outside)
- Structurally sound (no cracks or weak spots)
- Free of obstructions (pipes, wires, or ductwork behind)
- Accessible for maintenance
Avoid walls with plumbing, electrical conduits, or load-bearing beams unless you’re certain of their location.
Check for Obstructions
Use a stud finder to locate studs, pipes, or wires behind the wall. Mark their positions with tape. You’ll need at least 6–8 inches of clear space around the installation area.
Also, ensure there’s enough outdoor space for airflow. The condenser unit needs at least 12 inches of clearance on all sides.
Verify Electrical Requirements
Most LG wall air conditioners require a dedicated 220–240V circuit. Standard 110V outlets won’t work.
Check your electrical panel:
- Is there an available 20- or 30-amp double-pole breaker?
- Is the wiring already in place?
- Do you need an electrician to run a new circuit?
If you’re not comfortable working with electricity, hire a licensed electrician. This is not a DIY step for beginners.
Step 4: Install the Mounting Bracket
The mounting bracket is the backbone of your installation. It supports the entire unit, so it must be level, secure, and properly aligned.
Use the Template
LG includes a paper template with your unit. Tape it to the wall at the desired height (usually 6–8 feet from the floor). Make sure it’s level using a spirit level.
Double-check alignment with a plumb line or laser level for precision.
Mark and Drill Holes
Once the template is level, mark the screw holes with a pencil. Remove the template.
Drill pilot holes using the appropriate bit for your wall type:
- Wood: Use a wood bit slightly smaller than the screw.
- Concrete/brick: Use a masonry bit and hammer drill.
- Metal studs: Use self-tapping screws.
Secure the Bracket
Attach the bracket using heavy-duty screws and anchors. For concrete, use expansion anchors. For wood, use lag screws into studs.
Tighten all screws firmly, but don’t over-torque—this can strip the holes.
Tip: Have a helper hold the bracket while you secure it. It’s heavy and awkward to manage alone.
Step 5: Prepare the Wall Opening
Now it’s time to cut the hole for the air conditioner. This is the most irreversible step, so measure twice, cut once.
Measure the Opening
The hole should match the dimensions of the unit’s rear panel. Typically, this is around 14–18 inches wide and 12–16 inches tall, but check your model’s specs.
Use a tape measure and mark the outline with a pencil.
Cut the Hole
For drywall or wood:
- Use a jigsaw or reciprocating saw.
- Start with a pilot hole to insert the blade.
- Cut slowly and steadily.
For brick or concrete:
- Use a hammer drill and chisel.
- Drill a series of holes along the outline, then chip away the material.
- Wear a dust mask and goggles.
Tip: Place a drop cloth below to catch debris.
Install the Wall Sleeve (If Required)
Some LG models require a wall sleeve—a metal or plastic frame that fits into the hole and holds the unit. Slide it in from the outside and secure it with screws.
Ensure it’s level and flush with the wall.
Step 6: Run Electrical Wiring
This step should only be done by someone qualified in electrical work. If you’re unsure, call an electrician.
Turn Off Power
Shut off the main breaker and verify with a voltage tester that the circuit is dead.
Run the Cable
Run 12/3 NM-B cable from the electrical panel to the installation site. Use conduit if required by code.
Strip the ends and connect to the junction box near the wall opening.
Connect to the Unit
LG units typically have a terminal block inside the electrical compartment. Connect:
- Black wire to L1 (hot)
- Red wire to L2 (hot)
- White wire to N (neutral)
- Green or bare wire to ground
Secure all connections with wire nuts and electrical tape.
Never splice wires inside the wall—use a junction box.
Step 7: Install the Air Conditioner Unit
Now for the main event—mounting the AC.
Position the Unit
With a helper, lift the unit and slide it into the wall sleeve or onto the bracket. Align the mounting holes.
Secure the Unit
Insert the provided screws through the front panel into the bracket. Tighten evenly to avoid warping the casing.
Check that the unit is level and doesn’t wobble.
Connect Refrigerant Lines (If Applicable)
Some LG wall units are pre-charged and don’t require line connection. Others (especially split systems) need copper lines connected.
If you’re handling refrigerant:
- Use a vacuum pump to remove air and moisture.
- Open the service valves slowly.
- Wear gloves and goggles.
Never release refrigerant into the air—it’s illegal and harmful to the environment.
Step 8: Seal and Insulate
A poorly sealed installation leads to energy loss, moisture problems, and pests.
Apply Weatherproof Sealant
Use silicone caulk or foam tape around the edges of the unit where it meets the wall. Fill any gaps between the sleeve and wall.
Pay special attention to the bottom—this is where condensation drains.
Insulate Exposed Areas
If there are gaps around pipes or wires, fill them with expanding foam insulation. Trim excess after it dries.
This keeps cold air in and hot air out.
Step 9: Test the System
Before you celebrate, make sure everything works.
Turn On Power
Restore power at the breaker panel.
Test Operation
Turn on the AC using the remote or control panel. Set it to cool mode and lower the temperature.
Listen for:
- Smooth compressor startup
- Even airflow from vents
- No unusual noises (grinding, rattling)
Check the outdoor unit (if applicable) to ensure the fan is running.
Check Drainage
Run the AC for 15–20 minutes. Look for water dripping from the drain hose outside. If it’s not draining, check for clogs or improper slope.
Test Smart Features
Download the LG ThinQ app and connect your AC to Wi-Fi. Test remote control, scheduling, and voice commands.
Troubleshooting Common Issues
Even with careful installation, problems can arise. Here’s how to fix the most common ones.
Unit Won’t Turn On
- Check the breaker—did it trip?
- Verify remote batteries.
- Ensure the unit is properly plugged in or wired.
Weak Cooling
- Check air filters—clean or replace if dirty.
- Ensure vents aren’t blocked.
- Verify the unit is the right size for the room.
Water Leaking Inside
- Check the drain hose for clogs.
- Ensure the unit is level—water pools if tilted.
- Inspect the seal around the wall opening.
Strange Noises
- Rattling: Tighten loose screws or panels.
- Humming: Could indicate electrical issues—call a technician.
- Clicking: Normal during startup or defrost cycles.
Wi-Fi Not Connecting
- Restart the router and AC.
- Ensure you’re using 2.4 GHz Wi-Fi (not 5 GHz).
- Re-enter network credentials in the app.
Maintenance Tips for Long-Term Performance
To keep your LG wall air conditioner running efficiently for years:
- Clean or replace filters every 1–2 months.
- Wipe down the exterior with a damp cloth.
- Clear debris from the outdoor unit (leaves, dirt).
- Check seals and re-caulk if needed.
- Schedule professional maintenance every 2–3 years.
When to Call a Professional
While many homeowners can handle basic installation, some situations require expert help:
- You’re not comfortable working with electricity.
- The wall is made of concrete or brick and you lack the tools.
- You need to run a new 220V circuit.
- The unit is part of a multi-zone system.
- You suspect refrigerant leaks or compressor issues.
A licensed HVAC technician can ensure code compliance, safety, and optimal performance.
Conclusion
Installing an LG wall air conditioner in 2026 is a manageable project if you plan carefully and follow the steps. From choosing the right model and preparing the site to mounting, wiring, and testing, each phase matters.
By using the right tools, sealing properly, and testing thoroughly, you’ll enjoy efficient, quiet cooling all season long. And with LG’s smart features, you’ll have comfort at your fingertips.
Remember: when in doubt, consult a professional. Your safety and the longevity of your unit are worth the investment.
Now go enjoy that cool, refreshing air—you’ve earned it!