
Featured image for how to install hisense portable air conditioner
Image source: machinesgeek.com
Installing your Hisense portable air conditioner is quick and hassle-free with just five simple steps. Start by positioning the unit near a window and power source, then attach the exhaust hose and secure the window kit for a snug, heat-blocking seal. Plug it in, power it on, and enjoy instant cooling—no tools or professional help required.
Key Takeaways
- Position near a window: Ensure proper venting by placing the unit close to a window.
- Secure the exhaust hose: Attach it tightly to prevent hot air leaks and inefficiency.
- Use the window kit: Seal gaps with included panels to keep cool air inside.
- Check power requirements: Plug into a grounded outlet to avoid electrical issues.
- Test before use: Run the unit briefly to confirm proper installation and function.
- Maintain airflow: Keep intake and exhaust vents unobstructed for optimal performance.
📑 Table of Contents
- Why Installing Your Hisense Portable Air Conditioner Matters
- Step 1: Unbox and Inspect Your Hisense Portable AC
- Step 2: Choose the Best Location for Your AC
- Step 3: Install the Window Venting Kit
- Step 4: Set Up and Power On the Unit
- Step 5: Maintain and Troubleshoot for Long-Term Use
- Final Thoughts: Enjoy Your Cool, Comfortable Space
Why Installing Your Hisense Portable Air Conditioner Matters
It’s a sweltering summer afternoon. The sun’s beating down, and you’re sweating through your shirt just sitting on the couch. You bought a Hisense portable air conditioner last week, hoping it would be your salvation. But now, you’re staring at the box, wondering: How the heck do I install this thing?
You’re not alone. Many people assume portable ACs are “plug-and-play,” but the truth is, proper installation makes all the difference. A poorly set-up unit can leak, underperform, or even damage your window frame. On the other hand, a correctly installed Hisense portable AC will cool your space efficiently, save energy, and last longer. The good news? Installing it is way easier than you think — and I’m here to walk you through it step by step.
Step 1: Unbox and Inspect Your Hisense Portable AC
What’s in the Box?
Before you even think about plugging anything in, take a deep breath and unbox your Hisense portable air conditioner carefully. Most models (like the Hisense AP-12CW1R, AP-14CW1R, or AP-10CW1R) come with:
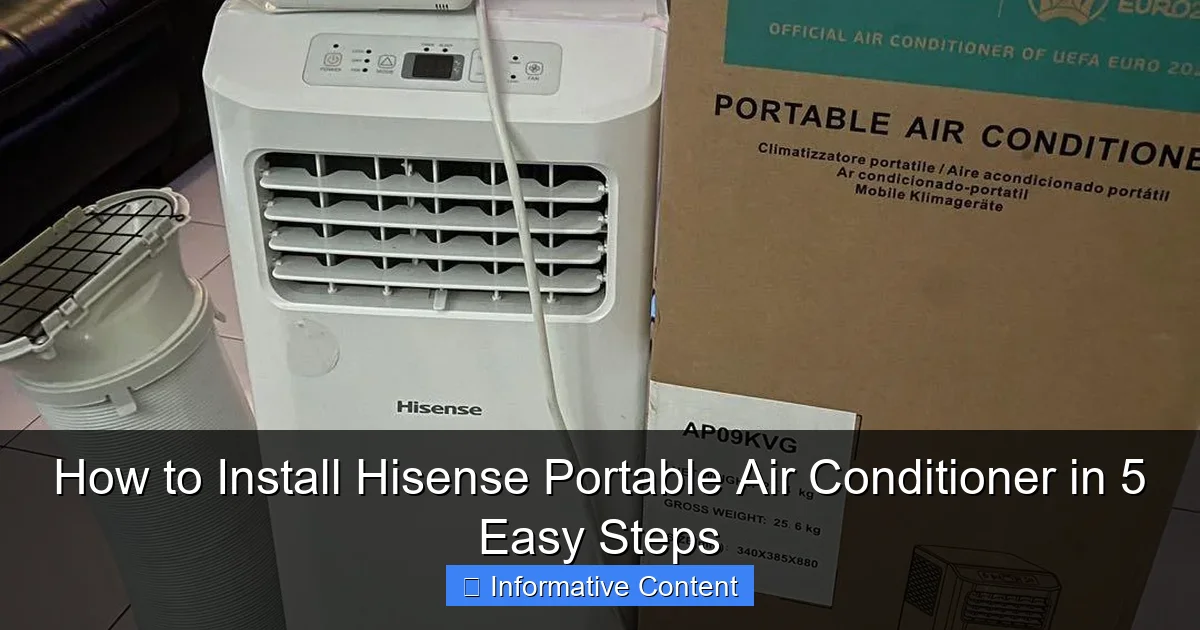
Visual guide about how to install hisense portable air conditioner
Image source: media.karousell.com
- The main AC unit
- Exhaust hose (typically 5–6 feet long)
- Window venting kit (plastic or foam panels)
- Hose connector and window adapter
- Remote control and batteries
- User manual and quick-start guide
Pro tip: Lay everything out on a clean, flat surface — maybe your dining table or floor. This helps you avoid losing small parts and ensures nothing’s missing.
Check for Damage
Now, inspect the unit and accessories for any signs of damage. Look for:
- Dents or cracks on the AC body
- Kinks or tears in the exhaust hose
- Missing or cracked window panels
- Wet spots (which could indicate a refrigerant leak — rare but serious)
If you notice anything suspicious, contact Hisense support or your retailer immediately. Don’t try to “fix” a damaged unit yourself. It’s not worth the risk.
Read the Manual (Yes, Really)
I know, manuals are boring. But the Hisense user manual includes model-specific details like hose length, drainage instructions, and safety warnings. For example, some Hisense models have a built-in water tank that needs emptying regularly, while others use continuous drainage. Skipping this step could lead to leaks or poor cooling performance.
Also, check if your model has a dual-hose or single-hose system. Dual-hose units (like the Hisense AP-14CW1R) are more efficient because they draw fresh air from outside for cooling the condenser. Single-hose models are simpler to install but slightly less efficient in very hot climates.
Step 2: Choose the Best Location for Your AC
Why Location Matters
You wouldn’t put a fan in a closet and expect it to cool your living room — same goes for your Hisense portable AC. The right placement affects cooling power, airflow, and energy efficiency.
Here’s what to look for:
- Near a window: The exhaust hose needs to vent hot air outside. Ideally, place the unit within 6 feet of a window.
- Clear of obstacles: Keep at least 2 feet of space on all sides. Blocking airflow makes the unit work harder and cools less effectively.
- On a flat, stable surface: A wobbly table or uneven floor can cause vibrations, noise, or even tip the unit over.
- Away from direct sunlight: If possible, avoid placing it near a sun-facing window or heat source (like a radiator).
Window Type Considerations
Not all windows are created equal. Hisense venting kits are designed for standard vertical or horizontal sliding windows, but you might need a little creativity for other types.
- Sliding windows (most common): Use the adjustable plastic or foam panels that come in the kit. They slide to fit your window width.
- Double-hung windows: Lower the top sash and place the venting kit between the sashes. Secure it with the included clamps or tape.
- Casement or crank-out windows: These are trickier. You may need a custom adapter or a temporary plexiglass panel with a hole for the hose. Some people use a venting sleeve that fits into the open window space.
- No window nearby? Consider a sliding door (with a similar venting kit) or a temporary hole in a wall (not ideal, but possible for renters with landlord permission).
Drainage and Water Management
Most Hisense portable ACs collect condensation in an internal tank. When the tank is full, the unit shuts off automatically to prevent leaks. But if you’re running it for hours (like overnight), you’ll need to empty it or set up continuous drainage.
- Manual drainage: Place a shallow pan under the unit and use the included drain plug. Empty every 4–8 hours, depending on humidity.
- Continuous drainage: Attach a standard garden hose (¼” to ⅜”) to the drain port at the back. Run the hose to a floor drain, sink, or outside. This is ideal for humid climates or long-term use.
Note: Some newer Hisense models (like the AP-10CW1R) have a “self-evaporative” system that recycles condensation to cool the condenser, reducing the need for frequent emptying. Check your manual!
Step 3: Install the Window Venting Kit
Prepare the Window
Close the window fully and clean the track or sill. Remove any dirt, dust, or debris that could interfere with the seal. A clean surface ensures the venting kit stays secure and prevents air leaks.
Assemble the Venting Panels
Most Hisense kits include two or three adjustable panels (plastic or foam) and a window adapter. Here’s how to put them together:
- Measure your window opening (width for sliding windows, height for double-hung).
- Slide the panels together to match the measurement. They usually have grooves or notches that click into place.
- Insert the window adapter into one end of the panel assembly. This is the part that connects to the exhaust hose.
Example: For a 30-inch sliding window, you might use two 15-inch panels. If your window is 32 inches, leave a small gap and use the included foam strips to seal it.
Secure the Kit in the Window
Now, open the window and place the venting kit inside. For sliding windows:
- Lower the sash (or slide the window) so it rests on top of the panels.
- Use the included clamps, screws, or adhesive strips to secure the panels to the window frame. This prevents them from shifting when the AC vibrates.
- Seal gaps with foam strips or weather stripping. Even a ¼-inch gap can reduce efficiency by 20%!
For double-hung windows:
- Lower the top sash until it sits on the venting kit.
- Use the included L-brackets or tape to hold the kit in place.
- Seal the sides with foam or tape.
Connect the Exhaust Hose
Attach one end of the exhaust hose to the back of the Hisense AC unit (look for the round port with a twist-lock or clamp). Then, connect the other end to the window adapter. Most hoses twist into place or use a simple clip mechanism.
- Make sure the hose is straight and not kinked. A bent hose restricts airflow and makes the AC work harder.
- Keep the hose as short as possible. Long hoses (over 6 feet) can cause pressure drops and reduce cooling.
- If you need to extend the hose, use a Hisense-approved extension (not a random PVC pipe).
Step 4: Set Up and Power On the Unit
Position the AC and Hose
Place the Hisense portable air conditioner near the window, but not so close that the hose is stretched. Ideally, the hose should form a gentle curve — not a sharp bend.
- Use the included casters to roll the unit into place. Most Hisense models have 360-degree swivel wheels for easy maneuvering.
- If you’re using continuous drainage, connect the hose to the drain port before powering on. Otherwise, water might leak out the back.
Plug It In (Safely!)
Always plug your Hisense AC directly into a wall outlet — never use an extension cord or power strip. Here’s why:
- Portable ACs draw a lot of power (up to 1,500 watts). Extension cords can overheat and cause fires.
- Power strips may not handle the startup surge (called “inrush current”).
Use a dedicated 15-amp circuit if possible. If the AC trips a breaker, unplug it and try a different outlet.
Power On and Test
Press the Power button on the unit or remote control. You should hear the compressor and fan start up. Wait a minute or two for the air to cool down.
- If the air is warm, check the exhaust hose — it might be loose or kinked.
- If the unit shuts off after 10 minutes, the water tank might be full. Empty it and restart.
- If nothing happens, check the outlet with another device (like a lamp).
Adjust Settings for Best Performance
Use the remote control to set your desired temperature (usually 72–78°F for comfort). Most Hisense models offer:
- Cool Mode: Standard cooling.
- Fan Mode: Circulates air without cooling.
- Dehumidify Mode: Removes moisture (great for humid climates).
- Sleep Mode: Reduces fan speed at night for quieter operation.
Pro tip: Start with a low fan speed to avoid blowing papers or dust around. Increase it if the room isn’t cooling fast enough.
Step 5: Maintain and Troubleshoot for Long-Term Use
Daily and Weekly Maintenance
Your Hisense portable AC works hard — and it needs a little TLC to keep running smoothly.
- Check the water tank: Empty it daily if you’re using manual drainage.
- Clean the air filter: Remove the filter (usually behind a panel on the side or back) and rinse it with water. Let it dry completely before reinstalling. Do this every 2–4 weeks.
- Wipe down the exterior: Use a damp cloth to remove dust and fingerprints.
Monthly Deep Clean
Every month, do a more thorough cleaning:
- Unplug the unit.
- Remove the filter and soak it in warm, soapy water for 10 minutes. Rinse and dry.
- Use a vacuum attachment to clean the exhaust port and hose connection.
- Check the exhaust hose for mold or mildew (especially in humid climates). Wipe with a mild bleach solution if needed.
Common Problems and Fixes
Even with proper care, issues can happen. Here are some common problems and how to fix them:
| Problem | Possible Cause | Solution |
|---|---|---|
| AC not cooling | Exhaust hose loose or kinked | Reattach or straighten the hose |
| Water leaking | Water tank full or drain hose clogged | Empty tank or clear hose |
| Unit shuts off randomly | Overheating or full tank | Check for blocked airflow or empty tank |
| Noisy operation | Loose panels or dirty filter | Tighten window kit or clean filter |
| Remote not working | Dead batteries or signal blocked | Replace batteries or aim directly at sensor |
Winter Storage Tips
If you’re not using your Hisense portable AC in winter, store it properly:
- Drain all water from the tank and drain hose.
- Clean the filter and interior (use a dry cloth).
- Coil the power cord and hose neatly.
- Store in a dry, temperature-controlled area (like a closet or basement).
Never store it in a garage or shed where temperatures drop below freezing — water left in the unit can expand and crack internal parts.
Final Thoughts: Enjoy Your Cool, Comfortable Space
Installing your Hisense portable air conditioner might seem intimidating at first, but it’s really just five simple steps: unbox, place, vent, power, and maintain. Once it’s set up, you’ll wonder how you ever survived without it.
I remember when I installed my first Hisense AC — I was nervous about the hose and worried the window would leak. But after following these steps, it cooled my 300-square-foot living room in under 20 minutes. Now, I use it every summer, and it’s still going strong after three years.
The key is to take your time, read the manual, and don’t skip the little details (like sealing gaps or cleaning the filter). A well-installed portable AC isn’t just a luxury — it’s a smart investment in your comfort, health, and energy savings.
So go ahead, crank that dial, and enjoy the cool breeze. Your summer just got a whole lot more bearable.
Frequently Asked Questions
How do I install a Hisense portable air conditioner?
To install your Hisense portable air conditioner, start by placing it near a window and power outlet. Connect the exhaust hose to the unit and window kit, then secure it tightly to ensure proper ventilation.
Can I install a Hisense portable air conditioner without tools?
Yes, most Hisense portable air conditioners require no special tools for installation. The window kit and hose use a simple clamp or slide mechanism for quick, tool-free setup.
Where should I place my Hisense portable air conditioner for best results?
Place the unit near a window (for exhaust) and a grounded electrical outlet, ensuring at least 12 inches of clearance on all sides for optimal airflow and efficiency.
How does the exhaust hose work in Hisense portable AC installation?
The exhaust hose removes hot air from the room and must be vented outside via the window kit. Keep the hose as straight and short as possible to maximize cooling performance.
Do I need to seal the window after installing the Hisense portable air conditioner?
Yes, use the included foam or adjustable panels to seal gaps around the window kit. This prevents hot air from re-entering the room and improves energy efficiency.
What’s the easiest way to set up a Hisense portable air conditioner window kit?
Attach the exhaust hose to the unit and window adapter, then adjust the sliding window kit to fit your opening. Tighten the clamps or screws to secure it in place.