

Featured image for how to install an air conditioner
Image source: veseldom.com
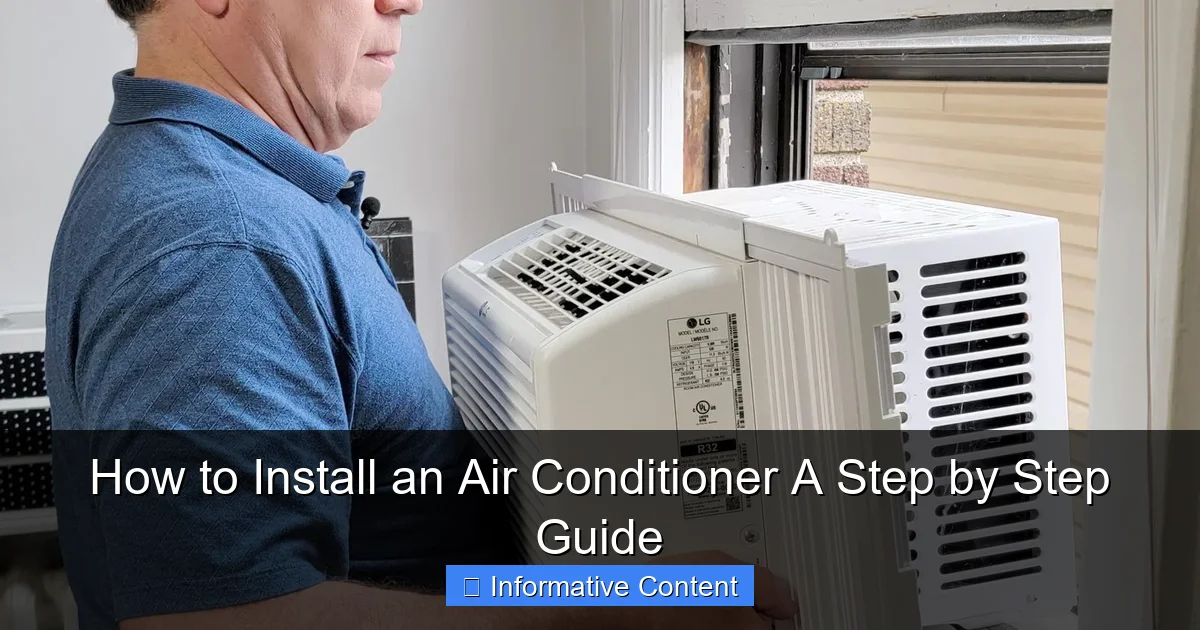
Installing an air conditioner properly ensures optimal performance and energy efficiency. This step-by-step guide walks you through selecting the right unit, preparing the installation site, mounting the indoor and outdoor components, and connecting refrigerant lines and electrical wiring—all while prioritizing safety and manufacturer guidelines. Whether you’re a DIY enthusiast or prepping for a pro, following these steps minimizes risks and maximizes cooling comfort.
Key Takeaways
- Choose the right unit: Match AC capacity to room size for optimal efficiency.
- Prepare tools early: Gather all necessary tools before starting installation.
- Seal gaps tightly: Prevent air leaks with proper insulation and sealing.
- Follow manufacturer instructions: Adhere strictly to the AC model’s guidelines.
- Test before finishing: Run the AC to check for leaks or errors.
- Safety first: Turn off power and use protective gear during installation.
📑 Table of Contents
- Why Installing an Air Conditioner Is Easier Than You Think
- Step 1: Choose the Right Air Conditioner for Your Space
- Step 2: Gather Your Tools and Prepare the Area
- Step 3: Install the Air Conditioner (Window and Through-the-Wall Units)
- Step 4: Install a Split-System (Mini-Split) Air Conditioner
- Step 5: Electrical and Final Setup
- Data Table: AC Installation Time and Difficulty by Type
- Final Thoughts: You’ve Got This!
Why Installing an Air Conditioner Is Easier Than You Think
Let’s be honest—when the summer heat hits, nothing feels better than stepping into a cool, air-conditioned room. But if you’re staring at a brand-new AC unit and feeling overwhelmed, you’re not alone. I remember the first time I tried to install my own air conditioner. I was sweating buckets, Googling “how to install an air conditioner” every five minutes, and second-guessing every decision. Sound familiar?
The truth is, installing an air conditioner isn’t as intimidating as it seems—especially if you take it step by step. Whether you’re replacing an old unit or setting up your first one, this guide will walk you through the entire process. From choosing the right AC for your space to safely mounting it and testing it out, we’ll cover everything you need to know. And don’t worry—no engineering degree required. With the right tools, a little patience, and a clear plan, you can do this. So grab a glass of iced tea (or maybe a cold beer), and let’s get started.
Step 1: Choose the Right Air Conditioner for Your Space
Before you even think about drilling holes or handling refrigerant lines, you need to pick the right air conditioner. This is the foundation of a successful installation. Choose wrong, and you’ll either freeze in the winter (because your AC is too powerful) or bake like a potato in the summer (because it’s underpowered).
Visual guide about how to install an air conditioner
Image source: familyhandyman.com
Know Your Room Size and BTU Needs
The first thing to consider is room size. Air conditioners are rated in BTUs (British Thermal Units), which measure cooling power. The general rule? 20 BTUs per square foot of living space. For example:
- A 250 sq ft bedroom needs about 5,000 BTUs
- A 400 sq ft living room needs around 8,000 BTUs
- A 600 sq ft open-concept area may need 12,000 BTUs
<
But it’s not just size. Sunlight, ceiling height, insulation, and even the number of people using the room affect cooling needs. A sun-drenched kitchen with big windows? Add 10–20% more BTUs. A basement with thick walls? You can go 10% lower.
Pro tip: Use an online BTU calculator (like EnergyStar’s) to double-check. And if you’re in a hot climate (hello, Arizona!), lean toward the higher end of the range.
Pick the Right Type of AC
Not all air conditioners are created equal. Here are the most common types for home use:
- Window AC units: Affordable, easy to install, and perfect for single rooms. Best for renters or small apartments. Downside? They’re not the most energy-efficient.
- Portable ACs: No permanent installation. Just vent the hose out a window. Great for renters or temporary cooling. But they’re louder and less efficient than window units.
- Split-system (mini-split) ACs: Ductless systems with an indoor unit and outdoor condenser. Super efficient, quiet, and great for larger homes. More expensive, but worth it for whole-house cooling.
- Through-the-wall ACs: Similar to window units but installed in a wall sleeve. More permanent and slightly more efficient.
I once tried using a 6,000 BTU window unit in my 400 sq ft living room. Big mistake. It ran non-stop, barely kept up, and my electricity bill skyrocketed. After switching to a 9,000 BTU unit, everything changed. So take your time here—this choice matters.
Check for Energy Efficiency and Features
Look for the Energy Star label and a high SEER rating (Seasonal Energy Efficiency Ratio). The higher the SEER, the less electricity you’ll use. Modern units often have smart features like:
- Wi-Fi control (turn on your AC before you get home!)
- Sleep modes (quieter at night)
- Dehumidifiers (great for muggy climates)
- Air filters (improves indoor air quality)
And don’t forget about noise levels. If you’re putting it in a bedroom, look for units with decibel ratings under 55 dB (about the sound of a quiet conversation).
Step 2: Gather Your Tools and Prepare the Area
You’ve picked your AC. Now it’s time to get your tools ready and prep the space. Trust me—rushing this step will cost you later.
Tools and Supplies You’ll Need
Here’s a checklist of what you’ll need for most installations:
- Measuring tape
- Level (a 2-foot level is best)
- Drill and drill bits (including a hole saw if needed)
- Screwdriver (Phillips and flathead)
- Adjustable wrench
- Caulking gun and exterior-grade caulk
- Weather stripping or foam sealant
- Support brackets (for window units)
- Extension ladder (if working on upper floors)
- Safety goggles and work gloves
- Vacuum cleaner (to clean the area before installation)
For split-system ACs, you’ll also need:
- Refrigerant lines (pre-charged or field-installed)
- Drain line and condensate pump (if needed)
- Electrical conduit and wiring
- Vacuum pump (for evacuating refrigerant lines)
Most window and portable ACs come with a mounting kit. But always check the manual—some require extra support brackets or foam insulation.
Prep the Installation Area
Clear the area around the window or wall where you’ll install the AC. Move furniture, remove curtains, and clean the surface. If you’re installing a window unit, open the window and check for:
- Structural integrity (no rot or loose sills)
- Proper clearance (at least 20 inches on each side for airflow)
- Weatherproofing (no gaps or leaks around the window frame)
For split systems, you’ll need to:
- Choose a spot on an exterior wall for the indoor unit (near the ceiling)
- Pick a level, shaded area for the outdoor condenser (away from debris and foot traffic)
- Plan the route for refrigerant and electrical lines (shortest, straightest path is best)
Pro tip: Take photos of the area before you start. It’ll help you remember how things were if you need to troubleshoot later.
Safety First
AC installation involves electricity, heavy lifting, and sometimes heights. So:
- Turn off power to the room at the circuit breaker before starting
- Use a spotter if lifting a heavy unit (window ACs can weigh 50–100 lbs)
- Wear non-slip shoes if working on a ladder
- Never work in extreme heat or storms
I learned this the hard way when I tried to install my AC during a 95°F heatwave. I was drenched in sweat, my hands were slippery, and I nearly dropped the unit. Now I always do it early in the morning or on a cooler day.
Step 3: Install the Air Conditioner (Window and Through-the-Wall Units)
Now for the fun part—installing the AC! Let’s start with window and through-the-wall units, which are the most common for DIYers.
Measure and Cut the Window Opening
Close the window and measure the width and height of the opening. Most window ACs come with an adjustable side panel kit. Extend the panels to fit snugly, leaving no gaps.
If the window is too tall, you’ll need to build a support platform or use a window AC bracket. These brackets attach to the window sill and hold the unit’s weight, preventing sagging or falling. Never rely on the window’s lower sash alone—it can’t support the weight.
Mount the Support Bracket
Here’s how to install a window AC bracket:
- Position the bracket on the window sill, centered under the unit
- Use a level to ensure it’s perfectly horizontal
- Mark the screw holes with a pencil
- Drill pilot holes (use a masonry bit if the sill is brick or concrete)
- Secure the bracket with screws (don’t overtighten—this can crack the sill)
Pro tip: If you’re renting, ask your landlord before drilling. Some allow it, but you might need to fill the holes later.
Install the AC Unit
Now, carefully lift the AC and slide it onto the bracket. The unit should sit level and flush against the window. Extend the side panels and lock them into place.
For through-the-wall units:
- Cut a hole in the wall using a reciprocating saw or hole saw (follow the manufacturer’s template)
- Insert the wall sleeve (a metal or plastic frame that holds the AC)
- Secure the sleeve with screws and seal the edges with exterior caulk
- Slide the AC into the sleeve and lock it in place
Once the unit is in, close the window down onto the AC’s top rail. Most units have a slot for the window sash. Tighten the locking mechanism (usually a screw or latch) to prevent the window from opening.
Seal All Gaps
This is critical. Air leaks make your AC work harder and waste energy. Use:
- Weather stripping on the window sash
- Foam sealant on side gaps
- Exterior caulk on the outside edges
Check for drafts by holding a lit candle near the edges. If the flame flickers, you have a leak. Seal it!
Step 4: Install a Split-System (Mini-Split) Air Conditioner
Split systems are more complex but offer better efficiency and quieter operation. They’re ideal for whole-house cooling or homes without ductwork.
Mount the Indoor Unit
Choose a spot on an interior wall, 6–8 inches from the ceiling. Use a level and mark the mounting plate’s position. Drill holes and secure the plate with wall anchors.
Route the refrigerant lines, drain hose, and electrical wiring through a 2–3 inch hole drilled to the outside. Use a line set cover to protect the lines and hide them from view.
Install the Outdoor Condenser
Place the condenser on a level concrete pad or wall-mounted bracket. Keep it:
- At least 12 inches from walls and plants
- Out of direct sunlight (shade improves efficiency)
- Accessible for maintenance
Connect the refrigerant lines to the condenser using flare fittings. Tighten with a wrench, but don’t over-torque—this can damage the threads.
Connect the Drain Line
The indoor unit produces condensation. Run the drain hose to a floor drain or outside. Use a condensate pump if the drain is uphill.
For refrigerant lines, you’ll need to:
- Evacuate the lines with a vacuum pump (removes air and moisture)
- Charge the system with refrigerant (this is best left to a pro unless you’re certified)
Important: Only EPA-certified technicians should handle refrigerant. If you’re not certified, hire a pro for this step. Improper charging can damage the system or violate environmental laws.
Step 5: Electrical and Final Setup
Now that the AC is mounted, it’s time to power it up and test it out.
Connect the Power
For window and portable ACs:
- Plug into a grounded outlet (never use an extension cord—it can overheat)
- If the unit is over 1,000 watts, consider a dedicated 20-amp circuit
For split systems:
- Run electrical wiring from the indoor unit to the outdoor condenser
- Connect to a dedicated circuit breaker (check the manufacturer’s specs)
- Use a disconnect box near the condenser for safety
Double-check all connections with a voltage tester before turning on the power.
Test the AC
Turn on the AC and set it to the coldest setting. Listen for:
- Smooth startup (no grinding or rattling)
- Consistent airflow from the vents
- Condensation draining properly
Use a thermometer to check the air temperature. Cold air should be 15–20°F cooler than the room temperature.
For split systems, monitor the refrigerant pressure (if you have gauges) and check for leaks with a refrigerant detector.
Seal and Insulate
Go back and re-check all seals. Add insulation to refrigerant lines (especially in cold climates) to prevent condensation. Use foam pipe insulation for the drain line.
Data Table: AC Installation Time and Difficulty by Type
| Type of AC | Estimated Installation Time | Difficulty Level (1-5) | Best For | Key Tools Needed |
|---|---|---|---|---|
| Window AC | 1–2 hours | 2 | Single rooms, renters | Drill, level, support bracket |
| Portable AC | 30–60 minutes | 1 | Temporary cooling, no permanent installation | Window vent kit, level |
| Through-the-wall AC | 2–4 hours | 3 | Homes with exterior walls, permanent solution | Reciprocating saw, wall sleeve, caulk |
| Split-system (mini-split) | 4–8 hours | 4 | Whole-house cooling, energy efficiency | Vacuum pump, refrigerant gauges, drill |
Note: Difficulty level is based on DIY experience. Split systems often require professional help for refrigerant charging.
Final Thoughts: You’ve Got This!
Installing an air conditioner might feel like a big project, but it’s totally doable. I’ve walked you through every step—from choosing the right AC to sealing the gaps and testing the system. And remember, it’s okay to ask for help. If you’re not comfortable with electrical work or refrigerant handling, call a pro. There’s no shame in safety.
Think about the payoff: a cool, comfortable home all summer long. No more tossing and turning on sweaty sheets. No more cranky kids (or partners) because it’s too hot to think straight. And best of all? You’ll know exactly how your AC works—so when it’s time for maintenance or troubleshooting, you’ll be ready.
So go ahead—tackle that how to install an air conditioner project. Take your time, follow the steps, and don’t rush. Before you know it, you’ll be sipping iced coffee in your perfectly cooled room, proud of what you’ve accomplished. And hey, if you run into a snag? Just take a breath, check the manual, and remember: every expert was once a beginner.
Now get out there and beat the heat!
Frequently Asked Questions
How do I choose the right location to install an air conditioner?
Select a spot on an exterior wall with proper ventilation, away from direct sunlight and heat sources. Make sure the location allows easy access to a power source and has enough space for drainage to prevent water buildup.
What tools do I need to install an air conditioner unit?
You’ll need a drill, level, screwdriver, wrench, measuring tape, and a hole saw for the wall sleeve. Some units may require additional materials like mounting brackets or insulation tape, depending on the model and installation type.
Can I install an air conditioner without professional help?
Yes, you can install a window or portable air conditioner yourself if you follow the manufacturer’s instructions carefully. However, for split or central AC systems, hiring a professional is recommended to ensure safety and optimal performance.
How do I properly seal the air conditioner to prevent leaks?
Use foam insulation or weather stripping around the unit to close gaps between the AC and the window or wall. This helps prevent air leaks, improves efficiency, and keeps insects or debris from entering.
What are the electrical requirements for installing an air conditioner?
Check the unit’s voltage and amperage requirements—most room ACs need a 115V or 230V outlet, while larger units may require a dedicated circuit. Always turn off power at the breaker before connecting the unit to avoid electrical hazards.
How do I test the air conditioner after installation?
Turn on the unit and let it run for 10–15 minutes, checking for cool air output, unusual noises, or vibrations. Verify that the thermostat responds correctly and that no water leaks occur during operation.