
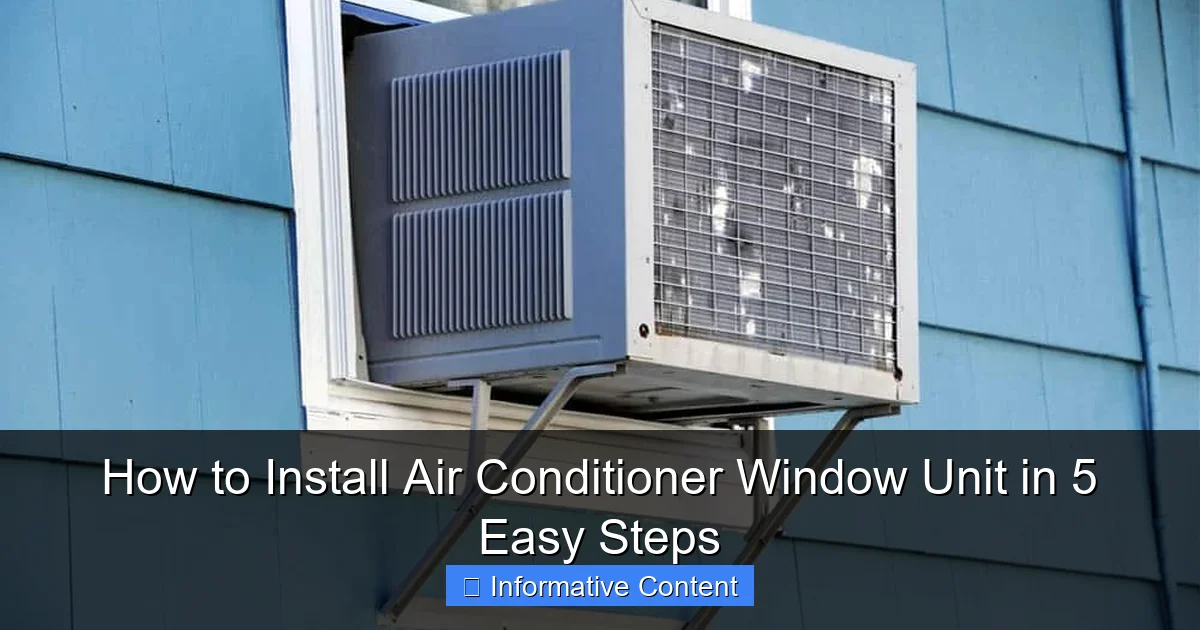
Featured image for how to install air conditioner window unit
Image source: cielowigle.com
Installing an air conditioner window unit is quick and straightforward when you follow the right steps. Begin by measuring your window opening and securing the unit with support brackets to ensure a safe, snug fit—this prevents leaks and improves efficiency. With just a few tools and under an hour, you’ll have cool, refreshing air flowing in no time.
Key Takeaways
- Measure your window: Ensure the AC unit fits securely before purchasing or installing.
- Prepare tools early: Have a screwdriver, level, and brackets ready for a smooth setup.
- Seal gaps tightly: Use foam or weather stripping to prevent air leaks and improve efficiency.
- Secure the unit: Anchor it properly to avoid falls or damage during operation.
- Test after installation: Run the AC and check for vibrations, noise, or leaks.
- Clean filters regularly: Maintain airflow and performance with monthly filter checks.
📑 Table of Contents
- How to Install Air Conditioner Window Unit in 5 Easy Steps
- Step 1: Choose the Right Window and Prepare the Area
- Step 2: Gather Tools and Safety Gear
- Step 3: Assemble and Position the Air Conditioner Unit
- Step 4: Secure and Insulate the Installation
- Step 5: Connect Power and Test the System
- Maintenance Tips to Keep Your Unit Running Smoothly
How to Install Air Conditioner Window Unit in 5 Easy Steps
There’s nothing quite like the sweet relief of cool air after stepping inside on a sweltering summer day. If you’ve ever wrestled with a bulky window AC unit, trying to balance it on a windowsill while your arms tremble and your patience wears thin, you’re not alone. Installing an air conditioner window unit might seem intimidating at first—especially if you’ve never done it before—but the truth is, it’s much simpler than most people think.
I remember my first attempt at installing a window unit. I was in my early twenties, living in a third-floor apartment with no central air. The unit was heavy, the instructions were confusing, and I nearly dropped it trying to slide it into place. But after a few missteps (and a bruised ego), I realized that with the right tools, a little patience, and a clear plan, anyone can do this. Whether you’re a renter trying to beat the heat or a homeowner looking for a cost-effective cooling solution, this guide will walk you through how to install an air conditioner window unit in just five straightforward steps. No engineering degree required—just common sense and a few basic tools.
Step 1: Choose the Right Window and Prepare the Area
Before you even unbox your air conditioner window unit, it’s crucial to pick the right window and get the space ready. Not every window is suitable, and a poor choice can lead to inefficiency, safety hazards, or even damage to your home.

Visual guide about how to install air conditioner window unit
Image source: m.media-amazon.com
Assess Window Type and Size
Most window units are designed for double-hung or sliding windows. If you have casement, awning, or fixed windows, you may need a special bracket or consider a wall-mounted unit instead. Measure your window opening from the inside—both the width and height. Then, check the manufacturer’s specs for your AC unit to ensure it fits. Most units need about 2–4 inches of extra space on each side for proper sealing and airflow.
- Example: If your window opening is 27 inches wide, choose a unit with a minimum width of 24 inches and a maximum of 28–30 inches.
- Tip: Avoid windows that face direct afternoon sun—this increases cooling load and reduces efficiency.
Clear the Work Area
Move furniture, curtains, and any breakable items away from the window. You’ll need space to maneuver the unit and access the window from both inside and outside. I once tried to install a unit while my cat was napping on the couch beneath it—needless to say, the cat wasn’t happy, and I nearly knocked over a lamp. Lesson learned: clear the zone!
- Remove screens (if possible) for easier access.
- Check for nearby power outlets—ideally within 3–4 feet. Avoid using extension cords, as they can overheat and pose a fire risk.
- Ensure the window sill is dry and free of debris. A clean surface helps prevent water damage and improves seal quality.
Check Structural Integrity
Inspect the window frame and sill for rot, warping, or loose screws. A weak frame can’t support the weight of an AC unit (which can range from 50 to 100 pounds). If the sill is soft or cracked, reinforce it with a wooden support board or consider a different window. Safety first—don’t risk a falling unit!
Step 2: Gather Tools and Safety Gear
Having the right tools on hand makes the entire process smoother and safer. You don’t need a full workshop, but a few essentials will save time and frustration.
Essential Tools and Materials
- Tape measure – For precise window and unit measurements.
- Level – Ensures the unit sits flat, preventing water leakage and vibration.
- Drill and screws – For securing side panels and brackets (if included).
- Adjustable wrench or screwdriver – For tightening bolts.
- Foam weatherstripping or insulation panels – To seal gaps around the unit.
- Support bracket (optional but recommended) – Provides extra stability, especially for heavier units or upper floors.
- Work gloves and safety goggles – Protect your hands and eyes during installation.
Why a Support Bracket Matters
Many people skip the bracket because the unit comes with built-in side panels. But a support bracket—especially for units over 70 pounds or in high-rise buildings—adds critical stability. I installed one without a bracket in my old apartment, and after a windy night, the unit started vibrating and making a loud rattling noise. The next day, I added a simple L-bracket under the unit, and the problem vanished. A $20 investment can save you from a $300 repair or worse—a falling AC.
- Tip: Look for universal AC support brackets at hardware stores—they work with most window units.
- Example: The AC-Safe Universal Support Bracket can hold up to 200 pounds and installs in minutes.
Double-Check Electrical Requirements
Most window units require a standard 120-volt outlet. But larger models (especially 15,000 BTU or higher) may need a 240-volt circuit. Check the unit’s label or manual. Using the wrong voltage can damage the compressor or trip breakers. If you’re unsure, consult an electrician.
Step 3: Assemble and Position the Air Conditioner Unit
Now comes the fun part—actually putting the unit in place. This step requires careful handling, especially since most ACs are top-heavy and awkward to lift.
Unbox and Inspect the Unit
Carefully remove the AC from its packaging. Check for any visible damage—dents, cracked casing, or bent fins. Open the front panel and inspect the evaporator coils. If they’re bent or dirty, gently straighten them with a fin comb (often included). Never force anything—these coils are delicate.
- Tip: Lay the unit on its back on a soft surface (like a towel) to avoid scratching the finish.
- Example: I once dropped a unit while unboxing—luckily, it was on carpet, but the side panel cracked. Always handle with care!
Attach Side Panels and Brackets
Most window units come with accordion-style side panels. Slide them into the tracks on the sides of the AC. Then, extend them to match your window width. Secure them with screws if needed. If you’re using a support bracket, install it now according to the manufacturer’s instructions—usually by attaching it to the wall or window frame below the sill.
- Tip: Test the fit by placing the unit (without fully installing) into the window. Make sure the side panels extend evenly and the unit sits level.
- Common mistake: Forgetting to extend the side panels fully—this leaves gaps for hot air to enter.
Lift and Position the Unit
This is the most physically demanding step. If you’re alone, use a dolly or furniture slider to move the unit close to the window. Then, with someone helping (or using your legs, not your back), lift the AC and slide it into the window opening. The back of the unit should extend outside, and the front should sit just inside.
- Safety tip: Always lift with your knees, keep your back straight, and ask for help if the unit is over 50 pounds.
- Pro move: Place a wooden board across the window sill to distribute weight and protect the wood.
Level the Unit
Use a level to ensure the AC is perfectly horizontal. If it tilts forward, water can leak inside. If it tilts backward, condensation won’t drain properly. Adjust by placing small shims (like wooden wedges) under the front feet.
- Example: My first unit leaned forward slightly—after a heavy rain, water dripped onto my desk. A simple shim fixed it.
Step 4: Secure and Insulate the Installation
Once the unit is in place, it’s time to lock it down and seal the gaps. A secure, well-insulated installation improves efficiency, reduces noise, and prevents bugs and dust from entering.
Secure the Unit to the Window Frame
Most ACs come with brackets that attach to the lower window sash. Close the window down onto the AC’s top rail, then use screws to fasten the bracket to the sash. This prevents the unit from being pushed out by wind or accidentally dislodged.
- Tip: Don’t overtighten screws—this can crack the plastic frame.
- Alternative: Some units use locking clips instead of screws—check your manual.
Seal the Side Gaps
Even with side panels, small gaps may remain. Use foam weatherstripping or cut-to-fit insulation panels (like foam board) to fill these spaces. Press the material firmly into the gaps—don’t leave any air leaks.
- DIY hack: Cut pool noodles in half and place them along the sides for a quick, cheap seal.
- Example: I used foam weatherstripping from a hardware store—it cost $10 and reduced noise by 50%.
Insulate the Top Gap
The space between the top of the AC and the closed window sash is a major source of air leaks. Use the included foam seal strip (often a long, flat piece) and place it along the top rail of the AC. When the window closes, it compresses the foam, creating a tight seal.
- Tip: If the foam is too thick, trim it with scissors for a snug fit.
Check for Stability
Give the unit a gentle shake. It should be rock-solid. If it wobbles, recheck the screws, brackets, and side panel connections. A loose unit can vibrate, damage the window, or fall.
Step 5: Connect Power and Test the System
The final step is to plug in the unit and make sure everything works as expected. This is your chance to catch any issues before summer’s peak heat hits.
Plug In and Power On
Plug the AC directly into a grounded outlet. Never use an extension cord unless it’s heavy-duty (14-gauge or lower) and rated for the unit’s wattage. Turn on the unit and select “Cool” mode. Listen for unusual noises—grinding, buzzing, or clicking—which could indicate a problem.
- Tip: Let the unit run for 10–15 minutes to stabilize. The fan may start slow and then ramp up.
Check for Airflow and Cooling
Feel the air blowing from the front vents. It should be cool and strong. If it’s weak or warm, check for obstructions in the air filter or condenser coils. Also, verify that the thermostat is set below room temperature.
- Example: My unit wasn’t cooling well—turned out the filter was clogged with dust. A quick rinse fixed it.
Inspect for Leaks and Condensation
Look under the unit (outside) for water dripping—this is normal, as ACs remove humidity. But if water leaks inside, the unit may not be level or the drain holes could be blocked. Wipe up any indoor moisture and re-level if needed.
Test Remote and Settings
If your unit has a remote, pair it and test all functions: fan speed, mode, timer, and swing (if available). Make sure the display lights up and responds to input.
Maintenance Tips to Keep Your Unit Running Smoothly
Installing your air conditioner window unit is just the beginning. To keep it efficient and extend its lifespan, regular maintenance is key.
Clean or Replace the Air Filter Monthly
A dirty filter reduces airflow and forces the unit to work harder. Most filters are washable—rinse with water, let dry, and reinstall. Replace every 6–12 months.
Clean the Evaporator and Condenser Coils
Over time, dust builds up on the coils. Use a soft brush or coil cleaner (available at hardware stores) to gently remove debris. Do this every 2–3 months during heavy use.
Check and Clear Drain Holes
Condensation drains through small holes in the unit’s base. If they get clogged, water can back up and leak. Use a paperclip or pipe cleaner to clear them monthly.
Inspect Seals and Panels Annually
Before each cooling season, check the foam seals for cracks or compression. Replace if worn. Also, ensure side panels are tight and not warped.
Store Properly in Winter
If you remove the unit in winter, clean it thoroughly, let it dry, and store it upright in a dry place. Cover it with a breathable cloth to prevent dust buildup.
| Maintenance Task | Frequency | Tools Needed |
|---|---|---|
| Clean air filter | Monthly | Water, soft brush |
| Clean coils | Every 2–3 months | Coil cleaner, soft brush |
| Clear drain holes | Monthly | Paperclip, pipe cleaner |
| Inspect seals | Annually | None (visual check) |
| Store unit | Seasonal | Cloth cover, dry storage |
Learning how to install an air conditioner window unit isn’t just about surviving the summer—it’s about doing it safely, efficiently, and with confidence. By following these five steps, you’ll not only enjoy cooler air but also save money on energy bills and avoid costly repairs down the line. Remember, the key is preparation: pick the right window, gather the right tools, and take your time. There’s no rush—this isn’t a race, it’s an investment in your comfort.
And if you ever doubt yourself, think back to my first attempt: arms shaking, cat meowing, and a unit that barely fit. But I did it. And so can you. With a little care and the right approach, you’ll be sipping iced tea in your cool, quiet room before you know it. Stay cool, and happy installing!
Frequently Asked Questions
How do I install an air conditioner window unit safely?
To install an air conditioner window unit safely, ensure the window frame is sturdy and the unit is level. Always support the AC with brackets or mounting hardware to prevent it from falling. Turn off power to the area before starting installation.
What tools do I need to install a window AC unit?
You’ll need a measuring tape, screwdriver, level, drill (if required), and mounting brackets or side panels. Most units come with installation kits, but check your model’s manual for specifics. A helper is also useful for lifting heavier units.
Can I install a window air conditioner by myself?
While possible, installing a window air conditioner alone can be risky due to the unit’s weight and awkward positioning. For safety and proper alignment, having a second person assist with lifting and holding the unit in place is highly recommended.
How do I seal gaps around the air conditioner window unit?
Use the included side panels or foam insulation strips to fill gaps between the unit and window frame. Secure them tightly to prevent hot air leaks and improve energy efficiency. Weatherstripping can also help seal any remaining small openings.
Do I need a special outlet for my window AC unit?
Most window air conditioner units require a grounded 115V outlet, but larger models may need a 230V circuit. Always check the manufacturer’s specifications and ensure the outlet is on a dedicated circuit to avoid overloading.
How do I level an air conditioner window unit properly?
Use a bubble level to ensure the AC tilts slightly outward (about ¼ inch) for proper drainage. Adjust the mounting brackets or use shims under the unit if needed. An uneven unit can cause water leaks and reduced efficiency.