
Featured image for how to install air conditioner
Image source: contentgrid.homedepot-static.com
Installing an air conditioner properly ensures maximum efficiency and longevity—start by choosing the right unit size and location to match your space and cooling needs. Follow manufacturer guidelines closely, secure mounting hardware, and connect refrigerant lines and electrical wiring with care to avoid leaks or system failure. With the right tools and safety precautions, a successful DIY installation is achievable in just a few hours.
Key Takeaways
- Choose the right AC size: Match unit capacity to room size for optimal cooling and efficiency.
- Turn off power first: Always disconnect electricity before starting installation to prevent accidents.
- Seal gaps properly: Use foam or tape to insulate and prevent air leaks around the unit.
- Level the mounting plate: Ensure it’s perfectly horizontal for safe, efficient operation.
- Follow manufacturer instructions: Adhere strictly to guidelines for warranty compliance and performance.
- Test after installation: Run the AC and check for leaks, noise, or cooling issues.
📑 Table of Contents
- Why Installing an Air Conditioner Yourself Can Be a Game-Changer
- 1. Pre-Installation: What You Need to Know Before You Begin
- 2. Installing a Window Air Conditioner: A Room-by-Room Approach
- 3. Setting Up a Portable Air Conditioner: The Ventless Option
- 4. Electrical Safety and Power Requirements
- 5. Post-Installation: Testing, Troubleshooting, and Maintenance
- 6. When to Call a Professional (And Why It’s Okay to Admit Defeat)
Why Installing an Air Conditioner Yourself Can Be a Game-Changer
There’s something deeply satisfying about tackling a home project and seeing it through—especially when it saves you hundreds of dollars. I remember the first time I installed an air conditioner. My apartment was sweltering in July, and the quote from a local HVAC company made my jaw drop. “For that price,” I thought, “I could buy the unit and learn how to install it myself.” That summer, I did just that. Not only did I save over $400, but I also gained a skill I’ve used time and again.
Installing an air conditioner might sound intimidating, but with the right tools, a bit of patience, and this guide, it’s totally doable. Whether you’re dealing with a window unit, a portable AC, or even a mini-split system, the process follows similar principles. The key is preparation. Think of it like baking a cake: if you have all your ingredients ready and follow the recipe, you’ll get great results. Skip steps or rush through? Well, you might end up with a lopsided cake—or worse, a broken AC.
1. Pre-Installation: What You Need to Know Before You Begin
Assessing Your Space and Needs
Before you even unbox your air conditioner, take a moment to assess your space. Ask yourself: What’s the room’s square footage? How many windows or doors lead outside? Is it a sunny room that gets hot quickly, or is it shaded and cooler? These details matter because they determine the BTU (British Thermal Unit) rating you need.

Visual guide about how to install air conditioner
Image source: i.ytimg.com
- For a 150–350 sq. ft. room, a 5,000–8,000 BTU unit is ideal.
- For 350–550 sq. ft., aim for 8,000–12,000 BTUs.
- Larger rooms (550–1,000 sq. ft.) may need 12,000–18,000 BTUs.
Pro tip: If your room has high ceilings or gets a lot of sun, go up one BTU tier. For example, a 400 sq. ft. sunroom might need a 10,000 BTU unit instead of 8,000. I once made the mistake of underestimating my kitchen’s heat load (it had a big oven and south-facing windows). My 8,000 BTU unit struggled all summer. Lesson learned!
Choosing the Right Type of Air Conditioner
Not all ACs are created equal. Here’s a quick breakdown of your options:
- Window units: Best for single rooms, easy to install, and affordable. Great for renters or temporary solutions.
- Portable ACs: No permanent installation needed. Just vent the hose out a window or door. Good for renters or rooms without windows.
- Mini-split systems: Ductless, energy-efficient, and quiet. Ideal for larger spaces or multiple rooms. Requires professional help for refrigerant line setup.
- Through-the-wall units: Permanent installation, like window units but more secure. Requires a wall sleeve.
For this guide, we’ll focus on window units and portable ACs—the most DIY-friendly options. If you’re considering a mini-split, I’ll touch on the basics, but honestly, that’s a job for a licensed pro (more on that later).
Gathering Your Tools and Materials
Here’s what you’ll need for most installations:
- Basic toolkit: Screwdriver, tape measure, level, utility knife, gloves.
- Safety gear: Safety goggles, work gloves (trust me, you don’t want splinters).
- Installation hardware: Most ACs come with brackets, foam insulation strips, and window support arms. If not, buy a universal kit.
- Weatherproofing materials: Caulk, weatherstripping, or foam tape to seal gaps.
- Extension cord (if needed): Use only if the AC’s cord can’t reach the outlet. Make sure it’s rated for AC use (check the manual).
One thing I always keep in my toolbox: a small level. An uneven AC can leak water or vibrate noisily. A few seconds with a level saves headaches later.
2. Installing a Window Air Conditioner: A Room-by-Room Approach
Preparing the Window and Frame
Start by cleaning the window track and sill. Remove any debris, old caulk, or dirt. A dirty track can cause the AC to sit crooked. Next, measure the window’s width and height to ensure your unit fits. Most window ACs need a minimum width of 23–36 inches and a sill depth of at least 14 inches.
Here’s a common mistake: not checking if the window opens smoothly. If it sticks or jams, the AC won’t seal properly. I once spent 20 minutes wrestling with a stubborn window—only to realize a loose nail was jamming the track. A quick hammer fix saved the day.
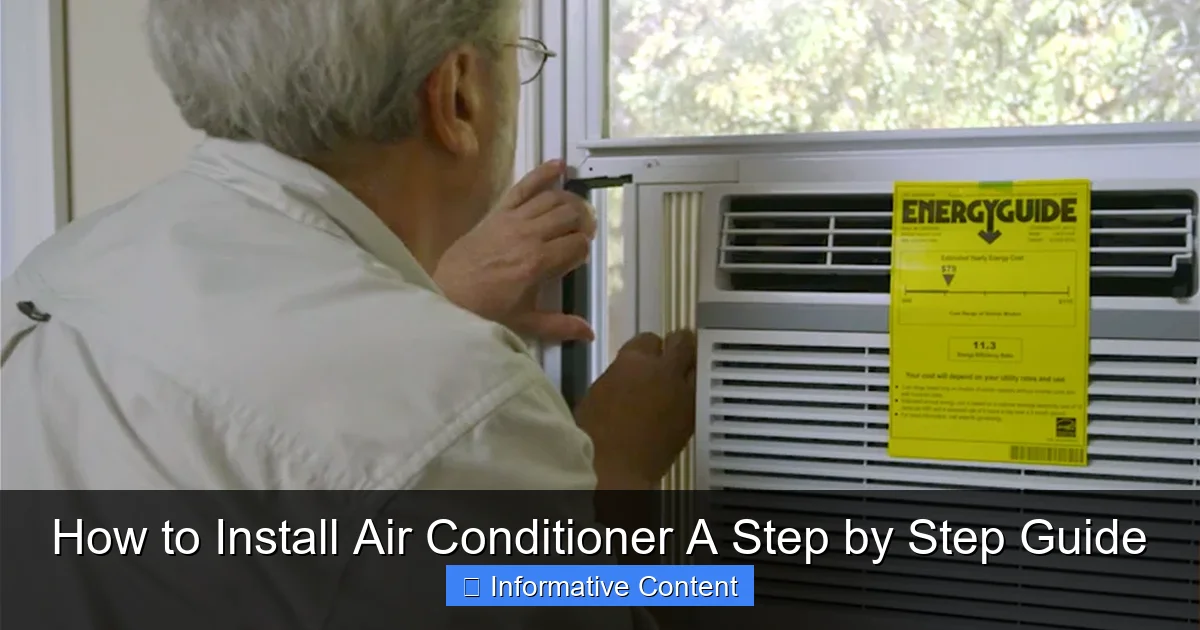
Securing the AC Unit
- Lift the AC into place: This is a two-person job for larger units. Slide the unit into the window, ensuring the bottom rail rests on the sill.
- Close the window: Lower the sash until it meets the AC’s top rail. Don’t force it—if it’s tight, adjust the AC’s position.
- Attach the side panels: Most units have accordion-style panels that extend to fill the gap. Tighten the screws to lock them in place.
- Install support brackets: Use the included L-brackets to anchor the AC to the window frame. Drill pilot holes first to avoid splitting the wood.
- Level the unit: Place your level on top. If it’s tilted forward, the condensate pan will overflow. Adjust the brackets until it’s perfectly level.
Pro tip: For extra security, add a window lock to prevent the sash from opening accidentally. I learned this after a storm blew my window open—and my AC nearly fell out!
Sealing and Insulating
Even a small gap around the AC can let hot air in. Here’s how to seal it:
- Apply foam insulation strips to the side panels and top rail.
- Use weatherstripping or foam tape along the window sash edges.
- For gaps larger than 1/4 inch, use expandable spray foam (but be careful—it’s messy!).
One reader told me they used pool noodles cut in half to fill gaps—genius! Just make sure it’s snug but not too tight. You don’t want to warp the window frame.
3. Setting Up a Portable Air Conditioner: The Ventless Option
Choosing the Venting Method
Portable ACs need to vent hot air outside. Your options:
- Window vent kit: Most common. Includes a plastic or metal plate with a hose connector. Fits standard double-hung or sliding windows.
- Sliding door vent: For patio doors. Uses a larger plate or adjustable curtain.
- Through-the-wall vent: Permanent. Requires drilling a hole and installing a vent pipe (not recommended for renters).
I once tried to vent a portable AC through a tiny bathroom window. The hose kept slipping off, and the room stayed hot. Switching to a sliding door kit made all the difference.
Connecting the Exhaust Hose
- Attach the hose to the AC’s exhaust port (usually on the back).
- Connect the other end to the vent plate.
- Place the plate in the window, ensuring it’s secure and the hose isn’t kinked.
- Seal gaps with foam tape or a towel (temporarily).
Important: Keep the hose as short and straight as possible. A long, coiled hose reduces efficiency. If you need extra length, buy an extension kit (not a generic hose).
Managing Condensation
Some portable ACs collect water in a reservoir you’ll need to empty. Others use a self-evaporating system that reuses the water for cooling (great for humid climates). If your unit has a reservoir:
- Check it daily during hot weather.
- Empty it before it reaches the “full” line.
- Clean the reservoir monthly with a vinegar-water mix to prevent mold.
For self-evaporating units, you’ll still get occasional water—especially in high humidity. Place a towel under the AC just in case.
4. Electrical Safety and Power Requirements
Understanding Voltage and Amps
Most window and portable ACs use 115V (standard household outlets). But high-BTU units (14,000+ BTUs) often need 230V. Check your AC’s manual and outlet type:
- 115V: Standard 2-prong or 3-prong outlet (NEMA 5-15R).
- 230V: Larger outlet (NEMA 6-20R or 6-15R). Requires a dedicated circuit.
Never force a 230V plug into a 115V outlet—or vice versa. I’ve seen people try this with disastrous results (burnt outlets, tripped breakers). If you’re unsure, hire an electrician.
Using Extension Cords and Surge Protectors
ACs draw a lot of power. Using a cheap extension cord can cause overheating or fires. If you must use one:
- Choose a heavy-duty cord (14-gauge or thicker).
- Keep it as short as possible (under 10 feet).
- Never run it under rugs or furniture.
For surge protection, use a metal-oxide varistor (MOV) protector rated for AC use. I once lost a $300 AC to a lightning surge. A $20 surge protector would’ve saved it.
Testing the Circuit
Before turning on the AC, check your circuit breaker. Most ACs need a 15-amp or 20-amp circuit. If other appliances share the circuit, unplug them first. A tripped breaker means you’re overloading the circuit—a serious fire hazard.
5. Post-Installation: Testing, Troubleshooting, and Maintenance
First-Run Checklist
After installation, follow this checklist:
- Turn on the AC and set it to “cool” mode.
- Listen for unusual noises (grinding, rattling).
- Check for air leaks around the unit.
- Verify the condensate is draining properly.
- Use a thermometer to ensure the air is cooling (should be 15–20°F cooler than room temp).
If the AC isn’t cooling, check:
- Is the filter clogged? (Clean it monthly.)
- Are the coils dirty? (Wipe them with a damp cloth.)
- Is the unit tilted correctly? (Adjust the level.)
Common Installation Mistakes (And How to Fix Them)
| Problem | Likely Cause | Solution |
|---|---|---|
| AC leaks water inside | Unit isn’t level or condensate pan is clogged | Re-level the AC; clear the drain hole |
| Noisy operation | Loose parts or vibration | Tighten all screws; add rubber pads under the unit |
| Weak cooling | Dirty coils or poor insulation | Clean coils; seal gaps with foam tape |
| Tripped breaker | Overloaded circuit or faulty wiring | Unplug other devices; check wiring |
I’ve made all these mistakes (except the breaker—knock on wood). The good news? They’re all fixable. A little troubleshooting goes a long way.
Seasonal Maintenance Tips
- Monthly: Clean the filter with soap and water. Let it dry completely.
- Quarterly: Wipe the coils and check the condensate drain.
- End of season: Remove the AC (if window-mounted), clean it, and store it in a dry place. Cover it with a breathable cloth.
For portable ACs, drain the reservoir and run the fan for 10 minutes to dry the internals. This prevents mold growth.
6. When to Call a Professional (And Why It’s Okay to Admit Defeat)
Mini-Split and Ducted Systems
Mini-splits are fantastic—but they’re not DIY-friendly. Why?
- Refrigerant lines: Require precise pressure and leak testing (a job for EPA-certified techs).
- Electrical work: Often involves 240V circuits and disconnects.
- Drilling through walls: Needs careful planning to avoid pipes or wires.
I once tried to install a mini-split. The outdoor unit was fine, but when it came to the refrigerant lines, I froze. I called a pro, and they had it fixed in two hours. Lesson: Some jobs need experts.
Signs You Shouldn’t DIY
- The AC is too heavy (over 80 lbs) and you’re alone.
- You’re not comfortable with electrical work.
- The installation requires structural changes (e.g., cutting drywall).
- Your home has old wiring or a fuse box.
There’s no shame in hiring help. A pro can install your AC faster, safer, and with a warranty. Think of it as an investment in peace of mind.
Cost Comparison: DIY vs. Professional Installation
Let’s say you’re installing a 10,000 BTU window unit:
- DIY: $200–$300 (AC unit + tools you already own).
- Pro: $300–$600 (labor + potential markup on the unit).
For a mini-split, DIY isn’t an option. Pro installation runs $1,000–$3,000, but it’s worth it for the efficiency and longevity.
Installing an air conditioner isn’t just about beating the heat—it’s about empowerment. You’re not just saving money; you’re gaining confidence in your ability to solve problems. Whether you choose a window unit, a portable AC, or bite the bullet and call a pro, you’re making your home more comfortable.
Remember: Take your time, follow the steps, and don’t rush. A well-installed AC can last 10–15 years. And when that first blast of cool air hits your face? It’ll all be worth it. Happy cooling!
Frequently Asked Questions
How do I install an air conditioner in a window?
To install a window air conditioner, first ensure the unit fits securely in your window frame. Follow the manufacturer’s instructions to support the weight, seal gaps with weather stripping, and secure it with brackets or locks to prevent accidents.
Can I install a portable air conditioner myself?
Yes, installing a portable air conditioner is simple and requires no permanent modifications. Just vent the exhaust hose through a window using the included kit and ensure proper drainage for the condensate.
What tools do I need to install an air conditioner?
Basic tools like a drill, screwdriver, level, measuring tape, and wrenches are typically needed. For split systems, additional tools like a vacuum pump and manifold gauge may be required for refrigerant handling.
How long does it take to install an air conditioner?
A standard window or portable unit can take 1-2 hours, while a mini-split or central system may require a full day or more. Complexity, location, and whether professional help is needed affect the timeline.
Do I need a professional to install an air conditioner?
Window and portable units can usually be DIY-installed, but split or central air conditioners require a licensed HVAC technician for proper refrigerant handling, electrical connections, and system balancing.
How do I prepare for air conditioner installation?
Clear the installation area, ensure proper electrical supply (e.g., dedicated outlet), and check local building codes. For split systems, plan the route for refrigerant lines and drainage to avoid complications.