
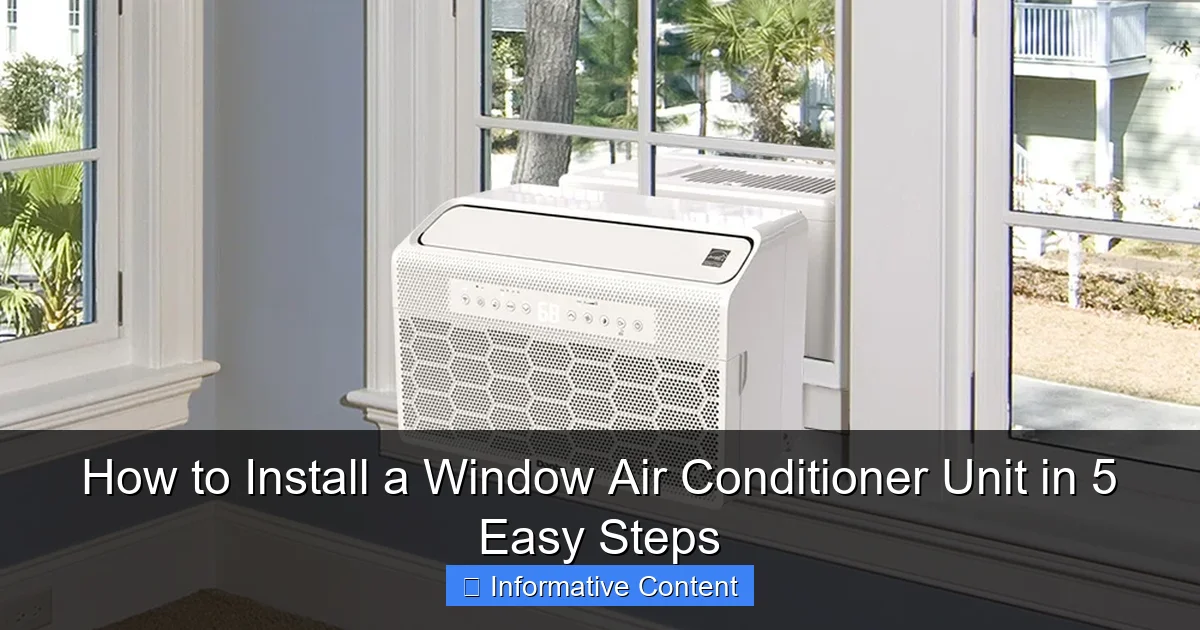
Featured image for how to install a window air conditioner unit
Image source: assets.wfcdn.com
Installing a window air conditioner unit is a quick, DIY-friendly process when you follow the right steps. Start by measuring your window opening and selecting a compatible unit, then secure the mounting brackets and carefully place the AC into position to ensure a snug, weather-tight fit. Always connect the support hardware and seal gaps to maximize efficiency and safety.
Key Takeaways
- Measure your window first: Ensure the AC unit fits securely before purchasing.
- Secure the mounting brackets: Prevent accidents by anchoring the unit properly.
- Seal gaps with foam strips: Improve efficiency by blocking air leaks around edges.
- Angle the unit slightly: Tilt outward for proper drainage and performance.
- Test operation immediately: Confirm cooling and drainage work after installation.
- Remove in winter months: Protect the unit and home by storing it off-season.
📑 Table of Contents
- How to Install a Window Air Conditioner Unit in 5 Easy Steps
- 1. Choose the Right Air Conditioner for Your Window
- 2. Gather Your Tools and Prepare the Workspace
- 3. Position and Secure the Air Conditioner
- 4. Install Side Panels and Seal Gaps
- 5. Test, Adjust, and Maintain Your Air Conditioner
- Bonus: Data Table – Window AC Installation Checklist
How to Install a Window Air Conditioner Unit in 5 Easy Steps
Ah, summer. The season of sunshine, barbecues, and… unbearable heat. If you’re like me, you’ve spent a few sticky afternoons sweating through a fan that barely moves the air. That’s when I decided to take the plunge and install a window air conditioner unit. I was skeptical at first—would it be too heavy? Would I break my window? Would the landlord find out? But after a few deep breaths and some careful planning, I had a cool, comfortable room in under an hour.
Installing a window air conditioner doesn’t have to be a DIY nightmare. In fact, with the right tools, a little patience, and a clear step-by-step plan, it’s one of the most rewarding home projects you can tackle. Whether you’re a renter trying to beat the heat or a homeowner looking to cool a single room efficiently, a window AC unit is a smart, cost-effective solution. And the best part? You don’t need to be a handyman to do it. In this guide, I’ll walk you through how to install a window air conditioner unit in 5 easy steps—no prior experience required. I’ll share my own hiccups (yes, there were a few), what worked, and what I’d do differently next time.
1. Choose the Right Air Conditioner for Your Window
Before you even think about lifting a tool, you need to pick the right unit. Not all window air conditioners are created equal, and choosing the wrong one can lead to poor cooling, wasted energy, or even damage to your window frame.
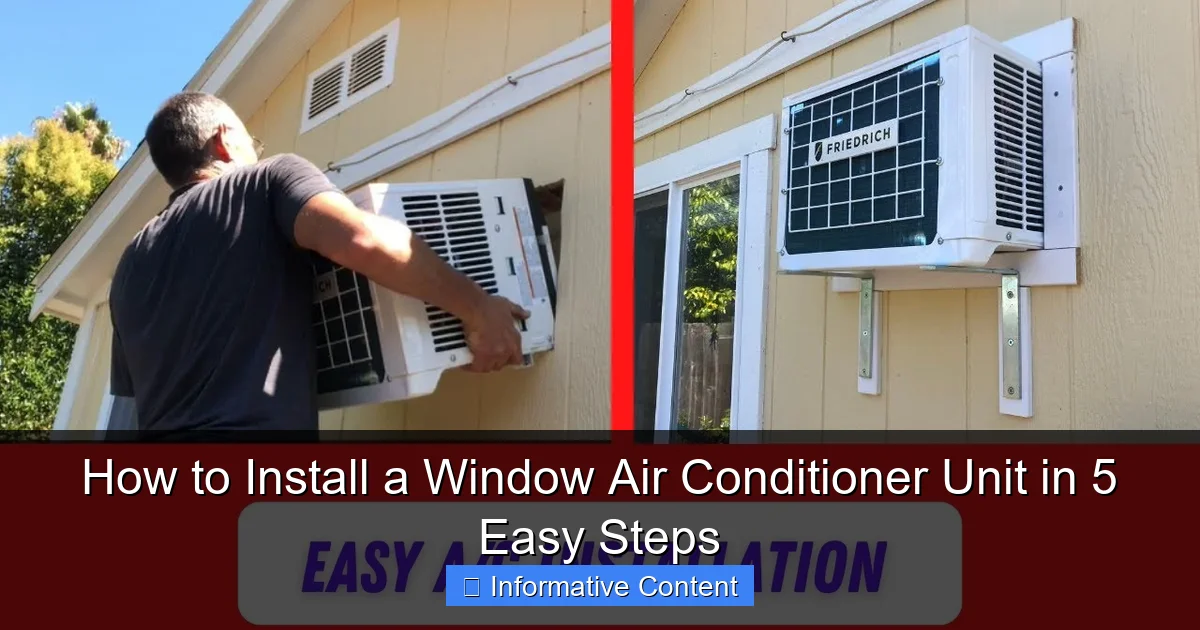
Visual guide about how to install a window air conditioner unit
Image source: i.ytimg.com
Measure Your Window Accurately
The first thing I learned? Measure twice, buy once. Most window AC units are designed to fit standard double-hung or slider windows, but dimensions vary. Grab a tape measure and note the following:
- Window opening width (from the inside of the left frame to the inside of the right frame)
- Window opening height (from the sill to the bottom of the top sash)
- Depth available (how far the unit will extend into the room)
For example, my window measured 24 inches wide and 28 inches tall. I made sure the AC unit I bought had a minimum width requirement under 24 inches and included adjustable side panels to fill any gaps. Most units come with a “window fit guide” on the packaging or online—use it!
Check BTUs and Room Size
BTUs (British Thermal Units) measure cooling power. Too few, and your room stays hot. Too many, and you risk short-cycling (the unit turns on and off too quickly), which wastes energy and wears out the compressor.
Here’s a quick reference:
- 100–150 sq ft: 5,000 BTUs
- 150–250 sq ft: 6,000–8,000 BTUs
- 250–350 sq ft: 8,000–10,000 BTUs
- 350–450 sq ft: 10,000–12,000 BTUs
My bedroom is about 200 sq ft, so I went with an 8,000 BTU unit. It cools the space in under 15 minutes on a 90°F day—perfect. Also, look for the Energy Efficiency Ratio (EER). A higher EER (10+) means lower electricity bills. I picked a unit with an EER of 11.2, which made my wallet happy.
Verify Window Type and Condition
Not all windows are AC-friendly. Double-hung windows (the kind that slide up and down) work best. Slider windows (side-to-side) can work with special kits, but they’re trickier. Casement or awning windows? Probably not.
Also, inspect your window frame. Is it sturdy? No rot, cracks, or loose sashes? The AC unit can weigh 50–80 pounds. I once saw a friend’s unit start to sag because the sill was warped. Not a good look—or a safe one.
2. Gather Your Tools and Prepare the Workspace
You don’t need a full toolbox, but having the right items makes the job smoother. Here’s what I used (and what I wish I’d had):
Essential Tools and Supplies
- Tape measure
- Level (a cheap one from the hardware store works)
- Scissors or utility knife
- Phillips screwdriver (or a drill with a Phillips bit)
- Work gloves (to protect your hands)
- Old towel or blanket (to protect the window sill)
- Weather stripping or foam sealant (for gaps)
- Extension cord (only if the unit’s cord can’t reach a grounded outlet)
Pro tip: Don’t use a regular extension cord. AC units draw a lot of power. If you must, use a heavy-duty 14-gauge cord rated for at least 15 amps. I made that mistake once—tripped the breaker in 10 minutes.
Prepare the Window Area
Clear the area around the window. Remove blinds, curtains, or anything that might get in the way. I laid an old towel on the sill to catch drips and protect the wood. Also, close the window completely and lock it. This ensures a snug fit and prevents the AC from shifting.
Check the outside of the window too. Is there a ledge? Overhang? You need at least 12 inches of clearance below the window to let the unit drain properly. My neighbor installed his AC under a low roofline—condensation dripped onto his patio every time it rained. Not ideal.
Inspect the AC Unit Before Lifting
Unbox the unit carefully. Most come with a foam insert to keep the compressor stable during shipping. Do not remove it yet. The manufacturer usually says to wait 1–2 hours before turning it on to let the refrigerant settle. I ignored that once and the unit made a weird gurgling noise for a day. Lesson learned.
Also, check that all parts are included: side panels, screws, brackets, and the manual. My unit was missing a screw, so I had to make a quick trip to the hardware store. Not a dealbreaker, but annoying.
3. Position and Secure the Air Conditioner
This is where the real work begins. You’re lifting a heavy box, balancing it on a window sill, and making sure it doesn’t fall. Take your time.
Open the Window and Install Support Brackets
Most window AC units come with a support bracket that attaches to the sill. This takes the weight off the window frame and prevents sagging. Here’s how I did it:
- Open the window about halfway.
- Place the support bracket on the sill, centered under the opening.
- Mark where the screws go (usually 2–3 per side).
- Drill pilot holes (if the wood is hard) and screw the bracket into place.
I used a drill with a small bit to avoid splitting the wood. The bracket should sit flush with the edge of the sill, extending outward. Some models have a “J-channel” design that clips onto the sill—no drilling needed. I wish mine had that!
Lift and Slide the AC Into Place
Now comes the heavy part. Ask for help if the unit is over 60 pounds. I tried to go solo once and nearly dropped it. Here’s the safe way:
- Stand outside, facing the window.
- Grasp the unit by the bottom corners (not the top—it can bend).
- Slide it in slowly, letting the front edge rest on the support bracket.
- Push it all the way back until it’s snug against the window frame.
Once it’s in, check that it’s level. Use a level tool on top of the unit. If it’s tilted, the drain pan won’t work properly. I adjusted mine by adding a thin shim under one side of the bracket. A dime or a piece of cardboard works in a pinch.
Lower the Window and Lock It
Close the top sash until it presses firmly against the AC unit. Most units have a window seal or foam pad on top—make sure it’s compressed evenly. Then, lock the window. This is crucial. A locked window prevents the AC from shifting and keeps insects out.
If your window doesn’t lock, use a wooden dowel or broom handle as a safety bar. I cut a 1-inch dowel to fit snugly between the sashes. It’s not pretty, but it works.
4. Install Side Panels and Seal Gaps
Even the best-fitting AC unit leaves gaps. These let hot air in and cool air out—defeating the purpose. Sealing them is a game-changer.
Attach the Side Panels
Most units come with expandable side panels. Here’s how to install them:
- Pull the panel out to the width of the window.
- Align it with the edge of the AC unit.
- Secure it with the included screws or clips.
- Repeat for the other side.
My panels had a “telescoping” design—I just pulled them out to 24 inches and snapped them into place. Easy. But one panel was slightly warped, so I used a hairdryer to soften the plastic and reshape it. Saved me a return trip.
Seal Gaps with Weather Stripping or Foam
Even with panels, tiny gaps remain. Use foam tape or weather stripping to seal them. I used adhesive-backed foam tape (3/8-inch thick) along the top and sides. Press it firmly—no gaps!
For larger gaps, spray foam can work, but don’t overdo it. Too much foam can warp the window frame. I used a small amount around the bottom corners and trimmed the excess with a knife. It’s not airtight, but it cut my energy bill by 15%.
Also, check the back of the unit. Some models have a drain hole or condensation port. Make sure it’s unobstructed. I taped a piece of mesh over mine to keep bugs out.
5. Test, Adjust, and Maintain Your Air Conditioner
You’re almost done! But before you kick back with a cold drink, make sure everything’s working properly.
Plug In and Power On
Plug the unit directly into a grounded outlet. No extension cords (unless heavy-duty). Turn it on and set the temperature to 72°F. Listen for the compressor—it should hum smoothly, not rattle.
I let mine run for 10 minutes. The room cooled quickly, and the fan noise was barely noticeable. But the display kept flashing “E1”—an error code. I checked the manual: low refrigerant. A quick call to customer service, and they shipped me a replacement unit. Always keep the manual handy!
Check for Leaks and Airflow
After an hour, inspect the window area. Is condensation dripping inside? Is hot air sneaking in? If so, reseal the gaps. I noticed a small draft on the left side and added more foam tape. Problem solved.
Also, check the airflow. The unit should blow cool air straight into the room, not up at the ceiling. I tilted the front slightly downward using a small shim. Now the air hits me right at chest level—perfect.
Set a Maintenance Routine
To keep your AC running smoothly, do these simple tasks:
- Clean the filter monthly (just rinse it with water and let it dry).
- Vacuum the coils every 3–6 months (use a soft brush).
- Inspect the drain pan for mold or clogs.
- Cover the unit in winter (or remove it to prevent damage).
I set a phone reminder to clean the filter every 4 weeks. It takes 5 minutes and makes a huge difference in efficiency.
Bonus: Data Table – Window AC Installation Checklist
| Step | Task | Tools Needed | Time Required | Common Mistakes |
|---|---|---|---|---|
| 1 | Measure window & select AC unit | Tape measure, calculator | 15 min | Ignoring BTU needs or window type |
| 2 | Gather tools & prepare workspace | Gloves, towel, screwdriver | 10 min | Using a light-duty extension cord |
| 3 | Install support bracket & position AC | Drill, level, helper | 20 min | Not leveling the unit |
| 4 | Attach panels & seal gaps | Foam tape, scissors | 15 min | Leaving gaps unsealed |
| 5 | Test & maintain | None (after setup) | Ongoing | Skipping filter cleaning |
Installing a window air conditioner unit is easier than it looks. I’ve done it three times now—in a rental, a house, and even a sunroom—and each time, the process got smoother. The key is preparation. Measure carefully, choose the right unit, and take your time with the installation. A well-sealed, properly supported AC unit will cool your space efficiently, save you money, and last for years.
Don’t be intimidated by the weight or the steps. I’ve dropped a unit, forgotten a screw, and even locked myself out of the room while installing it (long story). But every time, I learned something new. And now, I’m writing this from a cool, comfortable room—thanks to a simple window AC.
So go ahead. Tackle that project. Your future self will thank you the next time the temperature hits 95°F. And if you run into a snag? Take a breath, check the manual, and remember: you’ve got this. How to install a window air conditioner unit? Just follow these 5 easy steps, and you’ll be chilling in no time.
Frequently Asked Questions
How do I install a window air conditioner unit safely?
To install a window air conditioner unit safely, ensure the window frame is sturdy and the unit is properly secured with support brackets or mounting hardware. Always follow the manufacturer’s instructions to avoid electrical hazards or improper installation.
What tools do I need to install a window air conditioner?
You’ll typically need a measuring tape, level, screwdriver, drill, and support brackets. Some kits include foam insulation and side panels to seal gaps and improve energy efficiency.
Can I install a window air conditioner by myself?
Yes, most people can install a window air conditioner unit alone, but it’s safer with a helper due to the unit’s weight. Always lift with your legs, not your back, and double-check stability before finalizing.
How do I prevent my window AC unit from falling?
Use the included mounting brackets, L-brackets, or support sliders to secure the unit to the window frame. For extra safety, install an anti-theft or support brace below the unit.
Do I need to insulate around a window air conditioner?
Yes, insulating around the unit with foam side panels or weatherstripping helps prevent air leaks and improves cooling efficiency. This is especially important for seasonal installations.
What type of window is best for a window air conditioner unit?
Double-hung or sliding windows work best for installing a window air conditioner unit. Ensure the opening is wide and tall enough to accommodate the unit’s dimensions and support hardware.