
Featured image for how to install a through the wall air conditioner sleeve
Image source: hvachowto.com
Installing a through-the-wall air conditioner sleeve like a pro starts with precise wall measurements and ensuring a secure, weatherproof fit. By following proper alignment, sealing, and anchoring techniques, you’ll prevent air leaks and structural damage while maximizing cooling efficiency. With the right tools and careful attention to detail, this DIY project becomes a seamless, professional-grade installation.
Key Takeaways
- Measure carefully: Ensure precise wall and sleeve dimensions before cutting.
- Choose the right sleeve: Match it to your AC unit’s BTU and size.
- Seal all gaps: Use weatherproof caulk to prevent air leaks and drafts.
- Secure the sleeve: Anchor it firmly with screws for long-term stability.
- Check local codes: Verify electrical and structural requirements before installation.
- Level is critical: Use a bubble level to avoid drainage issues.
📑 Table of Contents
How to Install a Through the Wall Air Conditioner Sleeve Like a Pro
So, you’ve decided to upgrade your cooling game with a through-the-wall air conditioner—smart move! These units are perfect for rooms where a window unit just won’t cut it, or when you want a more permanent, streamlined solution. But before you kick back and enjoy that crisp, cool air, there’s one crucial step: installing the air conditioner sleeve. And let’s be honest—this part can feel a little intimidating if you’ve never done it before.
I remember the first time I tackled this project. I stood in front of my living room wall, tape measure in hand, wondering if I was about to accidentally turn my home into a drafty mess. Spoiler alert: I didn’t. With the right tools, a bit of patience, and a clear plan, installing a through-the-wall air conditioner sleeve is totally doable—even for DIY beginners. In this guide, I’ll walk you through every step, share some hard-earned tips, and help you avoid the common pitfalls that can turn a simple install into a weekend-long headache.
Whether you’re replacing an old unit or installing a brand-new sleeve for the first time, this guide will help you get it done safely, efficiently, and with professional-looking results. We’ll cover everything from measuring and cutting the wall to sealing and securing the sleeve—so you can enjoy reliable cooling without calling in a contractor. Let’s get started!
Why a Through-the-Wall Air Conditioner Sleeve Matters
Before we dive into the installation process, it’s important to understand why the sleeve is such a critical component. Think of the sleeve as the backbone of your through-the-wall AC unit. It’s not just a piece of metal or plastic—it’s the structural and thermal bridge between your indoor and outdoor environments. A properly installed sleeve ensures your unit fits snugly, operates efficiently, and doesn’t compromise your home’s insulation or security.
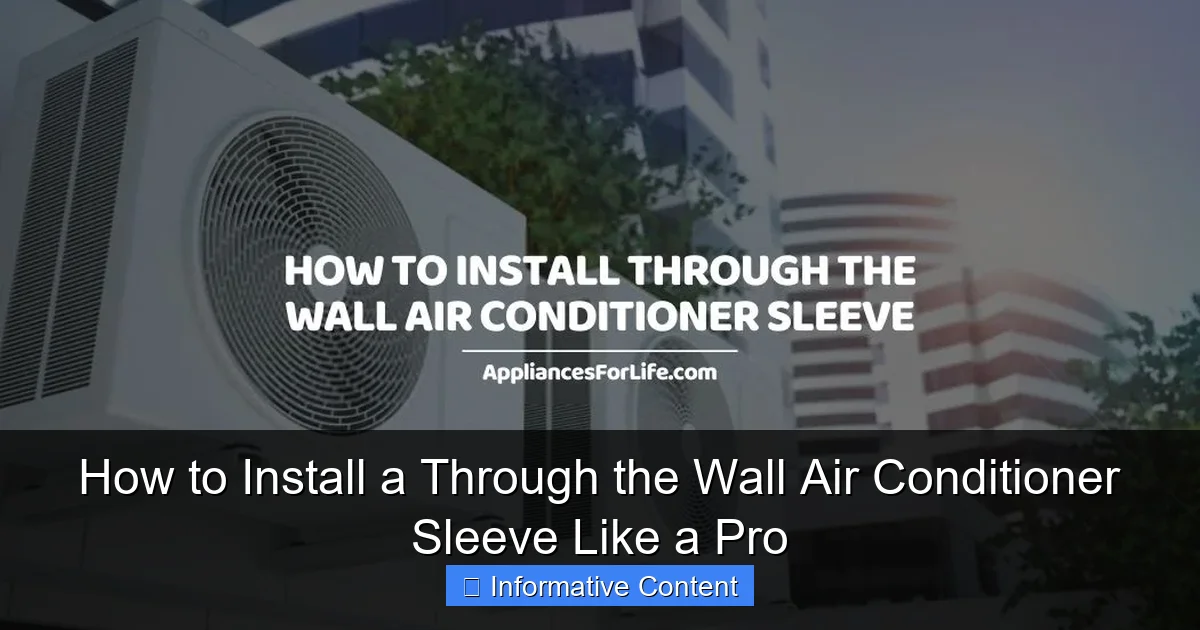
Visual guide about how to install a through the wall air conditioner sleeve
Image source: appliancesforlife.com
Structural Integrity and Support
The sleeve provides essential support for the air conditioner, which can weigh anywhere from 60 to 150 pounds depending on the model. Without a sturdy sleeve, the unit could sag, shift, or even fall—especially over time as the wall materials settle. A well-installed sleeve distributes the weight evenly and anchors the unit securely, preventing dangerous movement or damage to your wall.
Energy Efficiency and Insulation
A poorly sealed sleeve can be a major source of energy loss. Gaps around the sleeve allow hot air to sneak in during summer and cold air to leak out in winter. This not only drives up your energy bills but also forces your AC to work harder, shortening its lifespan. A properly installed sleeve, sealed with weatherproof materials, acts as a thermal barrier, keeping your indoor climate stable and your utility costs down.
Weatherproofing and Moisture Protection
Your home’s exterior wall is exposed to rain, snow, wind, and humidity. The sleeve must be installed with proper flashing and sealing to prevent water intrusion. If moisture gets behind the sleeve, it can lead to mold, rot, or even structural damage over time. A high-quality sleeve installation includes waterproofing measures like caulk, flashing tape, and drainage channels to keep your wall dry and your indoor air healthy.
Noise Reduction
Air conditioners can be noisy, especially older models. A snugly fitted sleeve helps dampen vibrations and reduce sound transmission between the indoor and outdoor units. This means less rattling, humming, or buzzing—so you can enjoy a quieter, more peaceful living space.
Aesthetic Appeal
Let’s face it: a sloppily installed sleeve can look unsightly. Gaps, uneven edges, or mismatched trim can make your wall look like a DIY disaster. A clean, professional installation enhances your home’s appearance and adds to its overall value. Plus, many modern sleeves come with decorative covers that blend seamlessly with your interior and exterior design.
In short, the sleeve isn’t just a housing—it’s a vital part of your AC system’s performance, safety, and longevity. Skimping on this step might save you time now, but it could cost you dearly later in repairs, energy waste, or even safety hazards.
Tools and Materials You’ll Need
Before you grab your drill and start cutting, take a moment to gather all the tools and materials you’ll need. Having everything on hand will save you time, reduce frustration, and help ensure a smooth installation. Here’s a comprehensive list based on my own experience and best practices from HVAC professionals.
Essential Tools
- Tape measure – For accurate measurements of the wall and sleeve.
- Level – To ensure the sleeve is perfectly horizontal and vertical.
- Pencil or chalk line – For marking cut lines on the wall.
- Stud finder – To locate wall studs and avoid cutting into structural supports.
- Circular saw or reciprocating saw – For cutting through drywall, wood, or siding.
- Jigsaw – Useful for cutting curves or adjusting openings.
- Drill and drill bits – For creating pilot holes and securing the sleeve.
- Screwdriver or impact driver – For tightening screws and brackets.
- Utility knife – For trimming insulation or cutting back drywall.
- Caulking gun – For applying sealant around the sleeve.
- Safety gear – Safety glasses, gloves, and a dust mask are non-negotiable.
Materials and Supplies
- Through-the-wall air conditioner sleeve – Make sure it matches your AC unit’s dimensions.
- Exterior-grade screws or lag bolts – For securing the sleeve to the wall.
- Weatherproof sealant (silicone or polyurethane) – To seal gaps and prevent moisture intrusion.
- Flashing tape or metal flashing – For added waterproofing around the exterior.
- Insulation foam or backer rod – To fill larger gaps and improve thermal performance.
- Interior and exterior trim or cover plates – For a clean, finished look.
- Drip edge or drainage channel (optional) – Helps direct water away from the sleeve.
Optional but Helpful Tools
- Ladder or scaffolding – Especially if you’re working on an upper floor or tall wall.
- Partner or helper – Some steps, like holding the sleeve in place, are much easier with two people.
- Vacuum or shop vac – To clean up dust and debris from cutting.
- Measuring square – Ensures your cut lines are perfectly aligned.
Pro tip: If you’re renting tools or buying new ones, consider investing in a quality reciprocating saw—it’s a game-changer for cutting through tough materials like brick or concrete. And don’t forget to check your local hardware store for sleeve-specific kits that include flashing, sealant, and trim in one package.
Step-by-Step Installation Guide
Now that you’re equipped with the right tools and materials, it’s time to get your hands dirty. Installing a through-the-wall air conditioner sleeve involves several key steps, each of which must be done carefully to ensure a safe, efficient, and long-lasting result. I’ll walk you through the process step by step, sharing practical tips and real-world insights along the way.
Step 1: Choose the Right Location
The first step is selecting the ideal spot for your sleeve. This decision affects everything from cooling efficiency to structural integrity. Here’s what to consider:
- Proximity to electrical outlets – Your AC unit will need a dedicated circuit, so choose a location near a suitable power source.
- Avoiding structural elements – Use a stud finder to locate wall studs, electrical wires, and plumbing. You don’t want to cut into a load-bearing wall or hit a water line.
- Sun exposure and airflow – Avoid areas that get direct afternoon sun, as this can reduce efficiency. Also, ensure there’s enough clearance outside for proper airflow.
- Interior accessibility – Make sure the indoor side of the sleeve is easy to reach for maintenance and cleaning.
Once you’ve identified a good spot, measure the dimensions of your air conditioner and confirm they match the sleeve. Most sleeves are designed for standard unit sizes, but double-check the manufacturer’s specifications to avoid surprises.
Step 2: Measure and Mark the Opening
Accuracy is everything here. A misaligned or oversized cut can lead to gaps, poor insulation, and a wobbly installation. Follow these steps:
- Hold the sleeve against the wall where you plan to install it.
- Use a pencil to trace the outer edges of the sleeve onto the wall.
- Use a level to ensure your lines are perfectly horizontal and vertical.
- Extend the lines slightly beyond the traced area to account for cutting errors.
- Double-check your measurements—measure twice, cut once!
Pro tip: If you’re working on a textured wall (like stucco or brick), use chalk instead of a pencil for better visibility. And if you’re cutting through siding, consider removing a section first to make the process cleaner.
Step 3: Cut the Wall Opening
This is the moment of truth—where you actually cut into your wall. Take your time and prioritize safety.
- Start by drilling pilot holes in each corner of the marked area. This gives your saw a starting point and reduces the risk of splintering.
- Use a reciprocating saw or circular saw to cut along the marked lines. Go slow and steady, especially near corners.
- If you’re cutting through drywall, be prepared for dust—wear a mask and consider using a vacuum attachment.
- For brick or concrete walls, you’ll need a masonry blade and possibly a hammer drill. This step may require professional help if you’re not experienced.
Once the opening is cut, remove the debris and inspect the cavity. You should see the interior wall (drywall or plaster), insulation, and possibly the exterior sheathing. Make sure there are no obstructions like wires or pipes inside the wall.
Step 4: Install the Sleeve
Now it’s time to insert the sleeve into the opening. This step requires precision and teamwork if possible.
- Apply a bead of weatherproof sealant around the exterior flange of the sleeve.
- Carefully slide the sleeve into the opening from the inside, ensuring it sits flush against the interior wall.
- Use a level to confirm the sleeve is perfectly horizontal and vertical. Adjust as needed.
- Secure the sleeve to the wall using exterior-grade screws or lag bolts. Drive them through the flange into the wall framing or sheathing.
- Don’t overtighten—this can warp the sleeve or damage the wall.
Pro tip: If your sleeve has adjustable brackets or side flanges, use them to fine-tune the fit. Some models also include built-in leveling feet—take advantage of these for a perfect alignment.
Step 5: Seal and Insulate
A tight seal is essential for energy efficiency and moisture protection. Here’s how to do it right:
- Fill any gaps between the sleeve and the wall with expanding foam insulation or backer rod. Avoid overfilling—foam expands as it cures.
- Apply a continuous bead of silicone or polyurethane sealant around the interior and exterior edges of the sleeve.
- Use flashing tape or metal flashing on the exterior to direct water away from the opening. Overlap the pieces like shingles to prevent leaks.
- Install a drip edge or drainage channel at the bottom of the sleeve if recommended by the manufacturer.
Pro tip: Let the sealant and foam cure completely before installing the AC unit—usually 24 hours. Rushing this step can compromise the seal and lead to future problems.
Step 6: Add Trim and Finish
The final step is all about aesthetics and protection. Adding trim gives your installation a polished, professional look.
- Install interior trim around the sleeve using screws or adhesive. Choose a style that matches your room’s decor.
- On the exterior, attach a cover plate or decorative grille to hide the sleeve and improve airflow.
- Touch up any paint or siding around the opening to blend it with the surrounding wall.
Congratulations—you’ve just installed a through-the-wall air conditioner sleeve like a pro! Now you’re ready to mount your AC unit and enjoy cool, comfortable air all summer long.
Common Mistakes to Avoid
Even with the best intentions, it’s easy to make mistakes during installation. I’ve learned this the hard way—after spending an entire weekend fixing a sleeve that was crooked, leaking, and poorly insulated. To save you the frustration, here are the most common pitfalls and how to avoid them.
Cutting the Opening Too Big or Too Small
One of the biggest errors is miscalculating the size of the wall opening. If it’s too small, the sleeve won’t fit. If it’s too large, you’ll have gaps that are hard to seal properly. Always measure the sleeve’s outer dimensions—not the AC unit—and add just 1/4 inch to each side for clearance. Use a template if provided by the manufacturer.
Ignoring Structural Elements
Cutting into a load-bearing wall or hitting a water pipe can lead to serious damage and costly repairs. Always use a stud finder and, if necessary, consult building plans or a professional before making any cuts. If you’re unsure, it’s better to relocate the sleeve than risk structural compromise.
Skimping on Sealing and Insulation
Many DIYers focus on the sleeve itself and forget about the gaps around it. These gaps are prime spots for air leaks, moisture intrusion, and pest entry. Always use high-quality sealant and insulation, and don’t rush the curing process. A well-sealed sleeve can reduce energy loss by up to 30%.
Improper Slope or Leveling
The sleeve must be installed with a slight outward slope (about 1/4 inch per foot) to allow condensation to drain properly. If it’s level or sloped inward, water can pool and leak into your home. Use a level during installation and adjust the sleeve as needed before securing it.
Using the Wrong Fasteners
Regular wood screws won’t cut it for exterior installations. Use corrosion-resistant, exterior-grade screws or lag bolts that can withstand weather and vibration. Avoid nails—they can loosen over time and compromise the seal.
Neglecting Exterior Flashing
Flashing is your first line of defense against water intrusion. Skipping this step is a recipe for mold, rot, and structural damage. Always install flashing tape or metal flashing in an overlapping pattern, starting from the bottom and working your way up.
Rushing the Process
Installation might seem straightforward, but rushing leads to mistakes. Take your time with each step—measuring, cutting, sealing, and finishing. A well-executed installation pays off in performance, efficiency, and peace of mind.
Remember: when in doubt, consult the manufacturer’s instructions or seek advice from a professional. It’s better to ask questions upfront than deal with problems later.
Maintenance Tips to Keep Your Sleeve in Top Shape
Once your sleeve is installed, the work isn’t over. Regular maintenance ensures it continues to perform well and protects your home from moisture, pests, and energy loss. Here’s how to keep your through-the-wall air conditioner sleeve in excellent condition year after year.
Inspect Annually
Set a reminder to inspect your sleeve at least once a year—ideally before the cooling season begins. Look for:
- Cracks or gaps in the sealant
- Signs of water damage or mold
- Loose screws or shifting of the sleeve
- Debris or pests inside the sleeve
Catch small issues early before they become big problems.
Clean the Interior and Exterior
Dust, dirt, and leaves can accumulate around the sleeve, especially on the exterior. Use a soft brush or vacuum to clean the area regularly. For the interior, wipe down the trim and check for dust buildup that could affect airflow.
Reapply Sealant as Needed
Over time, sealant can crack or shrink due to temperature changes and UV exposure. If you notice gaps or deterioration, remove the old sealant and apply a fresh bead. Use a high-quality silicone or polyurethane product designed for exterior use.
Check the AC Unit Fit
After removing and reinstalling your AC unit each season, make sure it still fits snugly in the sleeve. If it’s loose, adjust the mounting brackets or add shims to prevent vibration and noise.
Monitor Energy Bills
A sudden spike in your cooling costs could indicate a problem with the sleeve’s insulation or seal. Compare your usage month to month and investigate any unusual increases.
By staying proactive, you’ll extend the life of your sleeve, improve your AC’s efficiency, and keep your home comfortable and protected.
Conclusion
Installing a through-the-wall air conditioner sleeve might seem like a daunting task, but with the right preparation, tools, and attention to detail, it’s a project within reach of most homeowners. From choosing the perfect location to sealing every gap and adding the finishing touches, each step plays a vital role in ensuring your AC system operates safely, efficiently, and quietly.
Remember, the sleeve isn’t just a housing—it’s the foundation of your cooling system’s performance. A well-installed sleeve supports your unit, prevents energy loss, keeps moisture out, and enhances your home’s appearance. And while it’s tempting to cut corners, investing time and care upfront will save you money, stress, and hassle down the road.
So grab your tools, take a deep breath, and tackle that installation with confidence. Whether you’re cooling a bedroom, home office, or living room, you’re now equipped to do it like a pro. And when that first blast of cool air hits your face, you’ll know it was worth every minute.
Stay cool, stay safe, and enjoy the comfort of your perfectly installed through-the-wall air conditioner sleeve!
Frequently Asked Questions
What is a through the wall air conditioner sleeve, and why do I need one?
A through the wall air conditioner sleeve is a metal or insulated frame that secures your AC unit and provides a weatherproof barrier between the interior and exterior of your wall. It ensures proper support, prevents drafts, and improves energy efficiency while installing a through-the-wall AC unit.
How do I choose the right size sleeve for my air conditioner?
Measure your AC unit’s dimensions (width, height, and depth) and match them to a compatible sleeve model, ensuring it meets the manufacturer’s specifications. Most sleeves are designed for standard sizes, but always double-check to avoid gaps or fit issues during installation.
Can I install a through the wall air conditioner sleeve myself, or do I need a professional?
You can install a through the wall air conditioner sleeve yourself if you’re comfortable with basic carpentry and electrical work, but hiring a pro is recommended for complex wall structures or wiring. Ensure the wall is structurally sound and the sleeve is level before securing it.
What tools do I need to install a through the wall air conditioner sleeve?
Common tools include a drill, level, measuring tape, jigsaw or reciprocating saw, screwdriver, and caulk gun. You may also need masonry bits for brick or concrete walls and shims for leveling the sleeve during installation.
How do I weatherproof the sleeve to prevent leaks and drafts?
Apply high-quality exterior-grade caulk around the sleeve’s outer flange and use foam insulation or weatherstripping to seal gaps between the unit and sleeve. This step is crucial for maintaining energy efficiency and preventing water infiltration.
What’s the best way to secure the AC unit inside the sleeve?
Follow the manufacturer’s instructions to slide the AC unit into the sleeve and secure it with mounting brackets or screws. Ensure the unit is tilted slightly outward for proper drainage and locked in place to prevent shifting or vibration.