
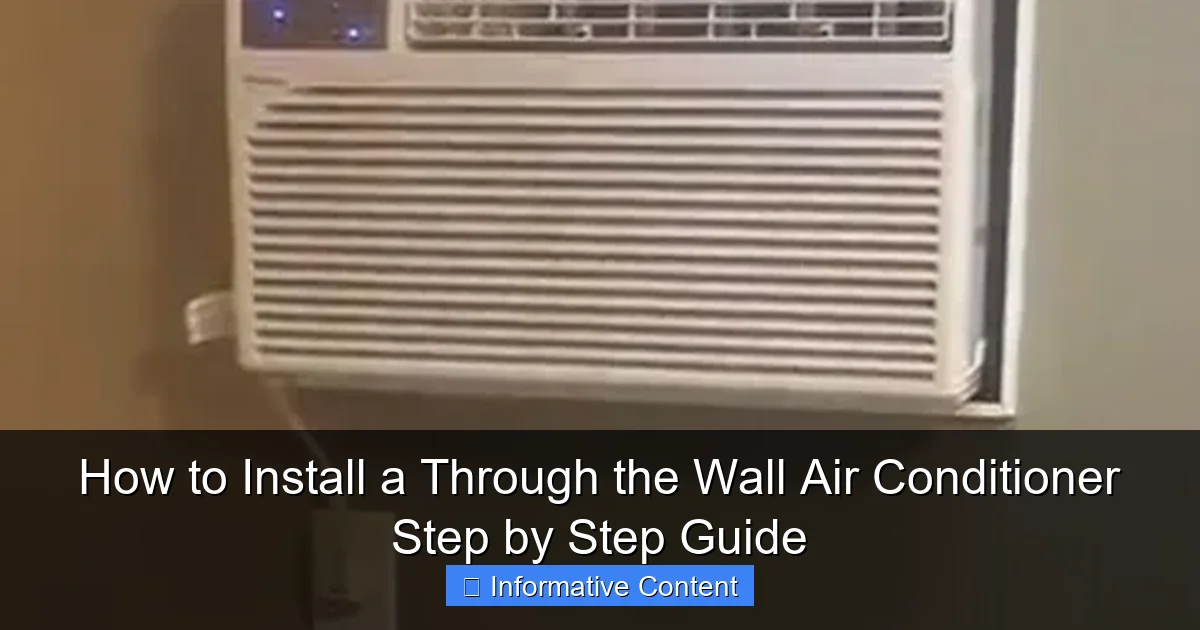
Featured image for how to install a through the wall air conditioner
Image source: hvachowto.com
Installing a through-the-wall air conditioner is a straightforward DIY project that can significantly improve your home’s cooling efficiency—if done correctly. This step-by-step guide walks you through essential tasks like measuring the opening, securing the unit, and ensuring proper insulation and weatherproofing for optimal performance and energy savings. With the right tools and safety precautions, you can complete the installation in just a few hours and enjoy reliable, quiet cooling all season long.
“`html
Key Takeaways
- Measure your wall opening carefully to ensure a proper fit for the AC unit.
- Choose the right location away from electrical sources and with proper drainage.
- Use a sturdy support bracket to secure the unit and prevent sagging or vibration.
- Seal gaps with weatherproof caulk to improve efficiency and prevent air leaks.
- Connect electrical wiring safely following local codes and manufacturer instructions.
- Test the unit after installation to confirm cooling and proper operation.
📑 Table of Contents
- How to Install a Through the Wall Air Conditioner Step by Step Guide
- Understanding Through the Wall Air Conditioners
- Tools and Materials You’ll Need
- Step-by-Step Installation Process
- Safety Tips and Common Mistakes to Avoid
- Maintenance and Troubleshooting
- Comparison of Popular Through the Wall Air Conditioner Models
- Final Thoughts and Tips for Success
How to Install a Through the Wall Air Conditioner Step by Step Guide
So, it’s that time of year again—summer is creeping up, and your home feels more like a sauna than a sanctuary. You’ve decided it’s finally time to upgrade from that wobbly window unit that barely cools one corner of the room. Enter the through the wall air conditioner: a sleek, permanent solution that delivers powerful cooling without sacrificing your view or window space. But before you start dreaming of crisp, cool air, there’s one big question: Can I really install this myself?
The good news? Yes, you absolutely can—if you’re comfortable with basic tools and following detailed instructions. Installing a through the wall air conditioner isn’t rocket science, but it does require careful planning, the right tools, and a bit of elbow grease. Unlike window units, these ACs are built to stay put, offering better insulation, quieter operation, and a cleaner look. Whether you’re a DIY enthusiast or just looking to save on installation costs, this step-by-step guide will walk you through the entire process—from measuring your space to enjoying that first blast of cool air. Let’s get started!
Understanding Through the Wall Air Conditioners
Before you grab your drill and start cutting into your wall, it’s important to understand exactly what a through the wall air conditioner is and how it differs from other cooling options. These units are designed to be installed directly into an exterior wall, with the condenser (the noisy part) on the outside and the evaporator (the cooling part) inside your home. This setup allows for efficient heat exchange and better airflow compared to window units, which often leave gaps that let in warm air and outdoor noise.
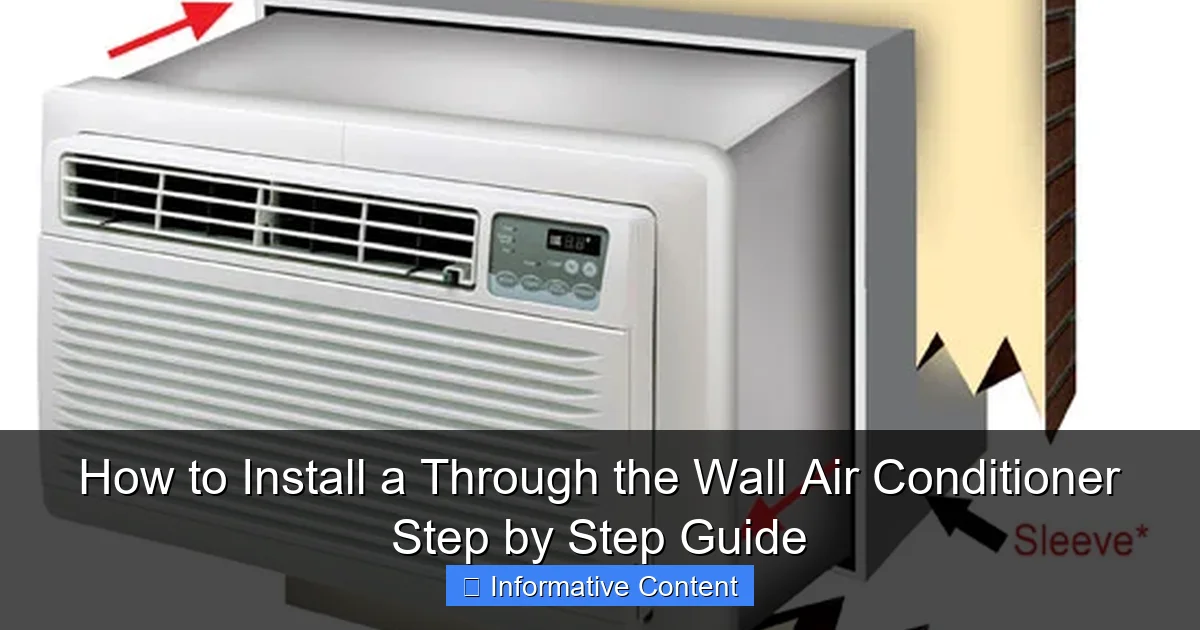
Visual guide about how to install a through the wall air conditioner
Image source: ajmadison.com
How They Work
Through the wall air conditioners operate on the same basic principle as other AC units: they absorb heat from indoor air and release it outside. The key difference is their placement. Because they’re built into the wall, they’re more secure, less prone to theft, and don’t block your windows. Most models come with built-in sleeves or frames that help seal the unit into the wall, reducing air leaks and improving energy efficiency.
Types of Through the Wall AC Units
Not all through the wall air conditioners are created equal. Here are the main types you’ll encounter:
- Standard Units: These are the most common and typically require a dedicated 230/240-volt electrical circuit. They’re powerful and ideal for larger rooms.
- 115-Volt Units: Great for smaller spaces, these plug into a standard outlet but may not cool as effectively in hot climates.
- Heat Pump Models: These can both cool and heat your room, making them a year-round solution. They’re more expensive upfront but can save money on heating bills.
- Smart ACs: Wi-Fi-enabled models that let you control temperature, schedules, and energy use from your phone. Perfect for tech-savvy homeowners.
Benefits and Considerations
Installing a through the wall air conditioner comes with several advantages:
- Energy Efficiency: Better sealing means less wasted cool air.
- Aesthetics: No bulky units sticking out of windows.
- Security: Harder to remove than window units, reducing theft risk.
- Noise Reduction: The compressor is outside, so indoor noise is minimal.
However, there are a few things to keep in mind:
- Permanent Installation: Once it’s in, it’s not easy to remove or relocate.
- Wall Modifications: You’ll need to cut a hole in your exterior wall, which may require permits or HOA approval.
- Electrical Requirements: Most units need a dedicated circuit, so you may need an electrician.
Tools and Materials You’ll Need
Before you begin, gather all the tools and materials. Having everything ready will save you time and frustration mid-project. Here’s a checklist based on my own experience installing a 12,000 BTU unit in my living room last summer.
Essential Tools
- Circular saw or reciprocating saw (for cutting the wall opening)
- Drill with masonry bits (if cutting through brick or concrete)
- Level (a 2-foot level works best)
- Tape measure
- Pencil or chalk line
- Screwdrivers (Phillips and flathead)
- Utility knife
- Caulk gun
- Stud finder
- Safety gear: gloves, goggles, dust mask
Materials and Supplies
- Through the wall air conditioner unit (check BTU rating for your room size)
- Mounting sleeve or frame (often included with the unit)
- Exterior-grade wood or metal flashing
- Exterior caulk (silicone or polyurethane-based)
- Insulation foam board or spray foam
- Screws and wall anchors (appropriate for your wall type)
- Electrical wire and conduit (if wiring is needed)
- Duct tape or foil tape
- Interior trim or grille (optional, for a finished look)
Optional but Helpful
- Laser level (for perfect alignment)
- Vacuum with hose attachment (to clean up dust)
- Helper (trust me, having a second person makes lifting and aligning much easier)
Pro tip: Always double-check your AC unit’s installation manual. Some manufacturers include specific tools or materials, and skipping these could void your warranty.
Step-by-Step Installation Process
Now for the main event—the actual installation. This is where things get hands-on, so take your time and follow each step carefully. I’ll walk you through the process as if we’re doing it together, side by side.
Step 1: Choose the Right Location
The first step is picking the perfect spot. You’ll want a location on an exterior wall that’s:
- Free from obstructions (like trees or fences) on the outside
- Close to an electrical outlet or where you can run a dedicated circuit
- Away from direct sunlight if possible (to reduce cooling load)
- At least 7 feet above the floor for optimal airflow
Use a stud finder to locate wall studs. You’ll want to center the opening between two studs to avoid cutting into structural supports. Mark the area with a pencil.
Step 2: Measure and Cut the Opening
Measure the dimensions of your AC unit’s sleeve (usually provided in the manual). Add about 1/4 inch to each side for clearance. Transfer these measurements to the wall, both inside and outside, using a level to ensure straight lines.
Start by drilling pilot holes in each corner of the marked area. Then, use a reciprocating saw or circular saw to cut along the lines. If you’re cutting through brick or concrete, switch to a masonry blade and go slowly to avoid cracking.
Safety first: Wear goggles and a dust mask. Brick and drywall dust are no joke for your lungs.
Step 3: Install the Mounting Sleeve
Slide the mounting sleeve into the opening from the inside. Make sure it’s level and flush with the interior wall. Secure it with screws driven into the wall framing. If your wall is masonry, use wall anchors.
From the outside, apply a bead of exterior caulk around the edges of the sleeve where it meets the wall. This prevents water from seeping in. Add flashing over the top of the sleeve for extra protection against rain.
Step 4: Wire the Unit (If Required)
Most through the wall air conditioners need a dedicated 230/240-volt circuit. If you’re not comfortable working with electricity, hire a licensed electrician. This isn’t a step to DIY unless you’re experienced.
If you’re doing it yourself, turn off the power at the breaker box. Run electrical conduit from the breaker to the AC location. Connect the wires according to the manufacturer’s instructions—usually black to black, white to white, and green to ground. Secure all connections with wire nuts and electrical tape.
Step 5: Install the Air Conditioner
With the sleeve in place and wiring complete, it’s time to lift the unit into position. This is where a helper really comes in handy. Slide the AC into the sleeve from the inside, making sure it seats properly.
Secure the unit to the sleeve using the provided screws. Check that it’s level and doesn’t wobble. If there are gaps around the unit, fill them with insulation foam or weatherstripping to prevent air leaks.
Step 6: Seal and Finish
Apply a generous bead of exterior caulk around the outside edges of the sleeve. This creates a waterproof seal. On the inside, you can install a decorative grille or trim to cover any gaps and give the installation a polished look.
Finally, plug in the unit (or turn the breaker back on) and test it. Set the thermostat to cool and listen for smooth operation. Check for drafts around the unit—if you feel air leaking, add more insulation or caulk.
Safety Tips and Common Mistakes to Avoid
Installing a through the wall air conditioner is generally safe if you follow the rules, but there are a few pitfalls that can turn your project into a headache—or worse, a hazard.
Safety First
- Always turn off power at the breaker before working on electrical connections.
- Wear safety goggles, gloves, and a dust mask when cutting or drilling.
- Use a sturdy ladder and have someone spot you when working on exterior walls.
- Never install an AC unit in a wall that’s near plumbing, gas lines, or electrical conduits without verifying their locations.
Common Mistakes
- Skipping the Level: An uneven unit can cause water to pool inside, leading to leaks or mold.
- Poor Sealing: Gaps around the unit let in hot air and reduce efficiency. Always use caulk and insulation.
- Wrong BTU Size: A unit that’s too small won’t cool effectively; one that’s too large will cycle on and off too often, wasting energy.
- Ignoring Local Codes: Some areas require permits for wall modifications or electrical work. Check with your local building department.
- Rushing the Cut: Take your time when cutting the wall. A crooked opening is hard to fix and can compromise the installation.
One mistake I made during my first installation? I forgot to check the slope of the sleeve. The unit needs a slight tilt (about 1/4 inch per foot) toward the outside to allow condensation to drain properly. I didn’t notice until water started dripping inside—lesson learned!
Maintenance and Troubleshooting
Once your through the wall air conditioner is up and running, the work isn’t over. Regular maintenance ensures it lasts for years and runs efficiently.
Routine Maintenance
- Clean the Filter Monthly: A dirty filter restricts airflow and makes the unit work harder. Most filters are washable—just rinse with water and let dry.
- Inspect the Exterior: Check the outside of the unit for debris, dirt, or blockages. Clear away leaves, dirt, or snow buildup.
- Check the Drain: Make sure the condensation drain isn’t clogged. A blocked drain can cause water to back up into your home.
- Seal Gaps Annually: Over time, caulk can crack. Reapply exterior caulk every year to maintain a tight seal.
Troubleshooting Common Issues
- Unit Won’t Turn On: Check the breaker, thermostat settings, and power cord. If it’s still not working, the capacitor or compressor may be faulty.
- Not Cooling Enough: Dirty filter, low refrigerant, or a blocked outdoor coil could be the cause. Clean the filter and coils first.
- Water Leaking Inside: Likely a clogged drain or improper slope. Clear the drain and ensure the unit tilts outward.
- Unusual Noises: Rattling could mean loose parts; grinding may indicate a failing motor. Turn off the unit and inspect.
Comparison of Popular Through the Wall Air Conditioner Models
Choosing the right unit can be overwhelming. Here’s a quick comparison of three popular models based on performance, features, and user reviews.
| Model | BTU Rating | Voltage | Key Features | Price Range |
|---|---|---|---|---|
| Frigidaire FHPW102AC1 | 10,000 | 230V | Wi-Fi enabled, washable filter, 3 cooling speeds | $500 – $600 |
| LG LW1216ER | 12,000 | 230V | Energy Star rated, remote control, 4-way airflow | $450 – $550 |
| Keystone KSTAT10-115 | 10,000 | 115V | Compact design, easy installation, quiet operation | $350 – $450 |
When choosing a model, consider your room size, electrical setup, and desired features. A 10,000 BTU unit cools about 450 square feet, while a 12,000 BTU unit handles up to 550 square feet. Always check the unit’s EER (Energy Efficiency Ratio)—higher is better for long-term savings.
Final Thoughts and Tips for Success
Installing a through the wall air conditioner is a rewarding project that can significantly improve your home’s comfort and efficiency. It’s not the easiest DIY task, but with the right preparation, tools, and patience, most homeowners can handle it. The key is to take your time, follow the steps carefully, and don’t skip safety precautions.
Remember, this isn’t just about cooling your space—it’s about doing it smartly. A well-installed unit will save you money on energy bills, last longer, and keep your home comfortable for years to come. And if at any point you feel unsure—especially with electrical work—don’t hesitate to call in a professional. It’s better to spend a little extra now than risk damage or injury later.
So, grab your tools, measure twice, cut once, and get ready to enjoy that refreshing, cool air. Your future self will thank you every time you walk into a comfortably chilled room on a sweltering summer day.
“`
Frequently Asked Questions
How do I choose the right size through the wall air conditioner for my space?
To select the correct size, calculate your room’s square footage and match it to the AC’s BTU (British Thermal Unit) rating. A unit that’s too small will struggle to cool, while an oversized one may cycle on/off too frequently, reducing efficiency. Most manufacturers provide sizing charts based on room dimensions.
Can I install a through the wall air conditioner myself, or do I need a professional?
If you have basic DIY skills, including measuring, cutting, and electrical work, you can install it yourself. However, if your project involves modifying electrical wiring or load-bearing walls, hiring a licensed HVAC technician is safer and ensures code compliance.
What tools are needed to install a through the wall air conditioner?
Essential tools include a measuring tape, level, stud finder, reciprocating saw, screwdriver, drill, and safety gear. You may also need a caulking gun for sealing and a helper to lift the unit into place. Check your AC manual for model-specific requirements.
How do I prepare the wall opening for a through the wall air conditioner?
First, turn off power to the area and mark the opening using the manufacturer’s template. Cut through the wall carefully, ensuring the hole is level and slightly larger than the sleeve. Remove debris and check for obstructions like pipes or wires before sliding the sleeve in.
Do I need to insulate around a through the wall air conditioner after installation?
Yes, sealing gaps with foam insulation or weatherstripping prevents air leaks and improves energy efficiency. Pay special attention to the sides and top of the unit, as gaps here can let in hot air, insects, or moisture. Use non-expanding foam to avoid warping the sleeve.
How do I ensure proper drainage when installing a through the wall air conditioner?
Most units have a built-in slant toward the outside for drainage, but double-check the level during installation. If your model includes a drain kit, connect it to a hose or pipe to direct condensation outside. Regularly clean the drain to prevent clogs and leaks.